The new Self-Service Automation Portal (SSAP)
Starting with version 2.6, Ansible Automation Platform includes Ansible automation portal. Ansible automation portal is currently supported on Red Hat OpenShift. However, this lab is using a new installation method, currently in preview, to support RHEL-based environments. The General Availability is planned around Summit 2026.
The AAP Self-Service Portal
The self-service automation portal makes enterprise automation accessible to users of varying roles and skill levels through a simplified web interface designed for business users, not automation experts. Instead of requiring users to understand what’s going on under the hood, SSAP provides a streamlined "point-and-click" experience.
Self-service automation portal uses your existing Ansible Automation Platform setup: it uses the same logins, same security controls, and the same automation logic.
Preparing AAP
Using the SSAP RHEL appliance, administrators will have to configure it and set up tokens and OAuth in Ansible Automation Platform.
| Most of this work has been done for you in this lab, only a few steps are required. |
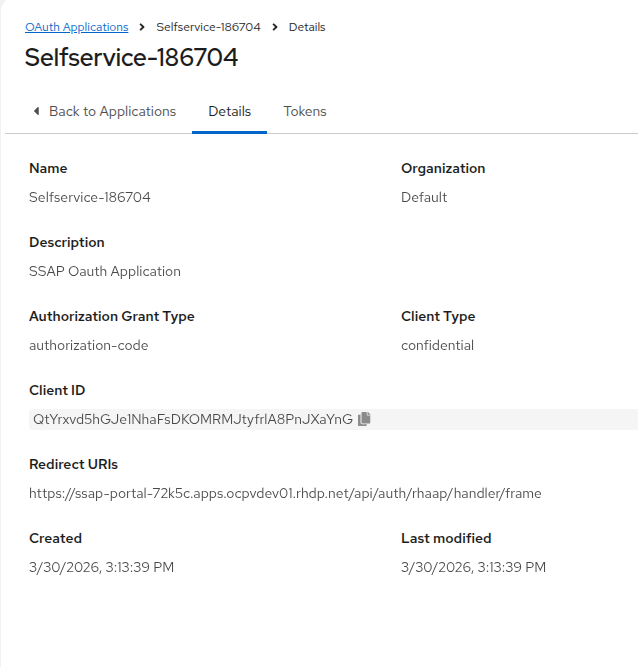
First check that the OAuth application has been configured, this is needed because SSAP uses AAP for authentication.
Access your AAP UI from the AAP tab in Showroom, or open https://MYCTLHOST.apps.ocpvdev01.rhdp.net in a browser tab. Log in as MYCTLUSER with password MYCTLPASSWORD. Then:
-
Open .
-
Open the OAuth application named
Selfservicefollowed by a number. -
Confirm it looks like this (apart from the number):
You’ll need to create a team called aap-admins belonging to the Default organization.
-
Open .
-
Click ⊕ Create team.
-
Enter:
-
Name:
aap-admins(the exact name is important!) -
Organization:
Default
-
-
Click Create team.
We could create and add users to this new team but MYCTLUSER as system administrator is already implicitly member of the team (have a look at ).
Accessing SSAP
Access the SSP UI:
-
Open https://MYSSAPHOST.apps.ocpvdev01.rhdp.net or the SSAP tab.
-
Click Sign In to sign in with Ansible Automation Platform.
-
If directed to AAP, log in as
MYCTLUSERwith passwordMYCTLPASSWORD. -
Click Authorize for Reading and Writing scope access.
You will be greeted by the shiny new SSP Portal! Since you are an admin user, you will see all Job Templates configured, but because you are not the admin user, you can’t do anything with it.
Let’s correct this!
Role Based Access Control
In a real world, you would give mostly others access to the portal. For example, the service portal can be very helpful for less technical audiences who don’t have to understand how Ansible works and just start the automation. For sake of simplicity, we will give ourselves access rights to the templates, and the right to synchronize with AAP.
-
Select in the lower left.
-
Click Create in the upper right.
-
Set Name to
ssap_operatorsand click Next. -
Select AAP Administrators in the Add users and groups screen of the wizard (you are one of them) and click Next.
-
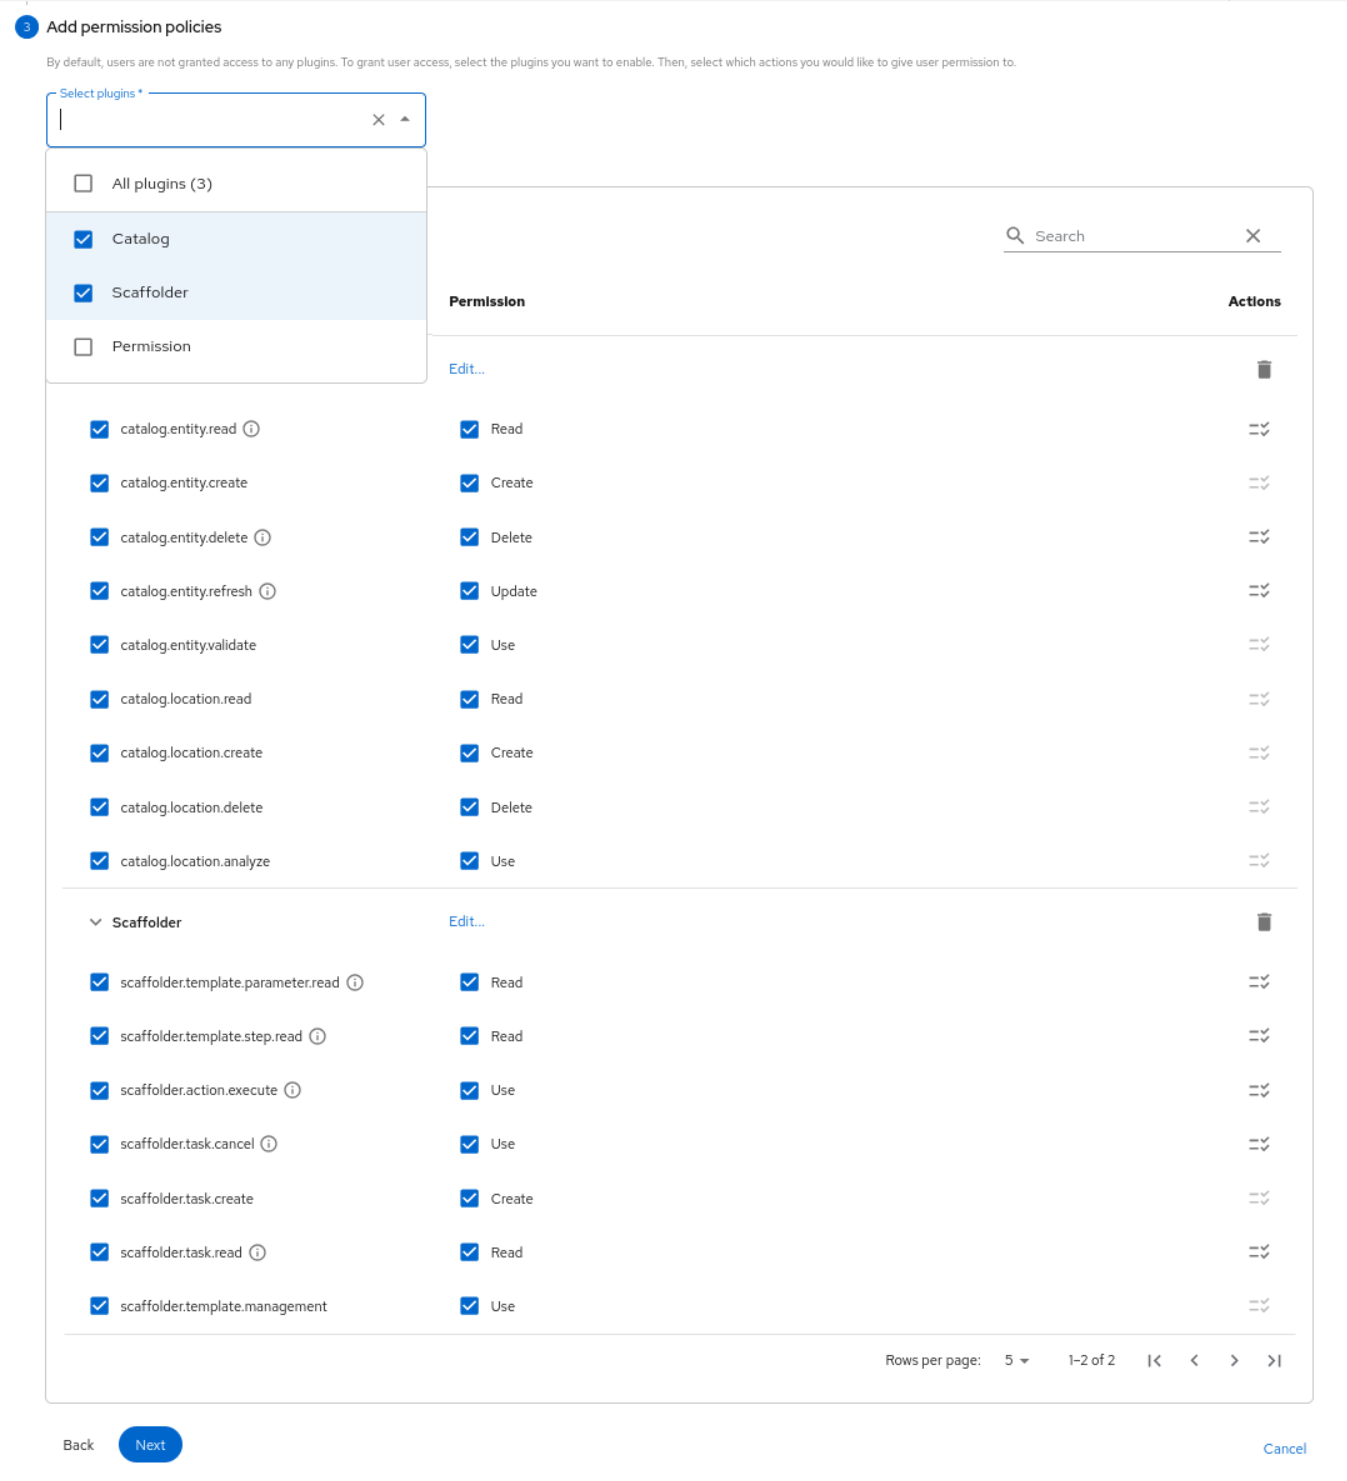
Select the Catalog and Scaffolder plugins and enable all permissions under each. The result should look as follows. When done, click Next.
-
Click Create.
Now, going back to the Templates menu, you’ll see that you can:
-
Sync the templates to get modified and new ones from AAP
-
Start the templates already available if your user has this right in AAP as well
Self-Service Portal synchronization with AAP
No description available as the template description is not ideal, so fix it as follows:
-
Open AAP and log in if necessary.
-
Open .
-
Edit Demo Job Template.
-
Set Description to
Say hello to the world. -
Click Save job template.
-
Return to the portal.
-
Click Sync now in the upper left.
-
Select Job templates only, then click Ok.
-
Refresh the frame, or the whole browser page.
You should now see your new fancy description.
Execute a Job Template
Now that you know what the job template is supposed to do, you can use it. As it’s the purpose of the portal, it’s super simple to do:
-
Click Start next to the Demo Job Template.
-
While the job runs, you can click Cancel.
-
Use Show Logs for a simplified job log similar to AAP.
-
When the job has finished, you can click Start Over.
Custom Templates
The main power of SSAP does come from the ability to use Custom dynamic templates. Custom Templates are templates that are stored in a git repository and are imported into the Self-Service portal by an administrator. They are used to create new sophisticated, enterprise-ready templates that provide more advanced options than what surveys can offer.
Import a Custom Template
Let´s go ahead and import a custom dynamic template.
-
Open the SSAP web UI
-
In the top right corner, click on Add Template.
You are prompted for Select URL to upload the custom dynamic template from a URL.
Paste the following URL into the Select URL field:
https://MYGITEAHOST.apps.ocpvdev01.rhdp.net/MYGITEAUSER/ssap-customtemplates/raw/branch/main/rhel_dynamic.yml-
Click Analyze to analyze the custom dynamic template.
-
Review the details on the Review step.
-
Click Import to import the custom dynamic template.
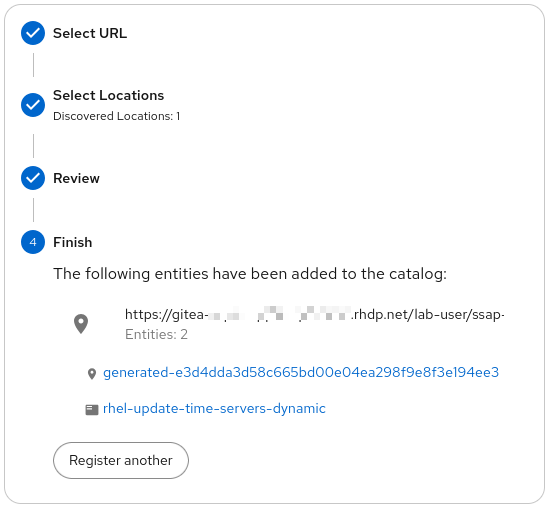
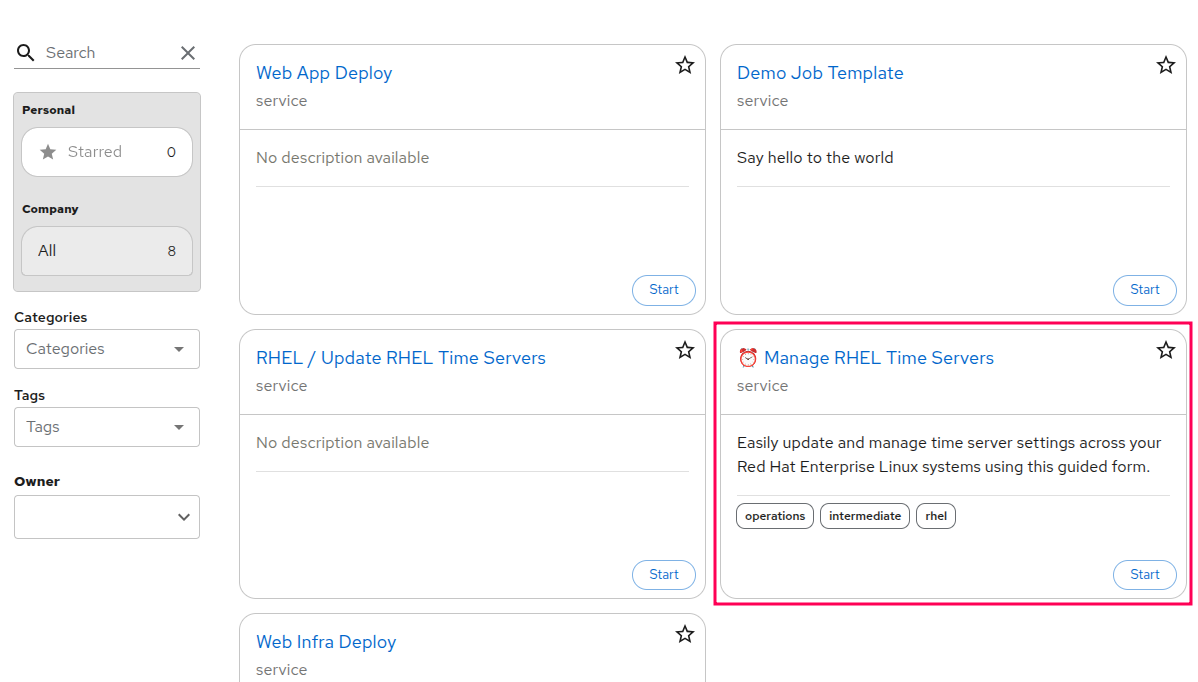
You will now see the custom dynamic template in the Templates list with a title of "⏰ Manage RHEL Time Servers"
Our custom template is backed by a job template in Ansible Automation Platform. In the imported YAML template, you can see which job template it launches. That file contains a section like this:
    - id: launch-job
      name: Update Time Servers
      action: rhaap:launch-job-template
      input:
        token: ${{ parameters.token }}
        values:
          template: RHEL / Update RHEL Time Servers
          inventory: ${{ parameters.inventory }}
So the custom template Manage RHEL Time Servers is launching the job template RHEL / Update RHEL Time Servers in AAP. However the user will see many more options to choose from when they launch the custom template!
BTW the job template RHEL / Update RHEL Time Servers is snake-oil, i.e. not doing anything but assisting to show the beauty of custom templates. You could of course configure RBAC in a way that a user would only see the custom template and not the job template in SSAP!
|
Launch the Custom Dynamic Template
Time to have a look…
-
Launch the custom template by clicking on the Start button.
-
Examine the options available to the user.
-
Enable the Show Advanced Options? checkbox. Notice this provides many more options to the user.
-
Select the options you like. Then advance using Next to the last step and click on Create to run the custom dynamic template automation job.
As you can see, custom dynamic templates provide a lot of flexibility to the user.
Conclusion
In this chapter, you’ve learned how to:
-
Connect the Self-Service Automation Portal to AAP
-
Configure access rights in the portal
-
Synchronize and start job templates using the portal
-
What custom dynamic templates are
-
How to import and use custom templates
The Self-Server Portal gives you much more capabilities in designing a catalog for less technical users and to simplify and improve the user experience.