Section 4 - Red Hat Lightspeed: CVE and Advisor Remediation
Agenda
| Section | Description |
|---|---|
Sign in to console.redhat.com and explore the dashboard |
|
Use an AAP Job Template to register and tag your RHEL nodes |
|
Generate a vulnerability report from the Lightspeed dashboard |
|
Download an Advisor playbook, review it, and run it through AAP |
|
Use Claude Code + MCP to find and fix a CVE end-to-end |
|
Exercise 4: HTTPD Configuration Fix (Automation coding assistant) |
Generate an HTTPD fix with Google Gemini in the IDE |
Apply a pre-built System Role for NTP configuration |
Objective
Estimated time: 30-40 minutes
In this section, you will use Red Hat Lightspeed (on console.redhat.com) to identify vulnerabilities and misconfigurations across your RHEL fleet, generate remediation playbooks, review them in a developer IDE, push them to Git, and create Job Templates in Ansible Automation Platform. This is the foundation for both human-guided and fully autonomous remediation workflows in the subsequent sections.
After completing this section, you will be able to:
-
🔍 Identify and report — Use Red Hat Lightspeed to discover CVEs and Advisor recommendations across your RHEL fleet, and generate executive vulnerability reports
-
🤖 Generate and remediate — Create remediation playbooks through multiple methods: manually via the Lightspeed web UI, agentically via Claude Code + MCP, and with AI assistance from Automation coding assistant
-
🚀 Promote to production — Review playbooks in code-server, push them to Git, and create AAP Job Templates ready for execution
|
Terminology Update — Red Hat Lightspeed Red Hat has consolidated its AI-powered services under the Lightspeed brand. Here is a quick reference for the new naming:
If you have used Insights or Ansible Lightspeed before, the functionality is the same; only the branding has changed. In Sections 1-3 of this workshop, you may see references to "Ansible Lightspeed" in job template and workflow names within AAP. This is the same technology now called Automation coding assistant. |
Background: Red Hat Lightspeed
Red Hat Lightspeed (formerly Red Hat Insights) is a managed service included with every RHEL subscription. It continuously analyzes your connected RHEL systems and provides:
-
Vulnerability reports — identifies CVEs affecting your systems, with severity ratings and remediation guidance
-
Advisor recommendations — proactive suggestions from Red Hat Support to improve stability, performance, and security (e.g., "SELinux is in permissive mode" or "system would not survive a reboot due to a bad policy")
-
Remediation playbooks — auto-generated Ansible Playbooks that fix identified issues, ready to download and execute
💡 Advisor vs CVE: Think of CVEs as reactive — patching known vulnerabilities. Advisor recommendations are proactive — fixing misconfigurations and applying best practices before they become incidents. Both are critical for a healthy RHEL fleet.
Lab Environment
RHEL Instances
This part of the lab uses three RHEL instances, each dedicated to a specific use case:
| Host | Purpose | Use Case |
|---|---|---|
|
Apache web server (from Section 1) |
HTTPD configuration remediation |
|
CVE remediation target |
Patch a known CVE |
|
Advisor recommendation target |
Fix an Advisor-flagged misconfiguration |
💡 Why three RHEL instances? Each use case runs on its own node so that if one breaks during the exercise, the lab continues on the others. This also keeps scenarios cleanly separated for simplicity.
Developer IDE: code-server
Your lab environment includes code-server, which is Visual Studio Code running in your browser. This gives you a full VS Code experience — editor, terminal, extensions — without installing anything locally.
| Component | Value |
|---|---|
code-server URL |
|
Password |
|
AI Agent: Claude Code
Your lab environment has Claude Code pre-installed — Anthropic’s CLI-based AI agent that runs in the terminal inside code-server. It supports MCP and connects to both the Ansible MCP server and the Red Hat Lightspeed MCP server.
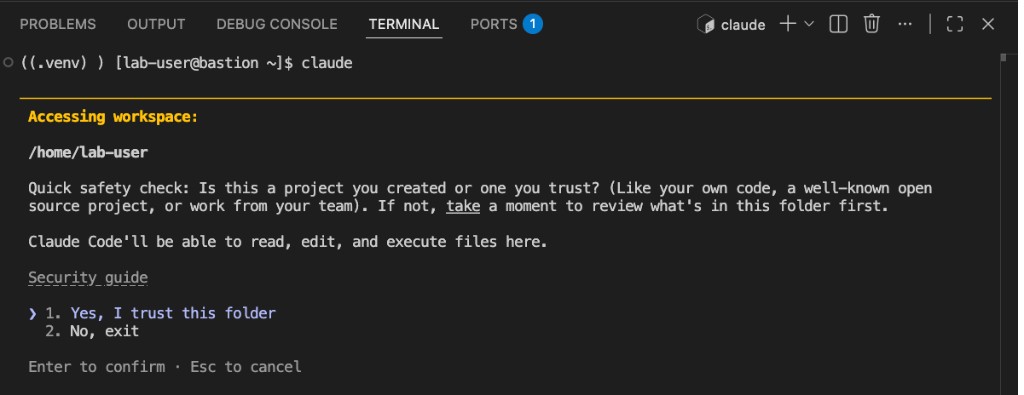
To launch Claude Code:
-
Open a terminal inside code-server. Navigate to Terminal → New Terminal from the top menu bar.

-
Type
claudeto start Claude Code. -
When prompted with the workspace trust dialog, select 1. Yes, I trust this folder and press Enter.
-
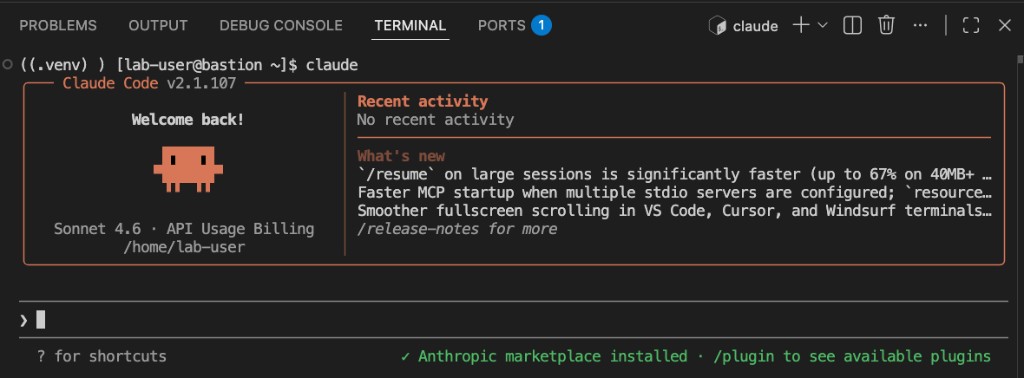
The Claude Code terminal interface will appear.
|
MCP is pre-configured. Claude Code is already connected to the Ansible MCP server and the Red Hat Lightspeed MCP server in your lab environment. You do not need to configure anything. |
|
Model availability. This lab environment provides access to Claude Sonnet 4.6 (
|

|
OpenCode is also installed in this environment but has not been tested with this lab. If you want to experiment with it, you can launch it by typing |
Logging in to Red Hat Lightspeed
|
Manual login required. You must log in to console.redhat.com with the credentials above. This is a shared Red Hat account that has your lab RHEL systems already registered. Open the link in a new browser tab and sign in before proceeding. |
-
Open console.redhat.com in a new browser tab.
-
Log in using the Username and Password shown in the table above.
-
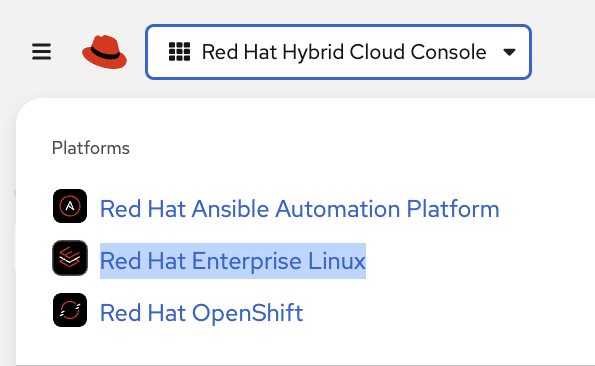
Click the Red Hat Hybrid Cloud Console dropdown (top-left) and select Red Hat Enterprise Linux.
Keep this browser tab open — you will come back to it shortly. Right now the dashboards are empty because your RHEL nodes have not been registered yet. In the next step, we will use Ansible Automation Platform to register them so they appear here.
Accessing Ansible Automation Platform
| Component | Value |
|---|---|
AAP URL |
AAP is preloaded in the lab interface. Click to open in a full tab: AAP Web UI |
Username |
|
Password |
|
-
Open AAP using the above details or click the AAP tab in your lab interface
-
Login using the credentials provided
RHEL Node Registration (Already Complete)
Your RHEL nodes have already been registered with Red Hat Lightspeed (formerly Red Hat Insights) during lab provisioning. The Register with Red Hat Lightspeed job template ran automatically when your environment was set up, connecting all three nodes (node1, node2, node3) to console.redhat.com.
|
How was this done? The lab provisioning process ran the Register with Red Hat Lightspeed job template against all RHEL nodes. This template uses |
Finding Your Nodes in Red Hat Lightspeed
To verify registration and locate your nodes:
-
Return to your console.redhat.com browser tab.
-
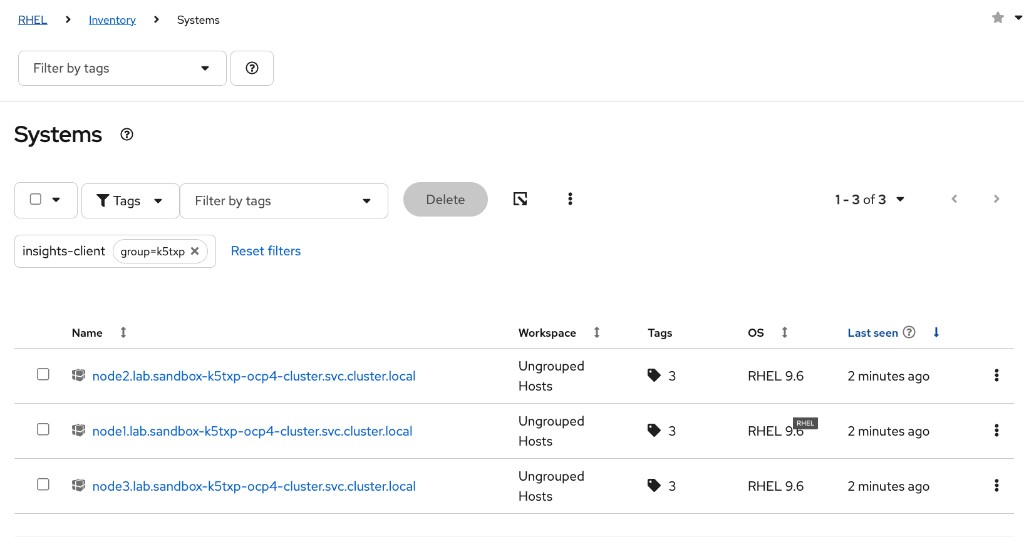
Navigate to Inventory → Systems.
-
Click Filter by tags, select Tags, and search for
group=my-guid. This filters the system list to show only the three RHEL nodes belonging to your lab environment.
Your sandbox ID is my-guid. You can find it in any of your lab URLs (e.g., controller-my-guid.apps…).
You can also verify registration from the AAP Jobs history. Look for the Register with Red Hat Lightspeed job that ran during provisioning.
Generating Remediation Playbooks
You will work through five exercises in this section. The first generates a vulnerability report, and the remaining four each produce a remediation playbook:
| # | Exercise | Description | Method |
|---|---|---|---|
1 |
Executive PDF Report |
Generate a PDF report summarizing CVEs affecting your environment |
Manual — Lightspeed web UI |
2 |
Advisor Remediation |
Fixes an Advisor-flagged misconfiguration on |
Manual — Lightspeed web UI |
3 |
CVE Remediation |
Patches a specific CVE identified by Lightspeed on |
Agentic — Claude Code + MCP |
4 |
HTTPD Configuration Fix |
Remediates the Apache configuration issue using Automation coding assistant |
AI-generated — Automation coding assistant (Gemini) |
5 |
System Roles Playbook |
Uses RHEL System Roles for NTP configuration |
Pre-built — provided in the lab |
Exercise 1: Executive PDF Report
Red Hat Lightspeed can generate PDF reports summarizing CVEs affecting your environment. You will generate an Executive Report to understand the vulnerability landscape before creating remediation playbooks.
-
In the console.redhat.com browser tab you already have open, expand Security → Vulnerability → Reports in the left navigation.
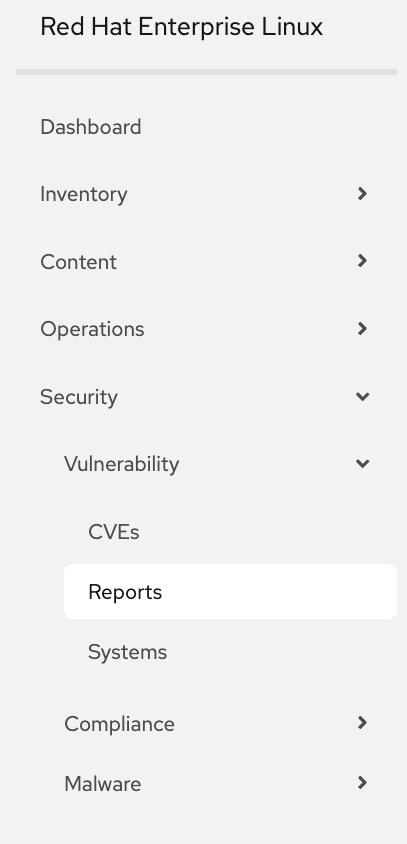
-
Click Executive Report to generate the report.
-
Download and review the PDF — it summarizes the CVEs affecting your connected RHEL systems, organized by severity.
💡 Why start with a report? The Executive Report gives you a high-level view of your environment’s vulnerability posture. This context helps you prioritize which CVEs and Advisor recommendations to remediate first in the exercises that follow.
|
Our goal: Take a moment to look at the Advisor recommendations and CVEs listed in your Lightspeed dashboard. Note how many issues are flagged across your three RHEL nodes. In the next two exercises, we are going to fix these issues — first an Advisor recommendation (Exercise 2), then a CVE (Exercise 3). By the end, you should see the remediated issues disappear from the dashboard. The nodes we didn’t fix will still show the issue, proving the remediation actually worked. |
Exercise 2: Advisor Remediation (Manual)
The Advisor section of Red Hat Lightspeed provides proactive recommendations — misconfigurations, compliance issues, and best practices flagged by Red Hat Support.
Step 1: Navigate to Advisor
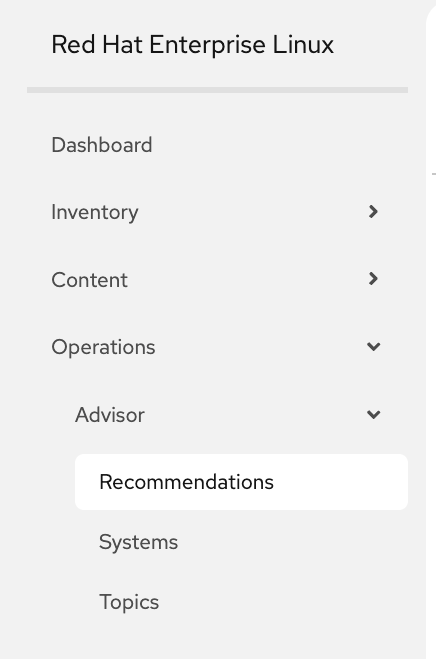
-
In the console.redhat.com browser tab you already have open, navigate to Operations → Advisor → Recommendations.
-
Find a recommendation affecting
{rhel_node3}. We recommend selecting Decreased security: OpenSSH LoginGraceTime settings.
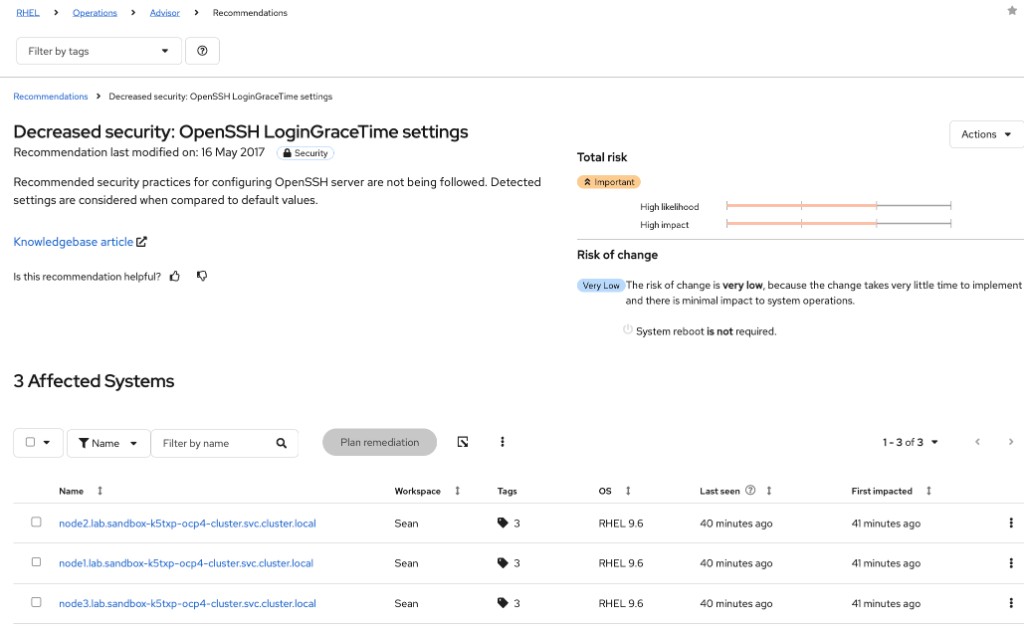
Step 2: Generate the remediation playbook
-
Select
{rhel_node3}from the Affected Systems list by clicking the checkbox next to it.
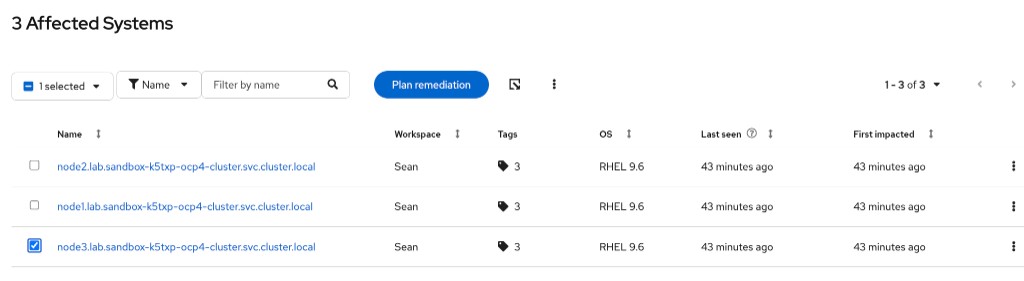
-
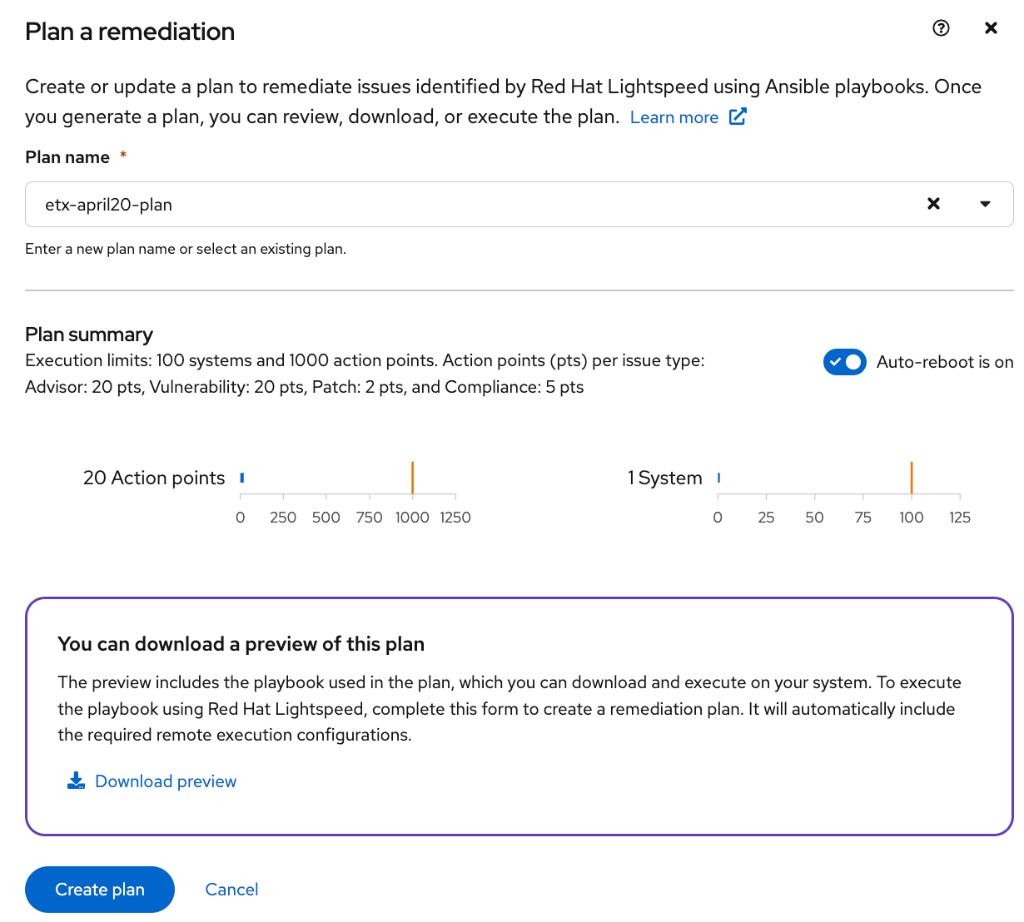
Click the blue Plan remediation button.
-
In the Plan a remediation dialog, enter a plan name (e.g.,
etx-advisor-plan) and click the blue Create plan button.
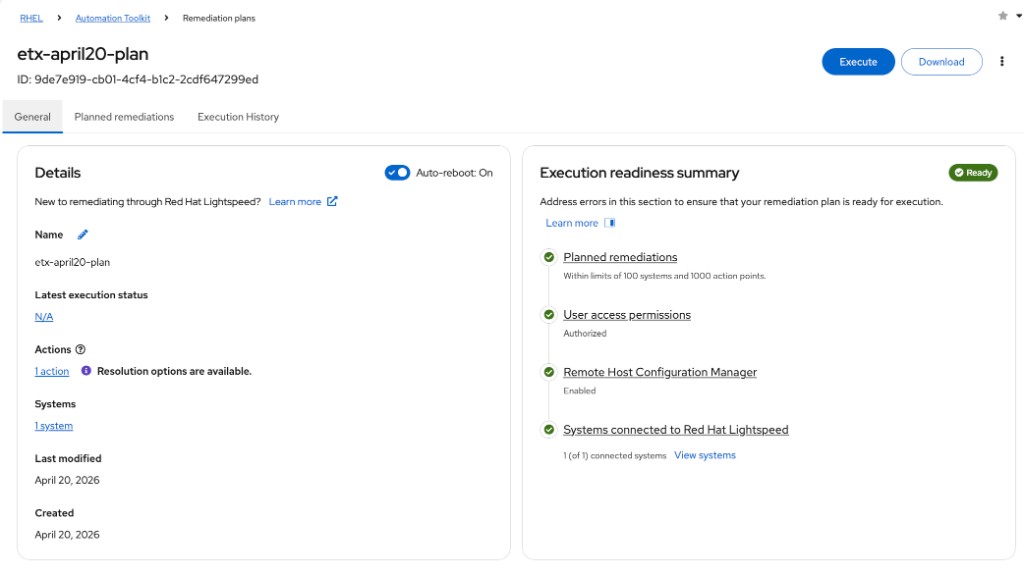
-
The screen will switch to the created remediation plan. Click the Download button to download the playbook to your workstation.
Once downloaded, you can view the Ansible Playbook on your workstation. Below is a snippet of the generated playbook:
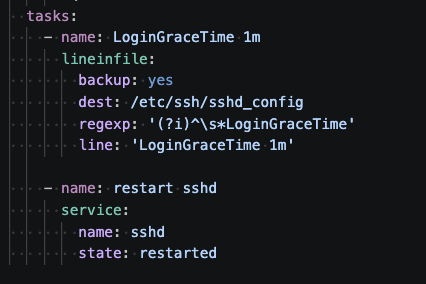
| This is only a snippet — the full playbook may contain additional tasks and configuration depending on the recommendation. |
Step 3: Upload the playbook to code-server
The playbook you downloaded in the previous step is on your local laptop/workstation. You need to upload it to the code-server instance running in your lab environment.
-
In your code-server browser tab, right-click the file explorer panel and select Upload Files… (or use File → Upload Files…).
-
Navigate to your local Downloads folder and select the playbook you just downloaded.
-
Save it as
remediation.ymlin thelightspeed_playbooksdirectory (/home/lab-user/lightspeed_playbooks/). This is the directory synced with Git.
Step 4: Fix the hostname to match your AAP inventory
-
Open
lightspeed_playbooks/remediation.ymland find thehosts:field — Lightspeed generates the full DNS name (e.g.node3.sandbox-my-guid-ocp4-cluster.svc.cluster.local). -
Change it to just
node3to match the host name in your AAP inventory.
Step 5: Push the playbook to Gitea
-
Ask Claude Code:
push remediation.yml to gitClaude will commit and push to your lightspeed_playbooks repo automatically.
Step 6: Sync the AAP project
-
Ask Claude Code:
sync the AAP projectThis pulls the latest playbook from Gitea into AAP’s Lightspeed-Playbooks project.
Step 7: Create the Job Template
-
Ask Claude Code:
Create a Job Template called "Remediation - SSH LoginGraceTime" that uses
the remediation.yml playbook from the Lightspeed-Playbooks project.
It should target node3.
Claude Code will use the Ansible MCP server to create the Job Template in AAP.
Step 8: Run the Job Template
-
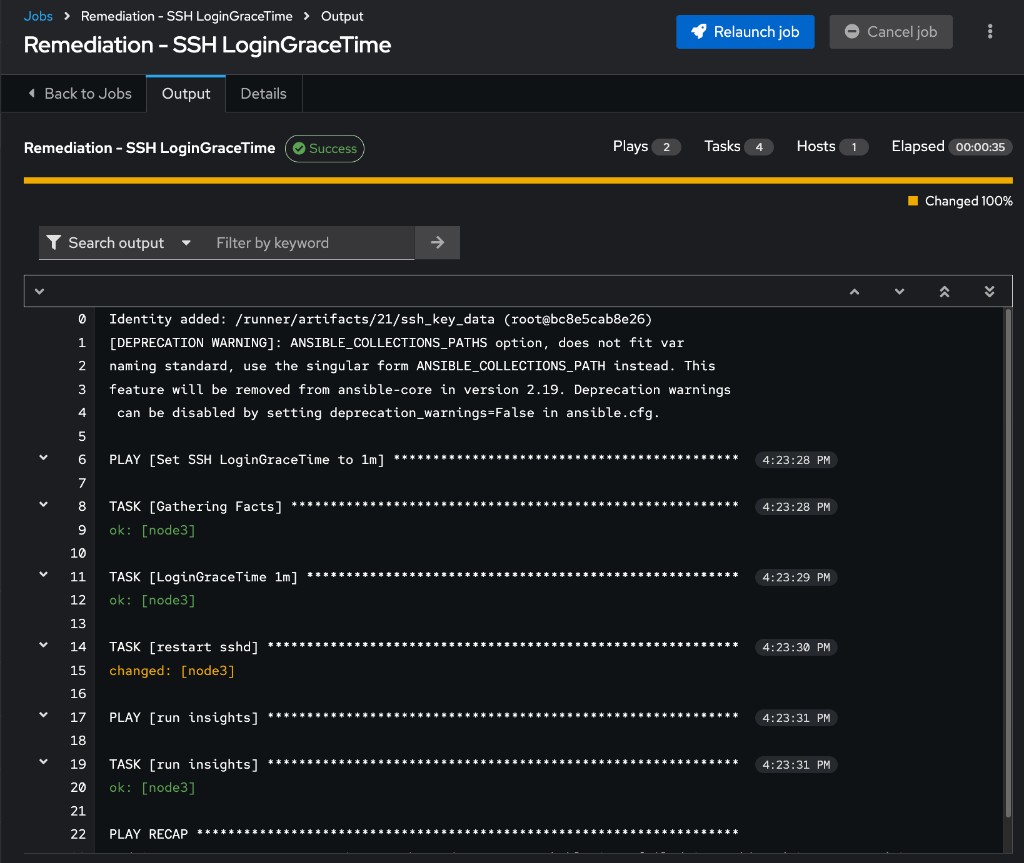
In AAP, navigate to Templates → Remediation - SSH LoginGraceTime.
-
Click Launch and verify the job completes successfully.
Verify the remediation
Go back to Operations → Advisor → Recommendations in console.redhat.com and revisit the Decreased security: OpenSSH LoginGraceTime settings recommendation. You should see that {rhel_node3} is no longer listed as an affected system — the remediation worked. The other nodes that were not remediated will still show the issue.
You can also verify using Claude Code by asking the Lightspeed MCP server directly:
Check if the OpenSSH LoginGraceTime Advisor recommendation still
affects my systems with the {guid} tag.
💡 Advisor recommendations are based on Red Hat’s deep expertise supporting thousands of enterprise RHEL deployments. These are not theoretical — they flag real misconfigurations that Red Hat Support has seen cause outages in production.
Exercise 3: CVE Remediation (Agentic via MCP)
This exercise demonstrates the fully agentic approach: you will use Claude Code to discover CVEs and download a remediation playbook entirely through the MCP interface, without ever opening the Lightspeed web UI manually.
Step 1: Launch Claude Code
-
Open a terminal in code-server. Navigate to Terminal → New Terminal from the top menu bar.
-
Type
claudeto start Claude Code. -
When prompted with the workspace trust dialog, select 1. Yes, I trust this folder and press Enter.
-
The Claude Code terminal interface will appear.
Step 2: Ask Claude Code about CVEs
In the Claude Code chat, type a prompt like the one below. Your sandbox ID my-guid is used as the tag to filter your systems:
What CVEs are affecting my RHEL systems? Show me the critical and important
ones that have remediation available. Only show hosts with the my-guid tag.
Claude Code will use the Red Hat Lightspeed MCP server to:
-
Query your connected RHEL systems filtered by your unique tag
-
List CVEs with severity ratings
-
Identify which CVEs have remediation playbooks available
Claude Code will prompt you for permission each time it wants to use an MCP tool. Select 1. Yes or 2. Yes, and don’t ask again to allow it to proceed. You may be prompted multiple times depending on how Claude Code chooses to solve the request — it may use multiple different tools.

At the end, you will get output similar to the following:
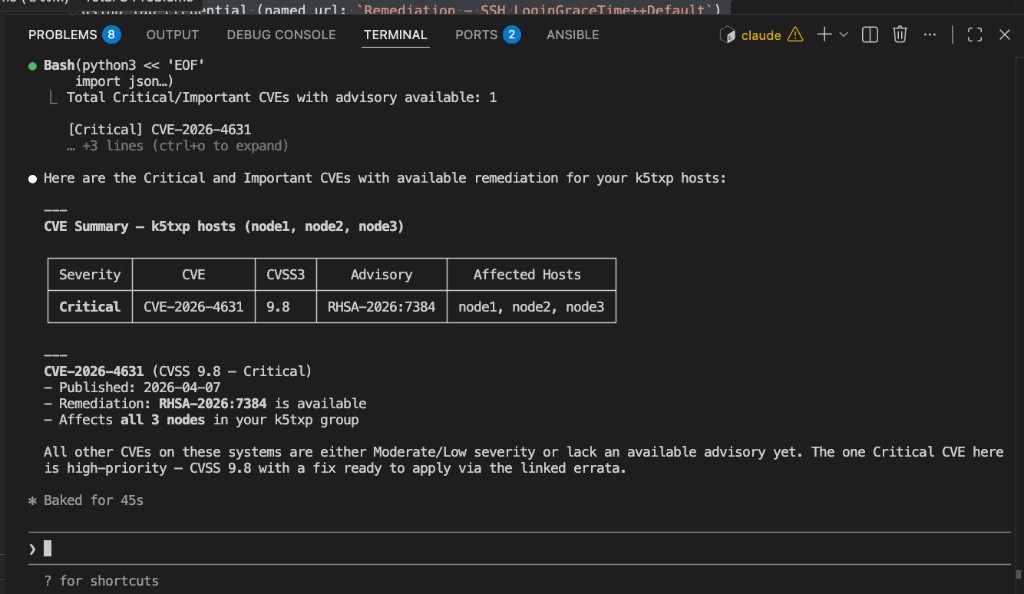
Step 3: Choose a CVE to remediate
From the results, select a CVE to fix. We recommend CVE-2025-31277 — A flaw was found in WebKitGTK. Processing malicious web content can cause memory corruption due to improper memory handling.
| You will reference this specific CVE in the following steps. If your environment shows a different critical CVE with an available advisory, you can choose that one instead — just adjust the prompts accordingly. |
Step 4: Download the remediation playbook
Ask Claude Code to download the playbook for the specific CVE:
Download the remediation playbook for CVE-2025-31277. Save it as
cve-remediation.yml in the lightspeed_playbooks directory.
Claude Code will use the Lightspeed MCP server to fetch the remediation playbook and save it to the lightspeed_playbooks directory.
Step 5: Review the playbook and fix the hostname
The downloaded playbook will automatically be available in the code-server file explorer. Open it and review the YAML content to confirm it addresses CVE-2025-31277.
Just like the Advisor exercise, the Lightspeed playbook will use the full DNS name in the hosts: field (e.g. node2.sandbox-my-guid-ocp4-cluster.svc.cluster.local). Change it to just node2 so it matches your AAP inventory and only runs on that one node.
Step 6: Push to Git
-
Ask Claude Code:
push cve-remediation.yml to gitClaude will commit and push to your lightspeed_playbooks repo automatically.
Step 7: Sync the AAP project and create a Job Template
-
Ask Claude Code:
Sync the AAP project, then create a Job Template called
"CVE Remediation - CVE-2025-31277" that uses the cve-remediation.yml
playbook from the Lightspeed-Playbooks project. It should target node2.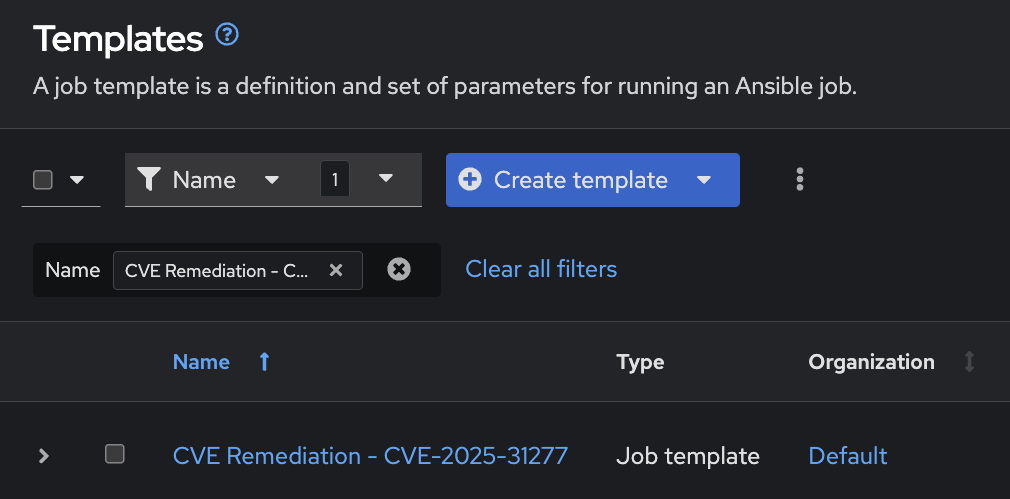
Step 8: Run the Job Template
-
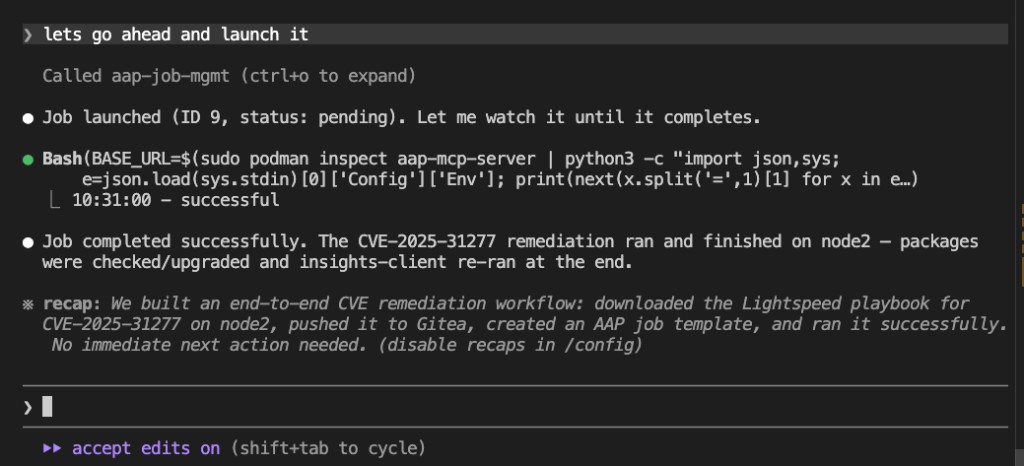
Ask Claude Code:
Go ahead and launch itClaude Code will launch the job and monitor it until completion.
Verify the remediation
Go back to Security → Vulnerability → CVEs in console.redhat.com and check the CVE you just remediated. You should see that {rhel_node2} is no longer listed as affected. The nodes that were not targeted will still show the vulnerability.

You can also ask Claude Code to verify without leaving the terminal:
Check if CVE-2025-31277 still affects my node2
💡 This was entirely agentic. You never opened a web browser, navigated dashboards, or clicked download buttons. Claude Code used MCP to query Lightspeed, found the CVE, fetched the playbook, pushed it to Git, created a Job Template, and ran it — all through a conversation in the terminal.
Exercise 4: HTTPD Configuration Fix (Automation coding assistant)
For this playbook, you will use Automation coding assistant — Red Hat’s AI-powered code generation tool integrated into your IDE — to generate a playbook that fixes the Apache configuration issue from Section 1.
💡 IDE-first workflow: In Labs 1-3, playbooks were generated programmatically via API calls and pushed to Git without human review. Here, you are working in the IDE as a developer would — using AI assistance to write the playbook, reviewing the output, and making any adjustments before committing. This is the modern developer workflow for infrastructure as code.
|
What is Automation coding assistant? Automation coding assistant (previously called Ansible Lightspeed) is an AI-powered tool that generates Ansible Playbook content from natural language descriptions. In Sections 1-3 of this workshop, it was called via API to auto-generate playbooks. In this section, you use it directly in your IDE as a developer tool. Flexible AI backends: Automation coding assistant is no longer tied to a single AI provider. Your lab environment is configured with Google Gemini as the backend, but it also supports Red Hat AI and IBM watsonx. This gives organizations the flexibility to choose the AI provider that best fits their requirements. |
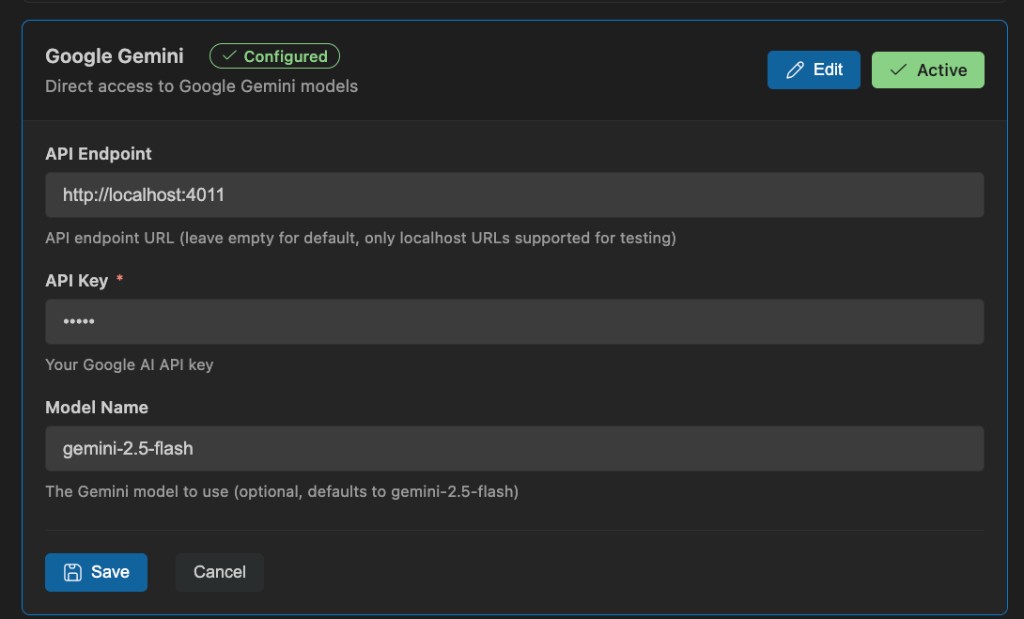
Step 1: Configure Automation coding assistant with Google Gemini
Before generating a playbook, you need to configure the Automation coding assistant extension with the Google Gemini LLM provider.
-
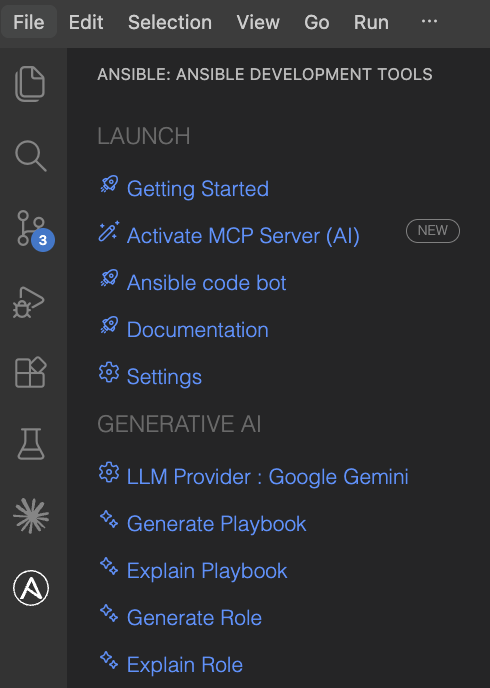
In code-server, click the Ansible "A" icon in the left sidebar to open the Ansible Development Tools panel.
-
Under GENERATIVE AI, click LLM Provider : Google Gemini.
-
Fill in the following values:
Field Value API Endpoint
API Key
dummyModel Name
gemini-2.5-pro
-
Click Save.
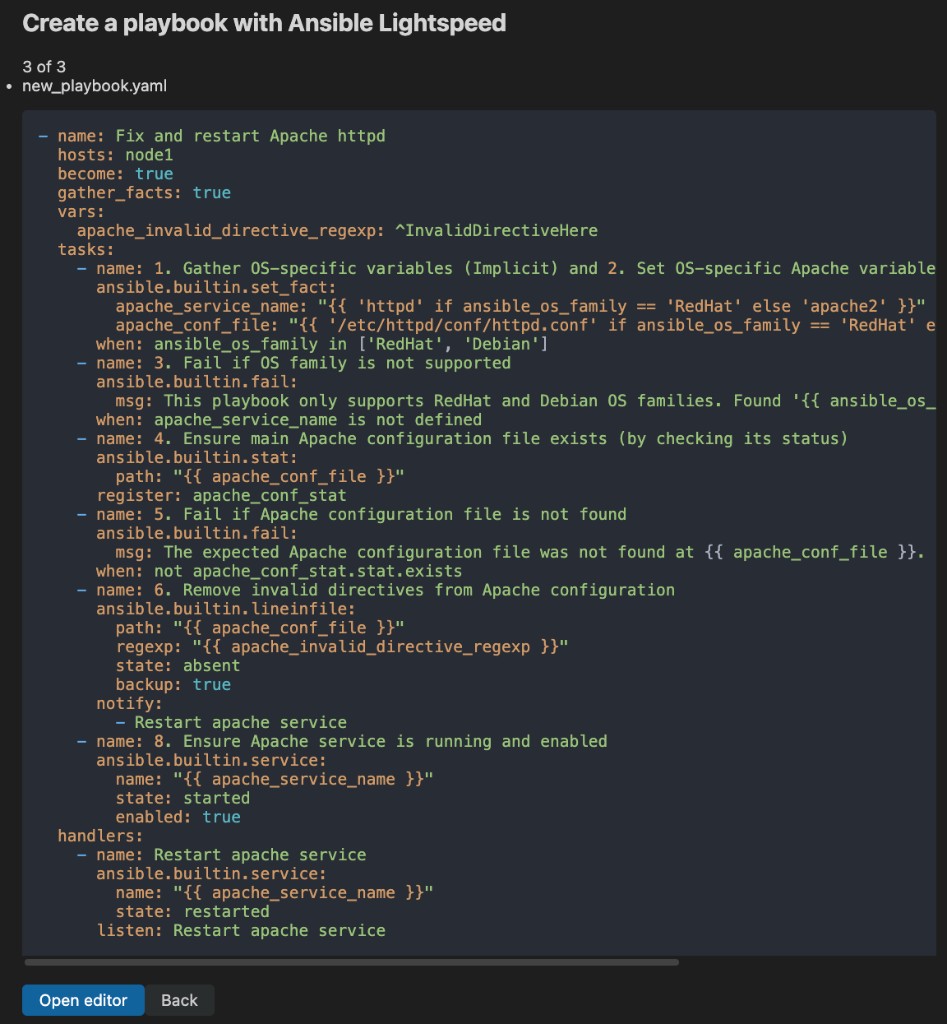
Step 2: Generate the playbook with the wizard
-
Click the Ansible icon in the left sidebar of code-server to open the Ansible Development Tools panel.
-
Under GENERATIVE AI, click Generate Playbook.
-
In the prompt field, enter:
Fix Apache httpd configuration by removing InvalidDirectiveHere and restarting the service, target node1, this needs to respond with one yaml file that we can run directly-
Click the blue Analyze button.
-
Wait for Automation coding assistant to process the request.
-
Click the blue Continue button.
The wizard will generate an Ansible Playbook:
-
Click Open editor to load the playbook into the code-server editor.
-
Click File → Save and save the playbook as
httpd-fix.ymlin thelightspeed_playbooksdirectory so it can be pushed to Git.
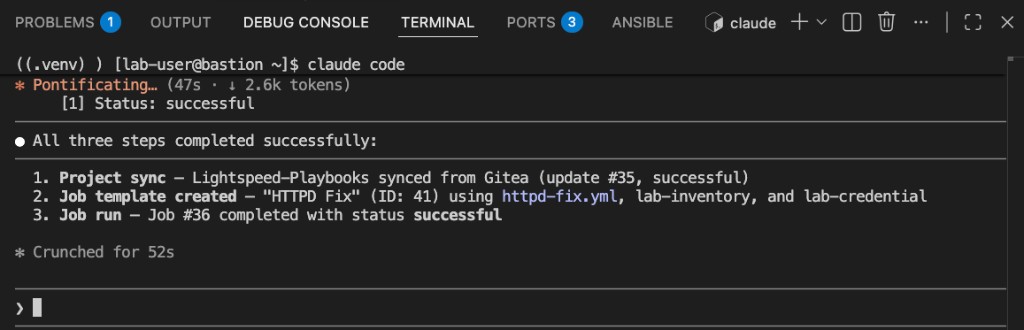
Step 3: Push, create Job Template, and run
-
Ask Claude Code to handle the full workflow:
Push httpd-fix.yml to git, sync the AAP project, create a Job Template
called "HTTPD Fix" using httpd-fix.yml from the Lightspeed-Playbooks
project targeting node1, and then launch it.
Claude Code will push the playbook to Gitea, sync the AAP project, create the Job Template, and run it — all in one go.
Step 4: (Optional) Verify in AAP
-
Switch to the AAP tab in your lab interface.
-
Navigate to Jobs and look for the most recent job run — you should see the HTTPD Fix job completed successfully.

Step 5: (Optional) Break and fix Apache again
Want to try the full break-and-fix cycle yourself? You can intentionally break Apache on node1 and then use the playbook you just generated to fix it again — similar to the self-healing workflow in Section 1.
-
In the AAP Web UI, navigate to Rulebook Activations.
-
Find the Web App rulebook activation and disable it (toggle it off so EDA does not auto-remediate).

-
Navigate to Templates and run the Break Apache Job Template.
-
Once Apache is broken, run your HTTPD Fix Job Template to remediate it.
|
In a real-world scenario, you would most likely discover the error through ticket enrichment similar to Section 1 — where AI analyzes logs and tells you exactly what the issue is. Then you can use Automation coding assistant to quickly create a playbook to fix it. This creates strong guardrails on generative AI: you know exactly what the issue is, and exactly how you are attempting to fix it. |
Exercise 5: RHEL System Roles (Pre-Built)
What are RHEL System Roles?
RHEL System Roles are a collection of officially supported Ansible roles and modules shipped with Red Hat Enterprise Linux. They provide a stable, consistent, and version-independent interface for managing common RHEL subsystems.
System Roles cover areas like:
-
rhel-system-roles.timesync— NTP/Chrony time synchronization configuration -
rhel-system-roles.network— Network interface and connection management -
rhel-system-roles.storage— Disk, partition, and filesystem management -
rhel-system-roles.selinux— SELinux policy and mode configuration -
rhel-system-roles.firewall— Firewall rules and zones -
rhel-system-roles.crypto_policies— System-wide cryptographic policies -
rhel-system-roles.logging— Rsyslog and journal configuration
💡 Why use System Roles? System Roles abstract away the differences between RHEL major versions. A playbook using rhel-system-roles.timesync works the same on RHEL 8 and RHEL 9, even though the underlying NTP implementation may differ. This makes automation portable and future-proof.
Example: Configuring NTP with System Roles
For this exercise, a pre-built playbook using the redhat.rhel_system_roles.timesync role is already configured as a Job Template in Ansible Automation Platform called RHEL System Roles - Timesync. This playbook configures NTP time synchronization across your RHEL fleet.
Here is the playbook content for reference:
---
- name: RHEL System Roles - Timesync
  hosts: all
  become: true
  vars:
    timesync_ntp_provider: "{{ ntp_provider | default('chrony') }}"
    timesync_ntp_servers:
      - hostname: "{{ ntp_server_1 | default('0.pool.ntp.org') }}"
        pool: "{{ ntp_server_1_pool | default(true) }}"
        iburst: "{{ ntp_server_1_iburst | default(true) }}"
      - hostname: "{{ ntp_server_2 | default('1.pool.ntp.org') }}"
        pool: "{{ ntp_server_2_pool | default(true) }}"
        iburst: "{{ ntp_server_2_iburst | default(true) }}"
  roles:
- redhat.rhel_system_roles.timesyncThis playbook:
-
Uses the
redhat.rhel_system_roles.timesyncrole — no raw module calls needed -
Configures two NTP servers with sensible defaults and overridable survey variables
-
Works identically across RHEL 8 and RHEL 9 because System Roles abstract the underlying implementation
Step 1: Explore the Job Template in AAP
Before using the agentic workflow, take a moment to see what is already configured in AAP.
-
Switch to the AAP tab in your lab interface.
-
Navigate to Automation Execution → Templates.
-
In the search/filter bar, type
timeto filter the list. -
Click on the RHEL System Roles - Timesync Job Template.
-
Click the Survey tab.
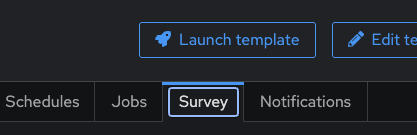
Notice that this Job Template is not just a playbook — it has a survey that prompts the operator for NTP provider, server hostnames, pool, and iburst settings. This is how AAP administrators create guardrails: the playbook logic is locked down, but specific parameters are exposed through a controlled form.
-
Click Launch template.
-
When prompted for Limit, type
node1and click Next. -
Review the survey form that appears:
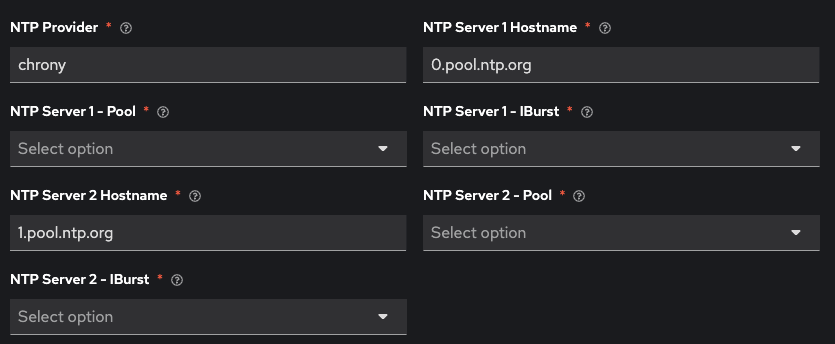
You can see the default values — 0.pool.ntp.org and 1.pool.ntp.org — along with the NTP provider and iburst options. You are welcome to launch this manually if you’d like, but cancel out for now — in the next step, we will have Claude Code do this for us.
💡 Why does the survey matter? Surveys are how AAP administrators define the boundaries of what an operator (or an AI agent) can change. The playbook itself is fixed and tested; only the survey variables are open for input. This means when an AI agent launches this template, it is constrained to the same guardrails as a human operator — it can only fill in the fields the administrator chose to expose.
Step 2: Launch Claude Code
-
Open a terminal in code-server. Navigate to Terminal → New Terminal from the top menu bar.
-
Type
claudeto start Claude Code.
Step 3: Configure NTP via the Agentic Workflow
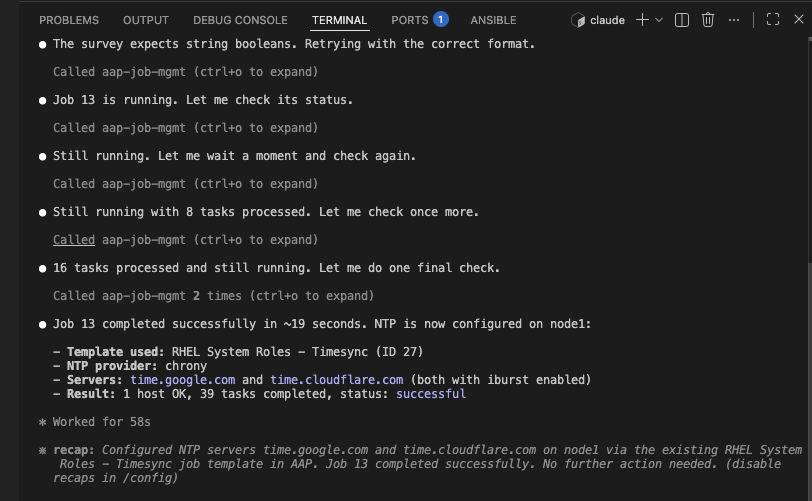
In the Claude Code chat, type the following prompt:
configure time.google.com and time.cloudflare.com as the NTP servers for node1 using AAPClaude Code will use the Ansible MCP server to find the RHEL System Roles - Timesync Job Template, read the survey spec to understand which parameters are required, fill in the survey variables with the requested NTP servers, and launch the job — all from a single natural language request.
💡 Notice what happened here. You saw the survey form in AAP — the AI agent sees the exact same thing through MCP. Claude Code discovered the Job Template, read its survey definition, understood the parameters, and filled them in correctly. The administrator’s guardrails are fully enforced: the AI can only supply values for the fields the survey exposes. It cannot modify the playbook, change the credentials, or bypass the inventory limit. This is how you keep AI on the rails that the administrator sets for that particular piece of automation.
Step 4: (Optional) Explore Other Pre-Built Templates
Your lab environment has several other Job Templates pre-configured in AAP. Take a few minutes to browse the Templates list and try launching one through Claude Code. For example, you might ask:
What job templates are available in AAP?Then pick one and ask Claude Code to run it. This is a great way to see how the agentic workflow handles different template types, surveys, and parameters.
|
Stretch goal — AI-generated System Roles playbooks: A known challenge in the Ansible community is getting AI code assistants to generate playbooks that use System Roles instead of raw module calls. This is an active area of work. In a future version of this lab, you may use a custom AI skill that instructs Automation coding assistant to prefer System Roles when generating RHEL automation. |
Key Takeaways
Where Do Good Playbooks Come From?
This section demonstrated four distinct sources for production-quality Ansible Playbooks:
| Source | Description |
|---|---|
CVE Remediation (Lightspeed) |
Red Hat Lightspeed identifies vulnerabilities affecting your RHEL fleet and generates targeted playbooks to patch them. These are based on Red Hat’s Security Data API and errata. |
Advisor Recommendations (Lightspeed) |
Lightspeed flags misconfigurations and best-practice violations (e.g., SELinux policy issues, configurations that won’t survive a reboot) and generates playbooks to fix them proactively. |
RHEL System Roles |
Officially supported, pre-built Ansible roles shipped with RHEL that provide a stable, version-independent interface for common configuration tasks (NTP, networking, storage, SELinux, firewall, and more). |
AI-assisted authoring (Automation coding assistant) |
Developers use Automation coding assistant in the IDE to accelerate playbook creation. The AI generates a first draft, then a human reviews, refines, and validates before committing. This speeds up production of custom playbooks that go through a proper review process. |
Each source has its place. Lightspeed and System Roles give you ready-made, trusted content. Automation coding assistant helps you create new playbooks faster — but the human review step is what makes them production-ready.
Human-in-the-Loop and Gatekeeping with AAP
The real power of this workflow is not just generating playbooks — it’s the gatekeeping. Ansible Automation Platform provides the controls that ensure nothing reaches production without proper review:
-
Git as source of truth — every playbook is version-controlled, auditable, and reviewable before it enters AAP
-
Project sync — AAP only runs playbooks that have been committed and synced from a trusted Git repository
-
Job Templates with guardrails — credentials, inventory limits, and surveys ensure playbooks run against the right targets with the right parameters
-
Approval gates — workflows can include approval steps where a human signs off before execution proceeds
-
Human-in-the-loop by design — whether a playbook was generated by Lightspeed, written with AI assistance, or hand-crafted, the same review and approval process applies
This is the difference between "AI wrote it" and "AI wrote it, a human reviewed it, and AAP enforces that it runs safely." The IDE is where the review happens; AAP is where the gatekeeping happens.
The Agentic Architecture
Throughout this lab, Claude Code connected to Ansible Automation Platform via the Ansible MCP server. Here is how the components fit together:
code-server (VS Code in browser)
    └── Claude Code (AI agent in terminal)
            ↕ MCP Protocol
        Ansible MCP Server          Red Hat Lightspeed MCP Server
            ↕ REST API                      ↕ REST API
    Ansible Automation Platform     Red Hat Lightspeed (console.redhat.com)
    (Inventory, Job Templates,      (CVEs, Advisor, Remediation Playbooks)
     Credentials, Jobs)
The Ansible MCP server exposes AAP capabilities (inventory, job templates, projects, jobs) as MCP tools. The Lightspeed MCP server exposes vulnerability and advisory data. Claude Code calls both behind the scenes when you ask questions in natural language — you don’t need to know the API endpoints.
How This Differs from Traditional Workflows
| Aspect | Traditional (Labs 1-3) | Agentic (This Lab) |
|---|---|---|
Trigger |
Event (Filebeat, Splunk, Winlogbeat) |
Human prompt in Claude Code |
Decision Maker |
Pre-defined workflow logic |
AI agent with human approval |
Flexibility |
Fixed workflow steps |
Dynamic — Claude Code adapts to what it finds |
Approval |
Built into workflow (optional) |
Always required — Claude Code asks before acting |
Best For |
Known, repeatable scenarios |
Ad-hoc investigation and remediation |
💡 Think of it this way: Traditional automation is like a train on rails — fast and reliable, but it only goes where tracks exist. Agentic automation is like a GPS-guided driver — it can navigate new routes, but you’re sitting in the passenger seat and can say "stop" at any time.
Complete
You have completed Section 4 - Red Hat Lightspeed: CVE and Advisor Remediation. You used multiple approaches to generate, review, and deploy remediation playbooks — all through a human-in-the-loop workflow where AI proposes and you decide.
In the next lab, you will see the opposite approach: a fully autonomous workflow where Splunk detects a RHEL misconfiguration and pre-approved automation fixes it without any human intervention.
Click the link below to continue to Section 5: Autonomous AIOps - Self-Healing RHEL with Splunk.