Installation and RHACS Cloud Service
Module goals
-
Deploy RHACS Cloud Service Central Instance
-
Install Secured Cluster Services in your EKS cluster
-
Understands the secured cluster bundle and certification
Access the EKS cluster
We are going to use Helm to install the ACS secured cluster services in Amazon’s EKS. To do this we will need admin access to the cluster with Helm install. Verify that you have both before moving on.
This command ensures you have access to the EKS Cluster
oc config get-contexts
oc config use-context eks-admin
[lab-user@bastion ~]$ oc config get-contexts
oc config use-context eks-admin
CURRENT NAME CLUSTER AUTHINFO NAMESPACE
admin cluster-qkskx admin
* eks-admin arn:aws:eks:us-east-2:327895892313:cluster/qkskx-eks-cluster arn:aws:eks:us-east-2:327895892313:cluster/qkskx-eks-cluster
trusted-profile-analyzer/api-cluster-qkskx-qkskx-sandbox361-opentlc-com:6443/system:admin api-cluster-qkskx-qkskx-sandbox361-opentlc-com:6443 system:admin/api-cluster-qkskx-qkskx-sandbox361-opentlc-com:6443 trusted-profile-analyzer
*Switched to context "eks-admin".*
[lab-user@bastion ~]$And this command ensures you Helm installed
helm...
--qps float32 queries per second used when communicating with the Kubernetes API, not including bursting
--registry-config string path to the registry config file (default "/home/lab-user/.config/helm/registry/config.json")
--repository-cache string path to the directory containing cached repository indexes (default "/home/lab-user/.cache/helm/repository")
--repository-config string path to the file containing repository names and URLs (default "/home/lab-user/.config/helm/repositories.yaml")
Use "helm [command] --help" for more information about a command.Setting Up Red Hat Account and Creating Central Instance on ACS
Procedure
-
Head on over to https://www.redhat.com/en/technologies/cloud-computing/openshift/advanced-cluster-security-kubernetes/cloud-service/trial
-
Click on the Start Your Trial button.
-
Sign up for a Red Hat account if you don’t have one. (Make sure to remember your username and password!)
-
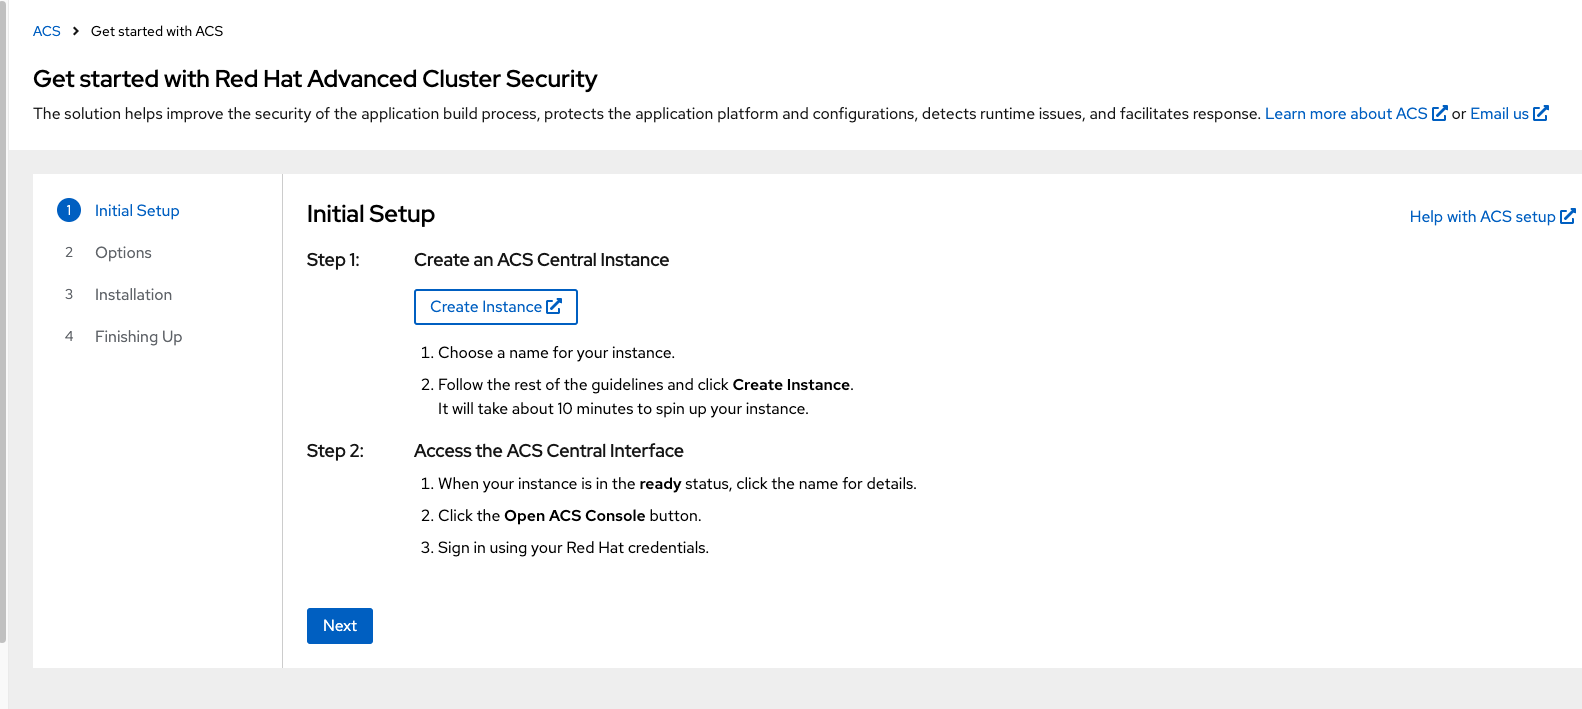
Once you are in "Getting Started" tab select "Create Instance".
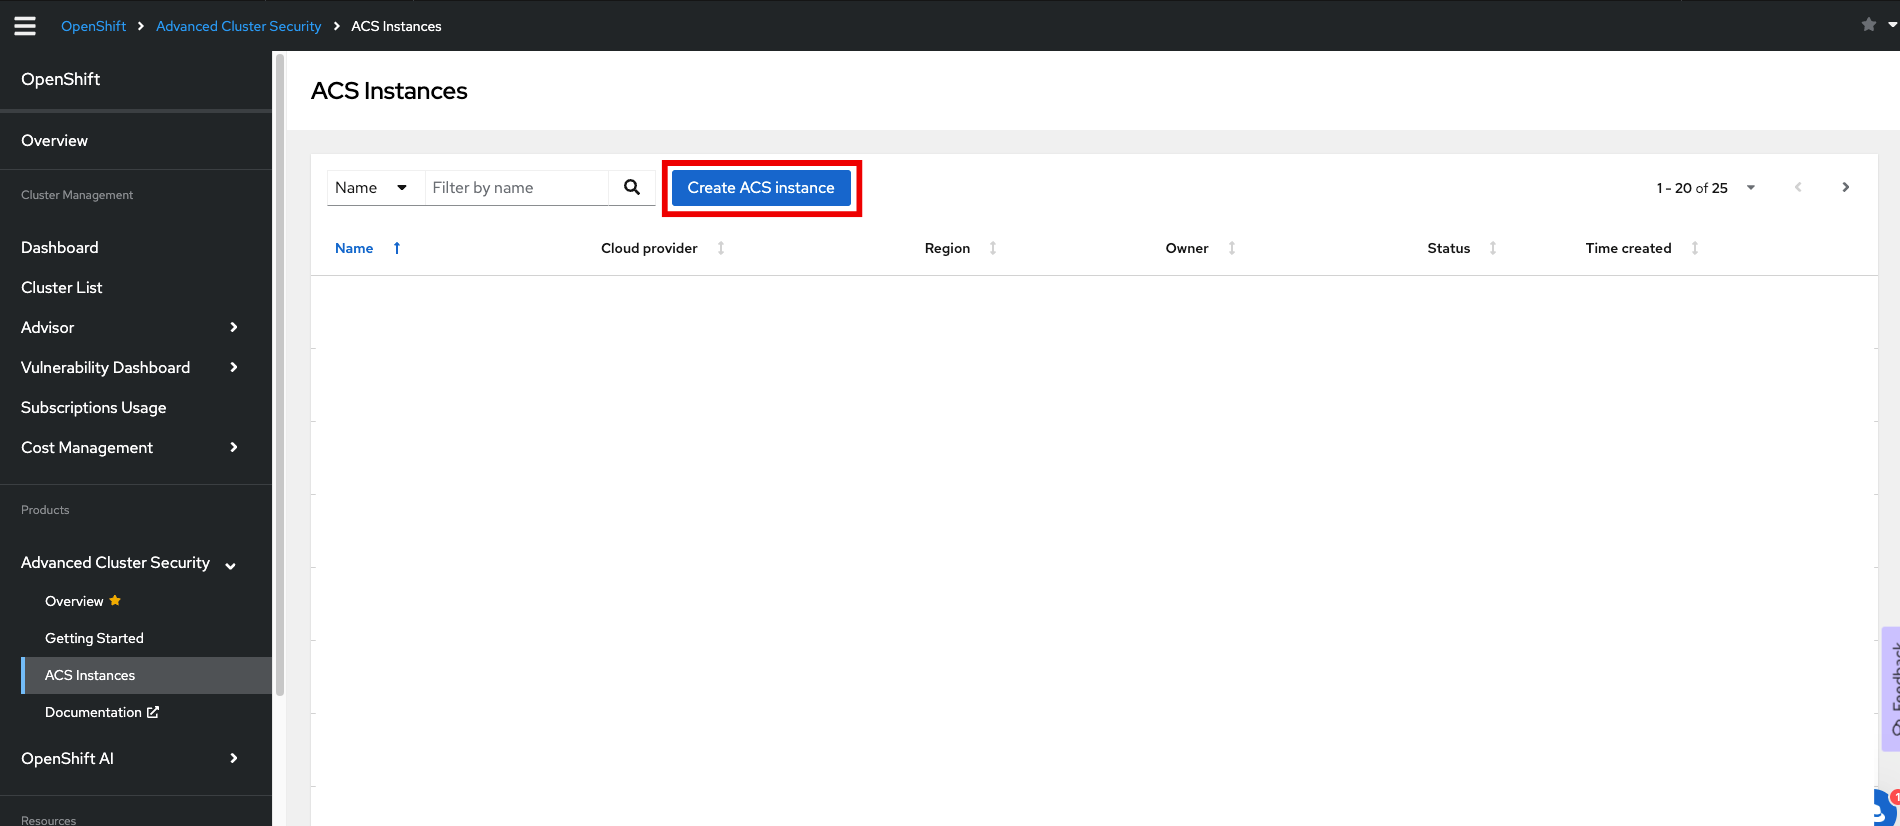
| You will be redirected to the ACS Instances page where you can view all of the central services that have been deployed. |
-
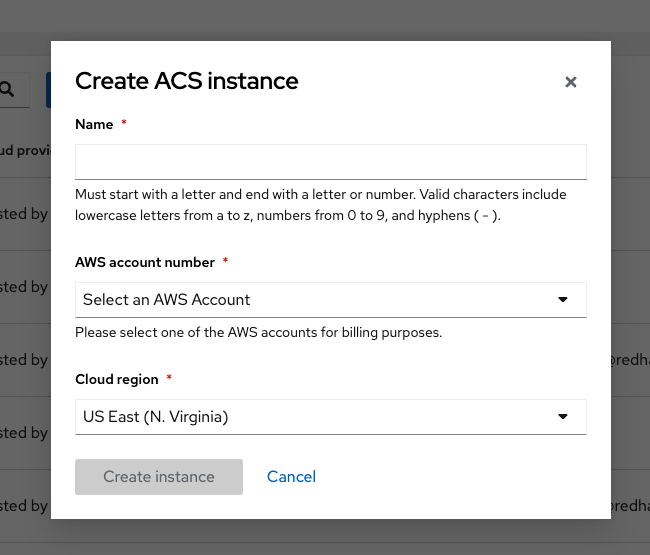
Click on Create ACS instance.
-
Fill in your name, and select your cloud region (US East or Europe).
-
Wait for the creation process to complete. Typically it is 7-10 minutes.
| You need ACS Central Services to be available to deploy ACS Secured Cluster Services into the EKS Cluster. Time to stretch your legs a bit. |
Checking and Accessing the Central Instance
Once the RHACS Central instance is available, we will check on it’s status.
Procedure
-
Ensure the Ready status is showing
-
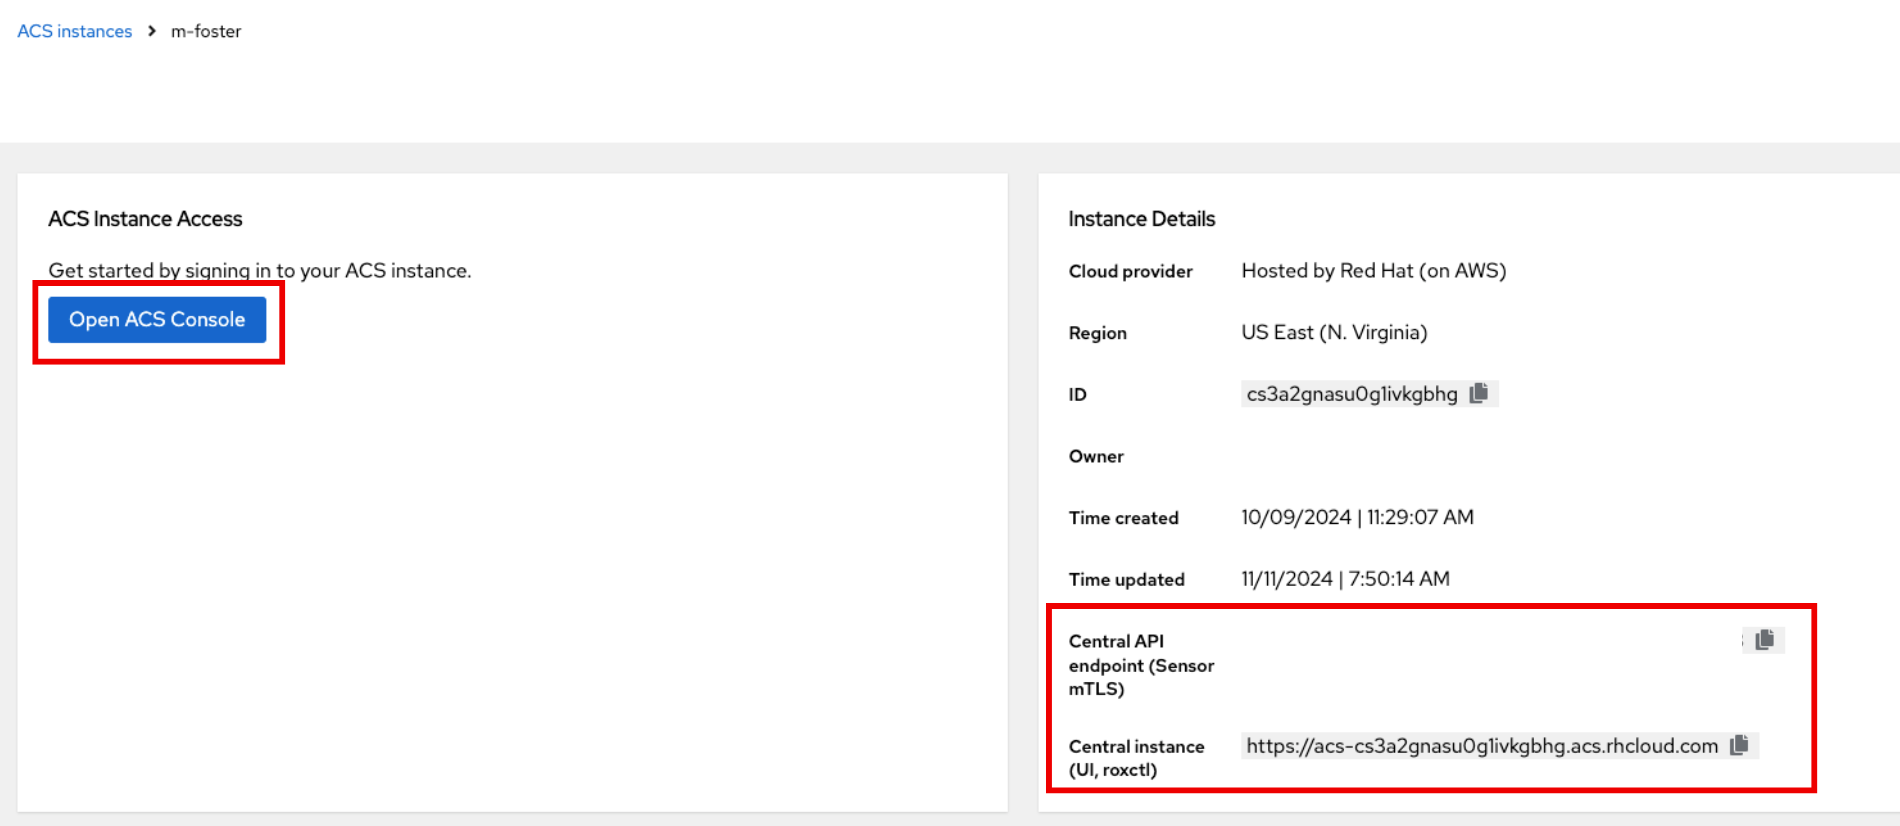
Click on the Name of your Central Service instance. You will be redirected to a page with all of the Central Services details and a few extra resources.
| Take note of the API and roxctl URL’s. It will be useful for connecting to the service later. |
-
Click on the Name of your Central Service instance. You will be redirected to a page with all of the Central Services details and a few extra resources.
-
Click on Open ACS Console and login to your account.
| You should be redirected to your ACS instance at a page that looks like the one above. Ask for help if you have not reached this step. |
Install the Secured Cluster Services Bundle
Red Hat Advanced Cluster Security for Kubernetes (RHACS) provides security services for self-managed RHACS on platforms such as Amazon Elastic Kubernetes Service (Amazon EKS), Google Kubernetes Engine (Google GKE), and Microsoft Azure Kubernetes Service (Microsoft AKS).
If you want to learn more abou the installation methods before proceeding you can review the resources below:
-
Understand the installation methods for different platforms.
-
Understand Red Hat Advanced Cluster Security for Kubernetes architecture.
-
Check the default resource requirements page.
The following list provides a high-level overview of installation steps:
-
Install link: Central services on a cluster using Helm charts or the
roxctlCLI. -
Generate and apply an init bundle.
-
Install secured cluster resources on each of your secured clusters.
Setup the helm chart command
Procedure
-
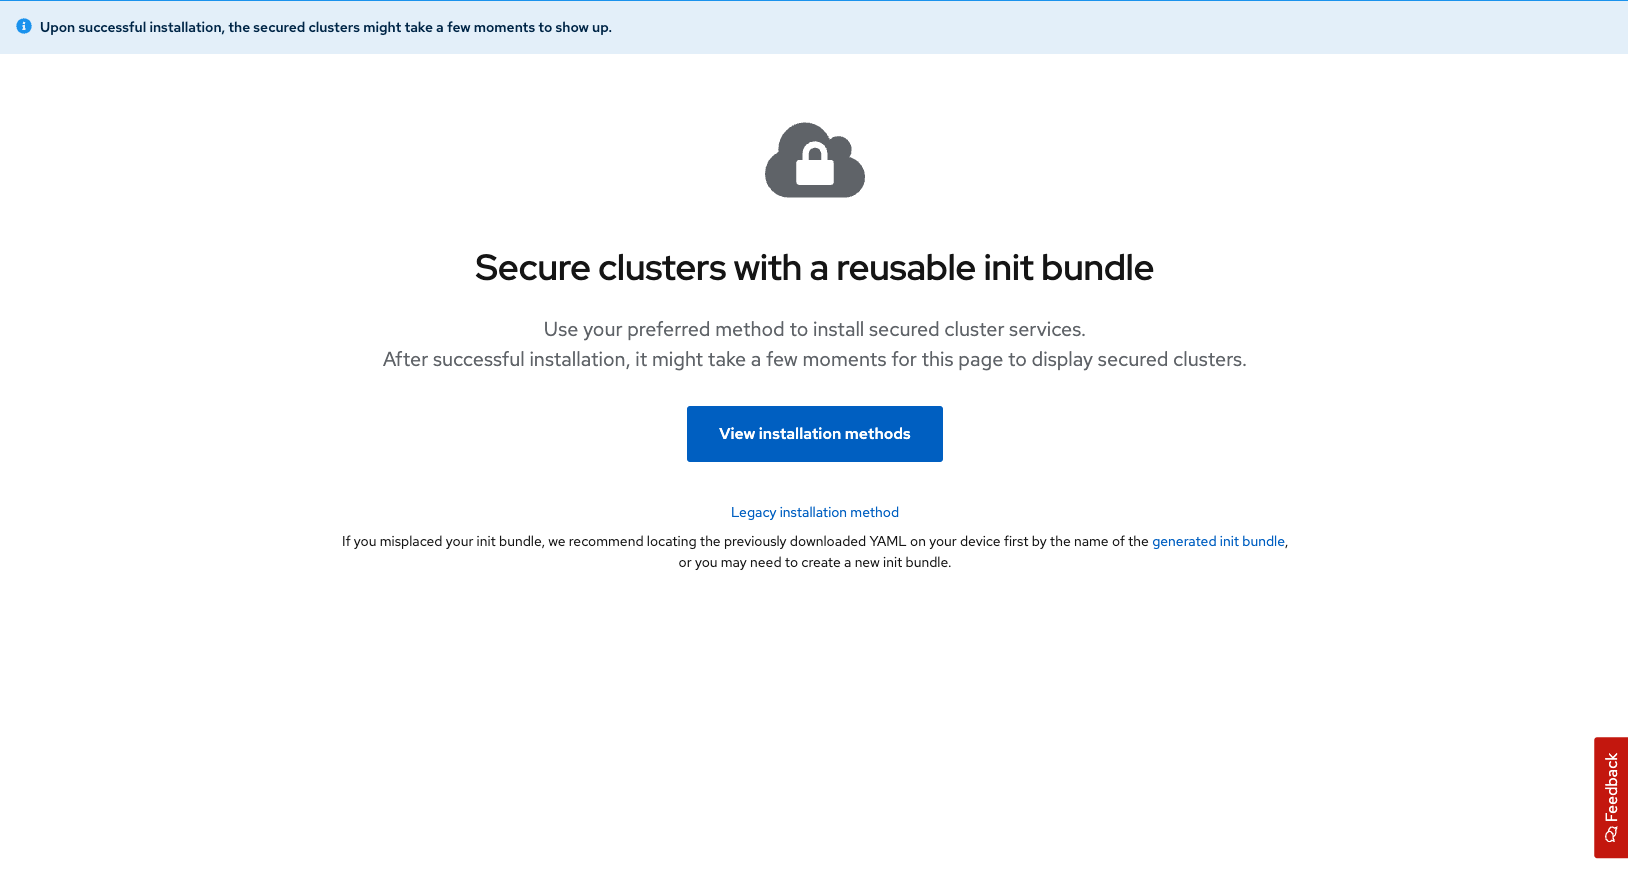
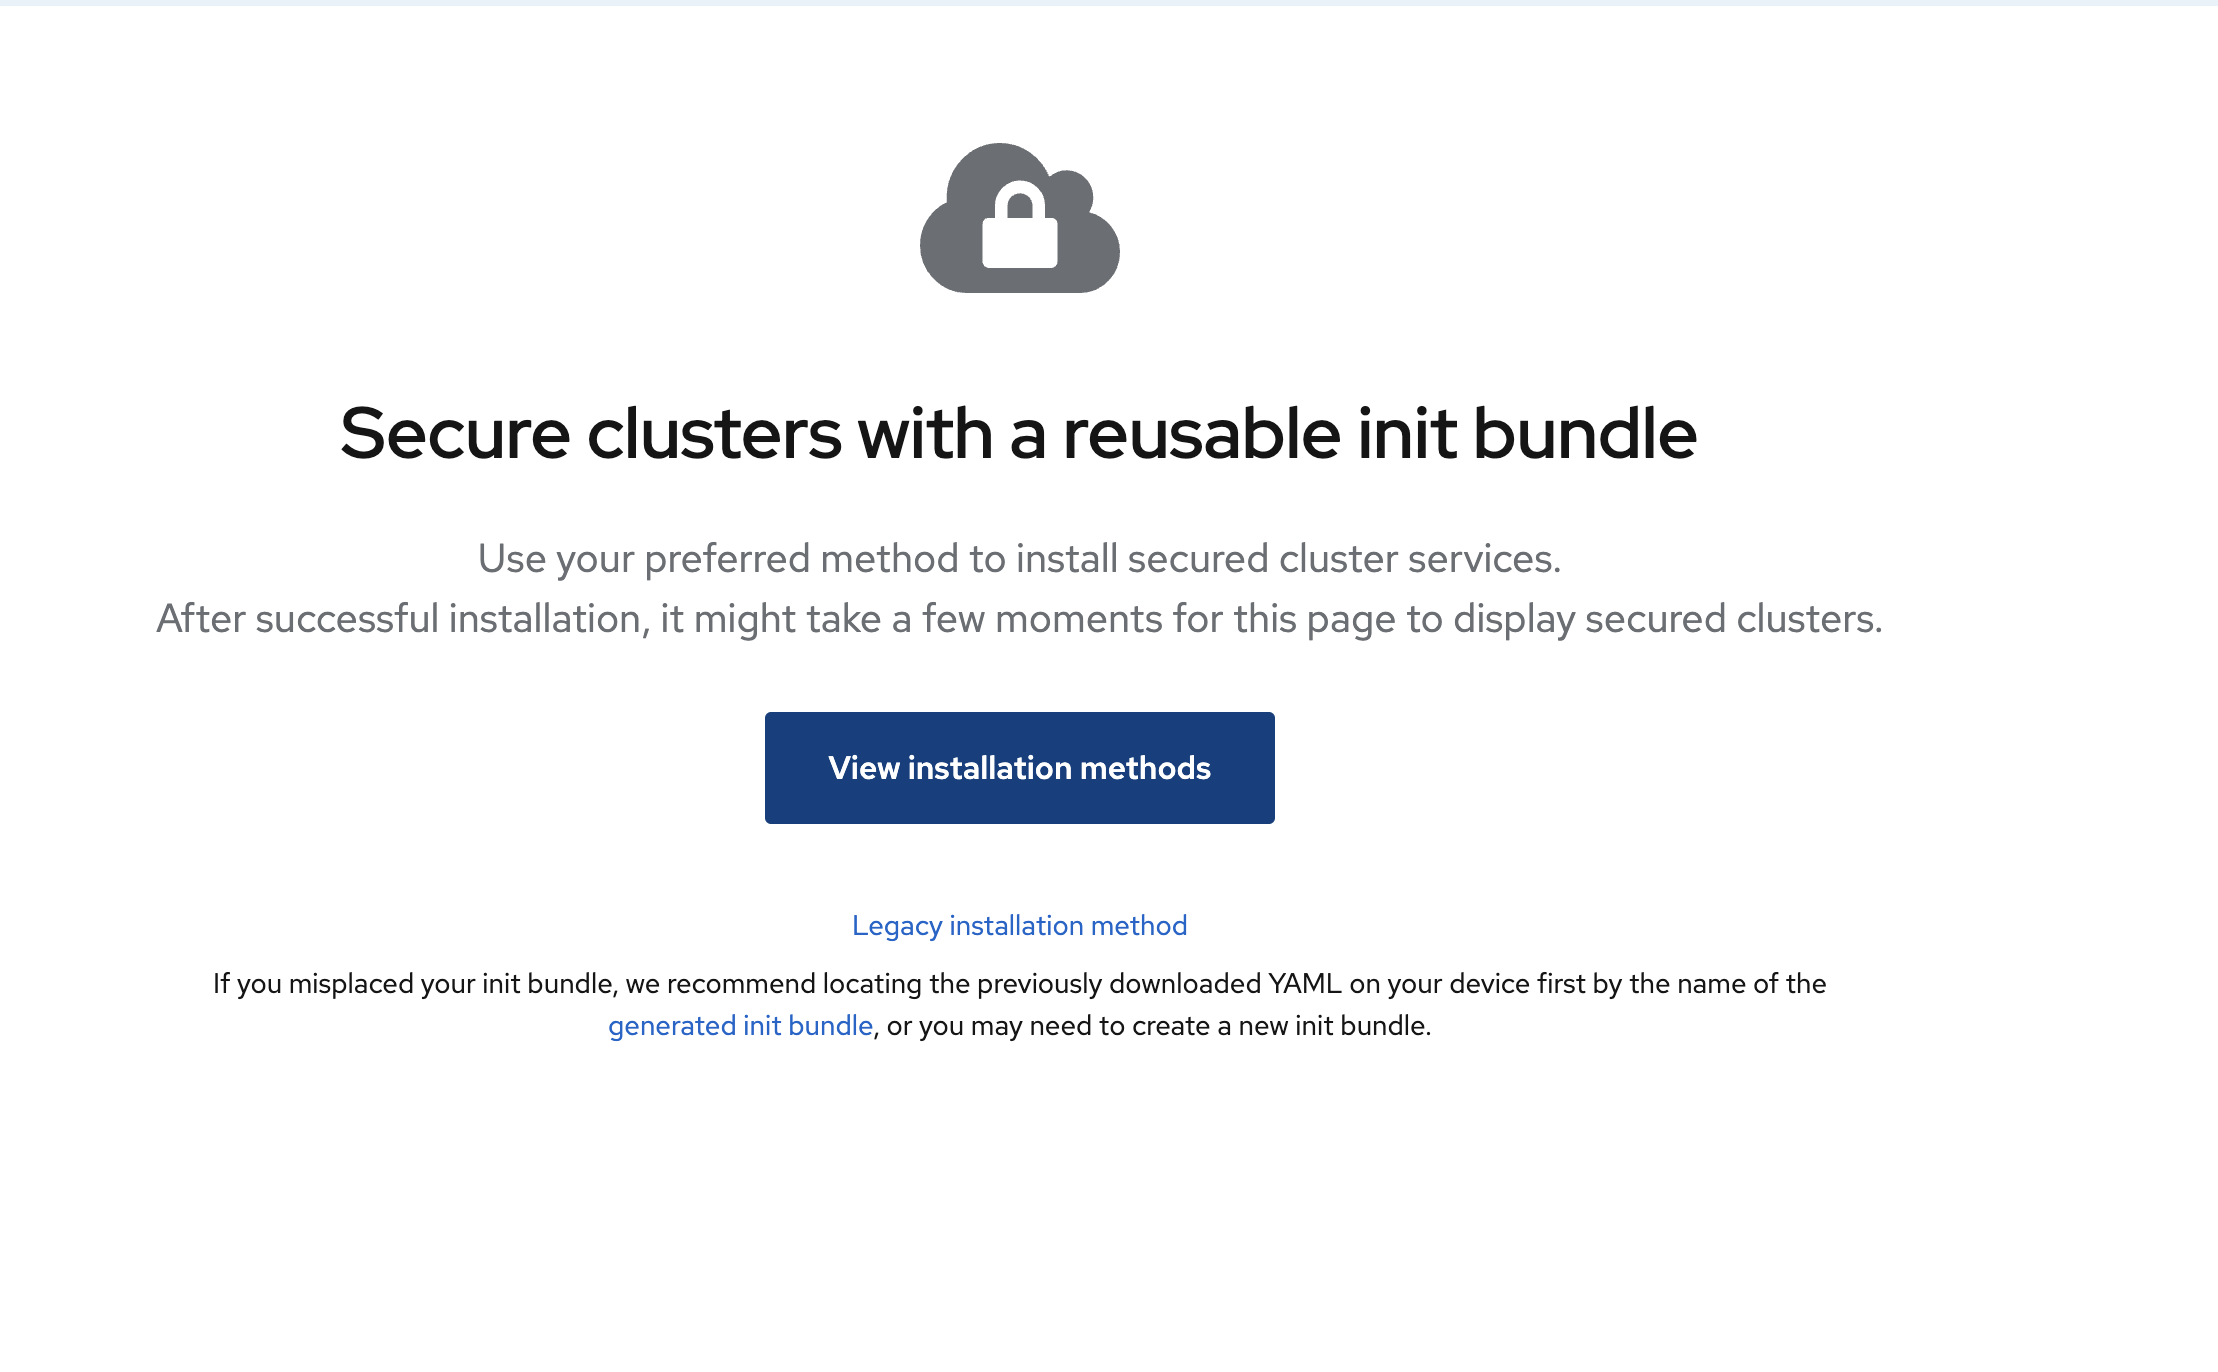
Click on the *View installation methods" button
-
Click on the Helm chart option
-
Run the following command helm command to update the charts
helm repo add rhacs https://mirror.openshift.com/pub/rhacs/charts/[lab-user@bastion ~]$ helm repo add rhacs https://mirror.openshift.com/pub/rhacs/charts/
"rhacs" has been added to your repositories| Review what is necessary for a successful Helm Chart deployment. |
-
You must download the YAML file for a cluster init bundle. One bundle can be used to secure multiple clusters.
-
Ensure you have access to the Red Hat Container Registry and a pull secret for authentication.
-
Obtain the address and port number on which you are exposing the Central service.
We are going to make this easier by using variables in our setup.
Create the init bundle
Procedure
-
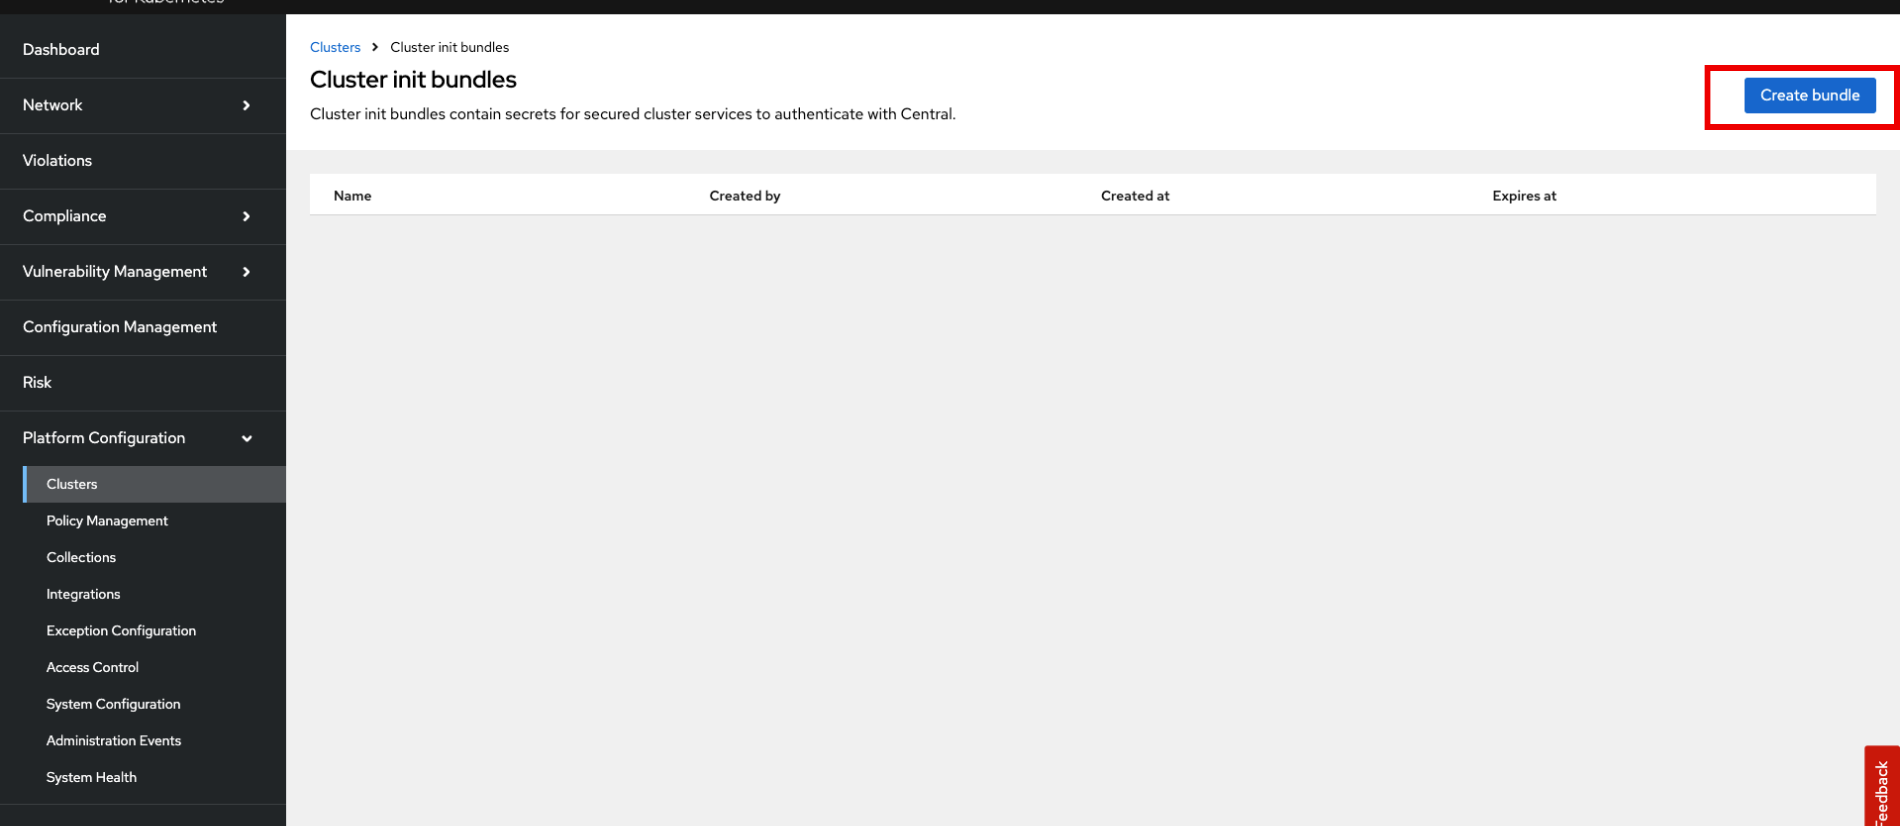
In the ACS Console Click on Platform Configuration → Integrations → Cluster Init Bundle
-
Click on the Create bundle button.
-
Give the bundle a name, click EKS cluster, and click ok.
-
Run the following command command to create a file name init.yml
touch init.yml-
Next, use Vi or nano to edit the file and copy the credentials into the init.yml folder.
-
Confirm the file is setup properly with a cat command.
cat init.yml AwEHoUQDQgAEQA7LyLvQHSjVldF02jvQ5vE9NfO3KHOE3ZJEFTYlzKnAEC7AHCyG
slzX6eYlj0R3AnHokWPgNX/DqyPN2pFDGw==
-----END EC PRIVATE KEY-----Obtain the address and port number on which you are exposing the Central service
This is a simple step in which you either head back to the RHACS dashboard and copy the URLs from before. Or simply copy the URL from the top of the dashboad and add port 443.
Procedure
-
Copy the URL from the address bar.
-
add a semicolon and 443 to the end of .com while removing the rest of the the URL including the "https:". The Address should look something like this → acs-xxxxxxxxxx.acs.rhcloud.com:443
-
Run the following command with your URL to save as a shell variable.
echo export ACS_URL= YOUR_URL_HERE ~/.bashrc
ACS_URL= YOUR_URL_HEREecho $ACS_URL[lab-user@bastion ~]$ echo $ACS_URL
https://acs-cs3a2gnasu0g1ivkgbhg.acs.rhcloud.com:443Run the helm chart command
Now it’s time to run the helm chart command!
Procedure
|
Run the following Helm command and ensure that your credentials are added.
Make sure to add your cluster name to the command.
|
helm install -n stackrox --create-namespace \
   stackrox-secured-cluster-services rhacs/secured-cluster-services \
   -f init.yml \
   --set clusterName=eks-production-cluster \
   --set centralEndpoint=$ACS_URL \
   --set imagePullSecrets.username=USERNAME \
--set imagePullSecrets.password=PASSWORD| The imagePullSecrets.username is the username for your account and not your email. |
  OpenShift Cluster:                           false
  Admission Control Webhooks deployed:
  Admission Control Creates/Updates enforced:  false
  Scanner V4:                                  disabled

Please take note of the following:

- PodSecurityPolicies are disabled, since your environment does not support them according to API
  server properties.

Thank you for using StackRox!-
Verify that everything is up and running with the following command.
kubectl get pods -n stackrox -wNAME READY STATUS RESTARTS AGE
admission-control-574df56d8-4dj9x 0/1 Running 0 52s
admission-control-574df56d8-gfsm9 0/1 Running 0 52s
admission-control-574df56d8-xdgrl 0/1 Running 0 52s
collector-jc9qg 2/2 Running 1 (17s ago) 52s
collector-q4lzk 2/2 Running 1 (16s ago) 52s
collector-sdmpg 2/2 Running 1 (8s ago) 52s
sensor-64d5f886f7-g97nr 0/1 Pending 0 52sUpdate the Helm deploy via the value file
This file allows you to specify configurations for your Helm deployment.
# General settings
clusterName: "eks-production-cluster" # Replace with your cluster name

# Central Endpoint - specify the URL for the central server
centralEndpoint: "acs-cs3a2gnasu0g1ivkgbhg.acs.rhcloud.com" # Replace with your actual ACS central endpoint URL

# Image Pull Secrets - credentials to pull secured images
imagePullSecrets:
  username: ""   # Replace with your username
  password: ""   # Replace with your password

# Additional configuration
# Set any other options specific to your environment or requirements

# Namespace - specify the namespace to install the chart if not specified in CLI
namespace: "stackrox"

# Security Contexts (optional) - example settings
admissionControl:
  dynamic:
    disableBypass: false
    enforceOnCreates: true
    enforceOnUpdates: true
    scanInline: true
    timeout: 3
  listenOnCreates: true
  listenOnEvents: true
  listenOnUpdates: true

collector:
  collectionMethod: CORE_BPF
  disableTaintTolerations: false
  slimMode: false

  # Collector resource limits and requests
  resources:
    limits:
      cpu: "250m"     # Set the CPU limit for the collector
      memory: "512Mi" # Set the memory limit for the collector
    requests:
      cpu: "100m"     # Set the CPU request for the collector
      memory: "256Mi" # Set the memory request for the collector

sensor:
  # Sensor resource limits and requests
  resources:
    limits:
      cpu: "250m"        # Set the CPU limit for the sensor
      memory: "1Gi"   # Set the memory limit for the sensor
    requests:
      cpu: "100m"     # Set the CPU request for the sensor
      memory: "512Mi" # Set the memory request for the sensor

# Other customizable options depending on your RHACS version
To install the Helm chart using this values file, run the following command:
helm upgrade stackrox-secured-cluster-services rhacs/stackrox-secured-cluster-services \
   -n stackrox -f values.yml
Make sure to replace the placeholders with actual values specific to your RHACS environment before deploying.
Deploy the workshop applications (AGAIN…)
In the final part of this module, you’ll deploy several insecure applications to the OpenShift cluster. You’ll scan a few of these containers using the roxctl CLI to understand what you’re deploying and what to expect when you dive into RHACS.
| Make sure the variables are set before running the following commands. If not, go back to the Quay section to redo the previous commands. |
Run the following in the terminal and ensure you get the corrrect outputs.
echo $QUAY_USER
echo $QUAY_URL
Our insecure demo applications come from a variety of public GitHub repositories and sources. Including the Java application that you just pushed to Quay. Let’s deploy them into our cluster.
Procedure
-
Run the following commands in the terminal, one after the other.
oc config use-context admin[lab-user@bastion ~]$oc config use-context eks-admin
Switched to context "admin".oc apply -f $TUTORIAL_HOME/kubernetes-manifests/ --recursiveNow it’s time to review the results!
