Lab Setup and Introduction
Module Goals
-
Access all applications in the lab environment
-
Deploy default insecure applications
-
Build and deploy a "Developer" image for the workshop
Accessing the Workshop Components
Ensure you can access all necessary resources to complete this lab.
| Always open URLs in a new tab. For example, on a Mac, use <cmd> click. |
Access the Red Hat® OpenShift Container Platform (OCP) UI
First, make sure you can access the Red Hat® OCP console user interface.
Procedure
-
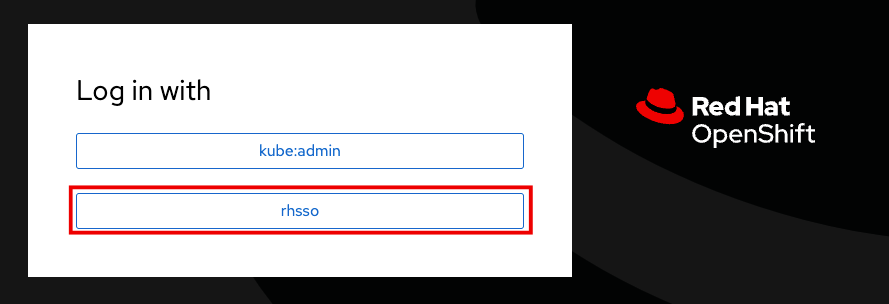
Log into the OCP console at
https://console-openshift-console.apps.cluster-sample.sample.sandboxsample.opentlc.com. -
Click the rhsso option.
| If variables on the screen are unavailable, inform your workshop administrator. |
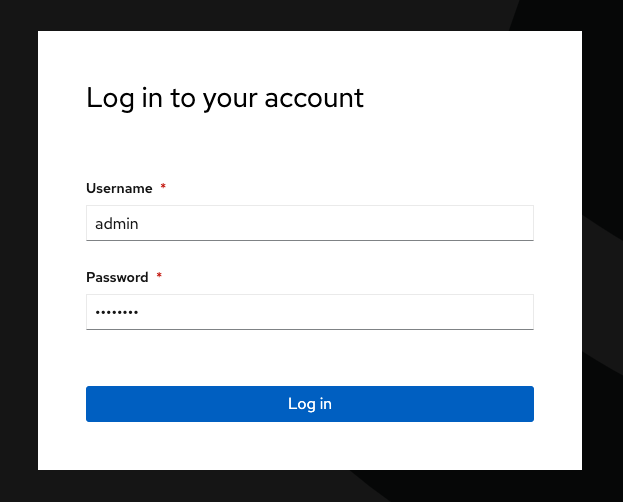
-
Enter the OCP credentials.
User: |
sample_user |
Password: |
sample_KQt21WpVVWzo |
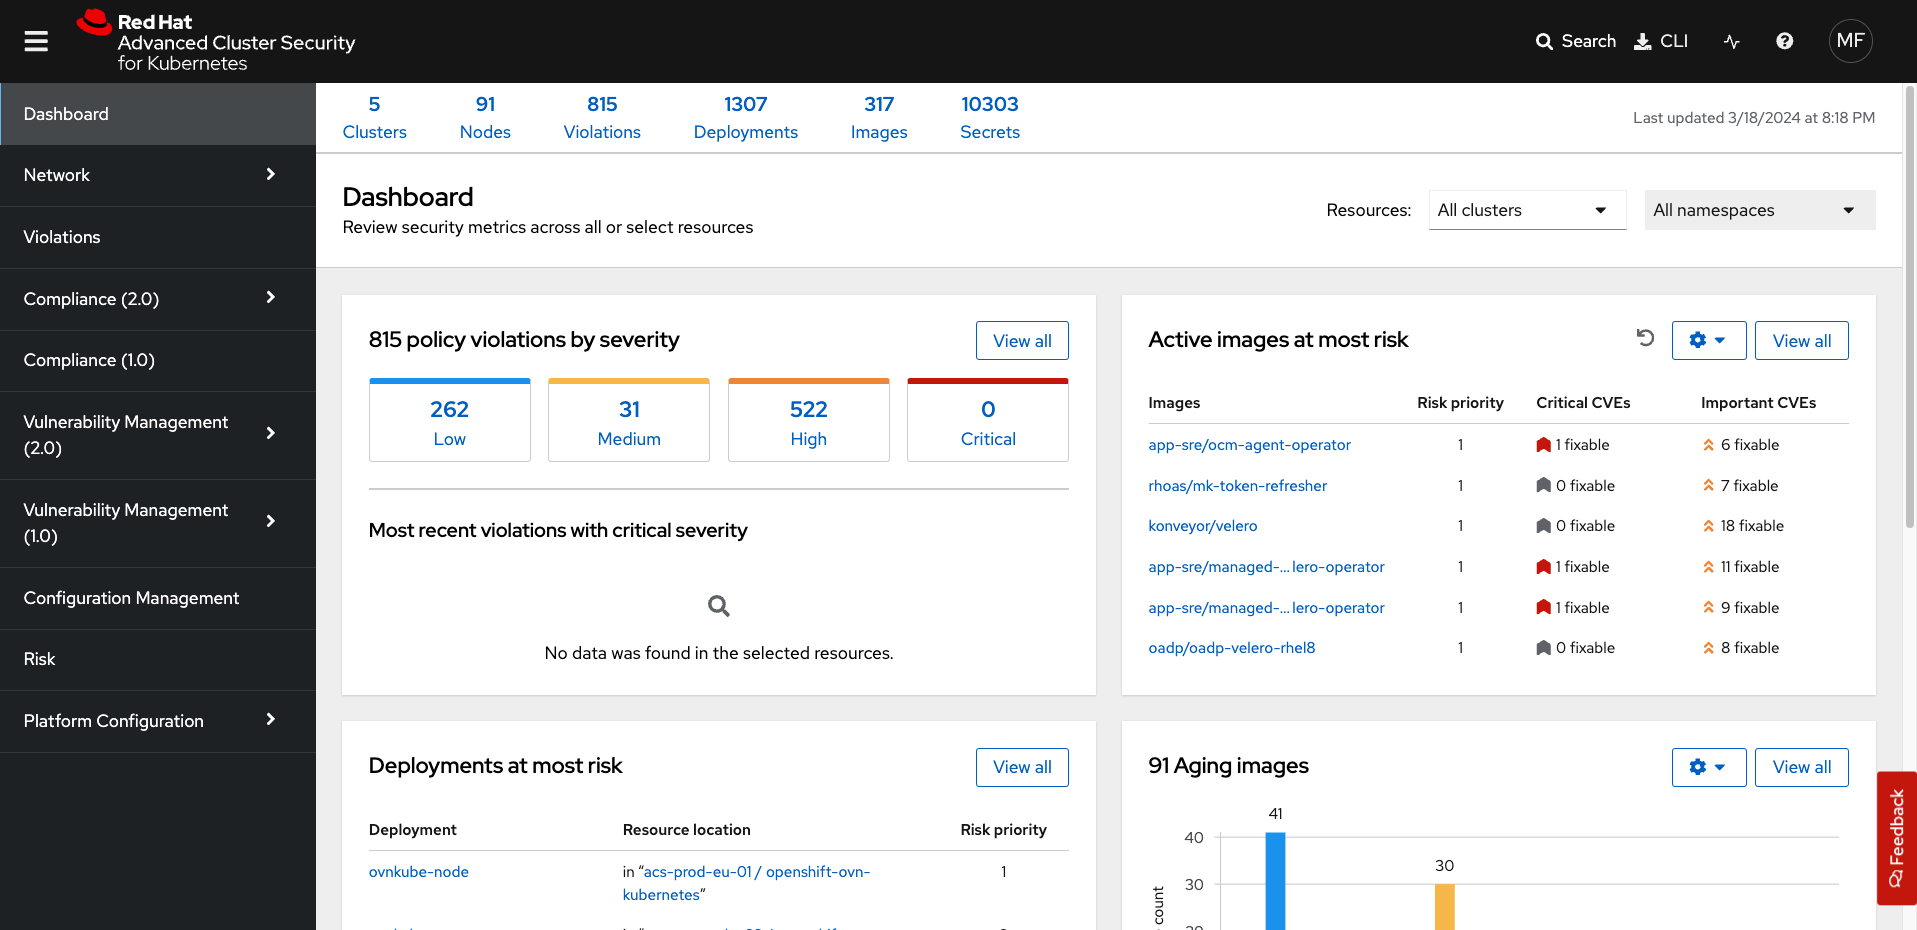
Access the Red Hat® Advanced Cluster Security (RHACS) User Interface
Ensure that you have access to the RHACS user interface.
Procedure
-
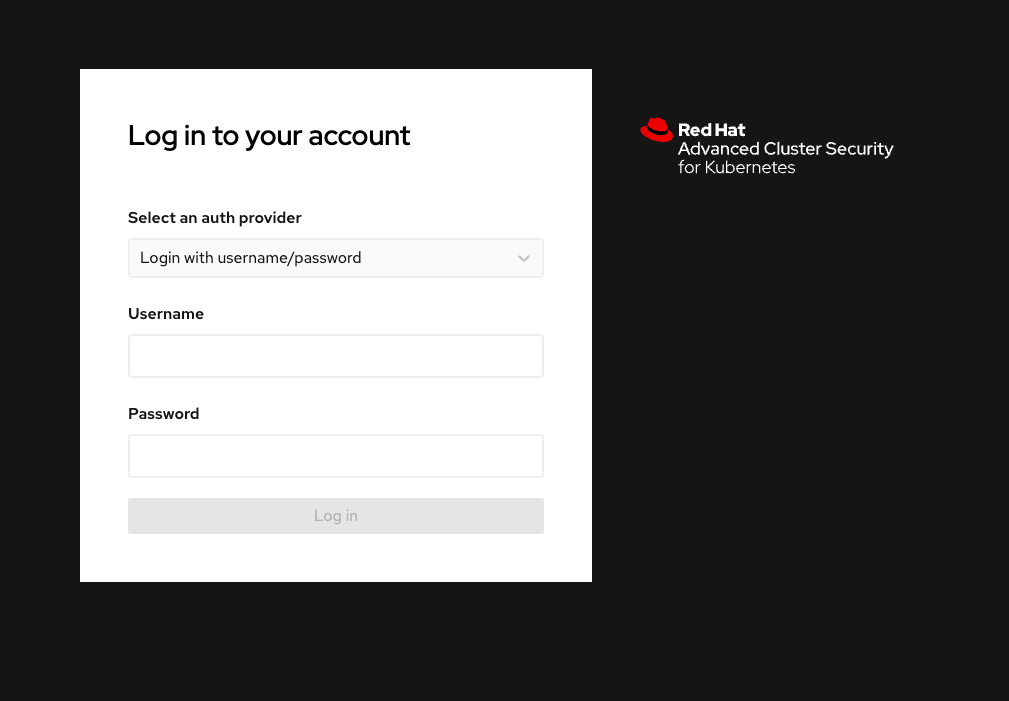
Log into the RHACS console at
https://central-stackrox.apps.cluster-sample.sample.sandboxsample.opentlc.com.
-
Enter the RHACS credentials:
RHACS Console Username: |
sameple_admin |
RHACS Console Password: |
sample_password |
Access the Red Hat® Quay UI
Red Hat Quay is an enterprise-grade container registry that provides a secure, scalable, and highly available solution for storing and managing container images. It offers integrated security scanning, access controls, and image signing to help ensure the integrity and security of containerized applications across hybrid and multi-cloud environments, including Red Hat OpenShift, AWS, Azure, and Google Cloud.
Let’s ensure that you have access to the Quay User Interface.
Procedure
-
Log into the Quay console at
https://quay-sample.apps.cluster-sample.sample.sandboxsample.opentlc.com
-
Enter the Quay credentials:
Quay Console Username: |
sample_quayadmin |
Quay Console Password: |
sample_LSncwGJkXcayY1tUMmr8 |
OpenShift Admin Access Verification
Verify that you have admin-level access using the oc CLI.
Procedure
-
Switch to the admin context:
oc config use-context admin-
Verify access and check available nodes:
oc whoami
oc get nodes -A
[lab-user@bastion ~]$ oc whoami
oc get nodes -A
system:admin
NAME STATUS ROLES AGE VERSION
<OCP_IP>0.us-east-2.compute.internal Ready worker 4h1m v1.27.11+749fe1d
<OCP_IP>.us-east-2.compute.internal Ready control-plane,master 4h7m v1.27.11+749fe1d
<OCP_IP>.us-east-2.compute.internal Ready control-plane,master 4h7m v1.27.11+749fe1d
<OCP_IP>.us-east-2.compute.internal Ready worker 4h2m v1.27.11+749fe1d
<OCP_IP>.us-east-2.compute.internal Ready control-plane,master 4h7m v1.27.11+749fe1d
<OCP_IP>.us-east-2.compute.internal Ready worker 4h2m v1.27.11+749fe1dYou will now see the OCP role using the oc command, as we are currently working in the OpenShift cluster.
Verify the roxctl CLI and Access to RHACS Central Services
Next, verify that we have access to the RHACS Central Service.
Procedure
-
Run the following command:
|
This command uses variables saved in the ~/.bashrc file to authenticate with the RHACS Central Service. |
roxctl --insecure-skip-tls-verify -e "$ROX_CENTRAL_ADDRESS:443" central whoamiUserID:
auth-token:718744a9-9548-488b-a8b9-07b2c59ea5e6
User name:
anonymous bearer token "pipelines-ci-token" with roles [Admin] (jti: 718744a9-9548-488b-a8b9-07b2c59ea5e6, expires: 2025-04-03T15:15:06Z)
Roles:
- Admin
Access:
rw Access
rw Administration
rw Alert
rw CVE
rw Cluster
rw Compliance
rw Deployment
rw DeploymentExtension
rw Detection
rw Image
rw Integration
rw K8sRole
rw K8sRoleBinding
rw K8sSubject
rw Namespace
rw NetworkGraph
rw NetworkPolicy
rw Node
rw Secret
rw ServiceAccount
rw VulnerabilityManagementApprovals
rw VulnerabilityManagementRequests
rw WatchedImage
rw WorkflowAdministration| This output shows that you have unrestricted access to the RHACS product. These permissions can be seen in the RHACS Access Control tab that we will review later. |
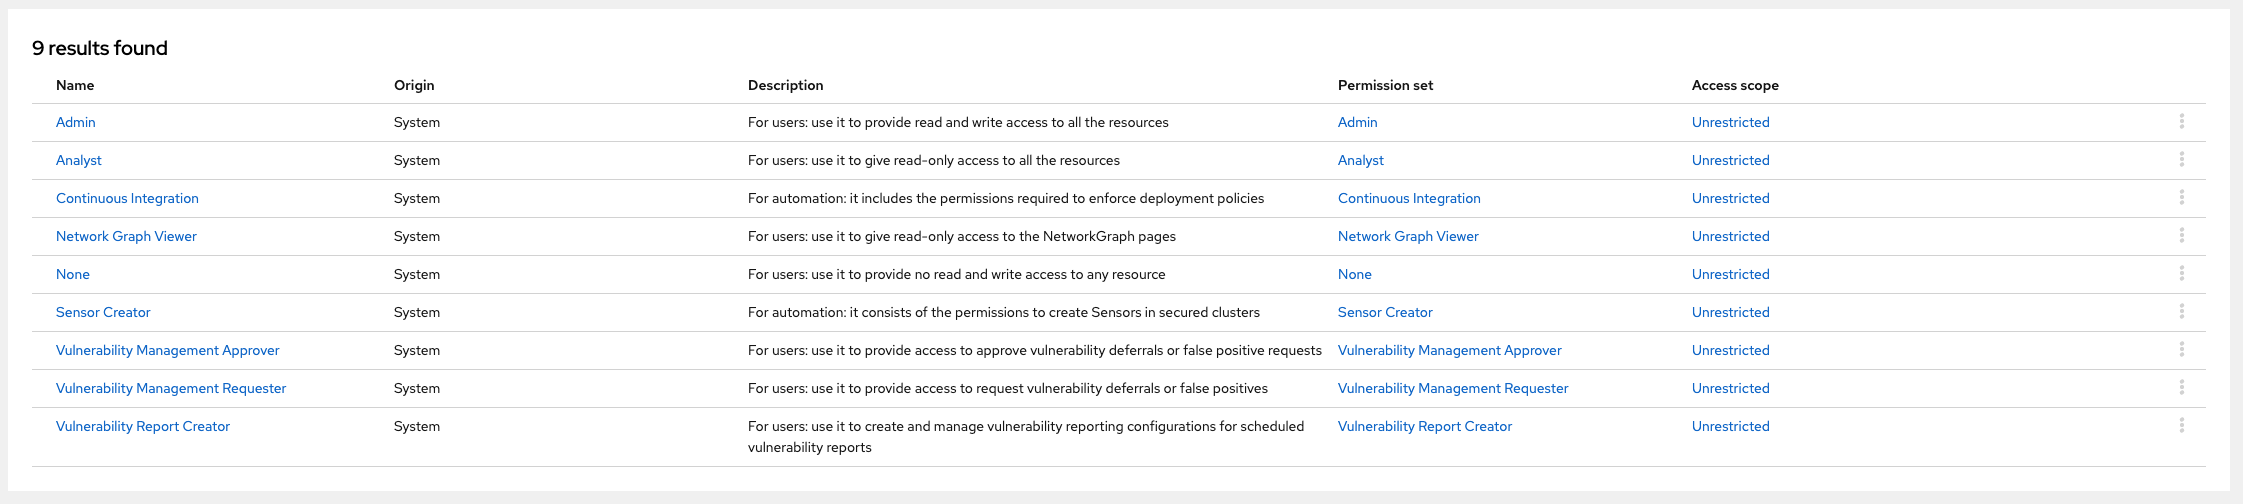
Great job!
Deploy the Vulnerable Workshop Applications
You now have access to the core OpenShift applications. Next, you’ll deploy several insecure apps into the OpenShift cluster. Our insecure demo applications come from a variety of public GitHub repositories and sources. These apps will serve as the main use cases you examine during the workshop, ranging from well-known Capture the Flag (CTF) applications to vulnerabilities like Log4Shell and Apache Struts.
After deploying the applications, you’ll scan some of these containers using the roxctl CLI to get a feel for what you’ll be dealing with when you get to the security section with Red Hat Advanced Cluster Security.
Time to deploy
Procedure
-
Run the following commands in the terminal, one after the other.
This command downloads a repository containing Dockerfiles, attack scripts, and Kubernetes manifests that you will use to deploy the containerized applications to OpenShift.
git clone https://github.com/mfosterrox/demo-apps.git demo-appsThis command sets the variable TUTORIAL_HOME to equal the working directory, allowing you to make references to various files easily.
echo export TUTORIAL_HOME="$(pwd)/demo-apps" >> ~/.bashrc
export TUTORIAL_HOME="$(pwd)/demo-apps"
This command applies the manifests to the OpenShift environment.
oc apply -f $TUTORIAL_HOME/kubernetes-manifests/ --recursive[demo-user@bastion ~]$ oc apply -f $TUTORIAL_HOME/kubernetes-manifests/ --recursive
namespace/operations created
namespace/backend created
....
route.route.openshift.io/webgoat created
configmap/webgoat-config created| You should see warnings such as: Warning: would violate PodSecurity "baseline:latest": privileged (container "proxy" must not set securityContext.privileged=true). This is because you are deploying flawed container configurations and vulnerable container applications to the OpenShift cluster. |
The following command will watch all of the applications as they are successfully deployed to the OpenShift cluster. You can press ctrl+c to terminate the command.
oc get deployments -l demo=roadshow -A[demo-user@bastion ~]$ oc get deployments -l demo=roadshow -A
NAMESPACE NAME READY UP-TO-DATE AVAILABLE AGE
backend api-server 1/1 1 1 18s
default dvma 1/1 1 1 76s
default juice-shop 1/1 1 1 73s
default log4shell 1/1 1 1 70s
default open-api-server 1/1 1 1 39s
default reporting 1/1 1 1 42s
default vulnerable-node-app 1/1 1 1 36s
default webgoat 1/1 1 1 33s
frontend asset-cache 1/1 1 1 66s
medical reporting 1/1 1 1 58s
operations jump-host 1/1 1 1 54s
payments visa-processor 1/1 1 1 52s| Please ensure the deployed applications are deployed and available before moving on to the next module. |
-
Run the following roxctl commands to check on the vulnerability status of the applications you deployed.
The following command triggers a vulnerability scan by RHACS, roxctl filters the results into a table. The severity flag means only the critical and important vulnerabilities will be shown. This image is known as the "Damn Vulnerable Web Application" and it contains a significant amount of vulnerabilities.
roxctl --insecure-skip-tls-verify -e "$ROX_CENTRAL_ADDRESS:443" image scan --image=quay.io/mfoster/dvwa:0.1.0 --severity CRITICAL,IMPORTANT --force -o table| The following output can be configured using flags. You can configure different outputs (table, CSV, JSON, and sarif) and filter for specific severities. |
[demo-user@bastion ~]$ roxctl --insecure-skip-tls-verify -e "$ROX_CENTRAL_ADDRESS:443" image scan --image=quay.io/mfoster/dvwa --severity CRITICAL,IMPORTANT --force -o table
Scan results for image: quay.io/mfoster/dvwa

----------------------------------------------------------------------------
|     perl-base     |    5.36.0-7+deb12u1     | CVE-2023-31484 | IMPORTANT | 8.1  | https://nvd.nist.gov/vuln/detail/CVE-2023-31484 |            -            |    -     |       -       |
--------------------------------------------------------------------------------------------------------------------------------------------------------------------------------
| perl-modules-5.36 |    5.36.0-7+deb12u1     | CVE-2023-31484 | IMPORTANT | 8.1  | https://nvd.nist.gov/vuln/detail/CVE-2023-31484 |            -            |    -     |       -       |
--------------------------------------------------------------------------------------------------------------------------------------------------------------------------------
WARN:   A total of 180 unique vulnerabilities were found in 15 components
Build the main workshop application
Login to Quay from the CLI
Procedure
-
Run the following command.
Let’s export a few variables to make things easier. These variables will stay in the .bashrc file so they’re saved in case you need to refresh the terminal.
echo export QUAY_USER=sample_quayadmin >> ~/.bashrc
QUAY_USER=sample_quayadmin-
Run the following command to set the Quay URL variable
echo export QUAY_URL=$(oc -n quay-enterprise get route quay-quay -o jsonpath='{.spec.host}') >> ~/.bashrc
QUAY_URL=$(oc -n quay-enterprise get route quay-quay -o jsonpath='{.spec.host}')| Verify that the variables are correct |
echo $QUAY_USER
echo $QUAY_URL
[lab-user@bastion ~]$ echo $QUAY_USER
echo $QUAY_URL
quayadmin
quay-bq65l.apps.cluster-bq65l.bq65l.sandbox209.opentlc.com-
Using the terminal on the bastion host, login to quay using the Podman CLI as shown below:
podman login $QUAY_URL -u $QUAY_USER -p sample_LSncwGJkXcayY1tUMmr8| Use the quay admin credentials to sign in if you run into issues. |
Quay Username: |
sample_quayadmin |
Quay Password: |
sample_LSncwGJkXcayY1tUMmr8 |
Username: quayadmin
Password:
Login Succeeded!
Beautiful! We’re logged in. Now you can download, build, and push images directly to your Quay repository.
Create our developer golden image
Imagine a base image as a blank canvas, providing a reliable foundation like a minimal operating system or runtime environment. Developers add the essential configurations, libraries, and tools needed to fit their application’s unique demands. By tagging this customized creation as a golden image, developers ensure every deployment uses the same standardized, consistent setup, simplifying workflows and avoiding unexpected surprises.
Procedure
-
Run the following commands in succession:
podman pull python:3.12-alpine[demo-user@bastion ~]$ podman pull python:3.12-alpine
Trying to pull docker.io/library/python:3.12-alpine...
Getting image source signatures
Copying blob e846654b130a skipped: already exists
Copying blob 00bb69fc5235 skipped: already exists
Copying blob 1f3e46996e29 skipped: already exists
Copying blob 7b104e645578 skipped: already exists
Copying config 451fdb03e1 done |
Writing manifest to image destination
451fdb03e17285d3263d88f0f3bed692c82556935490d233096974386cd0381bThis command tags the python:3.12-alpine image with your Quay repository and username, allowing you to accurately push the image in a later step.
podman tag docker.io/library/python:3.12-alpine $QUAY_URL/$QUAY_USER/python-alpine-golden:0.1This command shows you the local images available.
podman images[demo-user@bastion ~]$ podman images
REPOSITORY TAG IMAGE ID CREATED SIZE
quay-w2t4c.apps.cluster-w2t4c.w2t4c.sandbox1647.opentlc.com/quayadmin/python-alpine-golden 0.1 451fdb03e172 5 weeks ago 50.6 MB
docker.io/library/python 3.12-alpine 451fdb03e172 5 weeks ago 50.6 MBThis command pushes the golden image to your repository.
podman push $QUAY_URL/$QUAY_USER/python-alpine-golden:0.1[demo-user@bastion ~]$ podman push $QUAY_URL/$QUAY_USER/python-alpine-golden:0.1
Getting image source signatures
Copying blob c6121fb0c7de done |
Copying blob a0904247e36a done |
Copying blob 5b6d0b88dd08 done |
Copying blob 375bee7d34e2 done |
Copying config 451fdb03e1 done |
Writing manifest to image destinationPerfect!
Create the Frontend Application and Upload It to Quay
In this section, you will add the application code to the image, build, tag, and push the new image to Quay. Later, we’ll use that image to deploy an application to the OpenShift Cluster.
| With the variables saved in the ~/.bashrc file, you will not have to declare them again in the future. |
Procedure
-
List the contents of the
frontenddirectory inside theapp-imagesfolder to see the files available for the project:
ls $TUTORIAL_HOME/app-images/frontend/[demo-user@bastion ~]$ ls $TUTORIAL_HOME/app-images/frontend/
Dockerfile main.py static-
Display the contents of the
Dockerfileto understand how the image is built, including installed dependencies and the copied files:
cat $TUTORIAL_HOME/app-images/frontend/Dockerfile[demo-user@bastion ~]$ cat $TUTORIAL_HOME/app-images/frontend/Dockerfile
FROM python:3.12-alpine AS build
# Install Bash and other dependencies
RUN apk add --no-cache bash
# Install required Python packages
RUN pip install --no-cache-dir httpx psycopg psycopg_binary psycopg_pool starlette sse_starlette uvicorn
# Install vulnerable packages for testing
RUN pip install --no-cache-dir setuptools==39.1.0
RUN pip install --no-cache-dir Flask==0.5
RUN pip install --no-cache-dir Django==1.11.29
RUN pip install --no-cache-dir requests==2.19.0
RUN pip install --no-cache-dir PyYAML==3.12
FROM python:3.12-alpine AS run
# Install Bash in the runtime container
RUN apk add --no-cache bash
# Create user and set permissions
RUN adduser -S fritz -G root
USER fritz
# Copy files from the build stage
COPY --from=build /usr/local/lib/python3.12/site-packages /usr/local/lib/python3.12/site-packages
COPY --chown=fritz:root static /home/fritz/static
COPY --chown=fritz:root main.py /home/fritz/main.py
# Expose the port and set the working directory
EXPOSE 8080
WORKDIR /home/fritz
# Set the entry point to start the application
ENTRYPOINT ["python", "main.py"]-
Update the
FROMstatement in the Dockerfile to reference a custom base image hosted in a private registry, usingsedto modify the line:
sed -i "s|^FROM python:3\.12-alpine AS \(\w\+\)|FROM $QUAY_URL/$QUAY_USER/python-alpine-golden:0.1 AS \1|" $TUTORIAL_HOME/app-images/frontend/Dockerfile-
Check the Dockerfile again to verify that the
FROMstatement has been updated correctly:
cat $TUTORIAL_HOME/app-images/frontend/Dockerfile[demo-user@bastion ~]$ cat $TUTORIAL_HOME/app-images/frontend/Dockerfile
FROM quay-w2t4c.apps.cluster-w2t4c.w2t4c.sandbox1647.opentlc.com/quayadmin/python-alpine-golden:0.1 AS build
RUN pip install --no-cache-dir
....-
Build the Docker image using
podmanfrom thefrontenddirectory. The-tflag tags the image with a version (0.1) and a registry URL:
cd $TUTORIAL_HOME/app-images/frontend/
podman build -t $QUAY_URL/$QUAY_USER/frontend:0.1 .
[demo-user@bastion frontend]$ podman build -t $QUAY_URL/$QUAY_USER/frontend:0.1 .
[1/2] STEP 1/2: FROM quay-w2t4c.apps.cluster-w2t4c.w2t4c.sandbox1647.opentlc.com/quayadmin/python-alpine-golden:0.1 AS build
.
.
.
Successfully tagged quay-w2t4c.apps.cluster-w2t4c.w2t4c.sandbox1647.opentlc.com/quayadmin/frontend:0.1
46ea42cba3f17c366b0c534164ae088719266df9ab4122532b0bffd1bbefaec9-
Upload the built image to a remote registry using
podman push. The--remove-signaturesflag ensures that image signatures are not included in the pushed image:
podman push $QUAY_URL/$QUAY_USER/frontend:0.1 --remove-signatures[demo-user@bastion frontend]$ podman push $QUAY_URL/$QUAY_USER/frontend:0.1 --remove-signatures
Copying blob e2adcecab318 done |
Copying blob 9944062081bf done |
Copying blob 83e98ac5789e skipped: already exists
Copying blob 32fd82e104c5 skipped: already exists
Copying blob 453d5d1264c7 done |
Copying blob 3c37dc31320d done |
Copying blob 210a2ae1a75e skipped: already exists
Copying blob 57a6ec527341 skipped: already exists
Copying config 46ea42cba3 done |
Writing manifest to image destination| Quay will automatically create a private registry to store the application image because of your admin access. |
The frontend application is finally built! The next step is to review it in Quay and deploy it to OpenShift using ACM and OpenShift GitOps.
Red Hat Quay
Red Hat Quay is an enterprise-quality registry for building, securing, and serving container images. It provides secure storage, distribution, and governance of containers and cloud-native artifacts on any infrastructure.
Accessing Quay
Your Red Hat Quay console is available at: https://quay-sample.apps.cluster-sample.sample.sandboxsample.opentlc.com
Administrator login is available with:
Quay Console Username: |
sample_quayadmin |
Quay Console Password: |
sample_LSncwGJkXcayY1tUMmr8 |
Browse the Registry
In the setup module, you downloaded, built, and pushed an insecure Java application called frontend. Now it’s time to deploy it to the OpenShift Cluster. To do this, you will need to make the registry that you created public.
Let’s take a look at our application in the registry.
Procedure
-
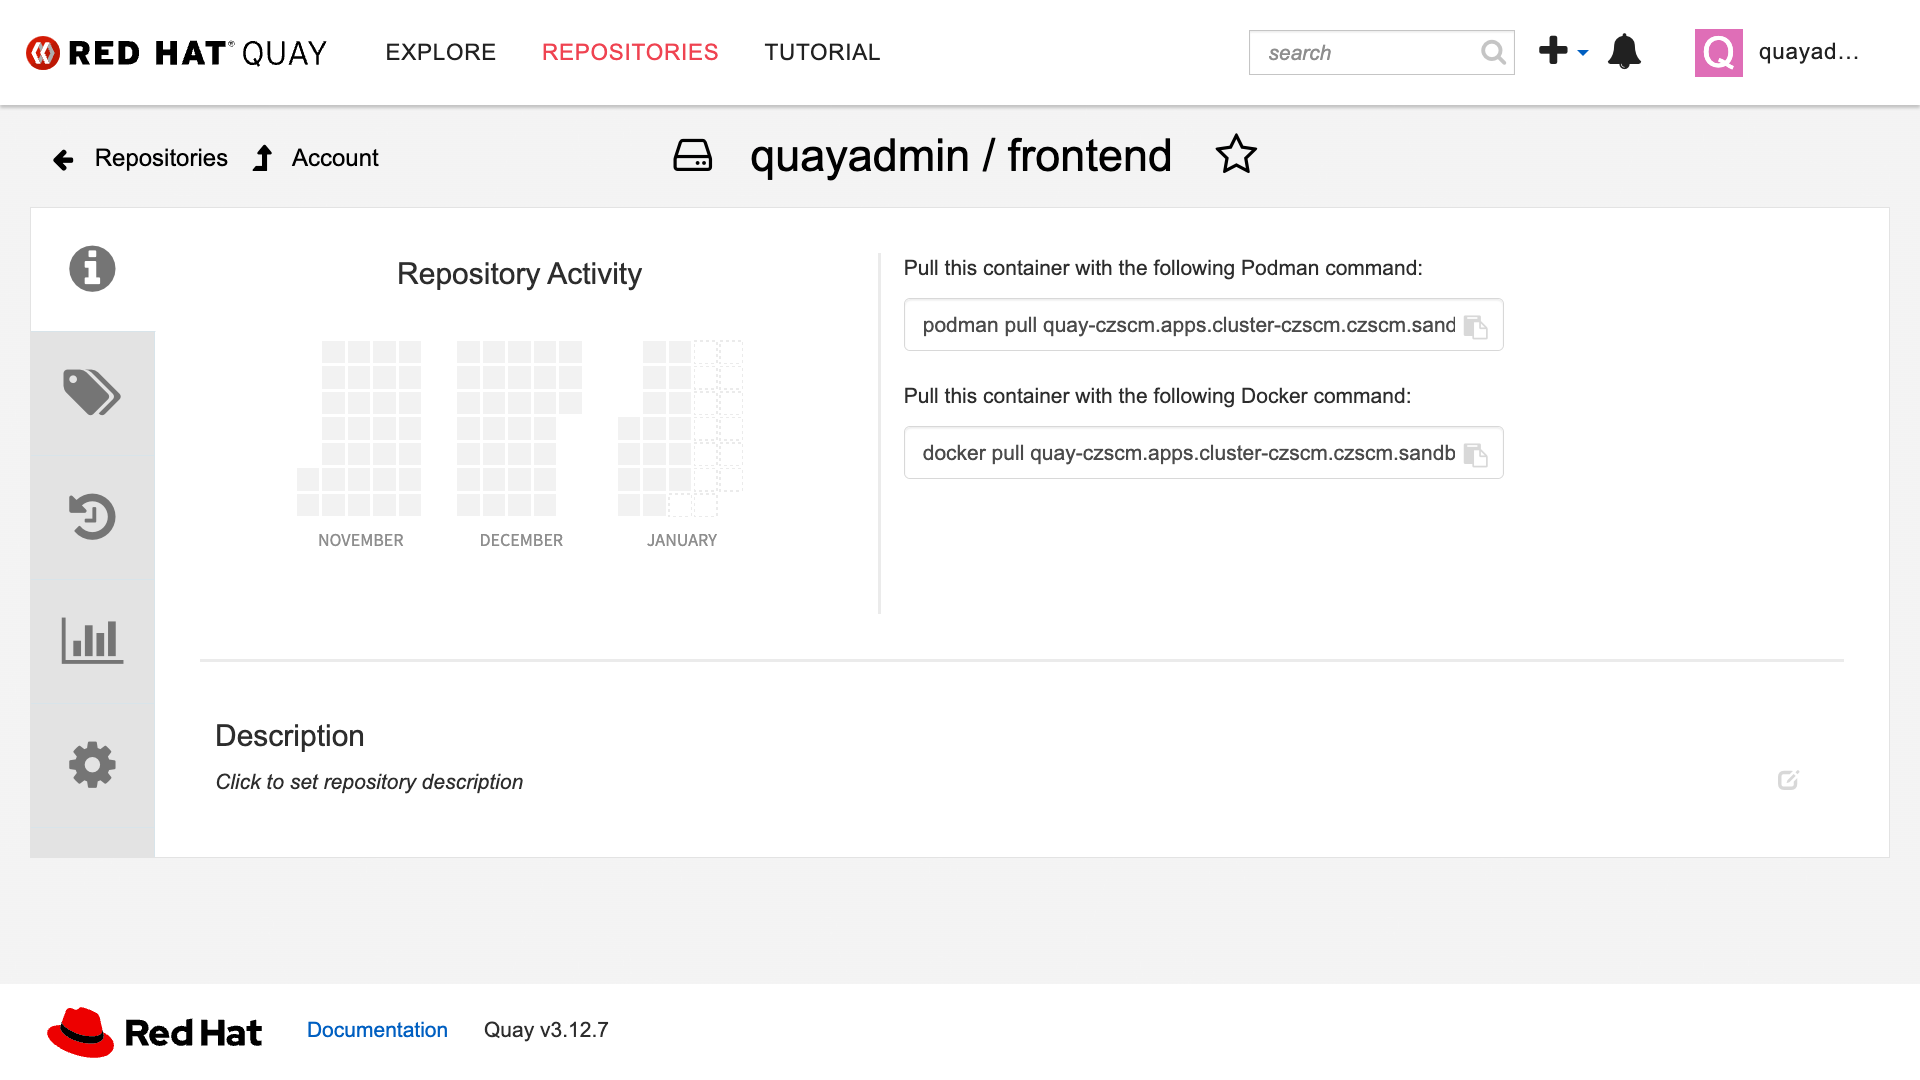
First, click on the frontend repository.
The information tab shows you information such as:
-
Podman and Docker commands
-
Repository activity
-
The repository description
On the left-hand side of the window, you should see the following icons labeled in order from top to bottom:
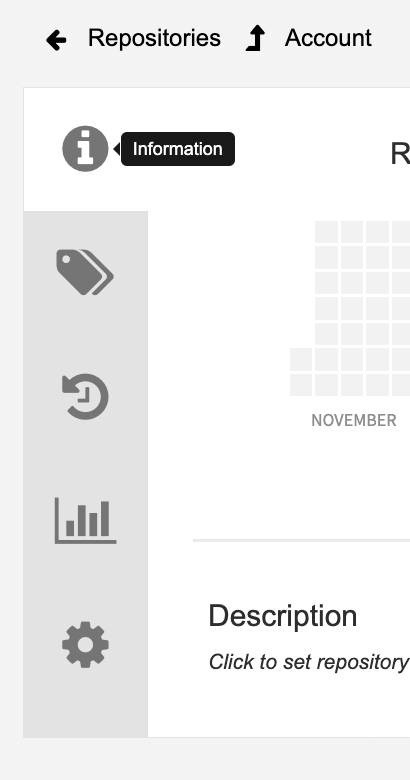
-
Information
-
Tags
-
Tag History
-
Usage Logs
-
Settings
-
Click on the Tags icon.
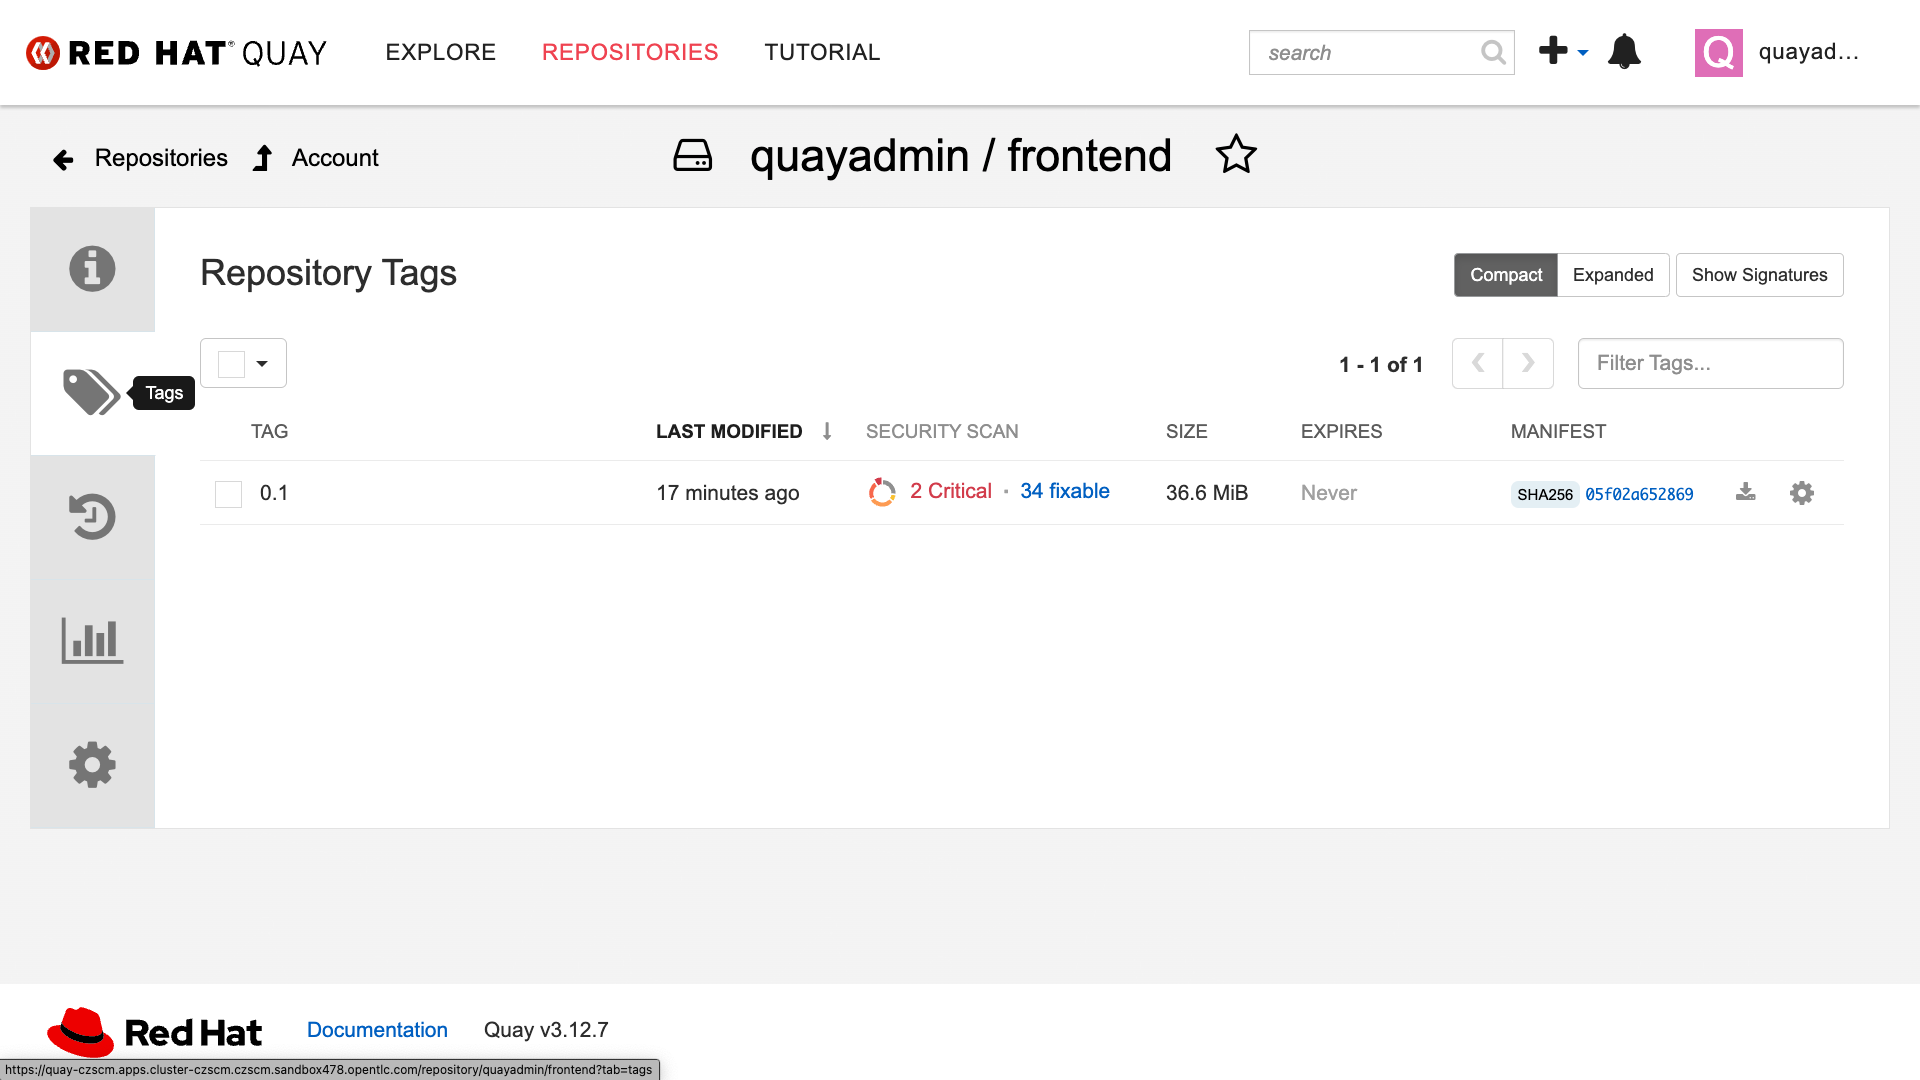
This tab displays all of the images and tags that have been uploaded, providing information such as fixable vulnerabilities, the image size, and allows for bulk changes to images based on the security posture.
We will explore this tab a little later in this module.
-
Click on the Tags History icon.
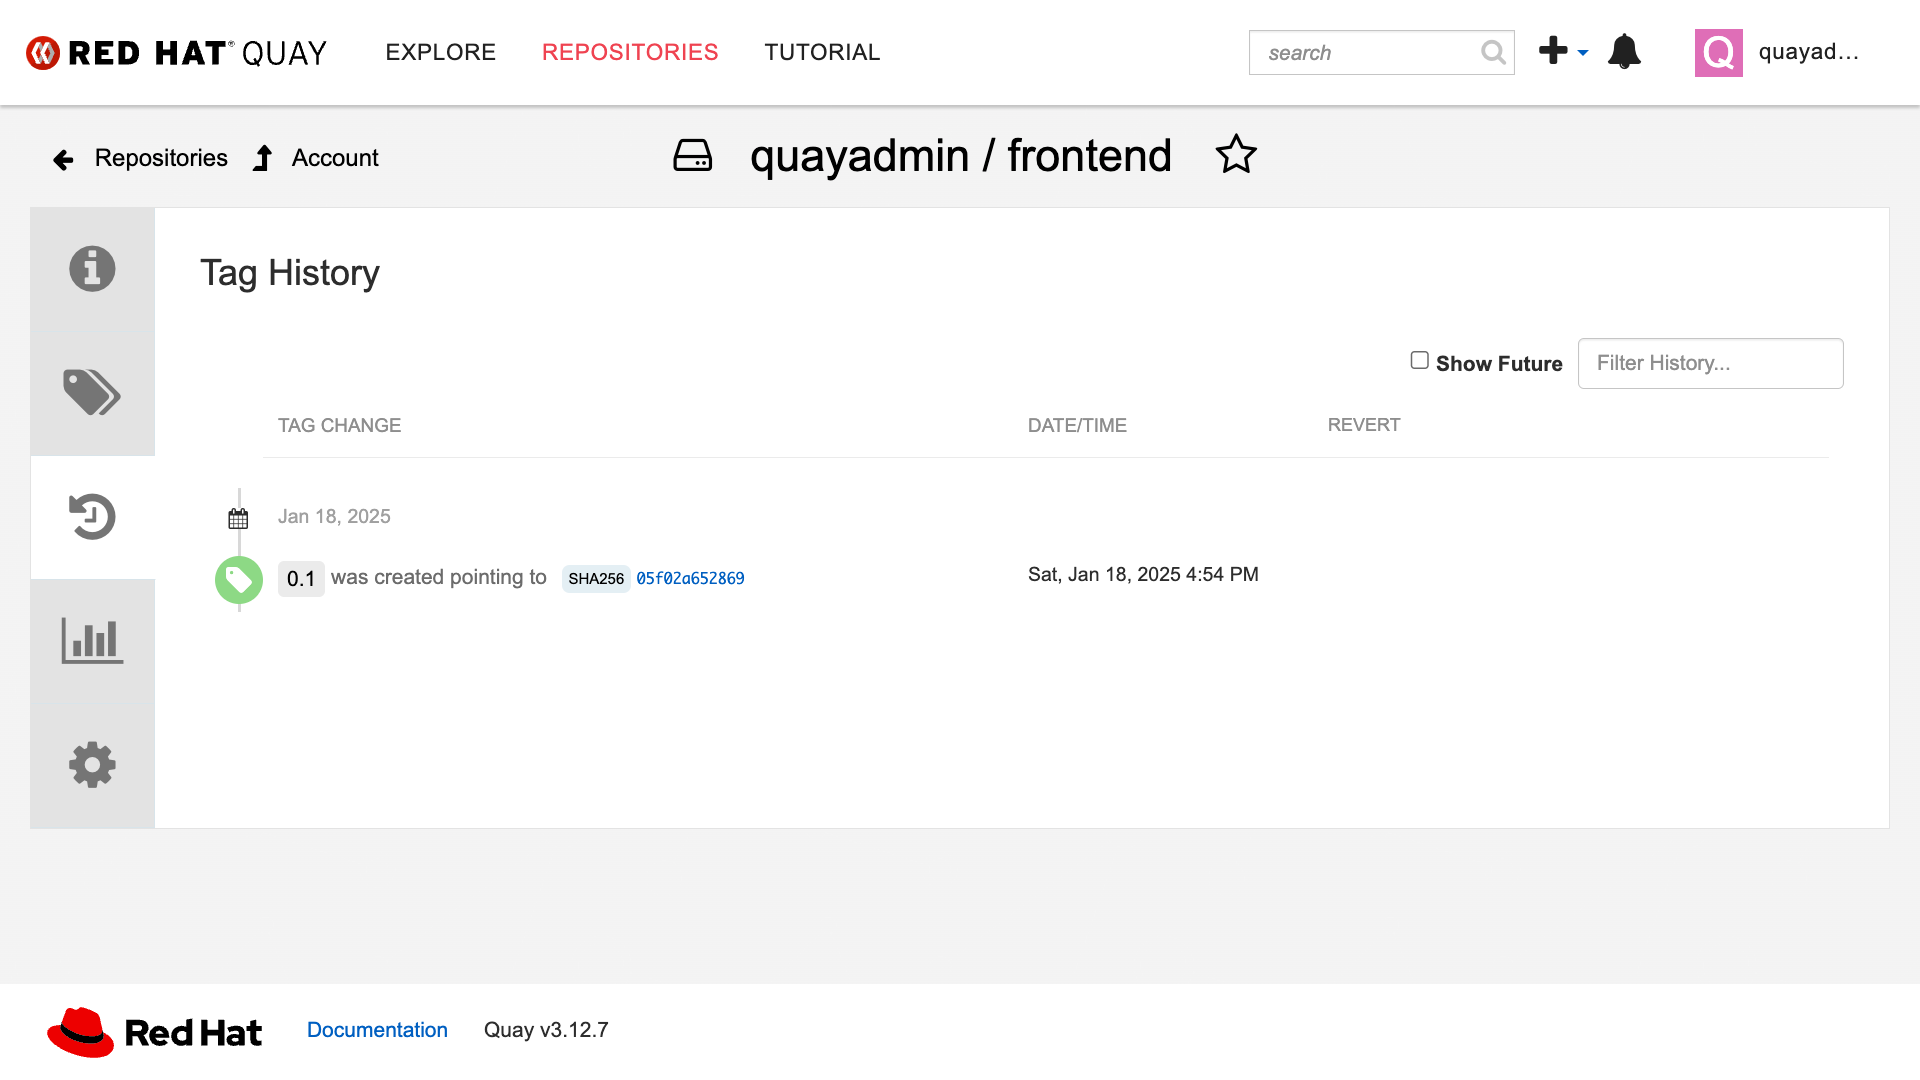
This tab simply displays the container image history over time.
-
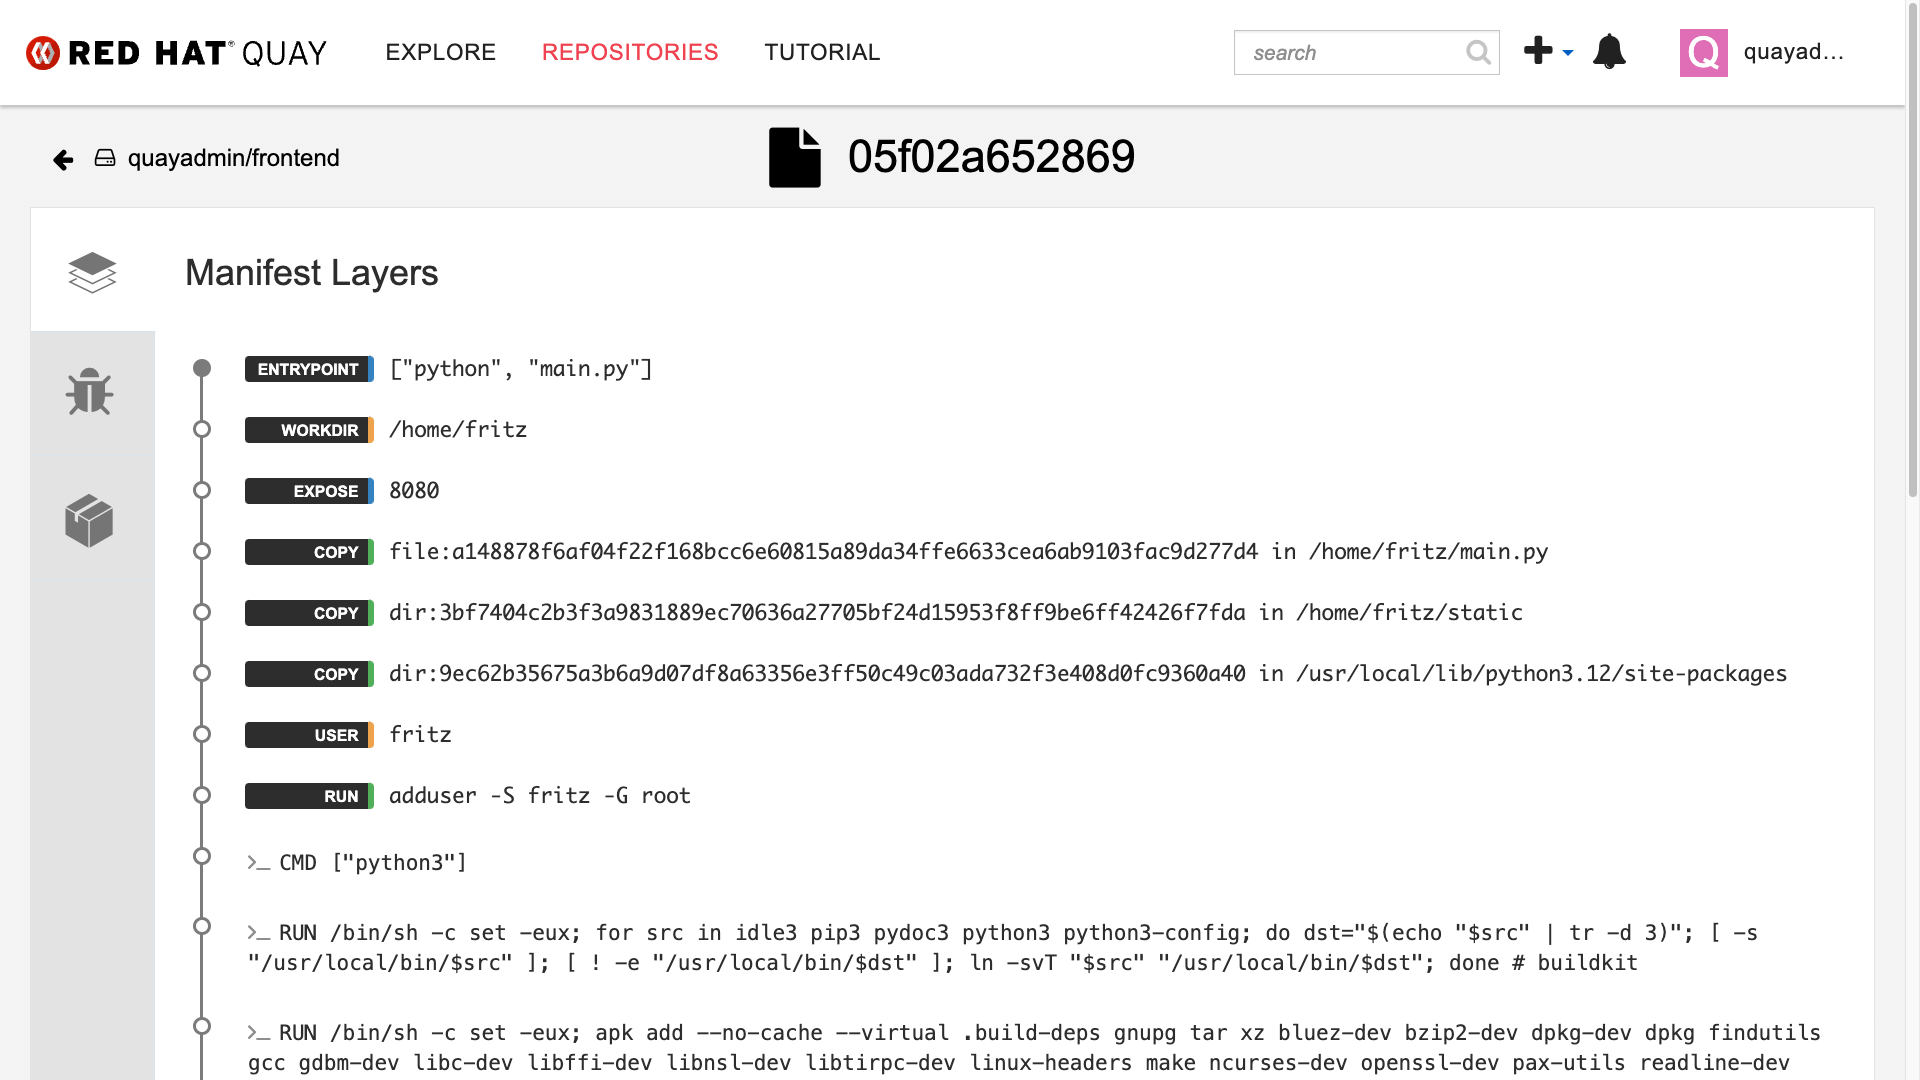
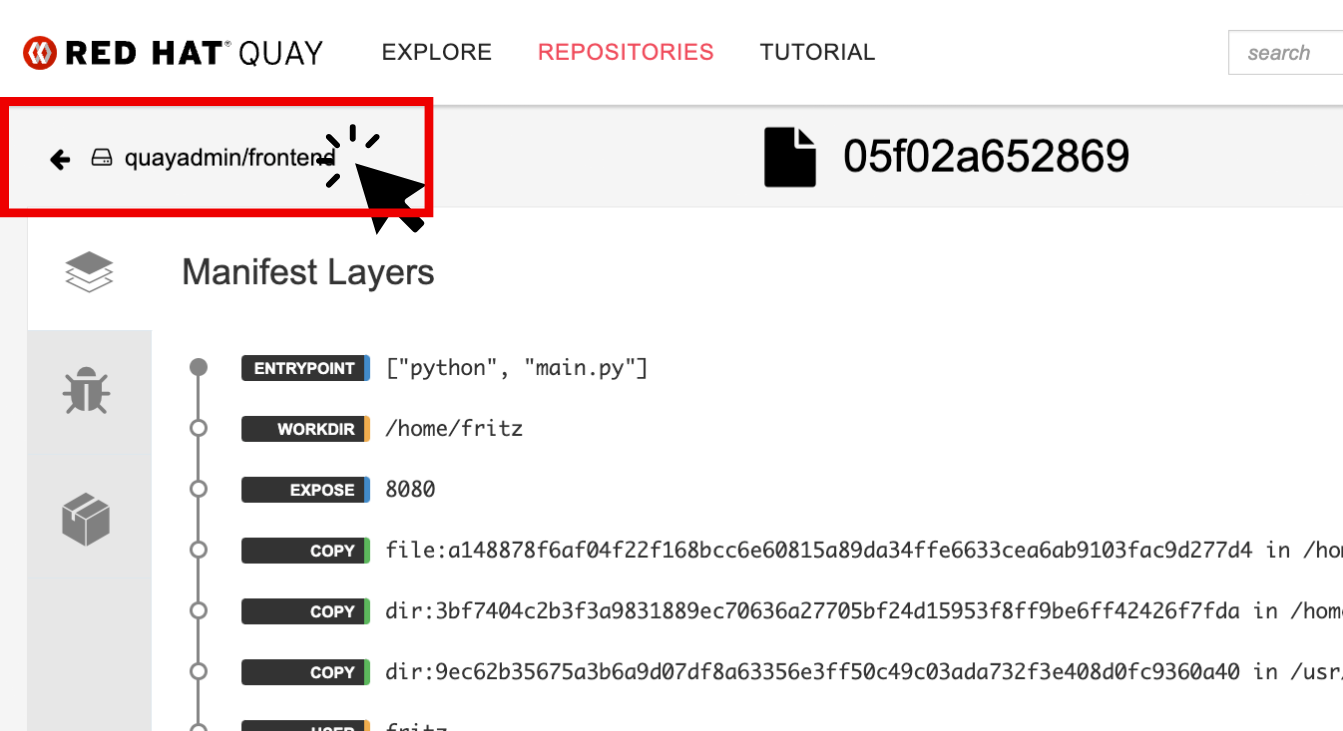
Click into the SHA256 hash number.
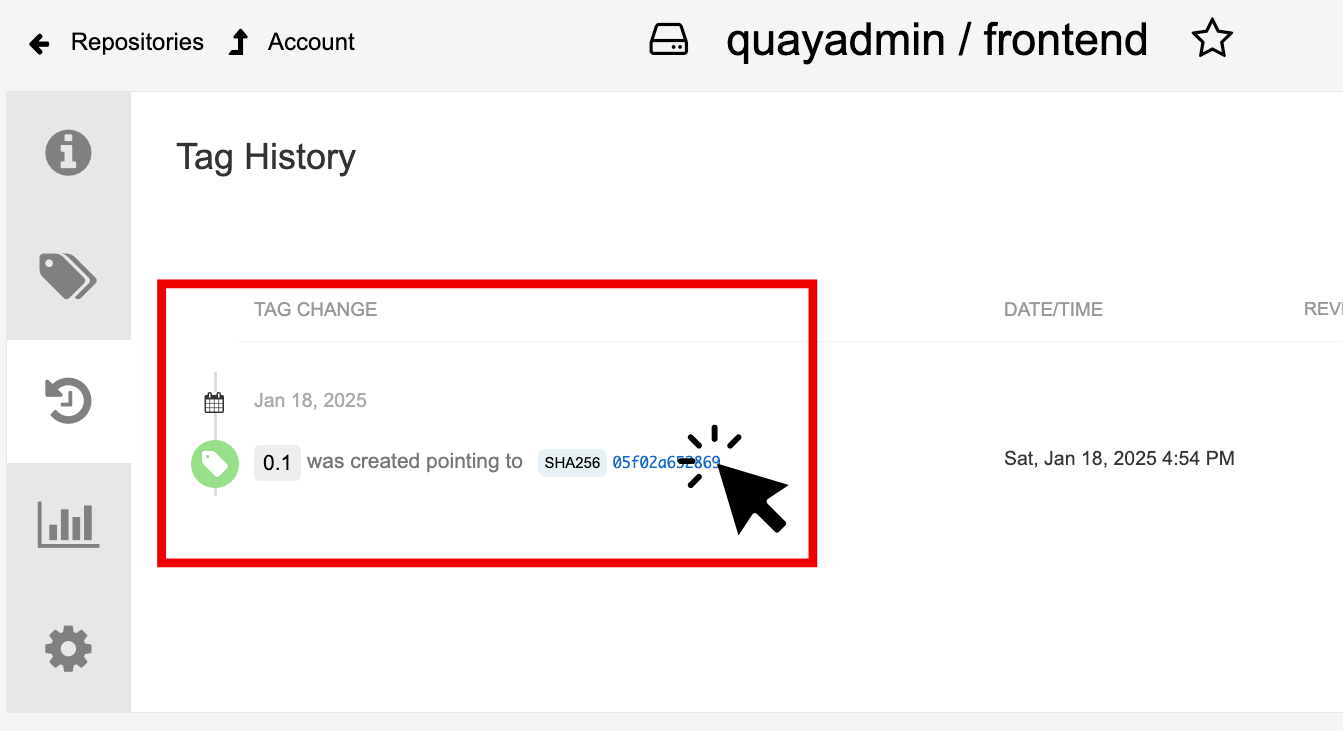
From this dashboard, you will be able to see the image manifest of that container image.
-
Click the BACK icon in the top left of the dashboard then click on the Usage Logs icon.
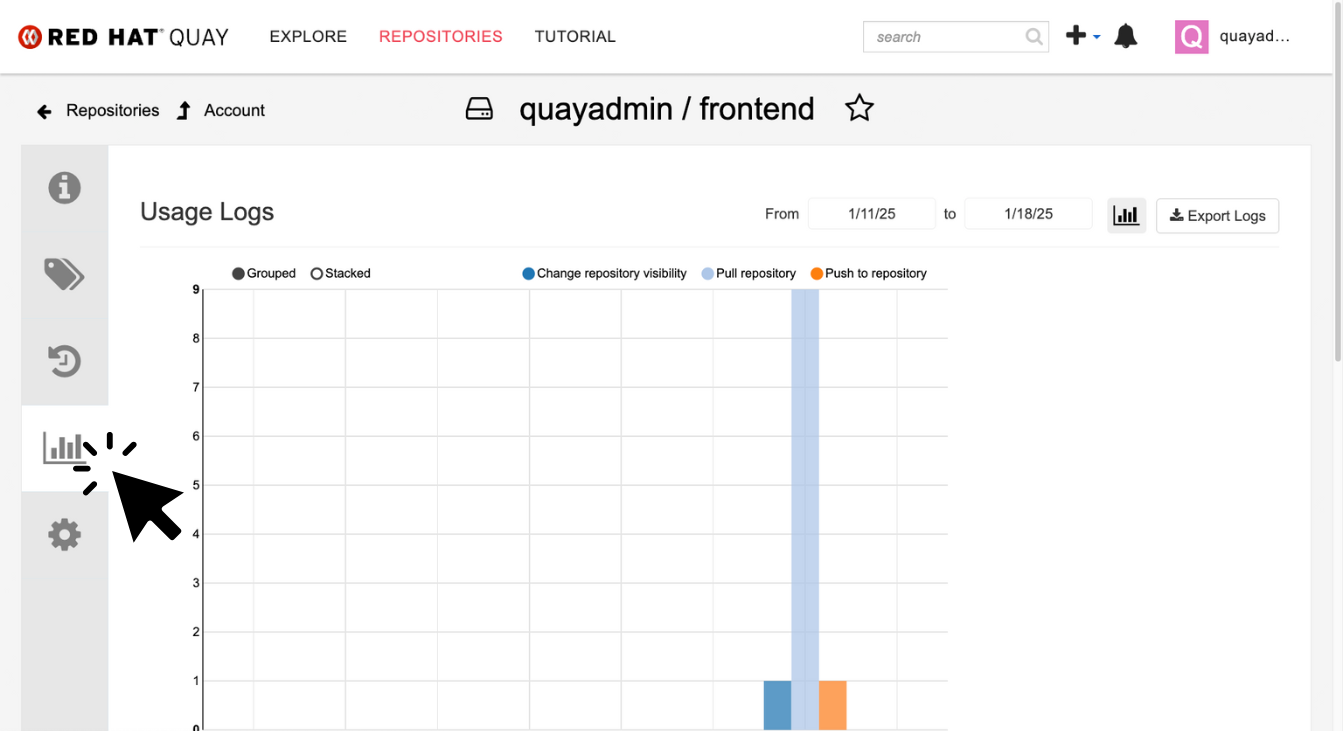
This tab displays the usage over time along with details about who/how the images were pushed to the cluster.
You should see that you (the "quayadmin") pushed an image tagged 0.1 to the repository today.
-
Lastly click on the Settings icon.
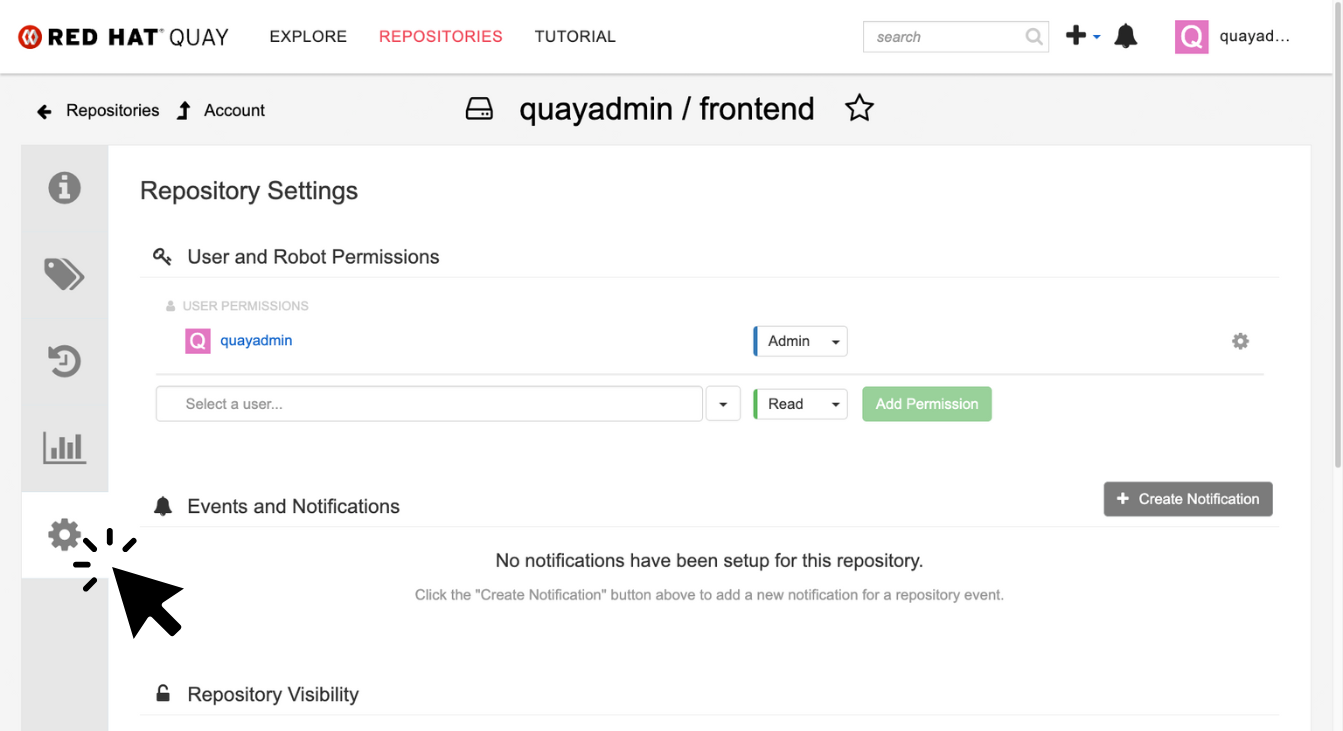
In this tab, you can add/remove users and update permissions, alter the privacy of the repository, and even schedule alerts based on found vulnerabilities.
-
Make your repository public before deploying our application in the next step by clicking the Make Public button under Repository Visibility:

-
Click OK:
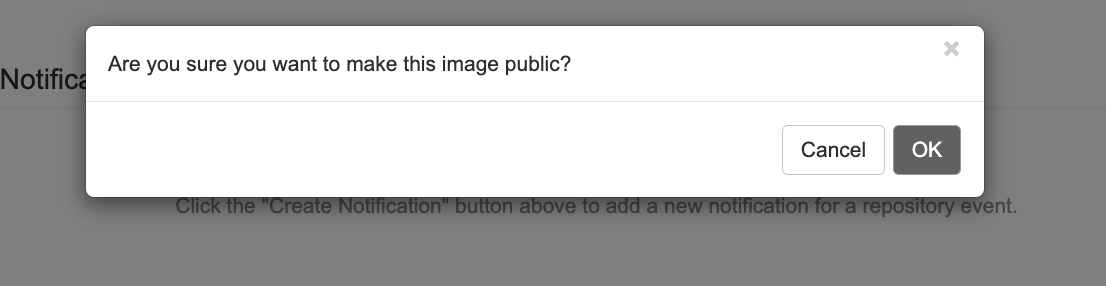
| You will need to make your repository public before deploying our application in the next step by clicking the Make Public button under Repository Visibility. |
Vulnerability Scanning with Quay
Red Hat Quay can also help with securing our environments by performing a container vulnerability scan on any images added to our registry and advising which ones are potentially fixable. This feature is also known as vulnerability scanning at rest.
Use the following procedure to check the security scan results for our Java container image you have uploaded.
Procedure
-
Click on the Tags icon on the left side of the screen like before.
| You may need to click the checkbox near the image you would like more information on, but the column for Security Scan should populate. |
-
By default, the security scan color codes the vulnerabilities, you can hover over the security scan for more information.
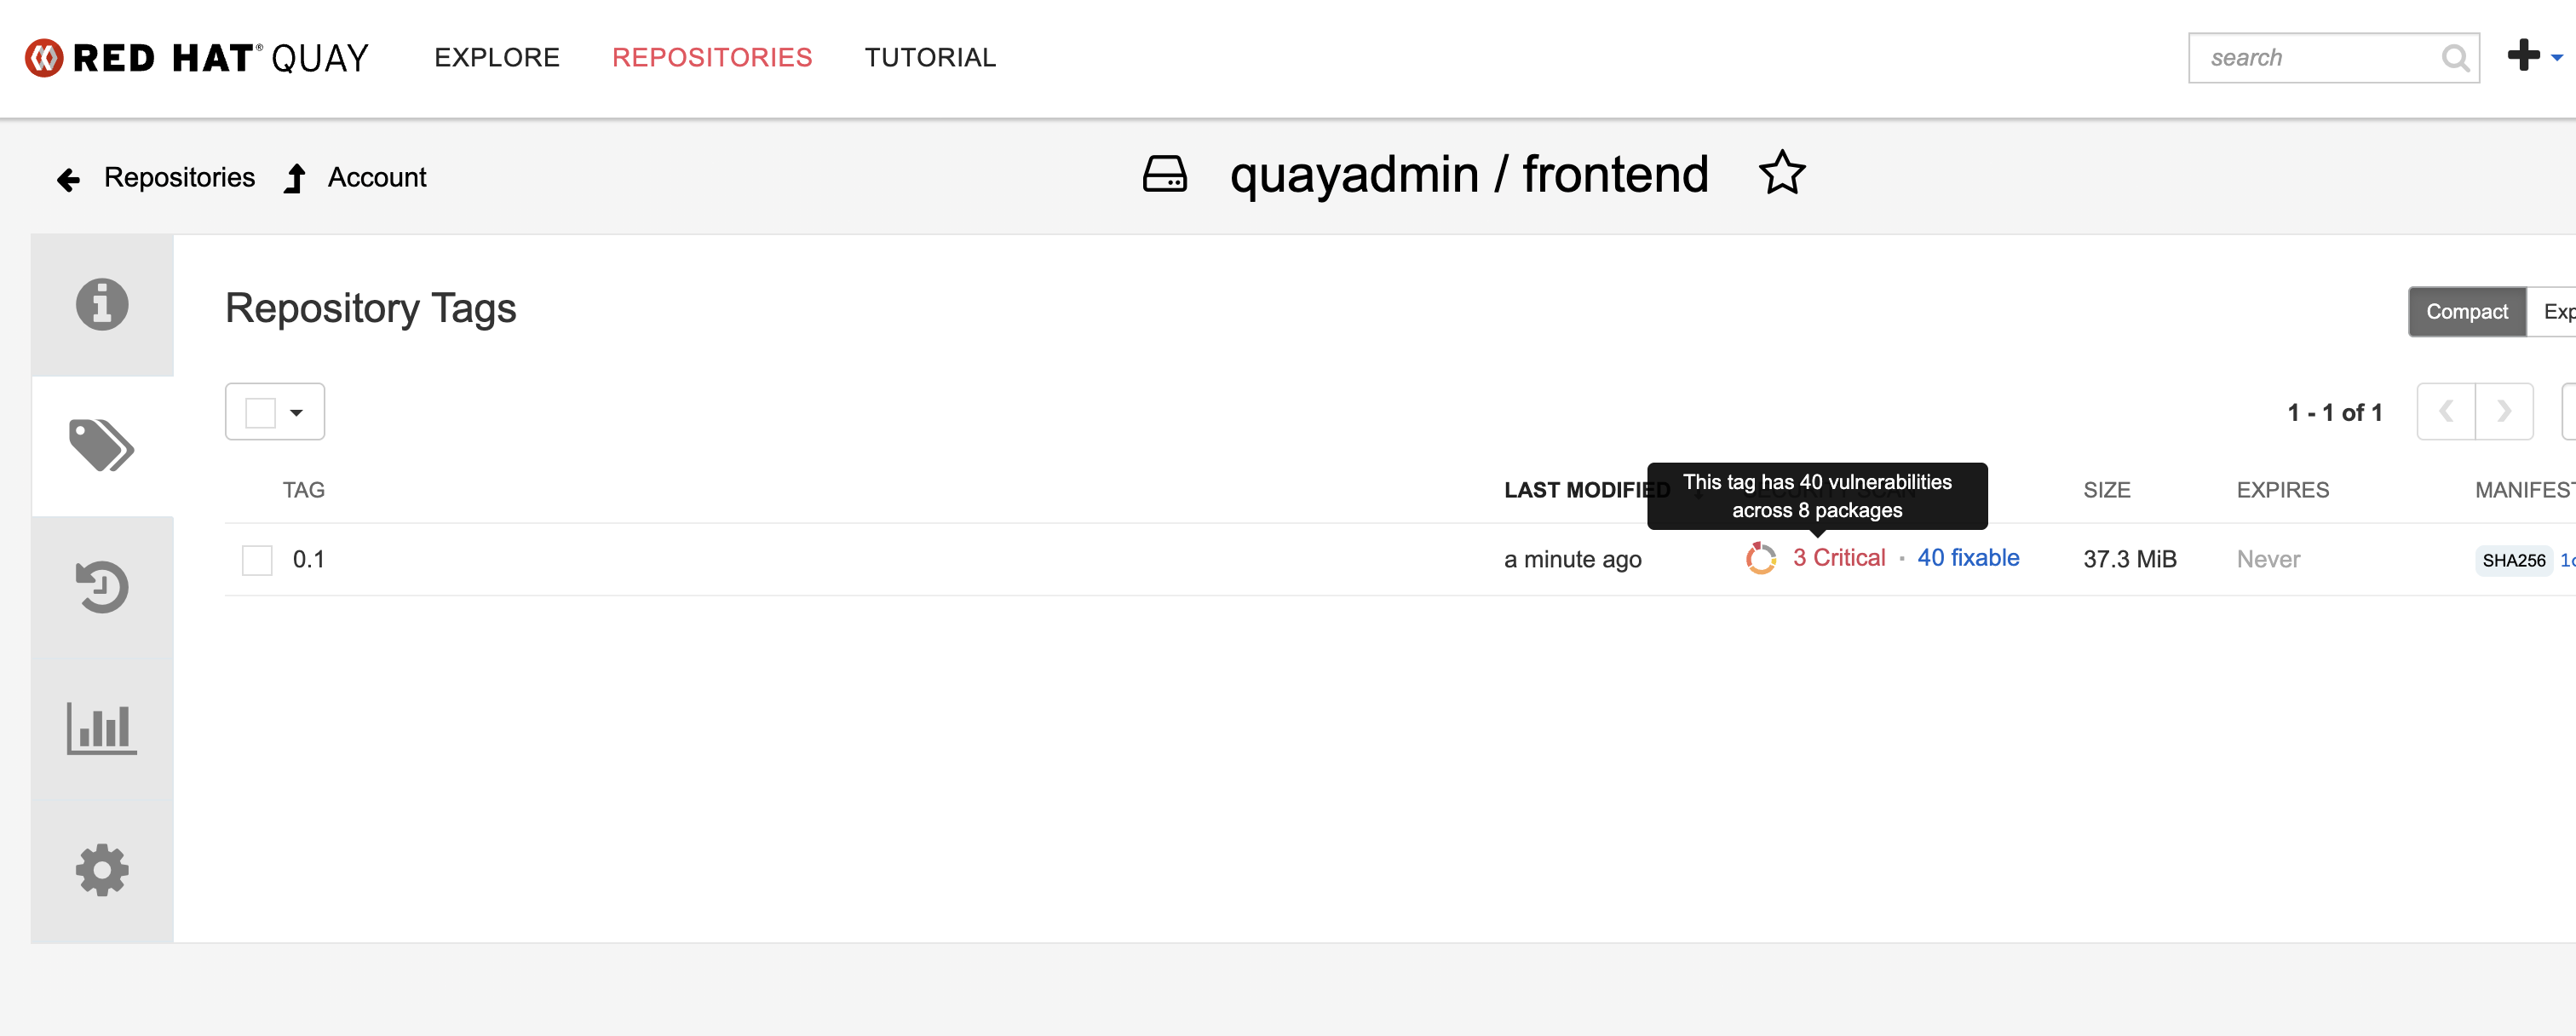
| The Alpine container image you are using in this lab shows 34 vulnerabilities, with 2 critical vulnerabilities. This number will change with time and will be different between container scanners for a variety of reasons such as reporting mechanisms, vulnerability feeds, and operating system support. |
-
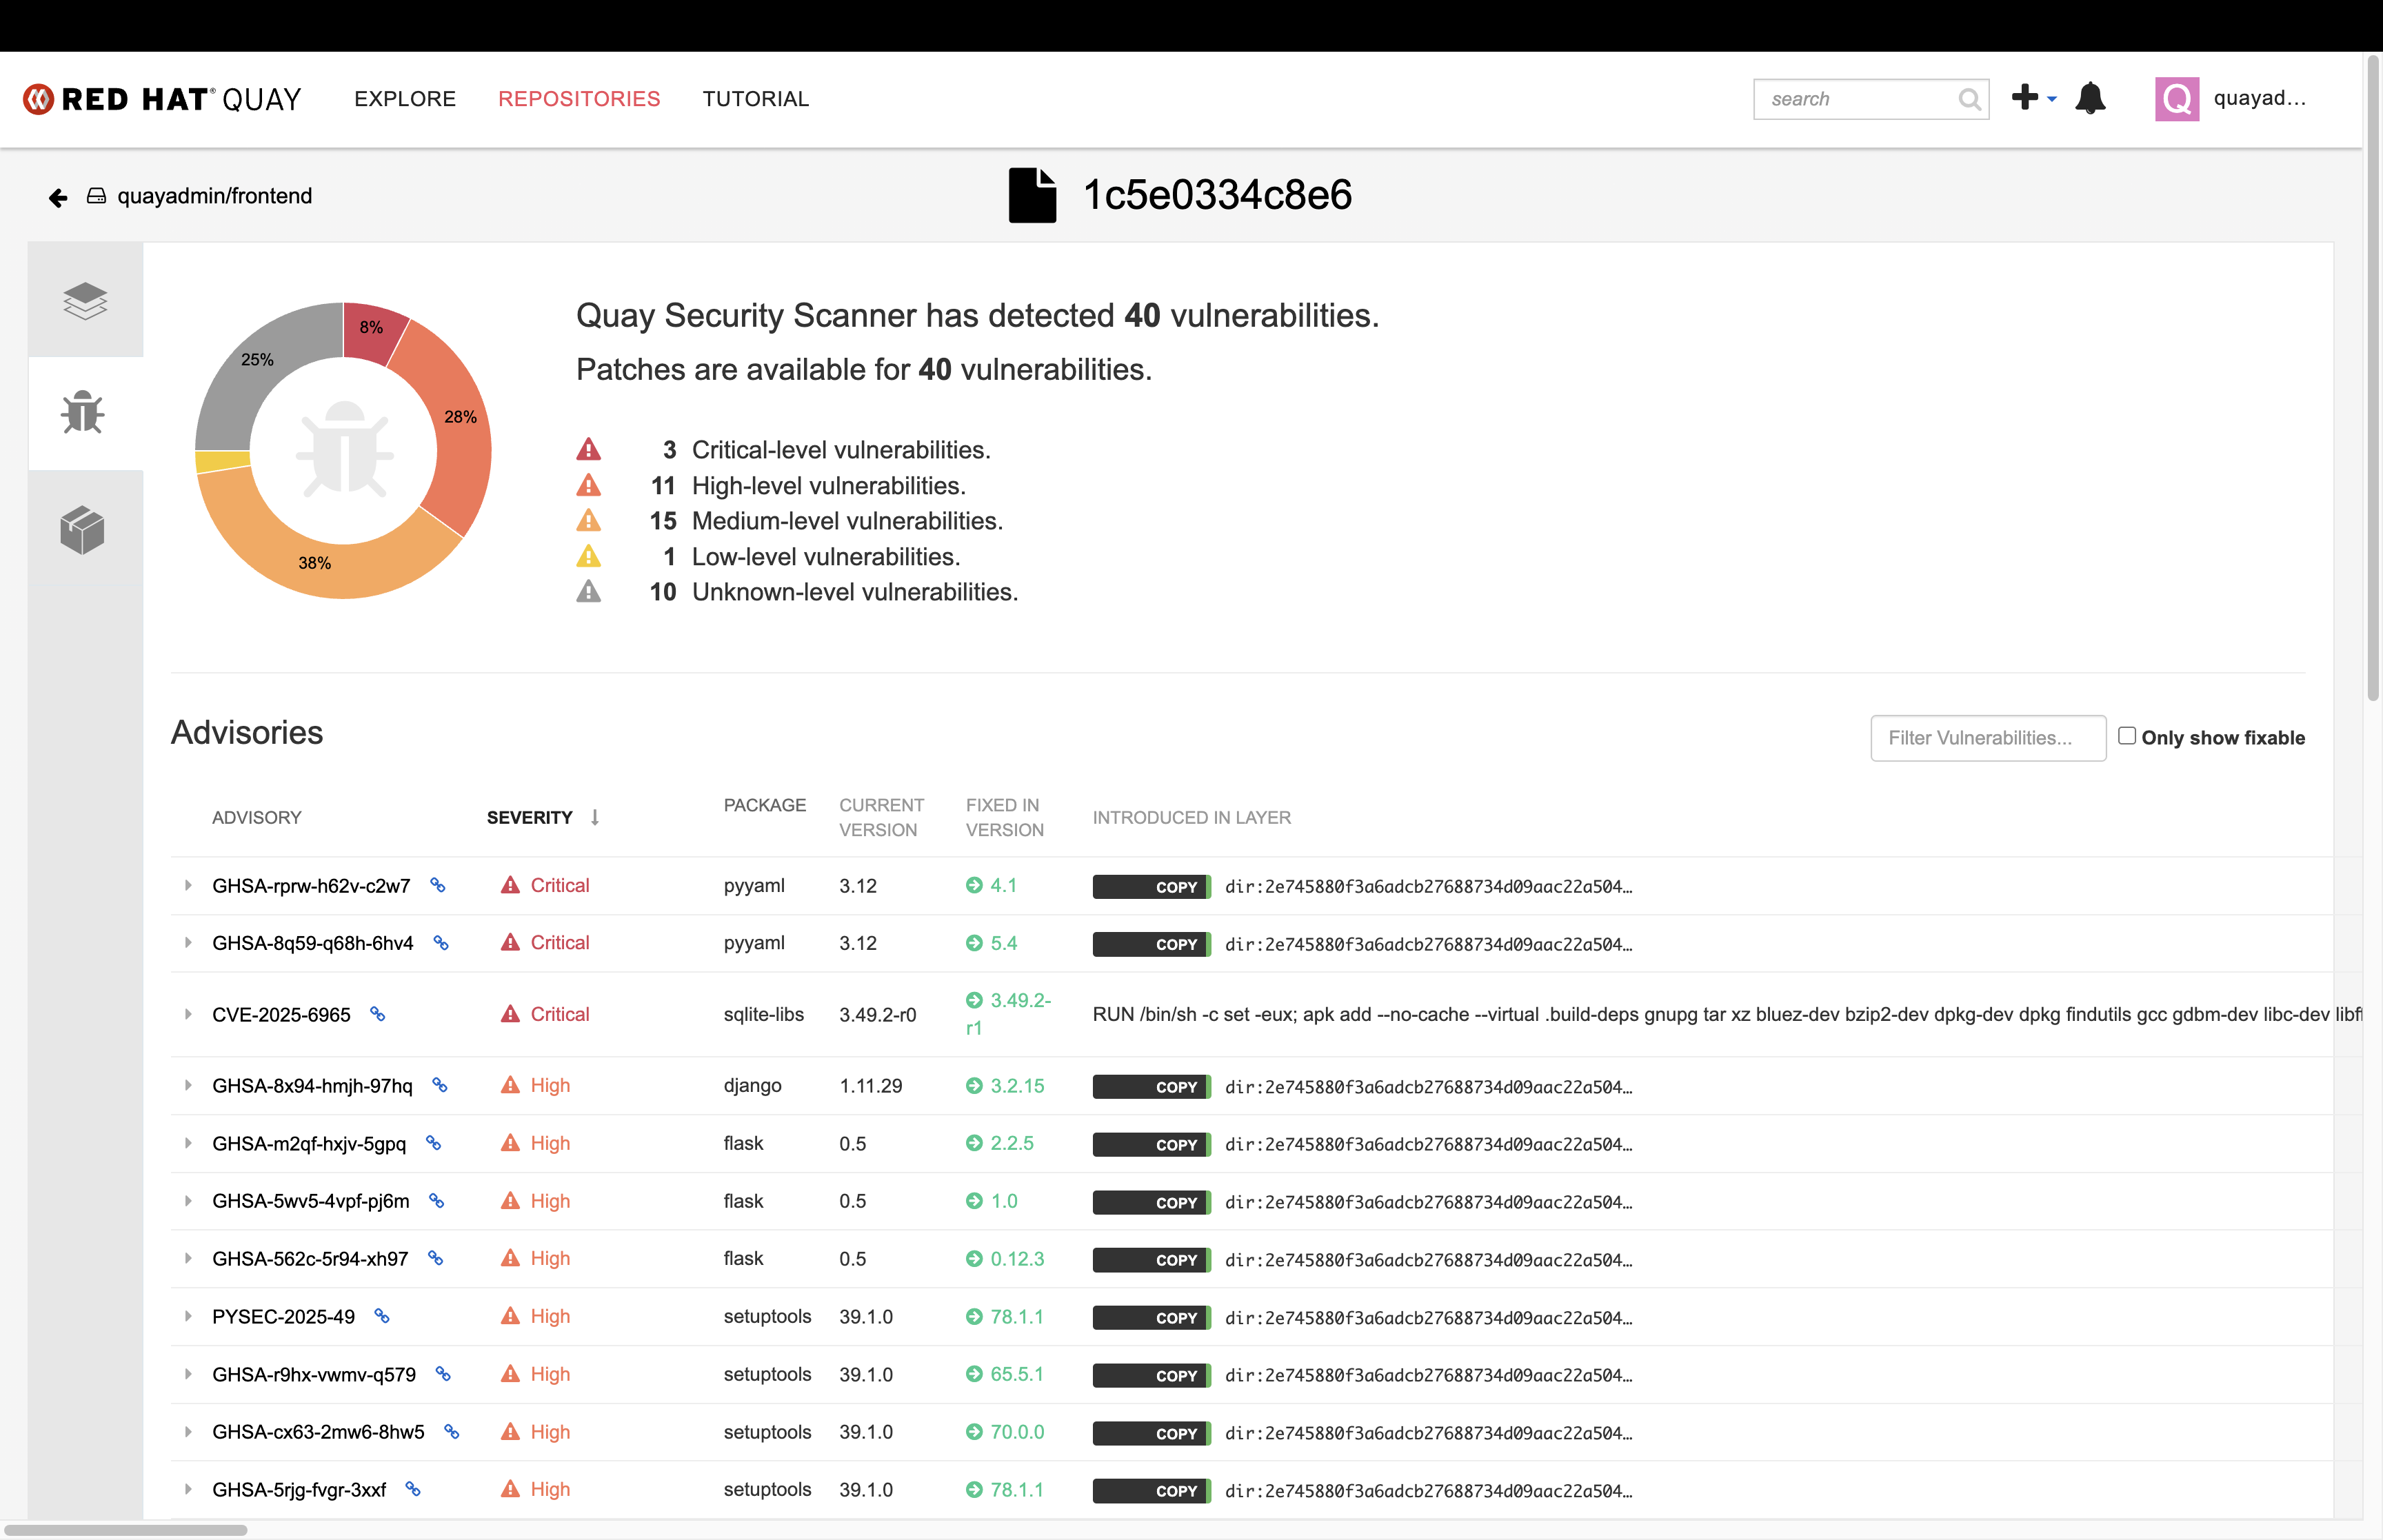
Click on the list of vulnerabilities to see a more detailed view.
-
Click on a vulnerable package on the left menu to get more information about the vulnerability and see what you have to do to fix the issue.
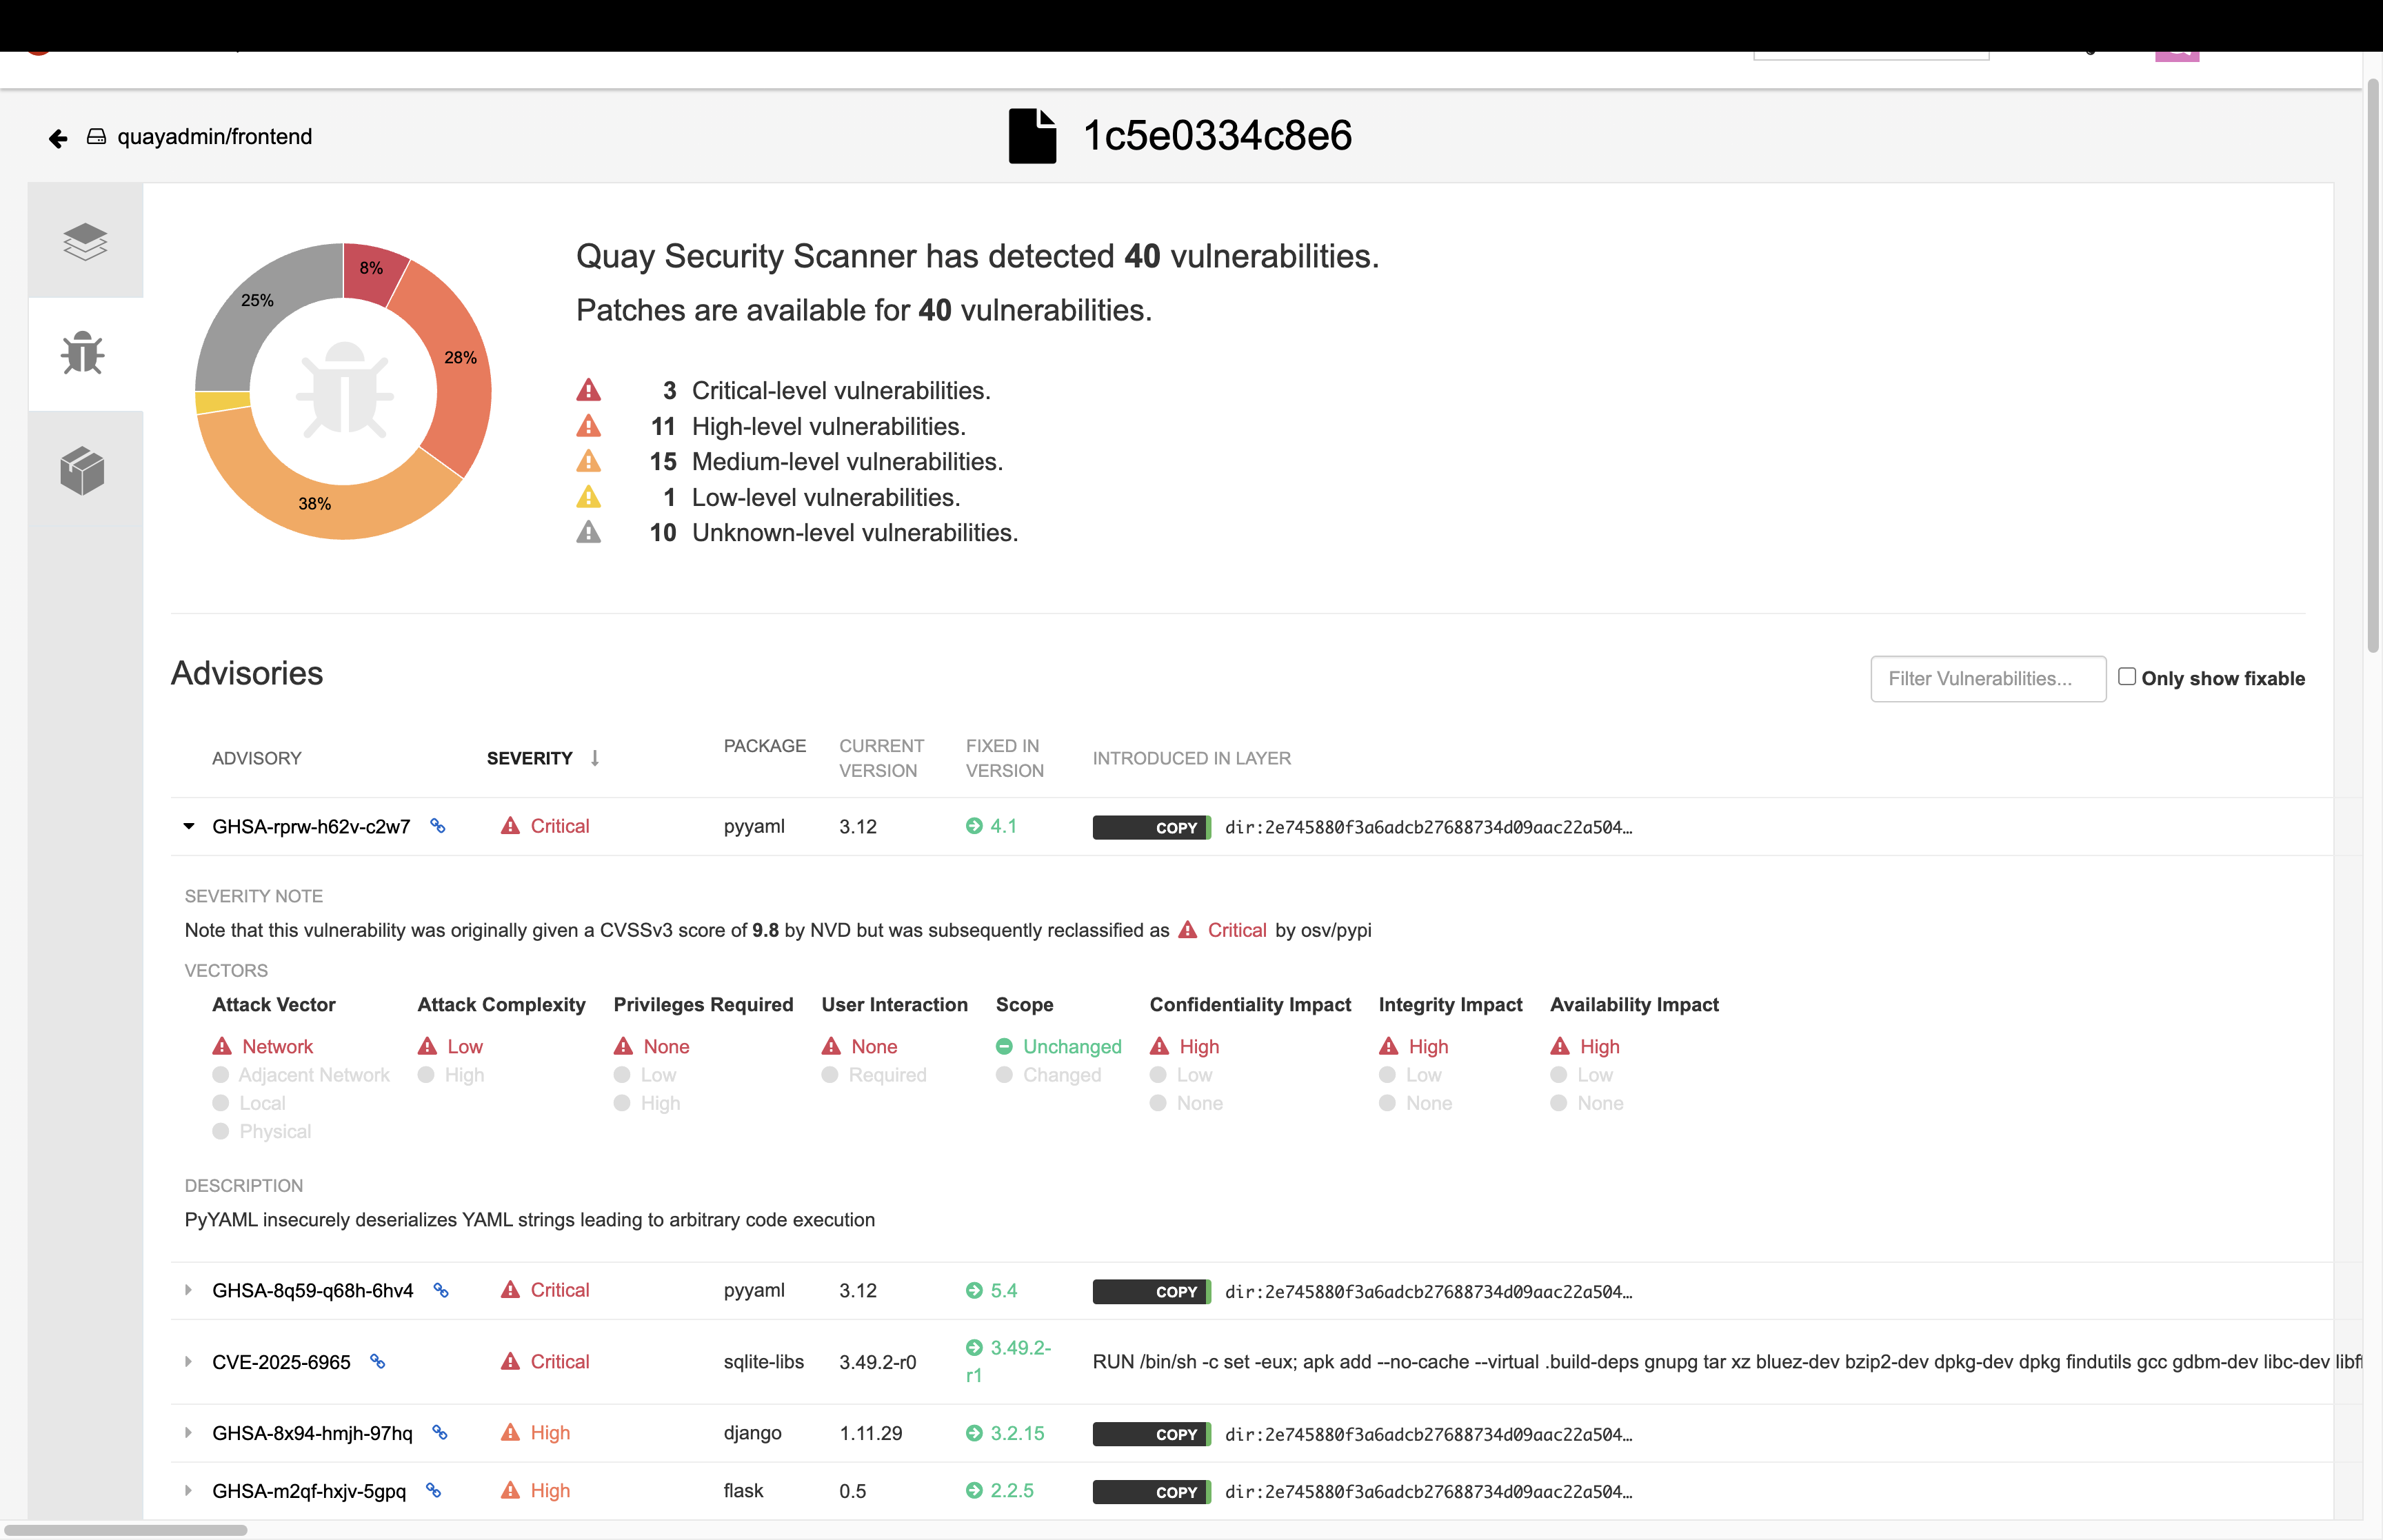
| Toggling for fixable/unfixable vulnerabilities is an excellent way for developers to understand what is within their responsibility for fixing. For example, since you are using an older version of Java, many fixes are available for these common issues. |
Ensure ACS Can Pull the Image Manifest from Your Quay Instance
Procedure
Run the following command to test the RHACS/Quay integration:
roxctl --insecure-skip-tls-verify -e "$ROX_CENTRAL_ADDRESS:443" image scan --image=$QUAY_URL/$QUAY_USER/frontend:0.1 --force -o table| The following output can be configured using flags. You can configure different outputs (table, CSV, JSON, and sarif) and filter for specific severities. |
.
.
-------------------------+
|             |           | GHSA-r64q-w8jr-g9qp |    LOW    |  0   |                  https://github.com/urllib3/urllib3/issues/1553                  |    1.24.3     |    -     |       -       |
----------------------------------------------------------------------------------------------------------------------------------------------------------------------------------------
WARN:   A total of 43 unique vulnerabilities were found in 8 components
Deploy Your Newly Built Application
The last step is to deploy the Skupper application with your specific frontend container. You will do this by altering an existing manifest.
Procedure
-
Run the following commands in the terminal, one after the other:
This command sets new variables for the Skupper example and clones the manifests.
git clone https://github.com/mfosterrox/skupper-security-demo.git skupper-app
echo export APP_HOME="$(pwd)/skupper-app" >> ~/.bashrc
export APP_HOME="$(pwd)/skupper-app"
Cloning into 'skupper-app'...
remote: Enumerating objects: 41, done.
remote: Counting objects: 100% (41/41), done.
remote: Compressing objects: 100% (29/29), done.
remote: Total 41 (delta 17), reused 31 (delta 11), pack-reused 0 (from 0)
Receiving objects: 100% (41/41), 10.93 KiB | 10.93 MiB/s, done.
Resolving deltas: 100% (17/17), done.Next, swap the default image repo for the local Quay one containing the frontend app you built.
sed -i "s|quay.io/mfoster/frontend:latest|$QUAY_URL/$QUAY_USER/frontend:0.1|g" $APP_HOME/skupper-demo/frontend.yml[lab-user@bastion skupper-demo]$ sed -i "s|quay.io/mfoster/frontend:latest|$QUAY_URL/$QUAY_USER/frontend:0.1|g" $APP_HOME/skupper-demo/frontend.ymlVerify the swap was successful:
cat $APP_HOME/skupper-demo/frontend.ymlapiVersion: apps/v1
kind: Deployment
metadata:
labels:
app: frontend
demo: roadshow
name: frontend
namespace: patient-portal
spec:
replicas: 3
selector:
matchLabels:
app: frontend
template:
metadata:
labels:
app: frontend
spec:
containers:
- name: frontend
image: quay-h2xfr.apps.cluster-h2xfr.h2xfr.sandbox2437.opentlc.com/quayadmin/frontend:0.1
(For example: Yours will be different)
imagePullPolicy: Always
env:Next, deploy the application with your updated manifests:
oc apply -f $APP_HOME/skupper-demo/namespace/patient-portal created
deployment.apps/database created
service/database created
deployment.apps/frontend created
route.route.openshift.io/frontend-patient-route created
service/frontend-service created
deployment.apps/payment-processor created
service/payment-service createdAnd lastly, verify that the application is running:
oc get pods -n patient-portal[lab-user@bastion skupper-demo]$ oc get pods -n patient-portal
NAME READY STATUS RESTARTS AGE
database-758f8f75f7-46ndf 1/1 Running 0 56s
frontend-5c487dcb47-7gsm7 1/1 Running 0 54s
frontend-5c487dcb47-f25hm 1/1 Running 0 54s
frontend-5c487dcb47-z9stn 1/1 Running 0 54s
payment-processor-6644dfc5b7-5vzqh 1/1 Running 0 51s
payment-processor-6644dfc5b7-96jb6 1/1 Running 0 51s
payment-processor-6644dfc5b7-9vl7b 1/1 Running 0 51s