CI/CD and Automation
Implement Policy-as-Code in ACM with OpenShift GitOps
Here, you will manage ACS security policies via RHACM and OpenShift GitOps. First, you must create an ArgoCD controller in RHACM.
RHACM Console Access
The RHACM console is available in the OpenShift cluster console at: https://console-openshift-console.apps.cluster-sample.sample.sandboxsample.opentlc.com
Administrator login is available with:
Username: |
sample_user |
Password: |
sample_KQt21WpVVWzo |
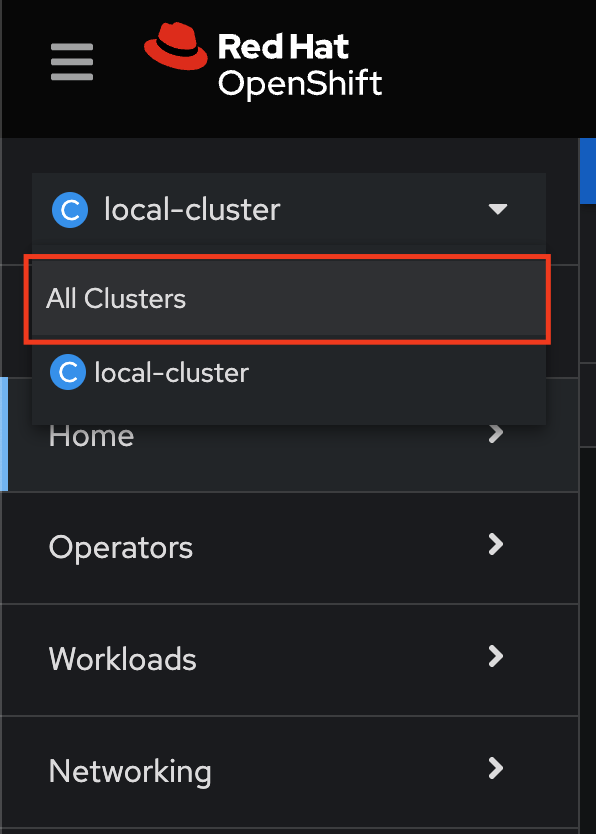
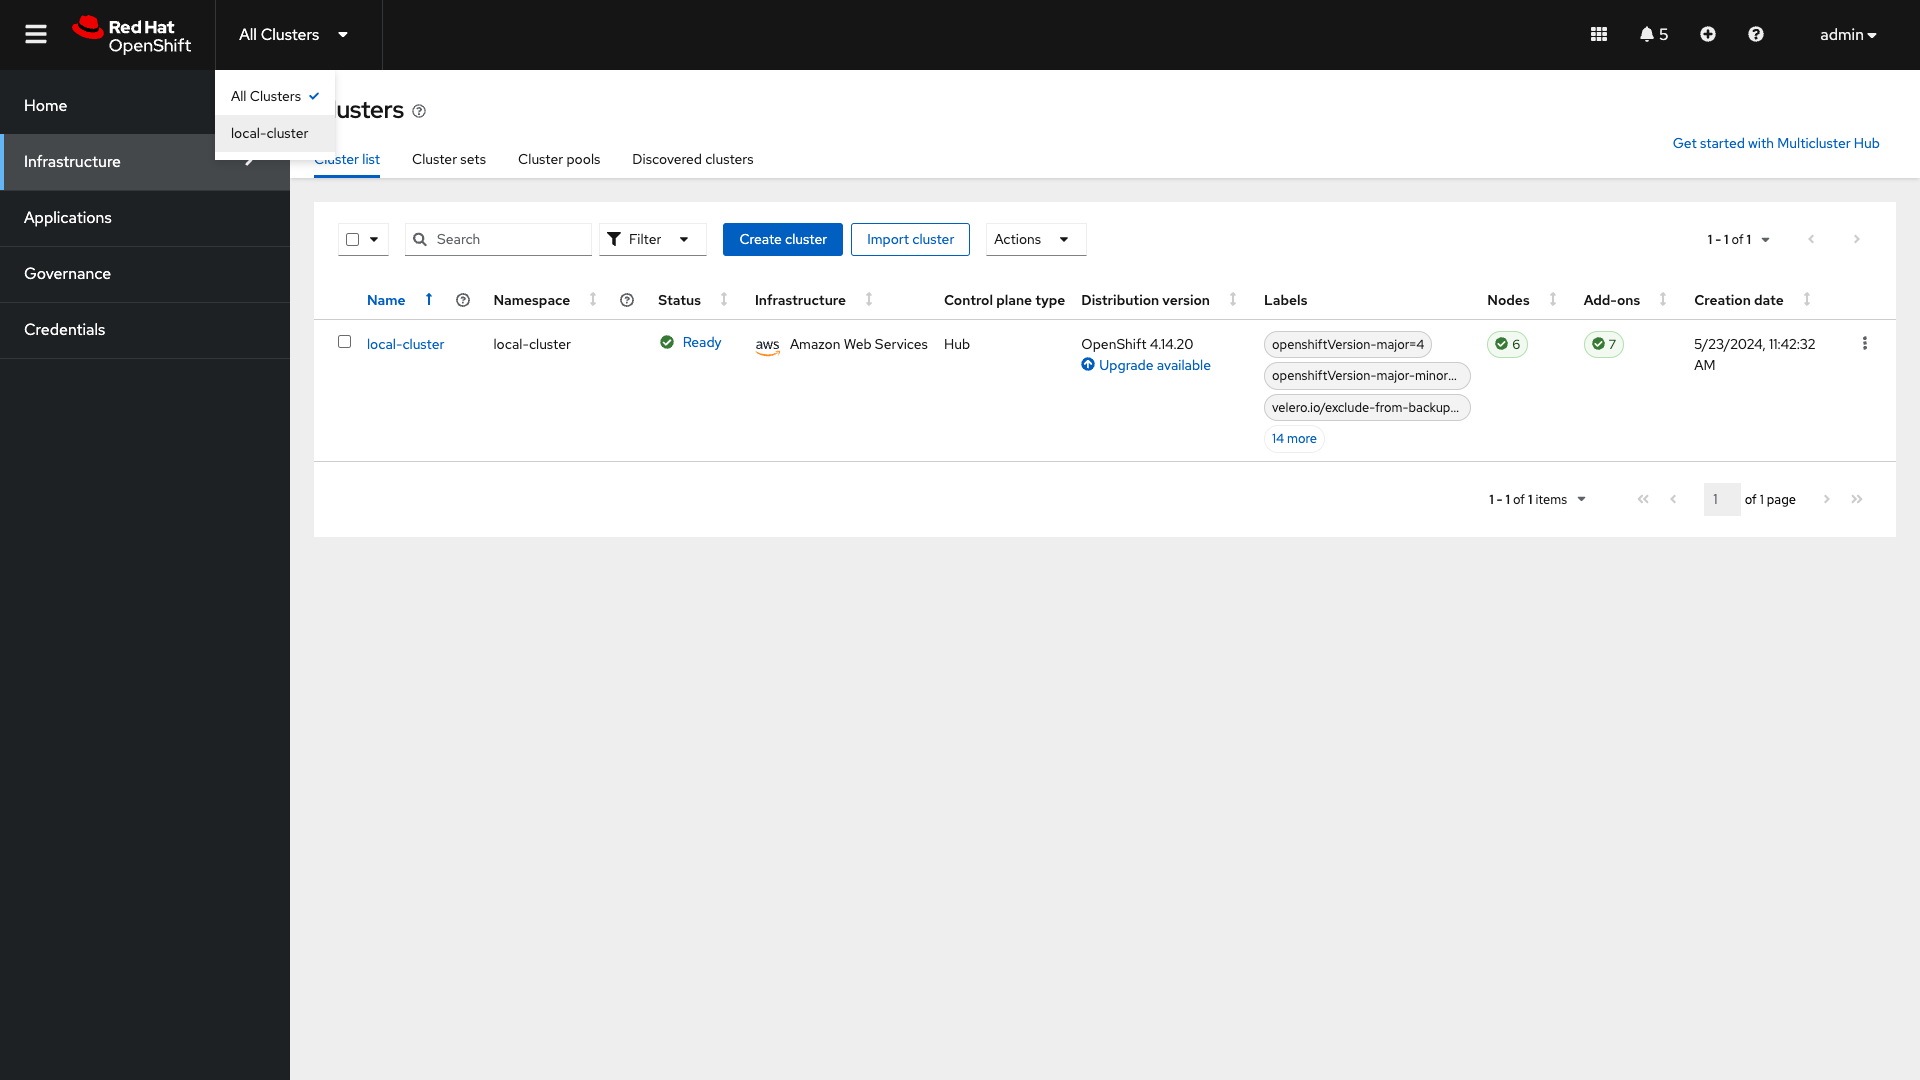
Navigate to the Cluster dropdown menu and then select All Clusters:
Implement Security Policy-as-Code
Procedure
-
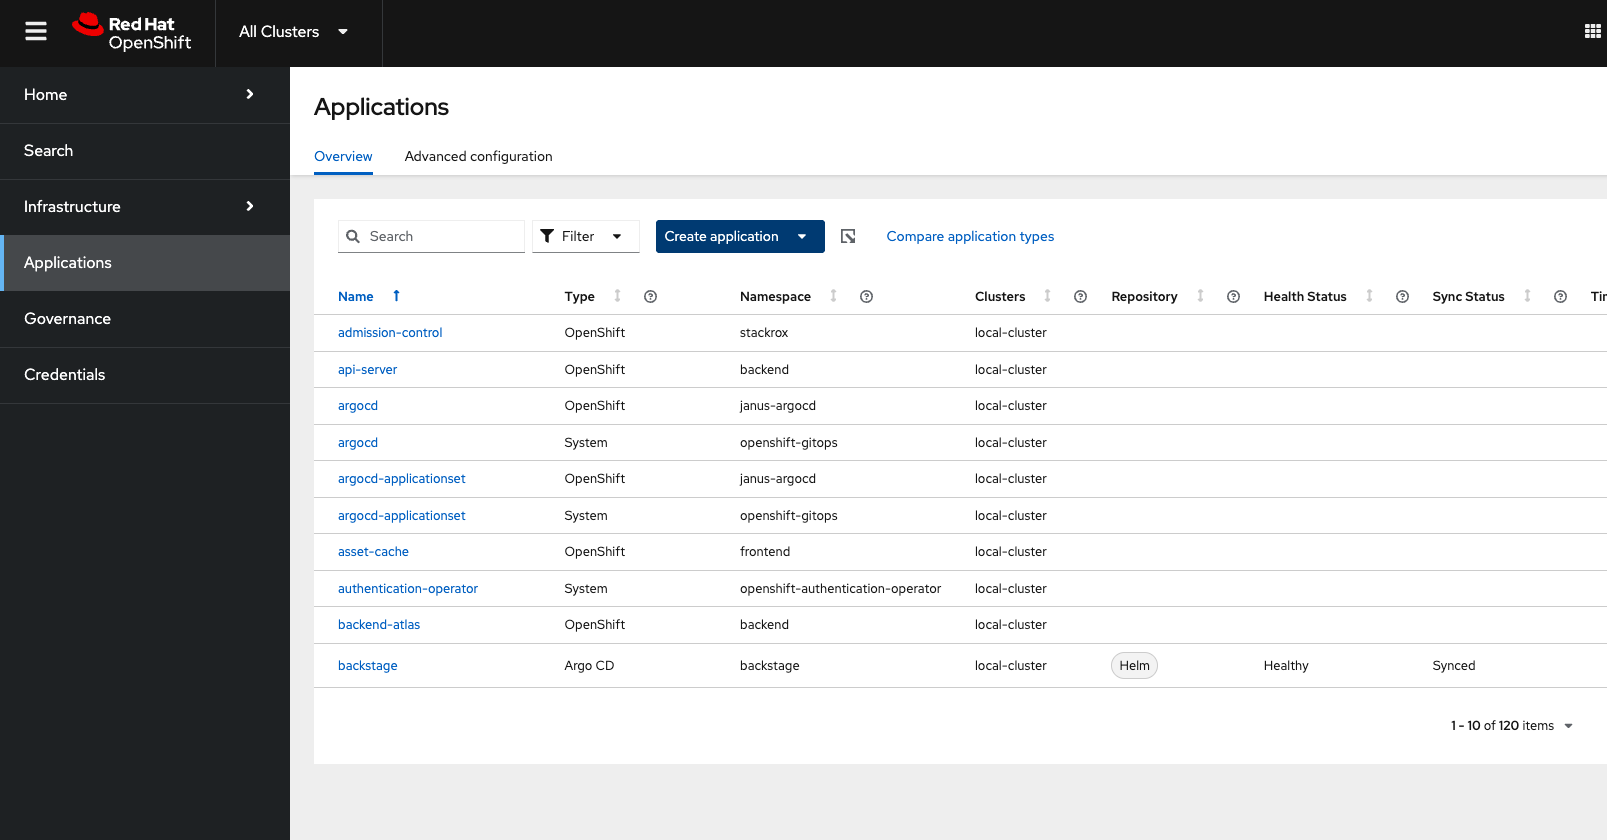
Navigate to Applications from the left side menu:
-
Click Create application, select ArgoCD ApplicationSet-Push Model:
-
Configure the Application:
-
Name: Give the application the name pac-custom-policies:
-
pac-custom-policies-
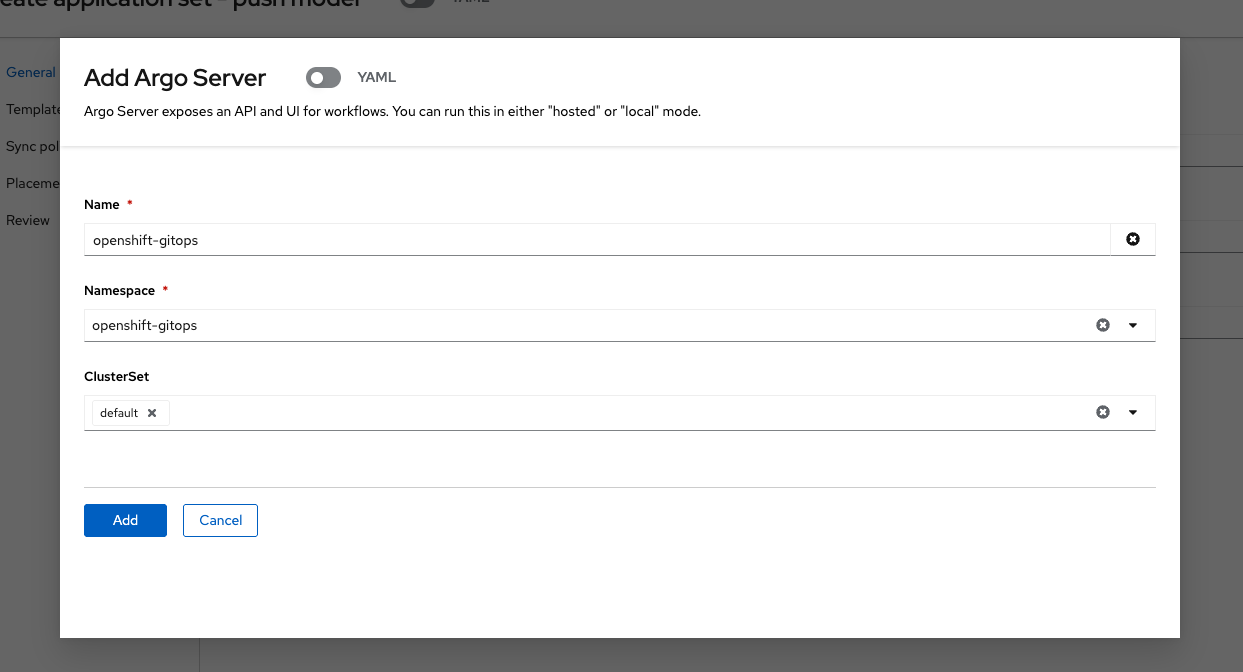
Under the Argo server, select Add Argo Server:
-
Enter the following information:
-
Name: openshift-gitops
-
Namespace: openshift-gitops
-
ClusterSet: default:
-
-
Click "Add," then make sure to select the created Argo server:
-
Click "Next"
-
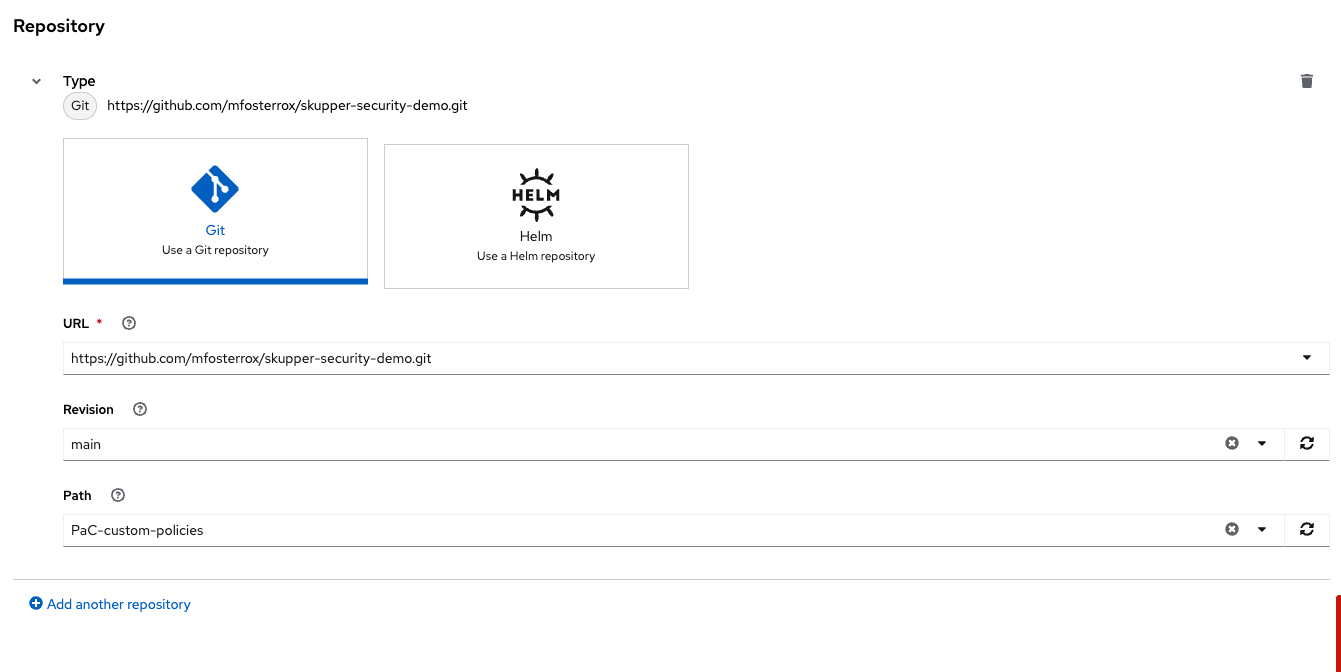
In the Template tab, select Git Repository and enter the URL of the GitHub repository containing the custom policies - URL: https://github.com/mfosterrox/skupper-security-demo.git:
-
Select "Main":
-
Select "PaC-custom-policies":
-
Enter the remote namespace of "stackrox":
-
Click "Next TWICE":
-
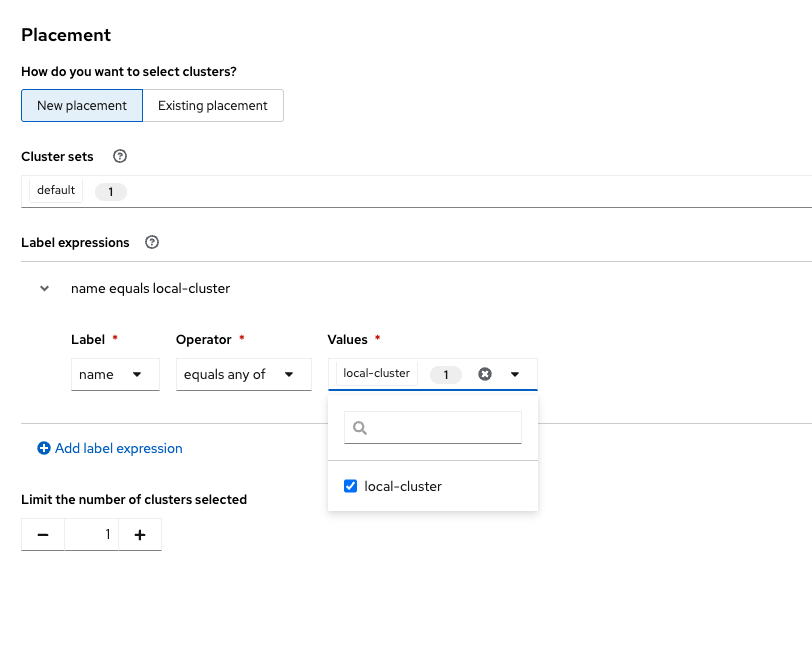
Set the following in the Placement tab:
-
Cluster sets: default:
-
-
Under Label expressions, click add label and select the following:
-
Label: name
-
Operator: equals any of
-
Values: local-cluster:
-
-
Click "Next":
-
Click "Submit":
-
Click on "Topology" and wait for the policies to go green:
Ensure That the Policies Are Properly Configured
Let’s run the check again to check if the policies were successful.
Procedure
-
Perform an image security scan using roxctl to check for policy violations:
roxctl -e $ROX_CENTRAL_ADDRESS:443 image check --image $QUAY_URL/$QUAY_USER/frontend:0.1WARN: A total of 4 policies have been violated
ERROR: failed policies found: 2 policies violated that are failing the check
ERROR: Policy "Alpine Linux Package Manager (apk) in Image - Build and Deploy - Enforce" - Possible remediation: "Run `apk --purge del apk-tools` in the image build for production containers."
ERROR: Policy "Alpine Linux Package Manager in Image - Enforce Build" - Possible remediation: "Run `apk --purge del apk-tools` in the image build for production containers."
ERROR: checking image failed: failed policies found: 2 policies violated that are failing the checkYou should see a second APK policy violation, as you have created a second "externally managed" policy in RHACS.
Check on Your Policies
Procedure
-
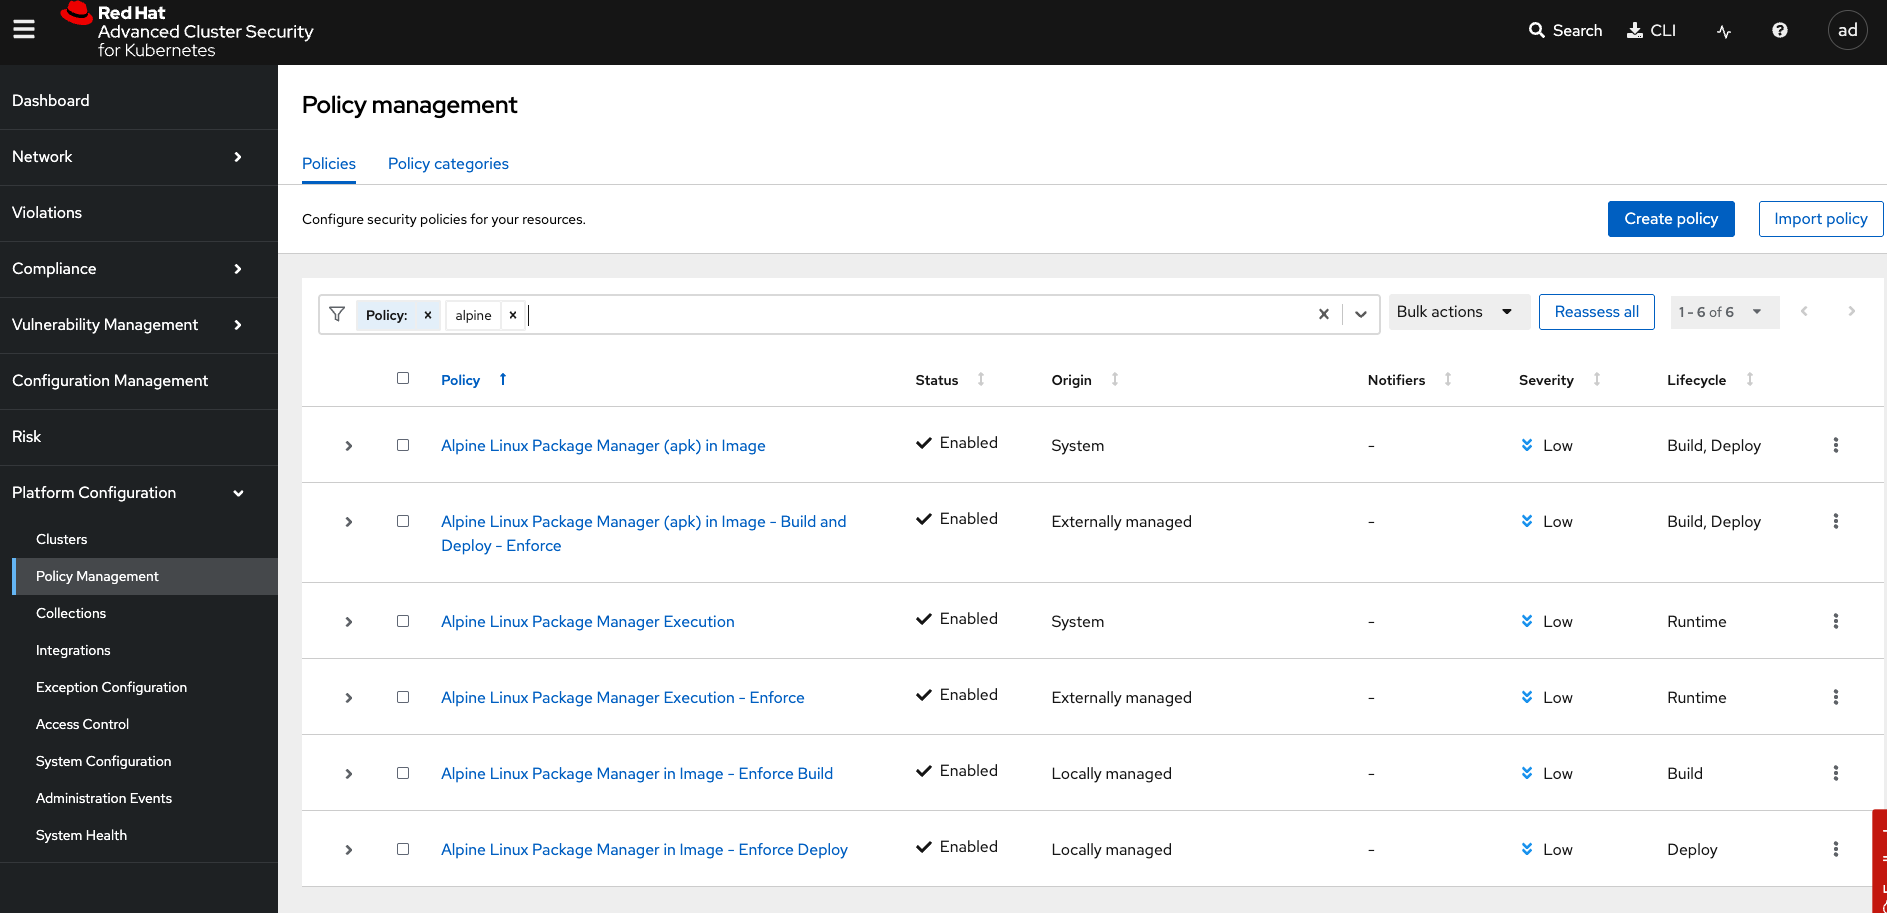
Go to the RHACS dashboard and head to the Platform Configuration → Policy Management dashboard:
-
Search by
Policythealpine:
Notice how the policies are System, Locally managed, and Externally managed?
What’s the difference?
-
System policies come with RHACS by default
-
Locally managed policies are created in RHACS or via the API
-
Externally managed policies are managed via GitOps and policy as code
-
Delete the locally managed "conflicting" policies by running the following command:
POLICY_ID=$(curl -X GET \
  -H "Authorization: Bearer $ROX_API_TOKEN" \
  -H "Content-Type: application/json" \
  https://$ROX_CENTRAL_ADDRESS/v1/policies | jq -r '.policies[] | select(.name=="Alpine Linux Package Manager in Image - Enforce Build") | .id')

curl -X DELETE \
  -H "Authorization: Bearer $ROX_API_TOKEN" \
  -H "Content-Type: application/json" \
  -d '{
        "id": "$POLICY_ID"
      }' \
  https://$ROX_CENTRAL_ADDRESS/v1/policies/$POLICY_ID
Nice job!
Implementing Security Checks into Your CI/CD Pipeline
Implementing CI/CD security in container builds involves more than just securing your container images and your deployment manifests. There are several best practices to ensure that your containerized applications are secure throughout the development and deployment lifecycle.
-
Access Control: Use strong authentication and authorization mechanisms. Implement role-based access control (RBAC) to limit who can modify the pipeline and deploy applications.
-
Audit Logging: Enable and regularly review audit logs to monitor access and changes to the CI/CD pipeline.
-
Official and Verified Images: Always start with official images from trusted sources (e.g., Docker Hub, Red Hat, Ubuntu).
-
Minimal Base Images: Use minimal base images to reduce the attack surface (e.g., alpine).
-
Static Analysis: Integrate static code analysis tools (e.g., SonarQube, Snyk) into the pipeline to detect vulnerabilities in the code.
-
Image Scanning: Use tools like Clair, Anchore, or Trivy to scan container images for known vulnerabilities before deploying them.
-
Pin Dependencies: Specify exact versions of dependencies to avoid introducing unverified or vulnerable components.
-
Regular Updates: Keep dependencies and base images updated to their latest versions to benefit from security patches.
-
Environment Variables: Avoid hardcoding secrets in the source code. Use environment variables or secret management tools.
-
Secret Management Tools: Use tools like HashiCorp Vault, AWS Secrets Manager, or Kubernetes Secrets to securely manage and inject secrets.
-
Policy as Code: Use tools like Open Policy Agent (OPA) to define and enforce security policies as code within your CI/CD pipeline.
-
Compliance Checks: Automate compliance checks to ensure all deployments adhere to security standards and policies.
Now, RHACS can be implemented into any CI/CD process as a step in the build-deploy-run lifecycle. RHACS is able to achieve this through the roxctl CLI and the admission controller. RHACS can implement those image scanning, environment variables, and compliance checks into those pipelines.
Let’s take a look at a very simple CI/CD pipeline in OpenShift Pipelines.
Review a Basic CI/CD Pipeline
In this section, we will review a simple pipeline that has been configured in Red Hat® OpenShift Pipelines.
Red Hat® OpenShift Pipelines is a Kubernetes-native CI/CD (Continuous Integration/Continuous Deployment) solution that automates the process of building, testing, and deploying applications. It leverages Tekton, a powerful and flexible open-source framework, to create cloud-native pipelines that integrate seamlessly with OpenShift and other Kubernetes environments. This enables developers to define and manage their build and deployment workflows as code, ensuring consistency, scalability, and repeatability across the software development lifecycle.
Procedure
-
Head over to the OpenShift Console. If you don’t have access, follow the steps below. If you do, proceed to the following section.
Access the Red Hat® OpenShift Container Platform (OCP) Web Console
First, make sure you can access the Red Hat® OCP console web console.
Procedure
-
Log into the OCP console at
https://console-openshift-console.apps.cluster-sample.sample.sandboxsample.opentlc.com: -
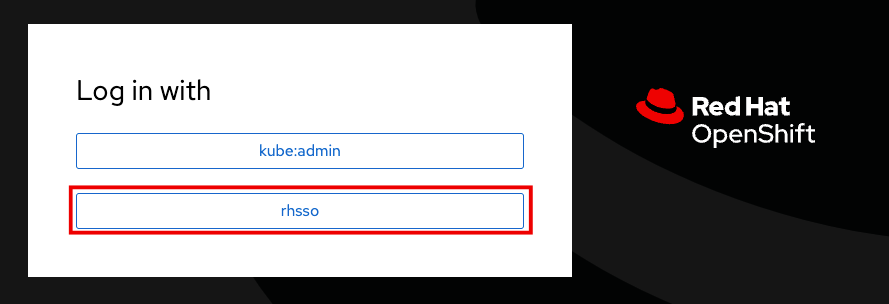
Click the rhsso option
-
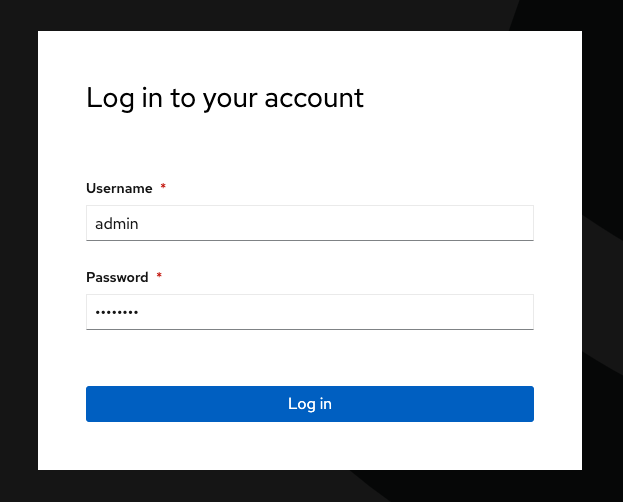
Enter the OCP credentials:
User: |
sample_user |
Password: |
sample_KQt21WpVVWzo |
-
Enter the OpenShift username sample_user and password: sample_KQt21WpVVWzo:
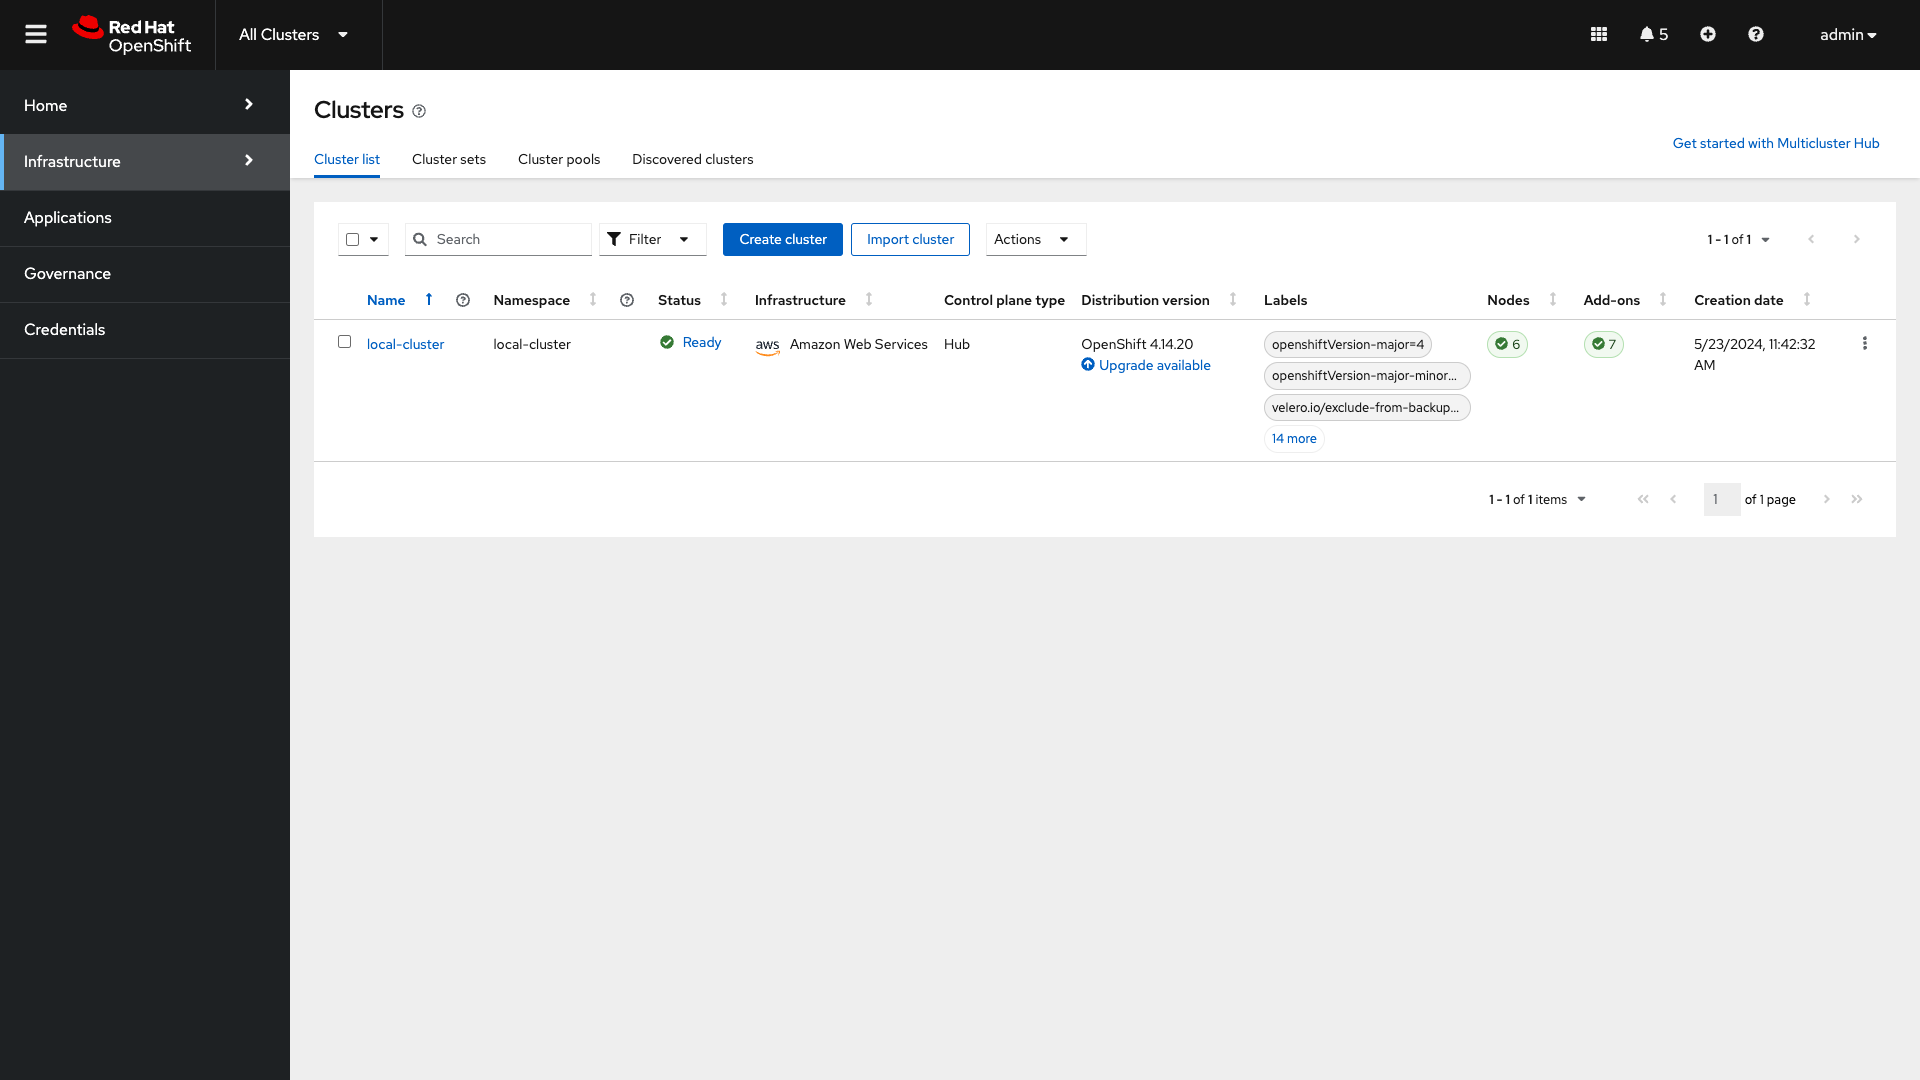
You should be directed to the RHACM dashboard. RHACM is integrated into the OpenShift dashboard.
-
To get to your cluster’s local OpenShift dashboard, click the top dropdown and select local-cluster:
-
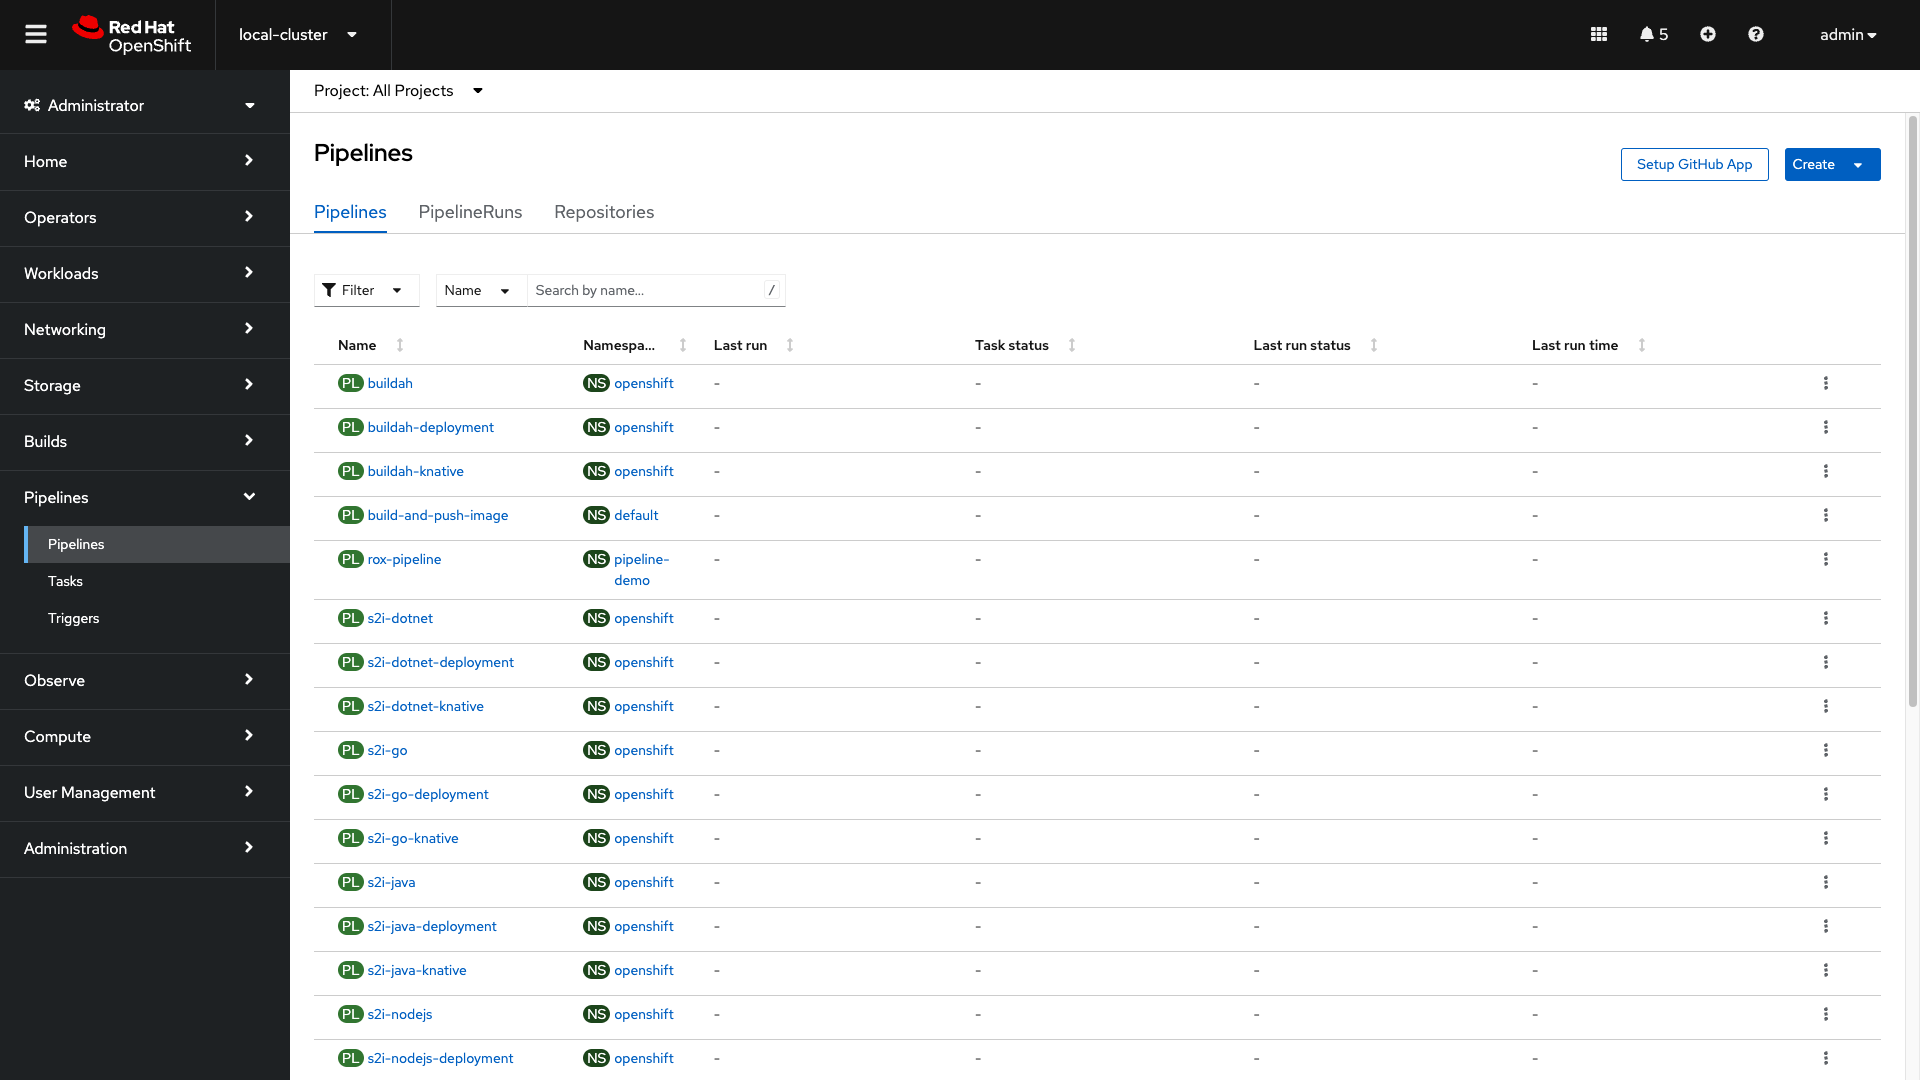
Click on the Pipelines tab on the left side of the page and select "Pipelines":
-
There’s no pipeline currently. Let’s apply it now:
oc apply -f $TUTORIAL_HOME/openshift-pipelines/ --recursive[lab-user@bastion ~]$ oc apply -f $TUTORIAL_HOME/openshift-pipelines/ --recursive
pipeline.tekton.dev/rox-pipeline created
secret/roxsecrets created
clustertask.tekton.dev/rox-deployment-check created
clustertask.tekton.dev/rox-image-check created
clustertask.tekton.dev/rox-image-scan createdThe pipeline we are looking for is called rox-pipeline, and you can either find it and select it or you can change the Project to "pipeline-demo".
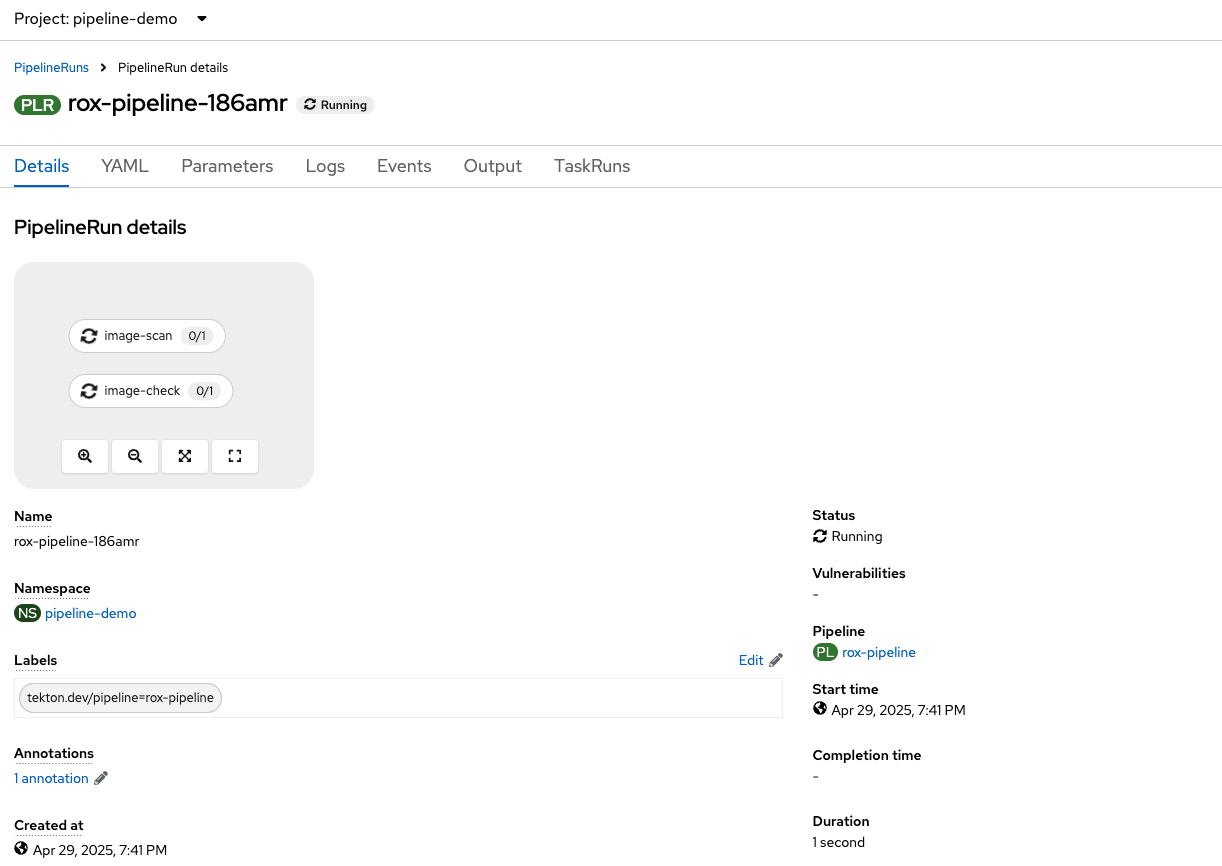
The pipeline has not been run yet, so start a pipeline run:
-
Click the three dots on the right side of the screen and select start:
This pipeline works by taking an image that you have created and passing it through a "roxctl image scan" and a "roxctl image check" process.
-
Let’s use the frontend:0.1 image that we’ve been using all day. Run the following and input it into the image bar:
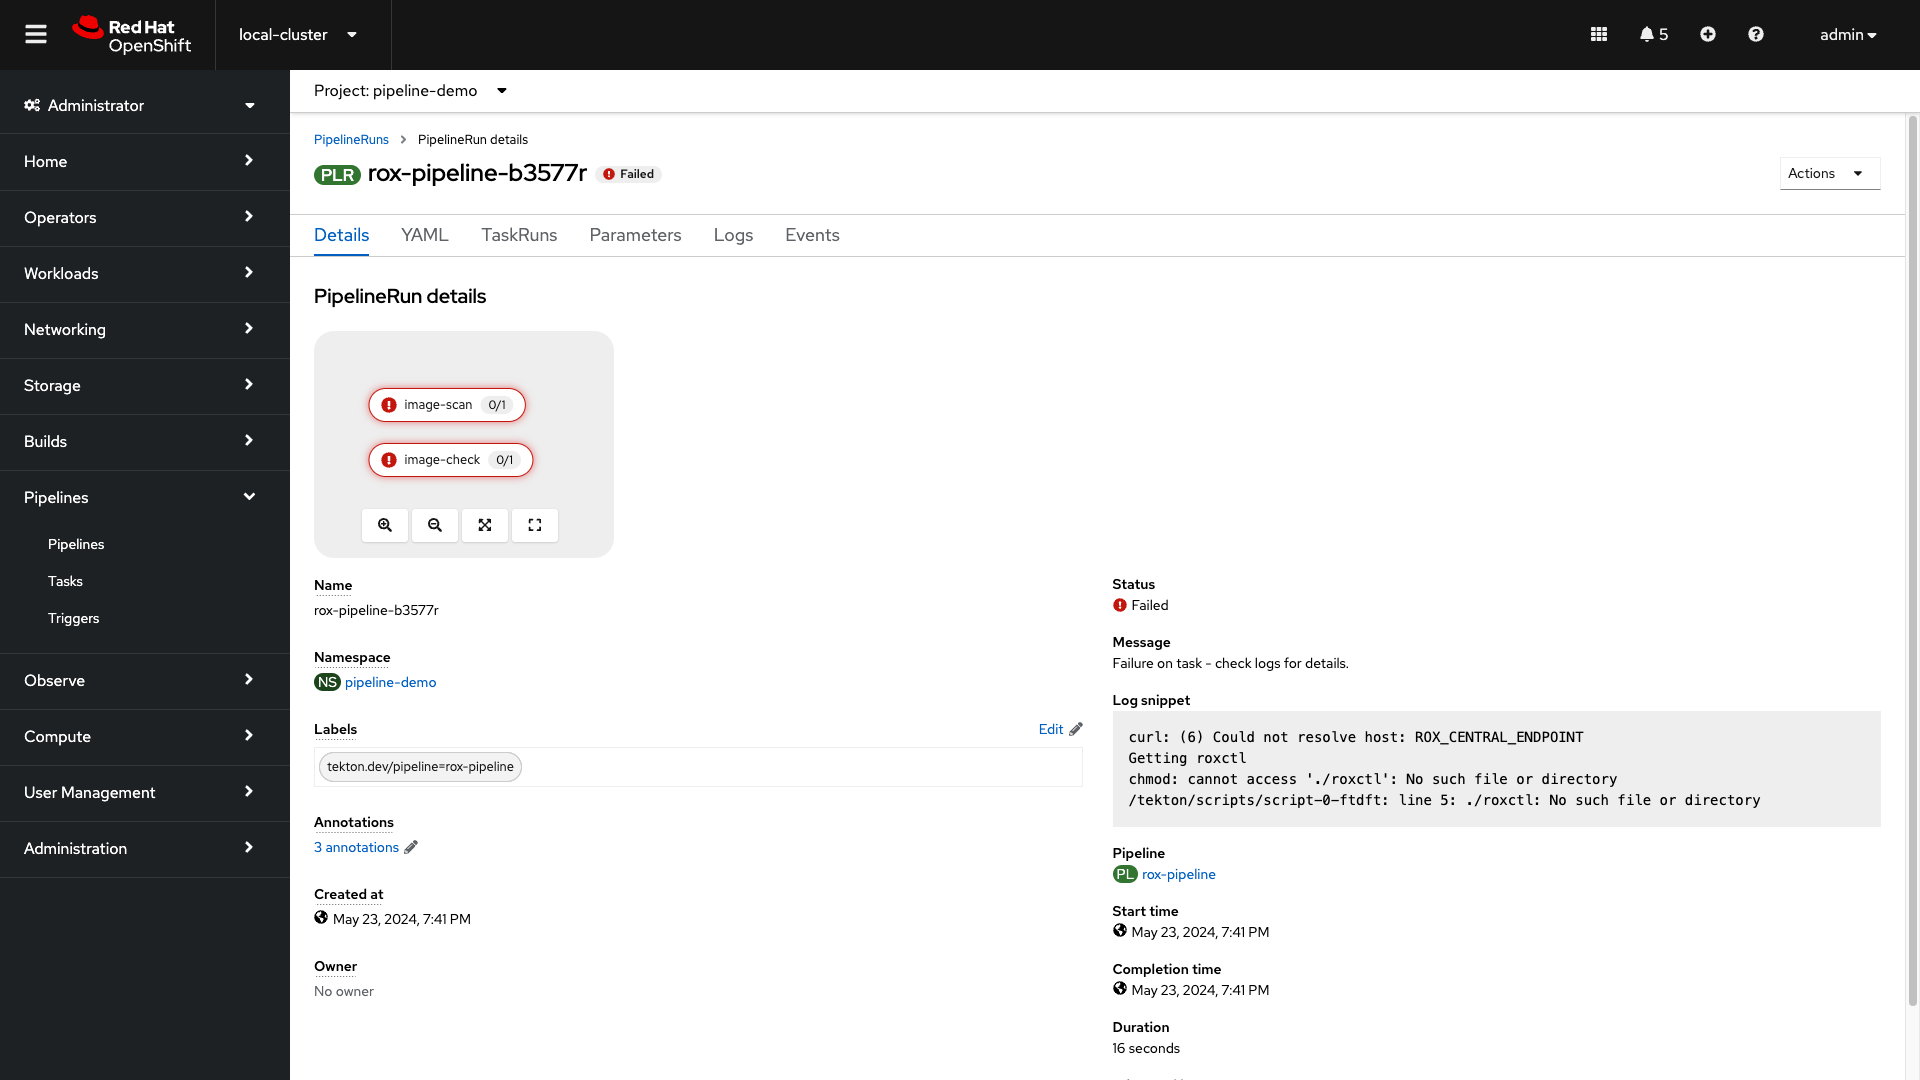
echo $QUAY_URL/$QUAY_USER/frontend:0.1| The pipeline should fail. |
Why do you think the pipeline failed?
Let’s look at the logs.
-
Take a look at the log snippet on the bottom right of the page:
curl: (6) Could not resolve host: ROX_CENTRAL_ENDPOINT
Getting roxctl
chmod: cannot access './roxctl': No such file or directory
/tekton/scripts/script-0-ftdft: line 5: ./roxctl: No such file or directory
This snippet indicates that there are incorrect variables. With RHACS, API access is required to query Central for results.
Let’s take a look at the secret file necessary for OpenShift Pipelines:
-
Run the following in the terminal:
ls $TUTORIAL_HOME/openshift-pipelines[lab-user@bastion pipeline]$ ls $TUTORIAL_HOME/openshift-pipelines
pipeline secrets tasksAs you can see, the pipelines are broken up into one pipeline, with three tasks that need a secret file. Let’s take a look at what variables are needed for the pipeline.
-
Run the following in the terminal:
cat $TUTORIAL_HOME/openshift-pipelines/secrets/rox-secrets.yml[lab-user@bastion pipeline]$ cat $TUTORIAL_HOME/openshift-pipelines/secrets/rox-secrets.yml
apiVersion: v1
stringData:
rox_central_endpoint: "$ROXCTL_CENTRAL_ENPOINT"
# The address:port tuple for StackRox Central (example - rox.stackrox.io:443)
rox_api_token: "$API_TOKEN"
# StackRox API token with CI permissions
# Refer to https://help.stackrox.com/docs/use-the-api/#generate-an-access-token
kind: Secret
metadata:
name: roxsecrets
namespace: pipeline-demoOk. So we need the RHACS Central endpoint and an API token with the right permissions. Luckily we have the RHACS Central endpoint and an admin access token that we can use.
-
Run the following in the terminal to update the RHACS Central address and API Token:
ACS_URL=$(oc -n stackrox get route central -o jsonpath='{.spec.host}')
ACS_URL_PORT=$(echo "$ACS_URL" | sed 's/$/:443/')
sed -i "s|ROXCTL_CENTRAL_ENDPOINT|$ACS_URL_PORT|g" $TUTORIAL_HOME/openshift-pipelines/secrets/rox-secrets.yml
sed -i "s|API_TOKEN|$ROX_API_TOKEN|g" $TUTORIAL_HOME/openshift-pipelines/secrets/rox-secrets.yml-
Verify by running the following command:
cat $TUTORIAL_HOME/openshift-pipelines/secrets/rox-secrets.ymlapiVersion: v1
stringData:
rox_central_endpoint: "central-stackrox.apps.cluster-88k5s.88k5s.sandbox139.opentlc.com:443"
# The address:port tuple for StackRox Central (example - rox.stackrox.io:443)
rox_api_token: "YOUR NEW API TOKEN"
# StackRox API token with CI permissions
# Refer to https://help.stackrox.com/docs/use-the-api/#generate-an-access-token
kind: Secret
metadata:
name: roxsecrets-
Lastly, apply the following and head over to the OpenShift Console:
oc apply -f $TUTORIAL_HOME/openshift-pipelines/secrets/rox-secrets.yml[lab-user@bastion pipeline]$ oc apply -f $TUTORIAL_HOME/openshift-pipelines/secrets/rox-secrets.yml
secret/roxsecrets configuredLet’s Try Again
Procedure
-
Go back to the pipelines view:
-
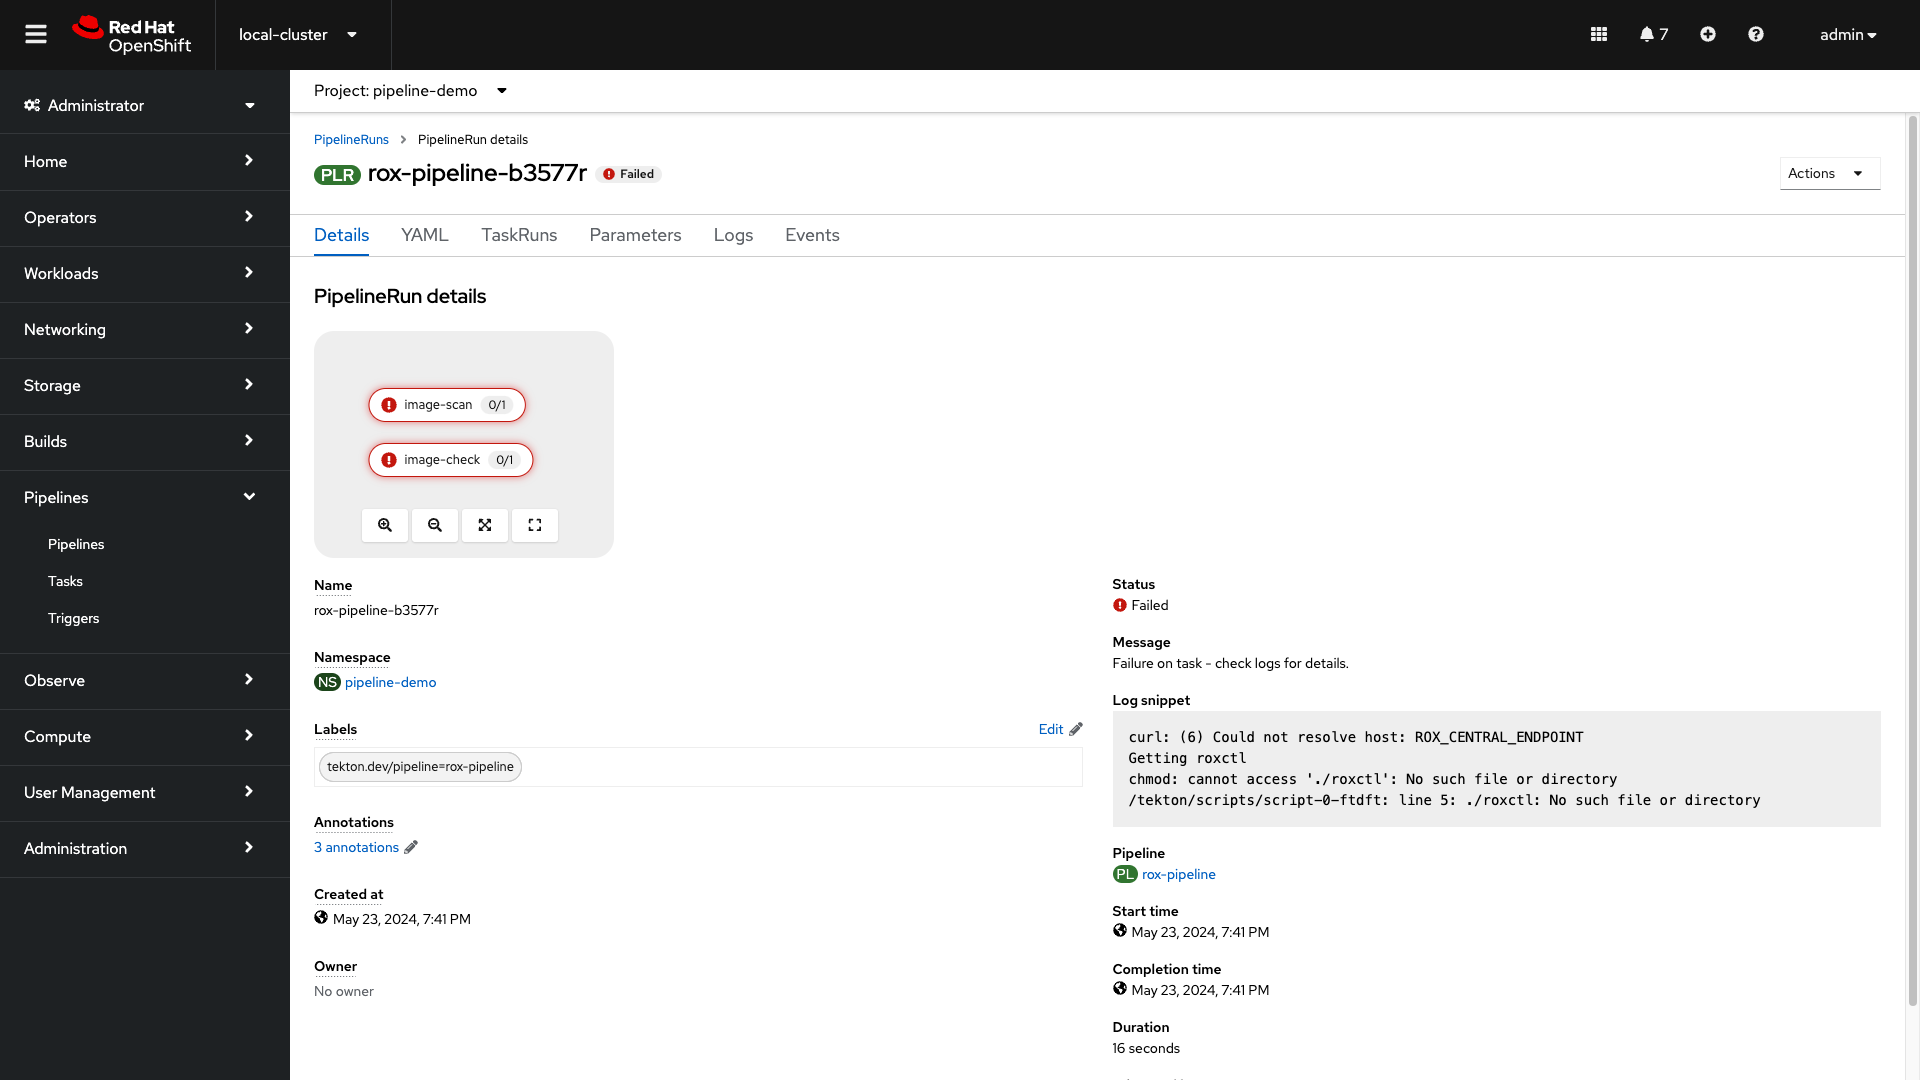
Click the Actions dropdown and select Rerun. Then relax for a few seconds and grab a sip of water:
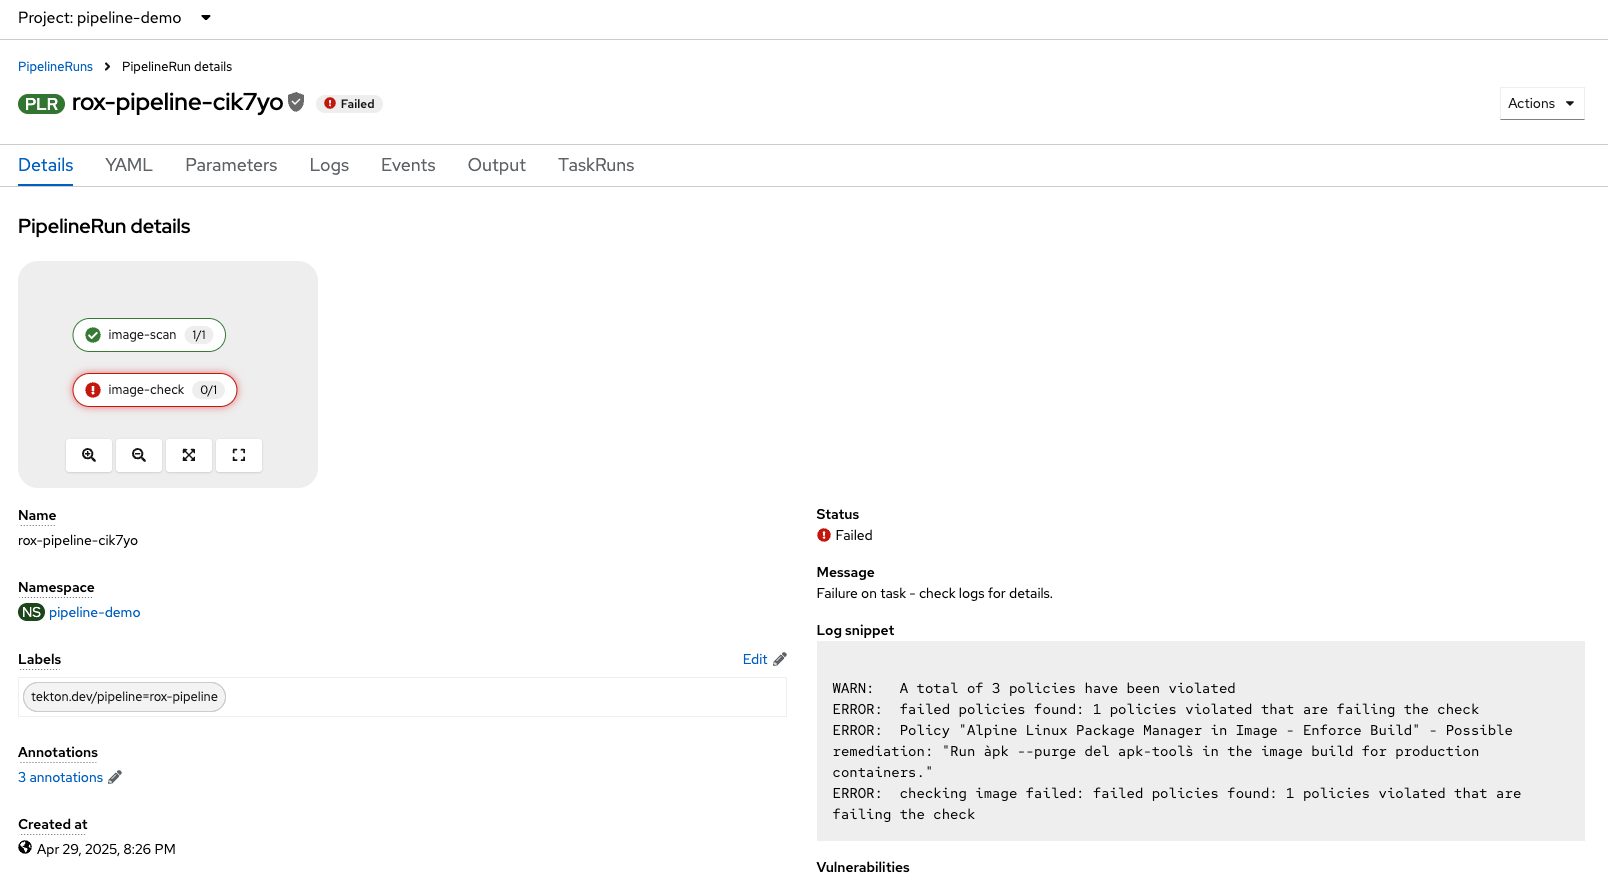
What happened? Did you expect this behavior?
-
Check the log snippet in the bottom right of the page:
--------------------------------+
WARN:	A total of 4 policies have been violated
ERROR:	failed policies found: 1 policies violated that are failing the check
ERROR:	Policy "Ubuntu Package Manager in Image - Build-time" - Possible remediation: "Run `dpkg -r --force-all apt apt-get && dpkg -r --force-all debconf dpkg` in the image build for production containers."
ERROR:	checking image failed after 3 retries: failed policies found: 1 policies violated that are failing the check
So it looks like our policy-as-code example blocked the pipeline from executing successfully.
