Module 3: Creating an Inventory
A guide to managing hosts and groups the easy way by creating and populating an inventory in automation controller.
Lab Briefing
This section provides an overview of inventories in Ansible Automation Platform.
What are Inventories?
An inventory defines the hosts and groups of hosts upon which commands, modules, and tasks in a playbook operate. It is the fundamental way that Ansible and the automation controller keep track of what systems to manage.
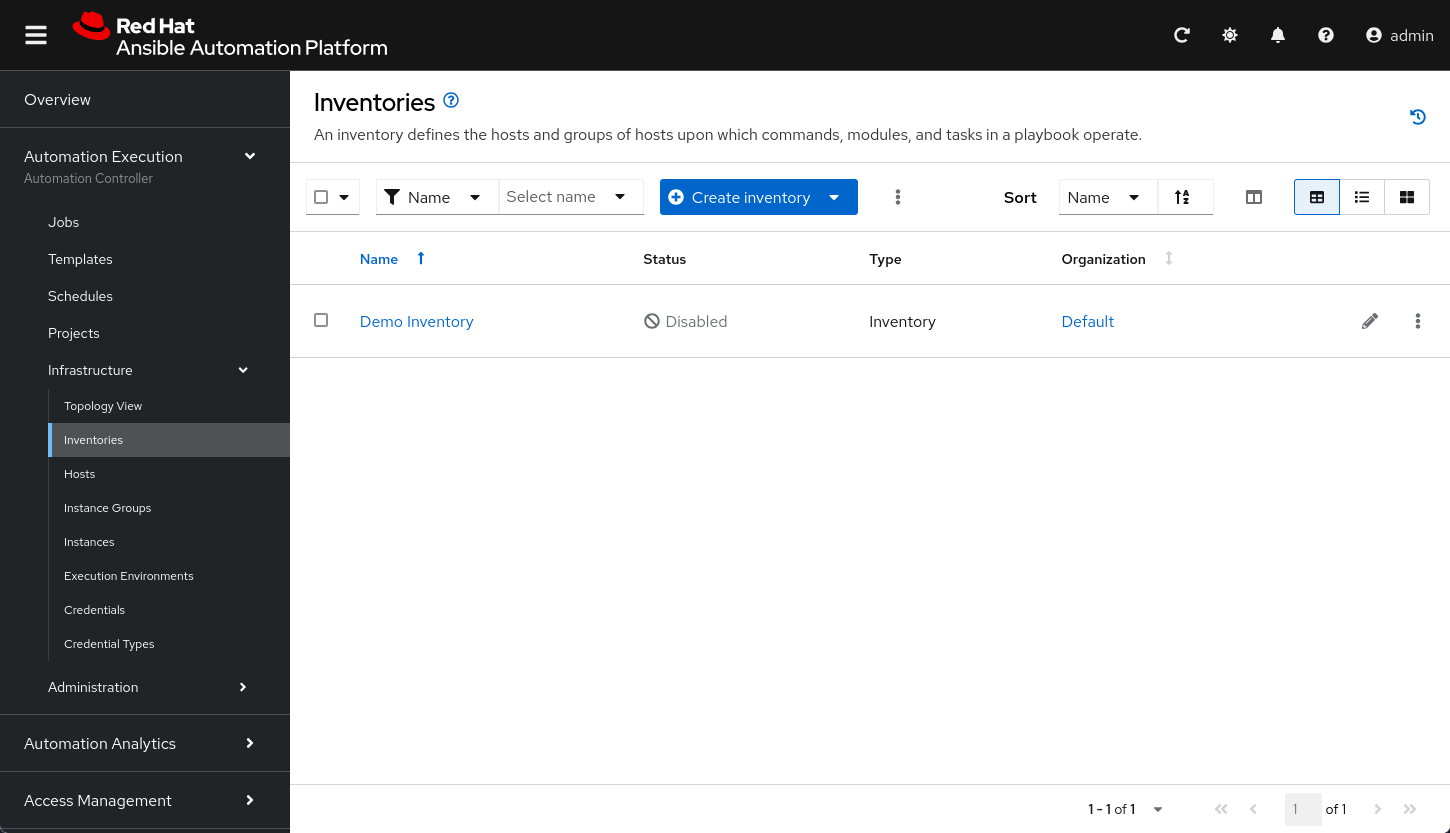
In this challenge, you will be creating a new inventory, adding hosts to it, and then creating a group to organize those hosts.
Lab Guide
An inventory is a collection of hosts against which jobs (like playbooks) may be launched. This is the same concept as an Ansible inventory file, but with a powerful UI and additional features.
Inventories are divided into groups, and these groups contain the actual hosts. Hosts can be referenced by their IP addresses or their hostnames and can be sourced manually or dynamically from a cloud provider.
|
The credentials for the automation controller are:
|
Task 1: Create the Inventory
First, you will create a new, empty inventory to hold your managed nodes.
-
Navigate to the Inventories page.
In the left navigation menu, go to Automation Execution → Infrastructure → Inventories.
-
Create a new inventory.
Click the blue Create inventory button and select Create inventory from the dropdown.
-
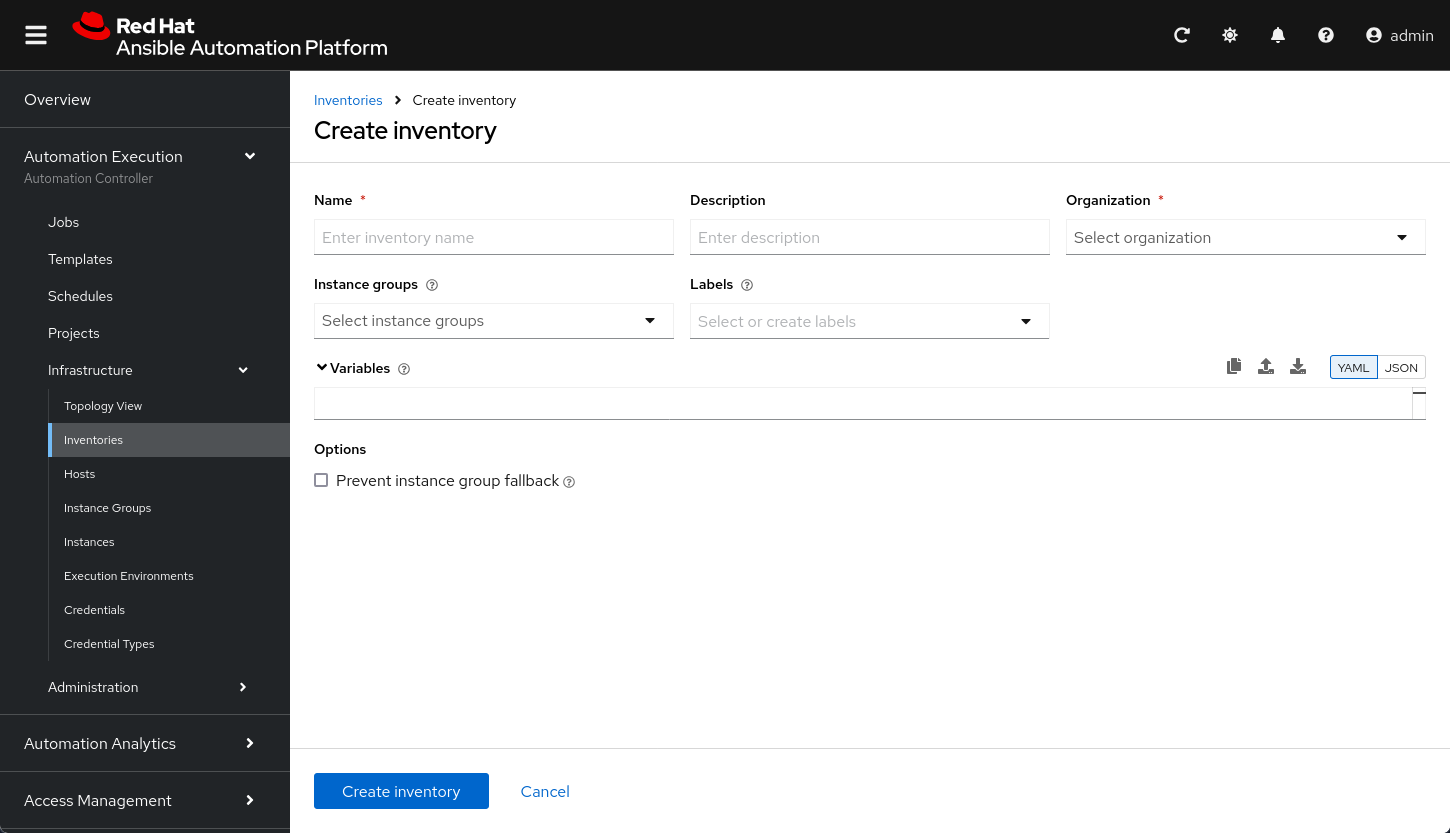
Enter the inventory details.
Fill out the form with the following information:
-
Name:
Lab-Inventory -
Organization:
Default
-
-
Save the inventory.
Click the blue Create inventory button.
Task 2: Add Hosts to the Inventory
Now you will manually add two hosts to your new inventory.
If you are not already on the Lab-Inventory details page, navigate back to it by clicking its name in the inventory list.
|
-
Navigate to the Hosts tab.
Within the
Lab-Inventory, click the Hosts tab. -
Create the first host.
Click the blue Create host button. In the Name field, enter
node1. Leave all other fields as they are and click Create host. -
Create the second host.
Navigate back to the main hosts list by clicking the < Back to Hosts breadcrumb link. Repeat the steps above to create a second host named
node2.
Task 3: Create a Group
Groups are used to organize hosts and apply variables to multiple hosts at once.
-
Navigate to the Groups tab.
Go back to the main
Lab-Inventorypage and click the Groups tab. -
Create a new group.
Click the blue Create group button.
-
Name the group.
In the Name field, enter
web.Unlike in a static inventory file, you do not need to use brackets []around the group name in the UI. -
Save the group.
Click the blue Create group button.
Task 4: Add Hosts to the Group
Finally, you will associate your two hosts with the new web group.
-
Navigate to the Hosts tab for the group.
Inside the
webgroup you just created, click the Hosts tab. -
Add existing hosts.
Click the blue Add existing host button.
-
Select the hosts.
In the pop-up window, select the checkbox for both
node1andnode2, then click Add hosts. -
Verify the association.
You should now see both
node1andnode2listed in the Hosts tab for thewebgroup.
Controller as Code Alternative
Everything you just created through the UI — the inventory, hosts, and group — can be defined as declarative YAML and applied automatically using the infra.aap_configuration collection.
YAML Definition
The following variable file (controller-as-code/configs/module-03/controller_objects.yml) defines the same objects:
---
controller_inventories:
  - name: Lab-Inventory
    organization: Default

controller_hosts:
  - name: node1
    inventory: Lab-Inventory
    state: present
  - name: node2
    inventory: Lab-Inventory
    state: present

controller_groups:
  - name: web
    inventory: Lab-Inventory
    hosts:
      - node1
      - node2
The dispatch role in infra.aap_configuration automatically creates the objects in the correct dependency order: inventory first, then hosts, then groups.
Troubleshooting
If you have encountered an issue or have noticed something not quite right, please open an issue on GitHub.