2-3: Creating a Survey
This module demonstrates the use of Ansible Automation Platform survey feature. Surveys set extra variables for the playbook similar to "Prompt for Extra Variables" does, but in a user-friendly question and answer way. Surveys also allow for validation of user input.
Learning objectives
By the end of this module, you will be able to:
-
Create a Job Template for configuring a banner on multiple network operating systems
-
Create a self-service survey to collect user input for Job Template variables
-
Launch a Job Template with a survey and verify the results on network devices
Step 1: Create a Job Template
-
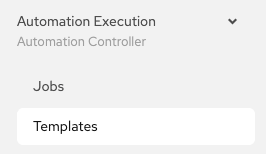
Open the web UI and click on the Templates link on the left menu.
-
Click on the blue Create template button and select Create job template to create a new job template (make sure to select
Job Templateand notWorkflow Template)Parameter Value Name
Network-Banner
Job Type
Run
Inventory
Workshop Inventory
Project
Workshop Project
Execution Environment
Network EE
Playbook
playbooks/network_banner.ymlCredential
Workshop Credential
-
Scroll down and click the blue Create job template button.
Step 2: Examine the playbook
Here is what the network_banner.yml Ansible Playbook looks like:
---
- name: set router banners
  hosts: routers
  gather_facts: no

  tasks:
    - name: load banner onto network device
      vars:
        - network_banner:  "{{ net_banner | default(None) }}"
        - banner_type: "{{ net_type | default('login') }}"
      include_role:
name: "../roles/banner"| You can also view the Ansible Playbook here: https://github.com/network-automation/toolkit |
The role banner has a very simple main.yml file:
- name: configure banner
  include_tasks: "{{ ansible_network_os }}.yml"
The ansible_network_os variable is being used to parameterize the network OS and create a vendor neutral playbook.
If you are working with a junos device, this playbook would call for a task file called junos.yml. If you are using an IOS-XE device, this playbook would call for a task file called ios.yml. This file will in turn contain the platform specific tasks:
---
- name: add the junos banner
  junos_banner:
    text: "{{ network_banner }}"
banner: "{{ banner_type }}"| Please observe that there are task files created for ios, nxos, eos and junos for this playbook. |
Also note that we are passing in 2 variables to the task file.
-
network_banner: This variable is populated using thenet_bannervariable -
banner_type: This variable is populated by a variable namednet_type
Step 3: Create a survey
In this step you will create a "survey" of user input form to collect input from the user and populate the values for the variables net_banner and banner_type.
-
Click on the Survey tab within the Network-Banner Job Template

-
Click the blue Create survey question button

-
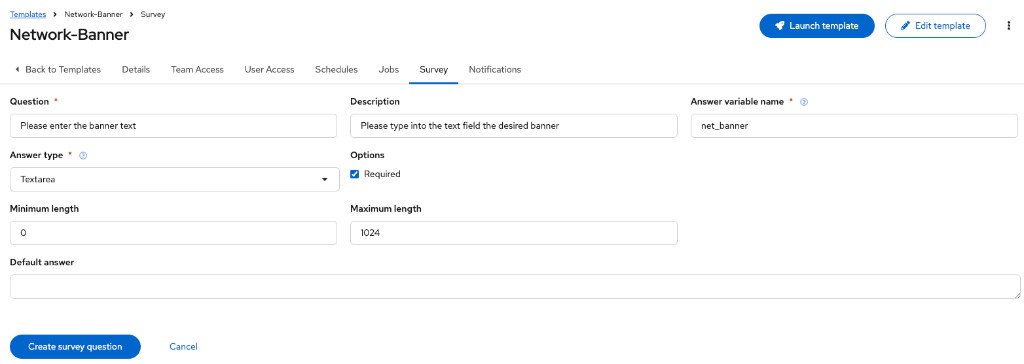
Fill out the fields
Parameter Value Question
Please enter the banner text
Description
Please type into the text field the desired banner
Answer Variable Name
net_bannerAnswer type
Textarea
Required
Checkmark
For example:
-
Click the blue Create survey question button
-
Click the blue Create survey question button in the Survey tab to add another question
-
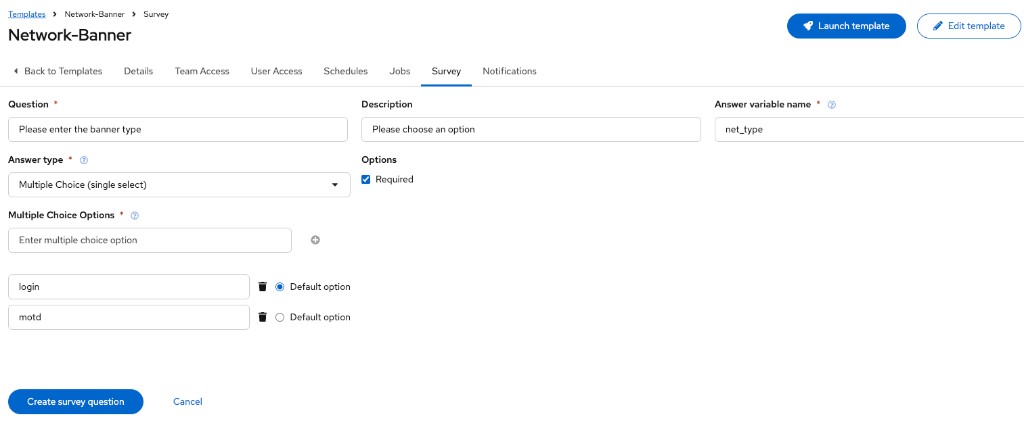
Next we will create a survey prompt to gather the
banner_type. This will either be "motd" or "login" and will default to "login" per the playbook above.Parameter Value Question
Please enter the banner type
Description
Please choose an option
Answer Variable Name
net_typeAnswer type
Multiple Choice (single select)
Multiple Choice Options
login, motd
Default answer
login
Required
Checkmark
For example:
-
Click the blue Create survey question button
-
Ensure the toggle switch is set to Survey Enabled

-
Click Back to Templates
Step 4: Launch the Job Template
Launch the Network-Banner job template you created in Step 1. If you are not already on that template, open Templates in the left menu, find Network-Banner in the list, and open it—then follow the steps below.
-
Click the rocket ship icon next to Network-Banner to launch that job template (or open Network-Banner and use Launch from the template detail view).
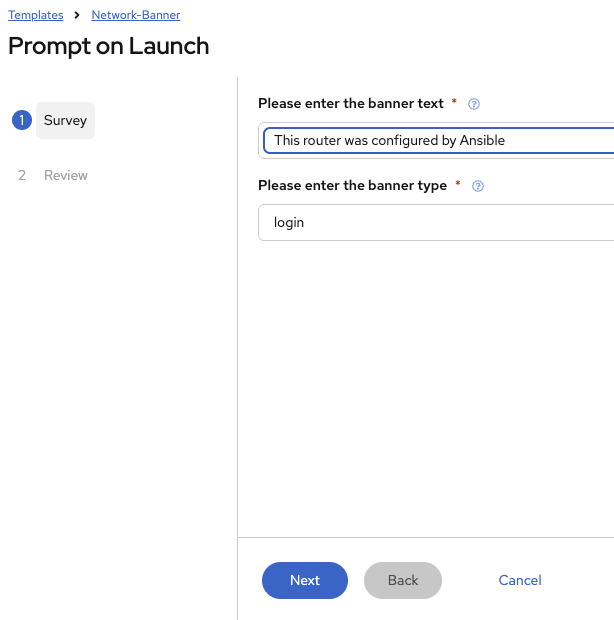
The job will immediately prompt the user to set the banner and the type.
-
Type in the banner message you want for the routers.
-
Choose between
loginandmotd. -
Click next to see how the survey rendered the input as extra vars for the Ansible Playbook. For this example the banner text is set as "This router was configured by Ansible".
-
Click the blue Finish button to submit the survey and start the job.

Let the job run to completion. Let the instructor know if anything fails.
Step 5: Verify the banner
The Network-Banner job applied the same banner intent across every router in the inventory—Cisco IOS-XE, Arista EOS, and Juniper Junos—without you choosing per-device syntax. Ansible used each host’s ansible_network_os (and the shared banner role) so the right modules and CLI ran for each platform; that vendor-specific work stays in the role and is largely invisible to the person running the template.
-
Log in to one of the routers and confirm the banner appears as you set it in the survey
ssh rtr1The banner will appear on login. Here is an example from above:
[rhel@vscode ~]$ ssh rtr1 Warning: Permanently added 'rtr1,3.237.253.154' (RSA) to the list of known hosts. This router was configured by Ansible -
Verify on additional routers
Module summary
In this module, you successfully:
-
Created a Job Template for configuring a banner on multiple network operating systems including Arista EOS, Cisco IOS and Juniper Junos
-
Created a self-service survey for the Job Template to fill out the
network_bannerandbanner_typevariables -
Executed a Job Template on all four routers, loading a banner on them simultaneously