2-5: Creating a Workflow
This module demonstrates the use of Ansible Automation Platform workflows. Workflows allow you to configure a sequence of disparate job templates (or workflow templates) that may or may not share inventory, playbooks, or permissions.
For this exercise we will create a time-stamped backup. If the backup job successfully completes, the workflow will simultaneously configure a banner and a user. If either job template fails we will restore to the time-stamped backup.
Learning objectives
By the end of this module, you will be able to:
-
Create a Workflow Template that chains multiple job templates together
-
Use the Workflow Visualizer to build and connect workflow nodes
-
Configure success and failure paths to implement automated rollback
-
Create converged links between workflow nodes
-
Launch and monitor a workflow execution
Step 1: Create a workflow template
-
Make sure you are logged in as the admin user.
-
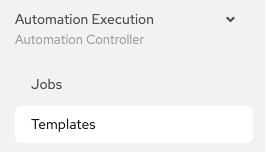
Click on the Templates link on the left menu.
-
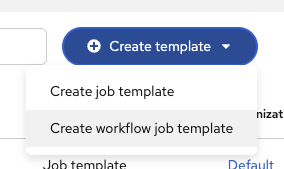
Click on the blue Create template button and select Create workflow job template.
-
Fill out the form as follows:
Parameter Value Name
Workshop Workflow
Organization
Red Hat network organization
Inventory
Workshop Inventory
-
Click on the blue Create workflow job template button
Step 2: The Workflow Visualizer
-
When you clicked the Create workflow job template the Workflow visualizer should automatically open. If not, click on the View workflow visualizer button.
-
By default only a blue Add step button will appear. Click on the Add step button.

-
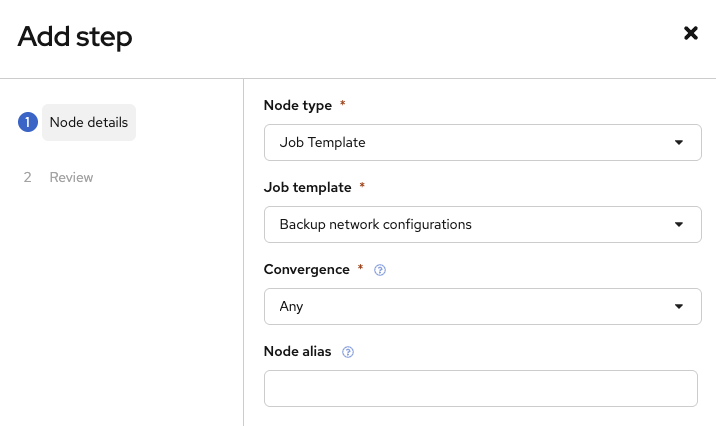
The Add step window will appear.
-
Set the Node Type to
Job Template. -
Select the
Backup network configurationsJob Template that was created in exercise 6. -
Convergence can be left as Any
-
Node alias can be left blank
-
Click the blue Next button.
-
Click on the blue Finish button
-
The Backup network configurations job template is now a node. Job or workflow templates are linked together using a graph-like structure called nodes. These nodes can be approvals, jobs, project syncs, inventory syncs, or even other workflows. A template can be part of different workflows or used multiple times in the same workflow.
|
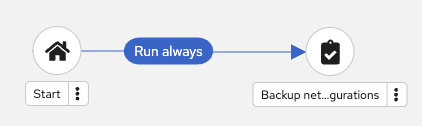
Step 3: Add the Configure Banner Job Template
-
Hover over the three dots on the
Backup network configurationsnode and click the Add step and link link.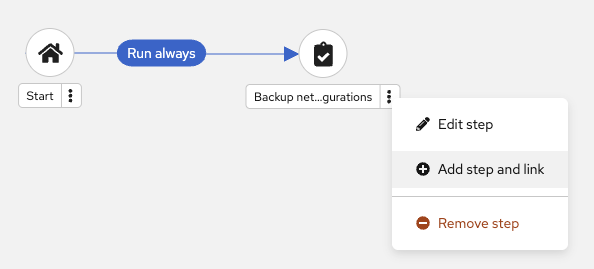
The Add Step window will appear again.
-
Fill out the following values:
Parameter Value Node Type
Job Template
Job template
Network-Banner
Status
Run on success
Convergence
Any
Node alias
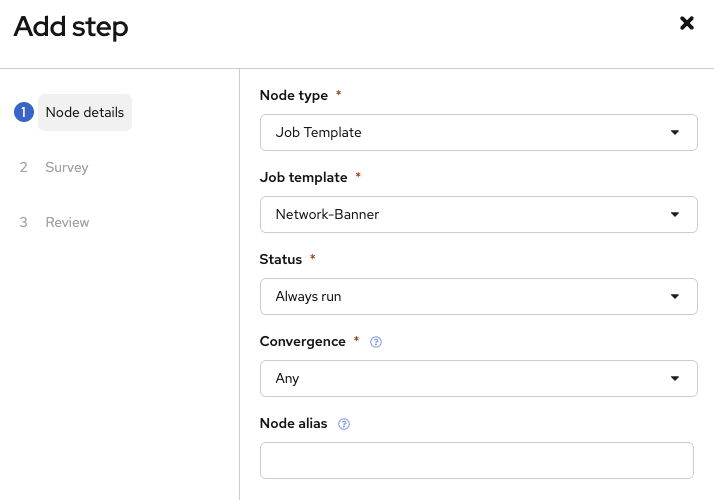
| Workflows can be configured to run automation jobs when the previous node succeeds, fails, or have it always run no matter what the previous job did. This allows workflows to fix issues or revert the state of a device. |
-
Click the blue Next button and fill out the survey field
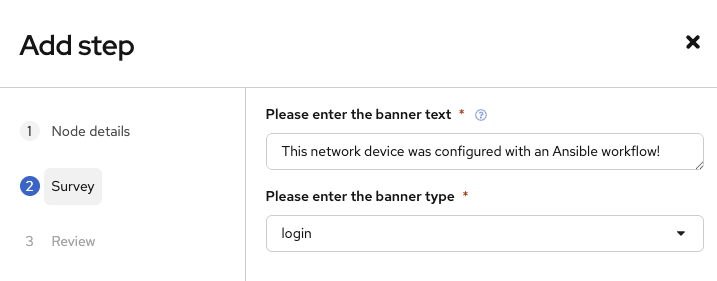
-
Click the blue Next button again, review, and then click the blue Finish button.
-
A green line should exist between
Backup network configurationsandNetwork-Banner
Step 4: Add the Configure Network-User Job Template
-
Hover over the three dots on the
Backup network configurationsnode and click the Add step and link link. (not theNetwork-Bannernode) -
Fill out the following values:
Parameter Value Node Type
Job Template
Job template
Network-User
Status
Run on success
Convergence
Any
Node alias
The Job template list is long. If Network-User does not appear at first, scroll the list or click Load More until you can select it. 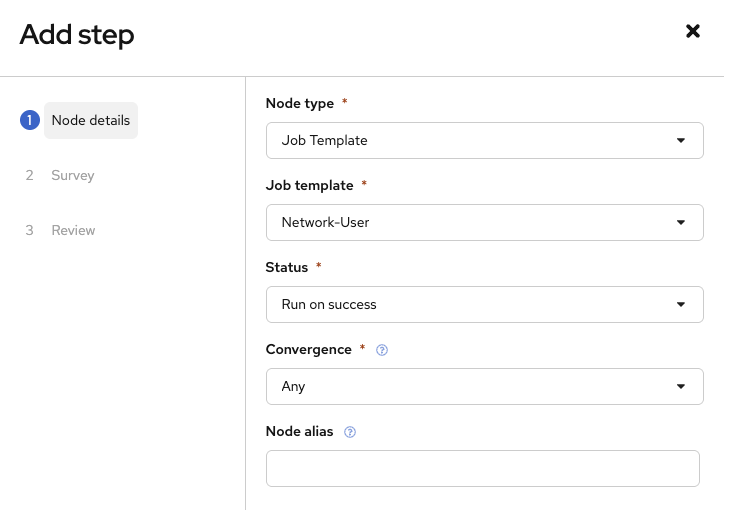
-
Click the blue Next button and fill out the survey field (feel free to leave the defaults!)
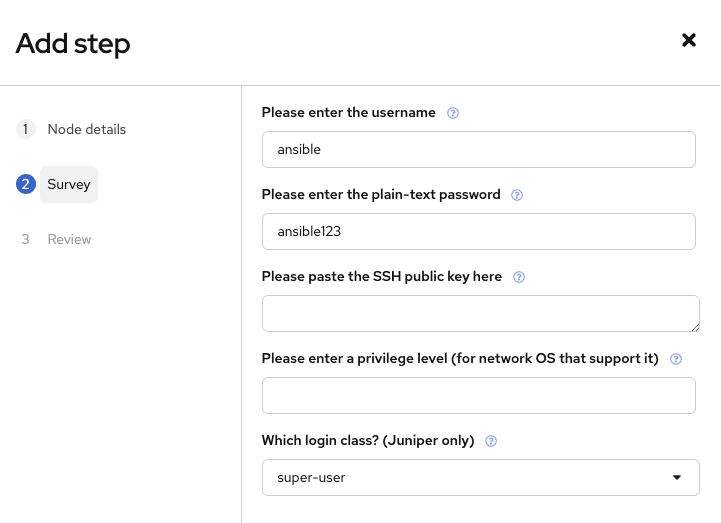
-
Click Next, review then click Finish
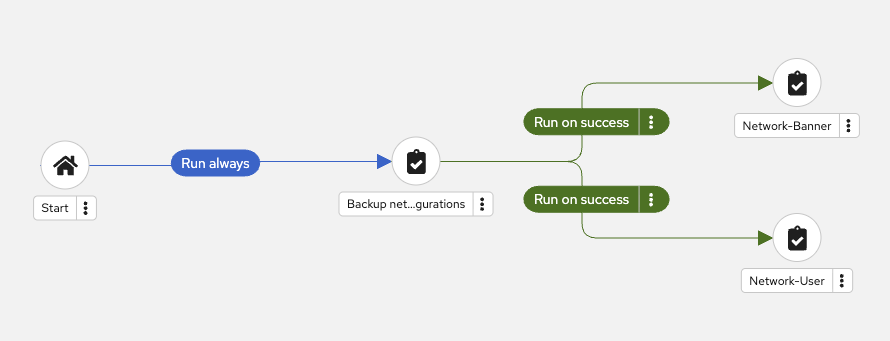
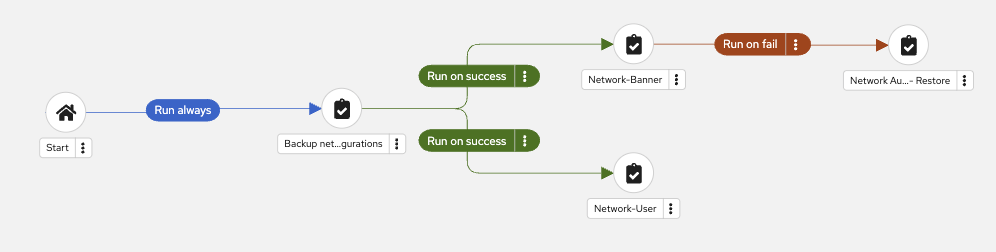
Your workflow should now look similar to the following image:
Step 5: Add the Network-Restore Job Template
-
Hover over the Network-Banner node and click the three dots. The Add step and link window will appear again.
-
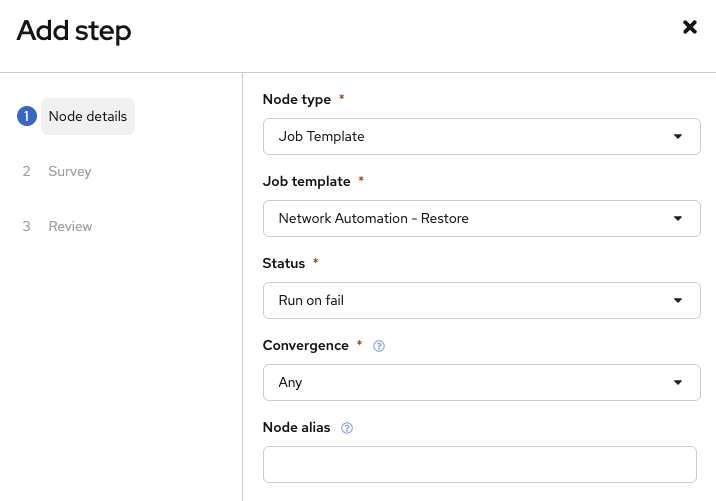
Fill out the following values:
Parameter Value Node Type
Job Template
Job template
Network Automation - Restore
Status
Run on fail
Convergence
Any
Node alias
Your form should look similar to the following image:
-
Click the blue Next button for the Survey step, then choose a rollback date (there may only be one choice if you only ran the backup one time)
-
Click the blue Next button again, then review and click the Finish button.
Your workflow should now look similar to the following image:
Step 6: Create a converged link
-
Hover over the
Network-Usernode until a small arrow appears to the right.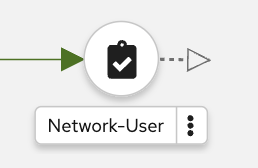
-
Click on the arrow (it will turn gray), and drag it over to the
Network Automation - Restorenode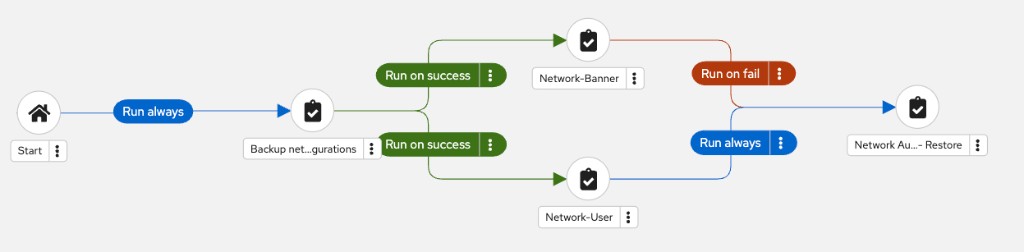
-
Now click on the Run always and change to Run on fail
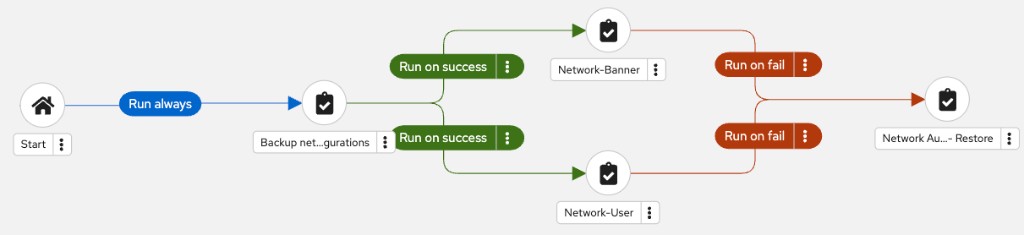
-
Click Save, then click on the X to exit the visualizer.
Step 7: Run the Workflow
-
Click the Launch button.

-
Watch the Workshop Workflow. At any time during the workflow job you can select an individual job template by clicking on the node to see the status.
You now have a workflow that handles multi-step network changes with built-in rollback — the kind of safety net that makes automation trustworthy enough for production.
Module summary
In this module, you successfully:
-
Built a reusable automation workflow that orchestrates backup, user provisioning, and banner configuration across all network nodes in a single run
-
Made the workflow self-healing — if any change fails, the network automatically rolls back to its last known-good state
-
Validated the end-to-end workflow and used the Workflow Visualizer to verify each stage completed as expected