Module 2 Lab 2: Content - Build a custom Collection and Execution Environment
We will create a custom Collection, publish it to a Private Automation Hub (PAH), build a custom Execution Environment (EE) from a Red Hat certified base image, and finally, run the automation from Ansible Automation Controller.
Content management is a critical component of enterprise automation. Instead of publishing and retrieving content directly from public sources, automation assets will be sourced from a local and trusted content source. This lab will guide you through the process of creating and publishing Ansible Content Collections to a Private Automation Hub, building custom Execution Environments, and integrating them with Ansible Automation Controller.
Learning Objectives
After completing this module, you will be able to:
-
Understand the role and benefits of Private Automation Hub
-
Create and publish custom Ansible Collections
-
Build and publish custom Execution Environments
-
Create a custom filter and add it to the Execution Environment
-
Experience the lifecycle management of these assets
Prerequisites
-
Access to OpenShift Dev Spaces
-
Automation Controller and Automation Hub
-
Windows managed host
-
Content collection and playbook created
1. Introduction: The Role of Private Automation Hub
A Private Automation Hub (PAH) acts as a central repository containing curated and trusted automation content. It allows you to manage, share, and control access to a curated set of Execution Environments and Ansible Content Collections.
1.1: Importance of Private Automation Hub
Private Automation Hub provides several key benefits for enterprise automation:
-
Centralized Control: A single source of truth for all your certified automation content.
-
Security & Trust: Ensures that teams are using approved and vetted collections and EEs.
-
Dependency Management: Simplifies dependency resolution by providing a private, trusted source for collections.
-
Scalability: Enables the distribution of automation content across large organizations.
2. Lab Setup: Configuring Your Environment
First, let’s configure the steps that your Dev Spaces environment needs to communicate with your Private Automation Hub.
2.1: Configure Ansible to Use PAH via Environment Variables
Instead of creating an ansible.cfg configuration file with your secret token that is used to communicate with PAH, we will set environment variables. This is a more secure practice for local development as it prevents tokens from being accidentally committed to source control.
2.1.1: Obtaining Your PAH API Token
Utilize the following steps to obtain your PAH API token:
-
Launch the Private Automation Hub web interface and login using the credentials from the Environment Details page.
-
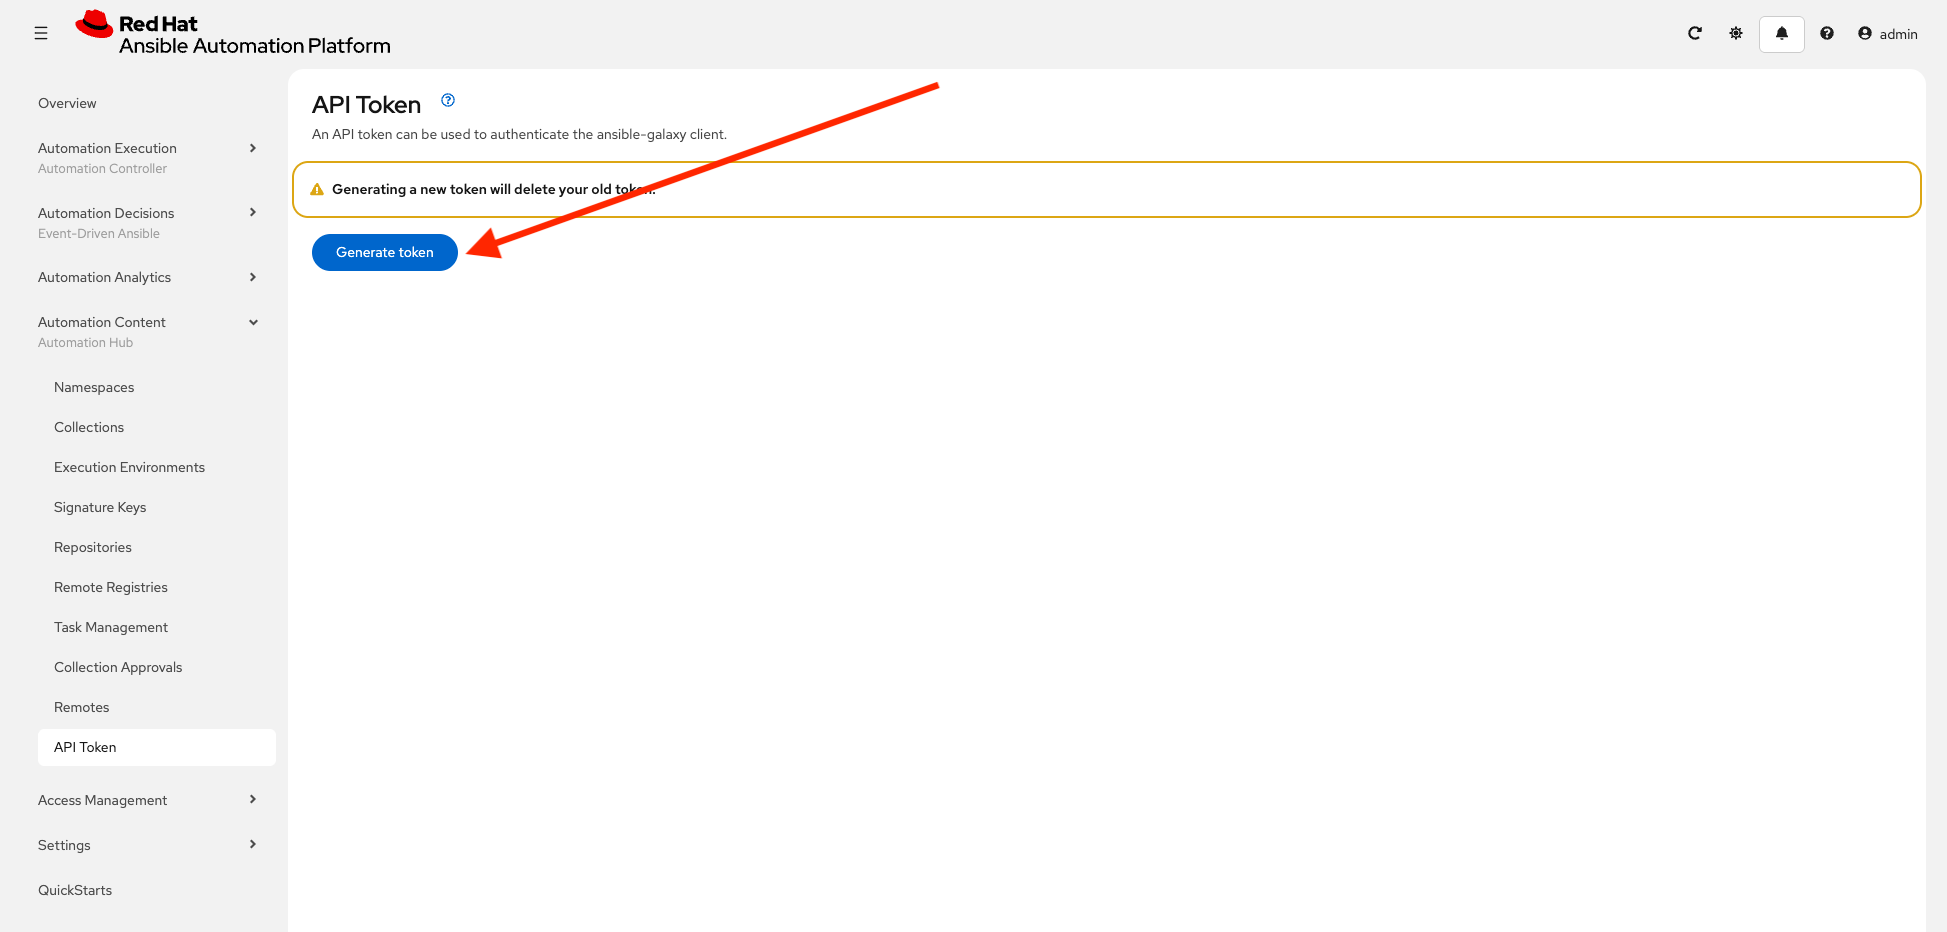
From the navigation menu on the left, expand Automation Content and click on API Token.

-
On the API Token page, click the Generate token button. Your API token will be displayed.
-
Click the Copy to clipboard icon to copy it.
Make sure to store the token securely, as it will not be displayed again. Also note that this is your token for Private Automation Hub, it should be around 40 characters. This is completely different from the UPSTREAM_CONSOLE_HUB_TOKEN obtained in the previous lab used to communicate upstream with console.redhat.com. This token is used to communicate with your specific lab Private Automation Hub.
Step 2.1.3: Set Environment Variables
In your Dev Spaces terminal, create a file containing the following variables. These will configure ansible-galaxy and ansible-builder to use your PAH instance instead of upstream to pull and push collections and execution environments.
-
Create a file called
set_pah_vars.envin your/projects/env/directory with the following contents. Be sure to use your PAH API token created previously:Replace YOUR_PAH_API_TOKEN below with the personal API token you just copied from PAH. /projects/env/set_pah_vars.env# This file contains configuration variables and is intended to be sourced, not executed. # This is your unique token from Private Automation hub export PAH_API_TOKEN=YOUR_PAH_API_TOKEN # Set your AAP web URL used throughout the rest of the vars export AAP_CONTROLLER_WEB_URL={aap_controller_web_url} # Set the list of servers Ansible should know about export ANSIBLE_GALAXY_SERVER_LIST=published,certified,validated,community # Configure the 'published' repository export ANSIBLE_GALAXY_SERVER_PUBLISHED_URL=${AAP_CONTROLLER_WEB_URL}/pulp_ansible/galaxy/published/ export ANSIBLE_GALAXY_SERVER_PUBLISHED_TOKEN=${PAH_API_TOKEN} # Configure the 'certified' repository export ANSIBLE_GALAXY_SERVER_CERTIFIED_URL=${AAP_CONTROLLER_WEB_URL}/pulp_ansible/galaxy/rh-certified/ export ANSIBLE_GALAXY_SERVER_CERTIFIED_TOKEN=${PAH_API_TOKEN} # Configure the 'validated' repository export ANSIBLE_GALAXY_SERVER_VALIDATED_URL=${AAP_CONTROLLER_WEB_URL}/pulp_ansible/galaxy/validated/ export ANSIBLE_GALAXY_SERVER_VALIDATED_TOKEN=${PAH_API_TOKEN} # Configure the 'community' repository export ANSIBLE_GALAXY_SERVER_COMMUNITY_URL=${AAP_CONTROLLER_WEB_URL}/pulp_ansible/galaxy/community/ export ANSIBLE_GALAXY_SERVER_COMMUNITY_TOKEN=${PAH_API_TOKEN} # Show loaded variables printenv | grep ANSIBLEAlso create a corresponding file named unset_pah_vars.envto clear these variables for any troubleshooting purposes:/projects/env/unset_pah_vars.env# This is only needed to switch between upstream Automation Hub and PAH # Clears all the following variables: unset PAH_API_TOKEN unset ANSIBLE_GALAXY_SERVER_LIST unset ANSIBLE_GALAXY_SERVER_PUBLISHED_URL unset ANSIBLE_GALAXY_SERVER_PUBLISHED_TOKEN unset ANSIBLE_GALAXY_SERVER_CERTIFIED_URL unset ANSIBLE_GALAXY_SERVER_CERTIFIED_TOKEN unset ANSIBLE_GALAXY_SERVER_VALIDATED_URL unset ANSIBLE_GALAXY_SERVER_VALIDATED_TOKEN unset ANSIBLE_GALAXY_SERVER_COMMUNITY_URL unset ANSIBLE_GALAXY_SERVER_COMMUNITY_TOKEN # Show variables - this should be empty printenv | grep ANSIBLE -
Load these variables into your shell environment:
source /projects/env/set_pah_vars.envANSIBLE_GALAXY_SERVER_COMMUNITY_URL=${AAP_CONTROLLER_WEB_URL}/pulp_ansible/galaxy/community/ ANSIBLE_GALAXY_SERVER_PUBLISHED_URL=${AAP_CONTROLLER_WEB_URL}/pulp_ansible/galaxy/published/ ANSIBLE_GALAXY_SERVER_VALIDATED_TOKEN=YOUR_PAH_API_TOKEN ANSIBLE_GALAXY_SERVER_CERTIFIED_TOKEN=YOUR_PAH_API_TOKEN ANSIBLE_GALAXY_SERVER_COMMUNITY_TOKEN=YOUR_PAH_API_TOKEN ANSIBLE_GALAXY_SERVER_PUBLISHED_TOKEN=YOUR_PAH_API_TOKEN ANSIBLE_GALAXY_SERVER_LIST=published,certified,validated,community ANSIBLE_GALAXY_SERVER_VALIDATED_URL=${AAP_CONTROLLER_WEB_URL}/pulp_ansible/galaxy/validated/ ANSIBLE_GALAXY_SERVER_CERTIFIED_URL=${AAP_CONTROLLER_WEB_URL}/pulp_ansible/galaxy/rh-certified/
3. Publishing our Custom Collection
3.1: Prepare collection directory
This lab will prepare the /projects/lab_collection/ directory to be published to Private Automation Hub.
-
Update the
galaxy.ymlfile and removeansible.utilsfrom the list ofdependenciesto appear as follows:/projects/lab_collection/galaxy.ymldependencies: "ansible.windows": "*" "chocolatey.chocolatey": "*" "microsoft.iis": "*" "ansible.posix": "*" -
Feel free to modify the rest of the file as desired, such as author and description details.
3.2: Publishing Collections
Publishing a Collection makes it available in PAH for use in Automation Controller and other tools. To publish a collection, a namespace must exist in PAH for which the collection can be built and then published.
3.2.1: Created a namespace for the collection
Create a new Namespace in PAH.
-
Launch the Private Automation Hub web interface and login using the credentials from the Environment Details page.
-
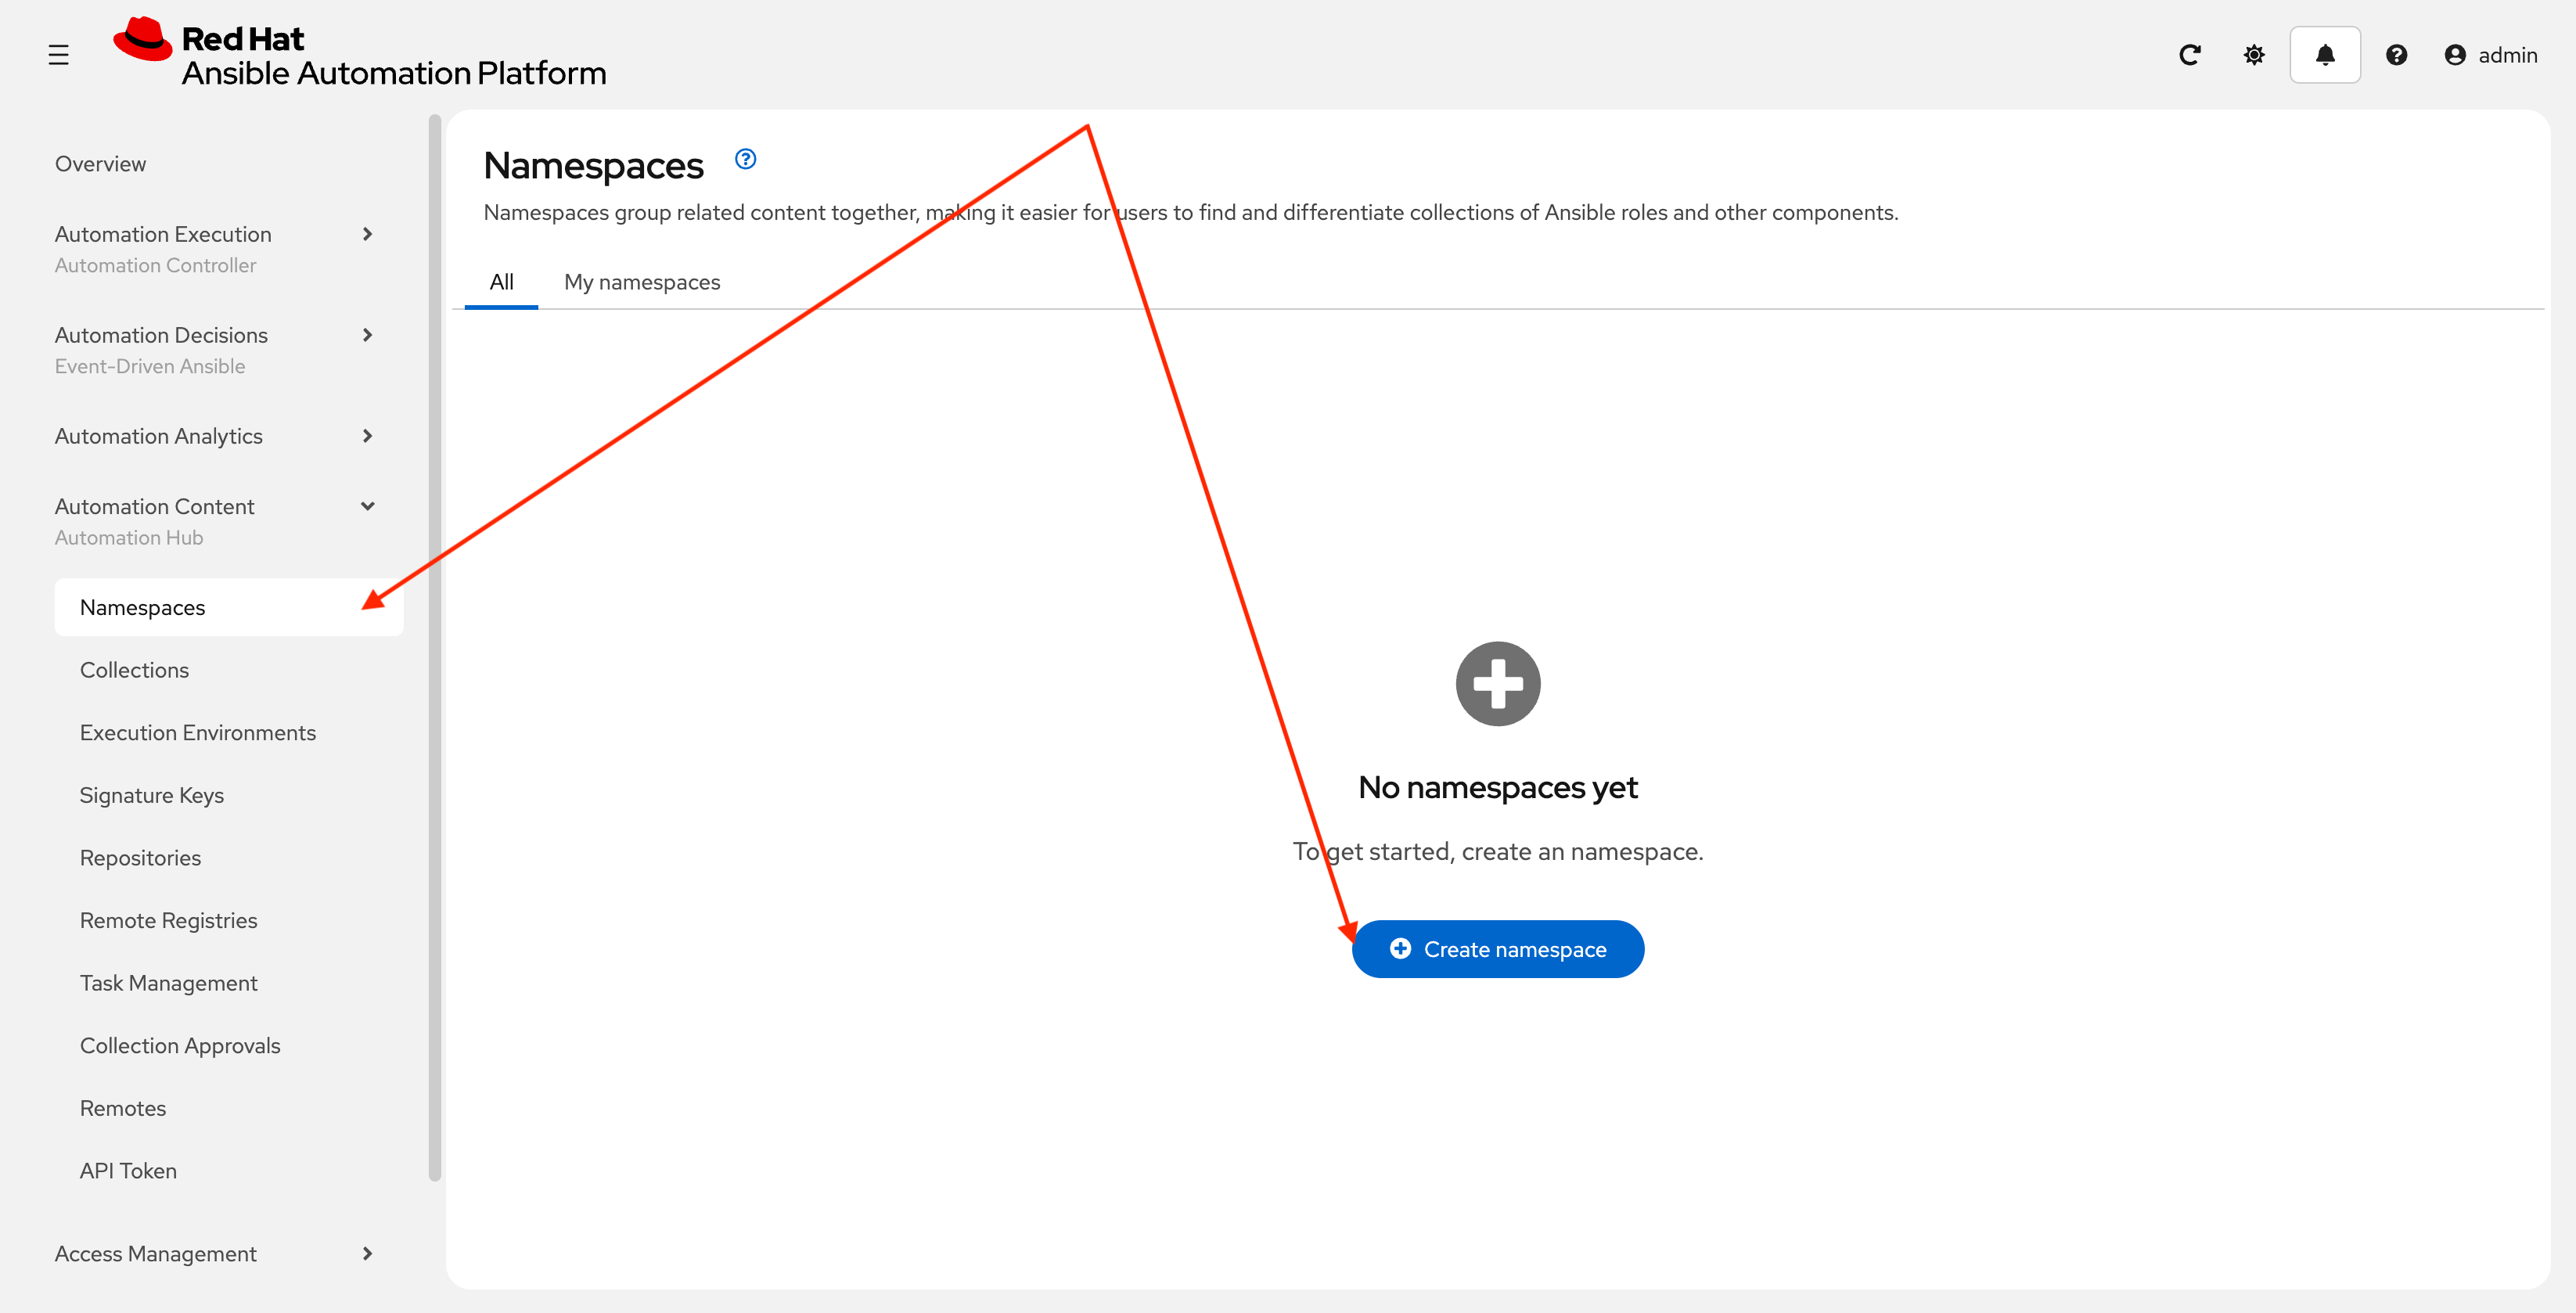
From the navigation menu on the left, expand Automation Content and click on Namespaces.
-
Click Create Namespace to create the namespace.
-
Enter
red_hat_onefor the name. The rest of the values can be left blank. Click Create namespace: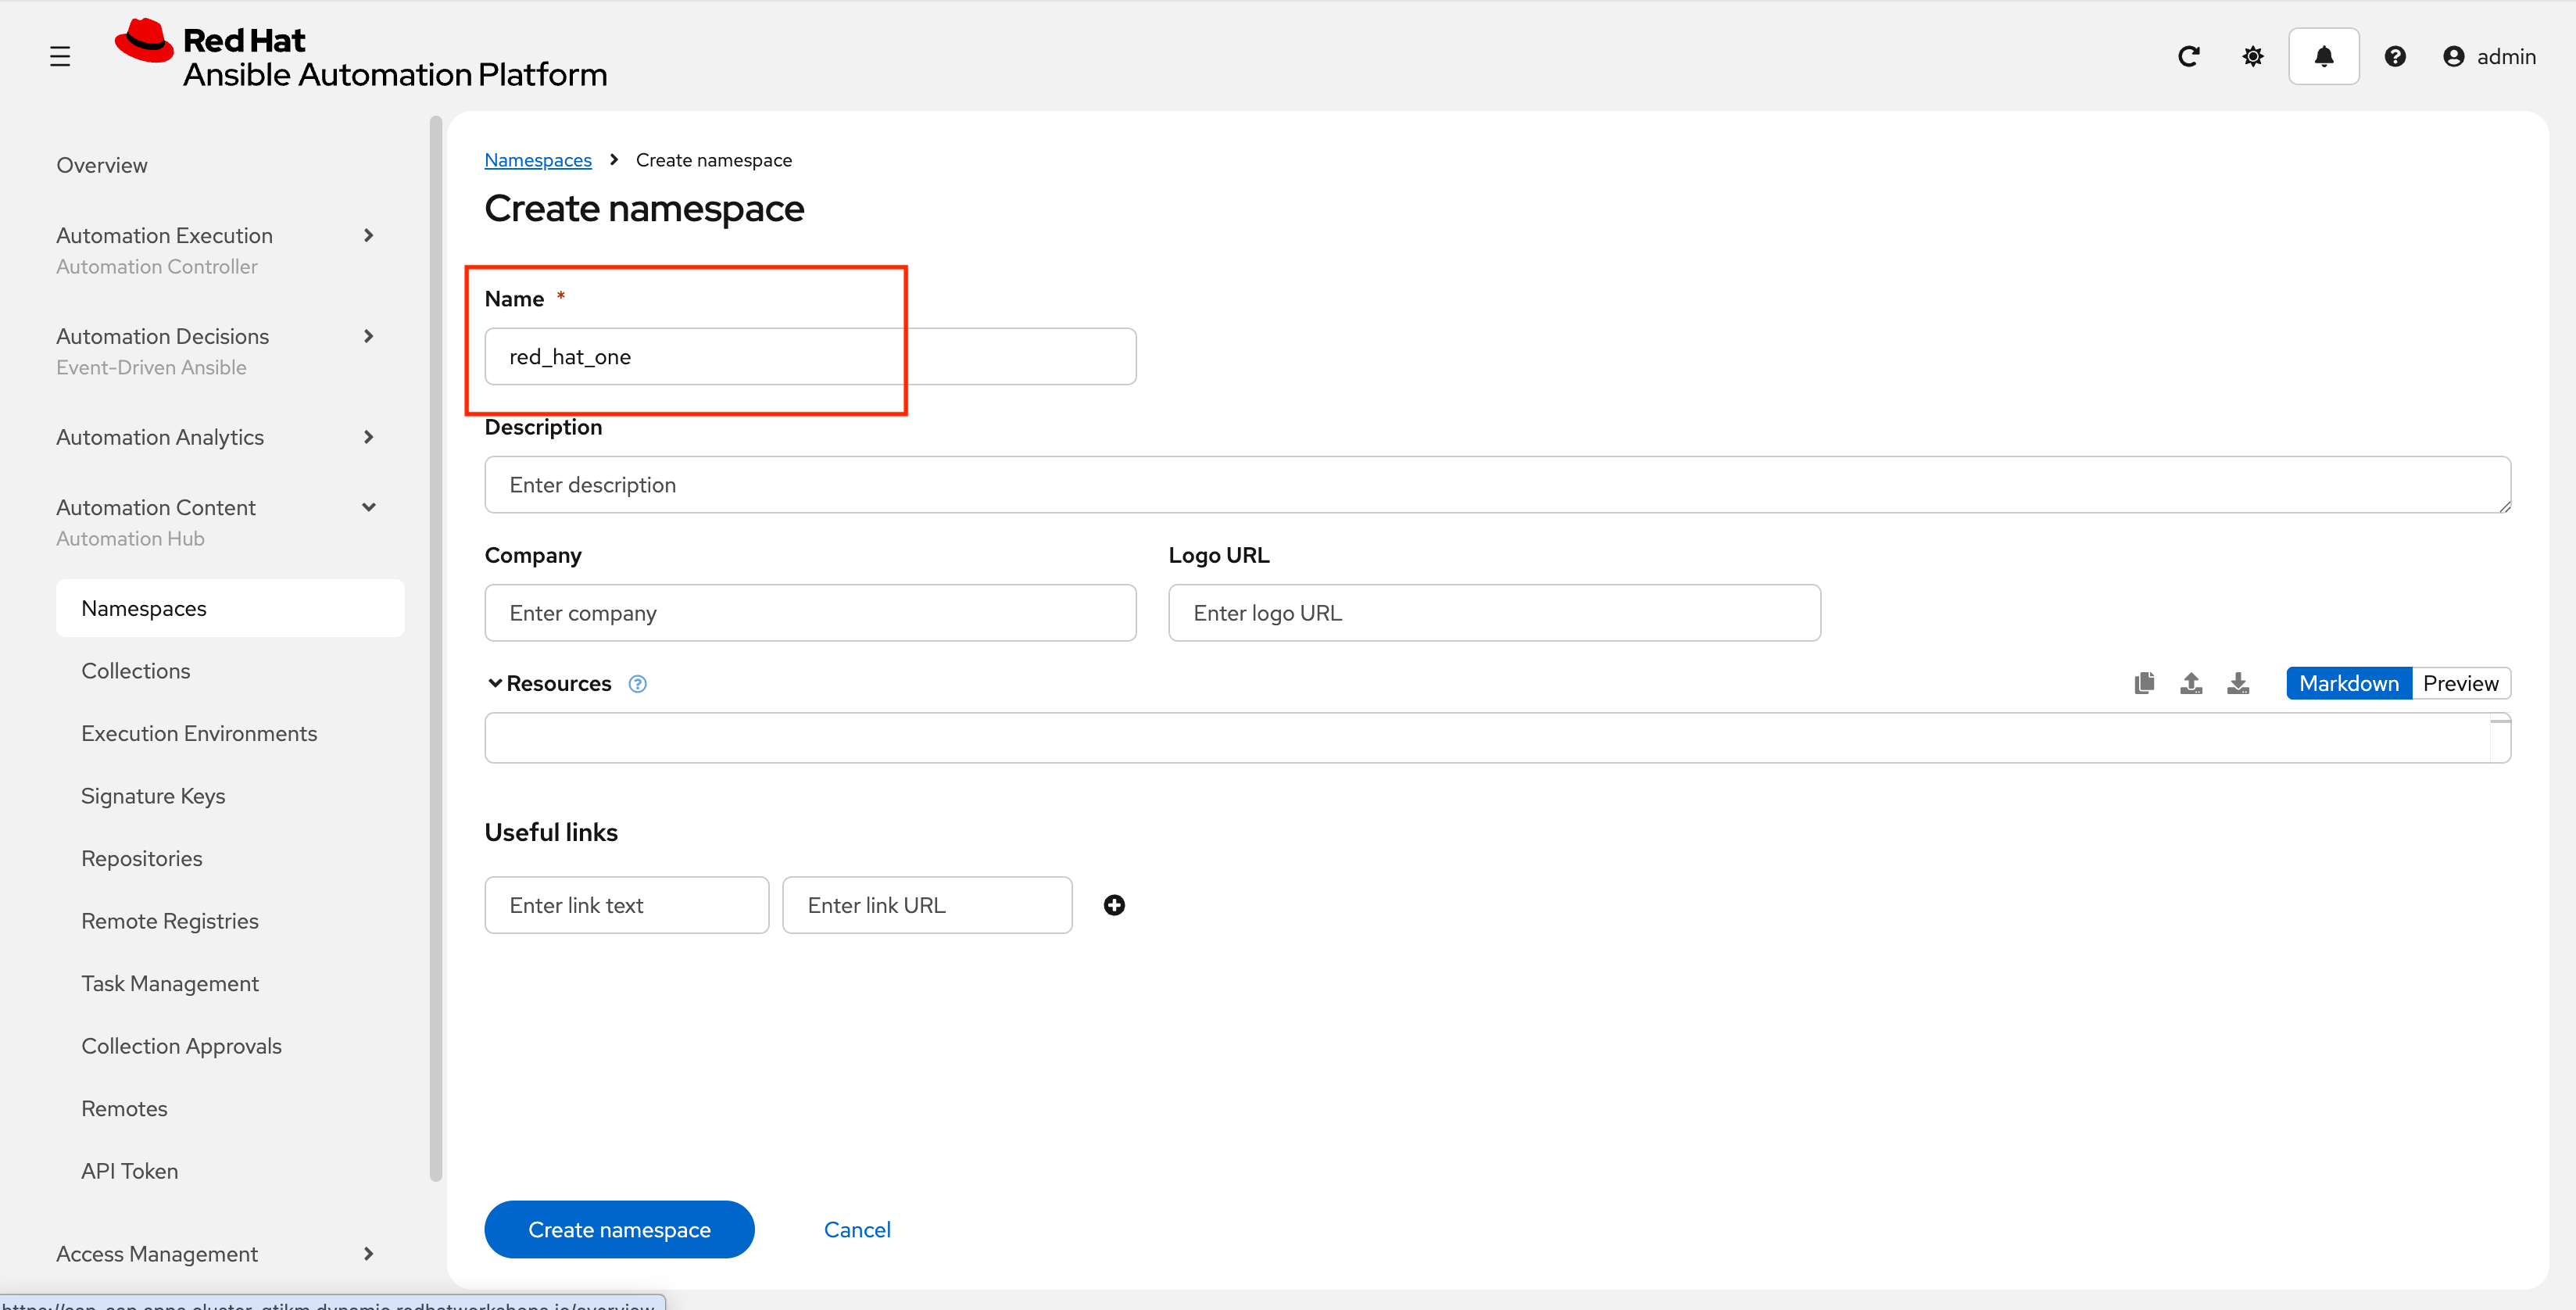
3.3: Build and Publish the Collection
Now that a namespace exists, we can build and publish our collection to PAH.
-
First ensure you are at the root of the collection in
/projects/lab_collection/cd /projects/lab_collection/ -
Build the collection with
ansible-galaxy:ansible-galaxy collection build --verboseNo config file found; using defaults Created collection for red_hat_one.super_lab at /projects/lab_collection/red_hat_one-super_lab-1.0.0.tar.gz -
Publish the collection to Private Automation Hub
ansible-galaxy collection publish \
  --server {aap_controller_web_url}/api/galaxy/ \
  red_hat_one-super_lab-1.0.0.tar.gz \
  --token ${PAH_API_TOKEN} \
  --verbose
No config file found; using defaults Publishing collection artifact '/projects/lab_collection/red_hat_one-super_lab-1.0.0.tar.gz' to cmd_arg https://aap-aap.apps.cluster-gtjkm.dynamic.redhatworkshops.io/api/galaxy/ Collection has been published to the Galaxy server cmd_arg https://aap-aap.apps.cluster-gtjkm.dynamic.redhatworkshops.io/api/galaxy/ Waiting until Galaxy import task https://aap-aap.apps.cluster-gtjkm.dynamic.redhatworkshops.io/api/galaxy/v3/imports/collections/019bc27e-b50e-70f8-bbc8-6b2590228801/ has completed Collection has been successfully published and imported to the Galaxy server cmd_arg https://aap-aap.apps.cluster-gtjkm.dynamic.redhatworkshops.io/api/galaxy/You can safely ignore any warnings that may be emitted during the publishing process, but as a bonus feel free to fix them. -
Once your collection has been published, it must be approved before it is available for use.
-
Launch the Private Automation Hub web interface and login using the credentials from the Environment Details page.
-
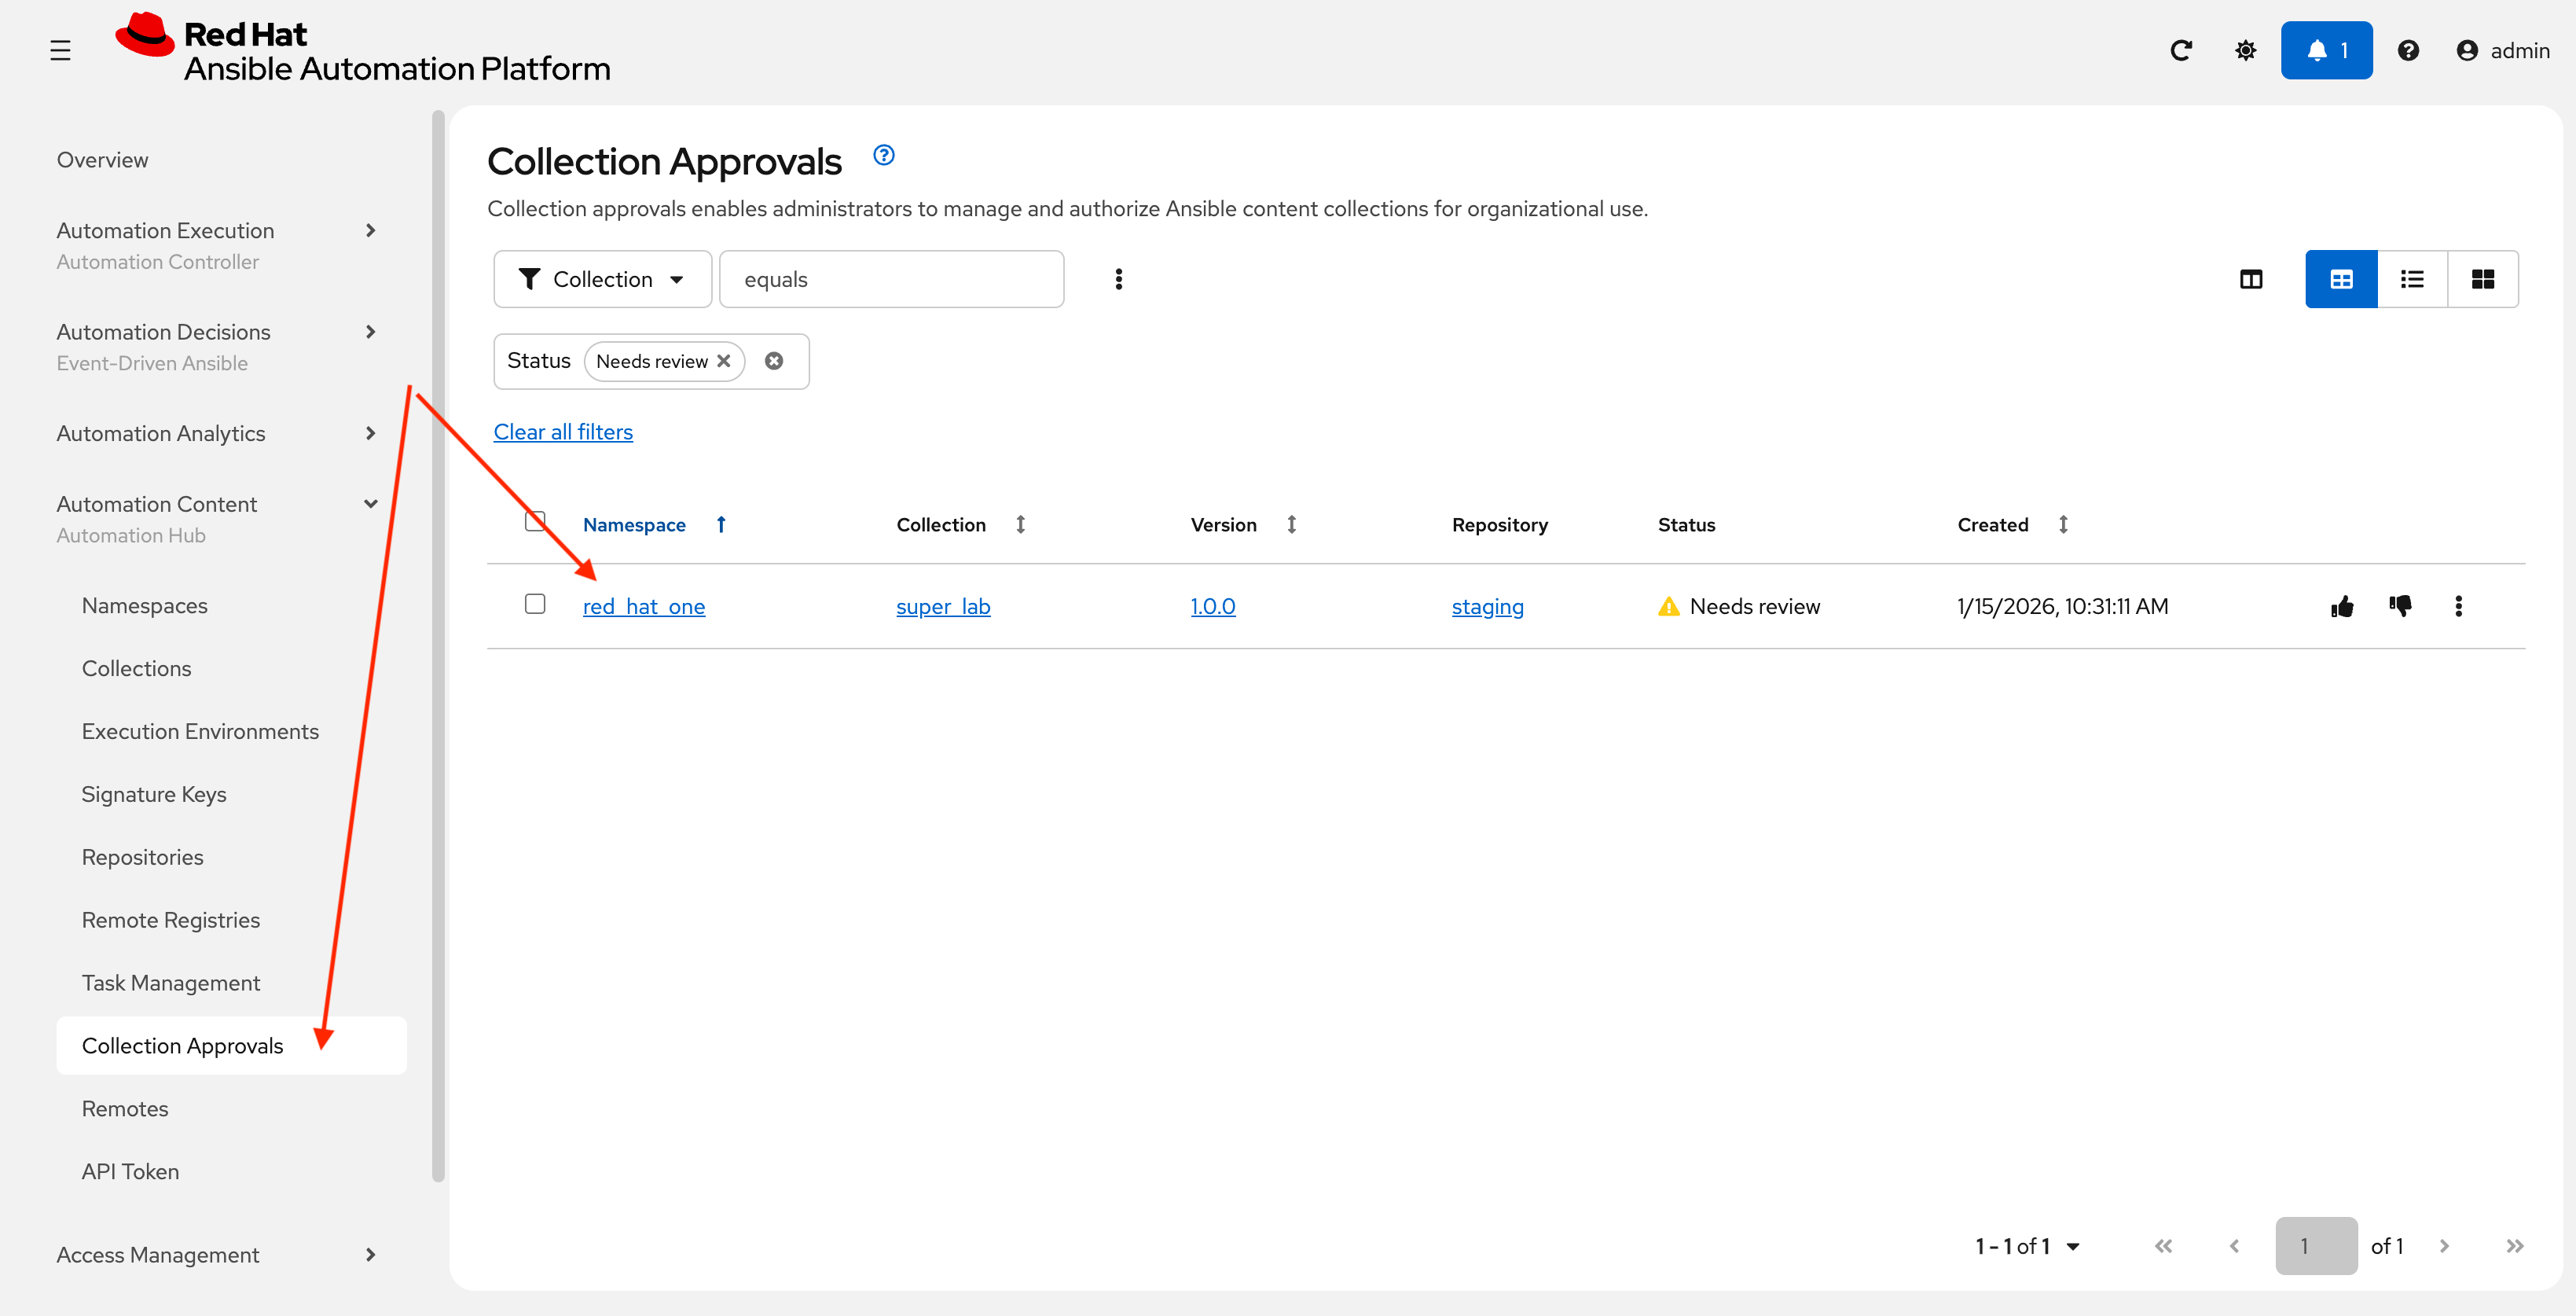
From the navigation menu on the left, expand Automation Content and click on Collection Approvals.
-
The
red_hat_one.super_labshould be listed as pending approval. Select this namespace checkbox and click the Thumbs Up icon all the way to the right to approve and sign the collection.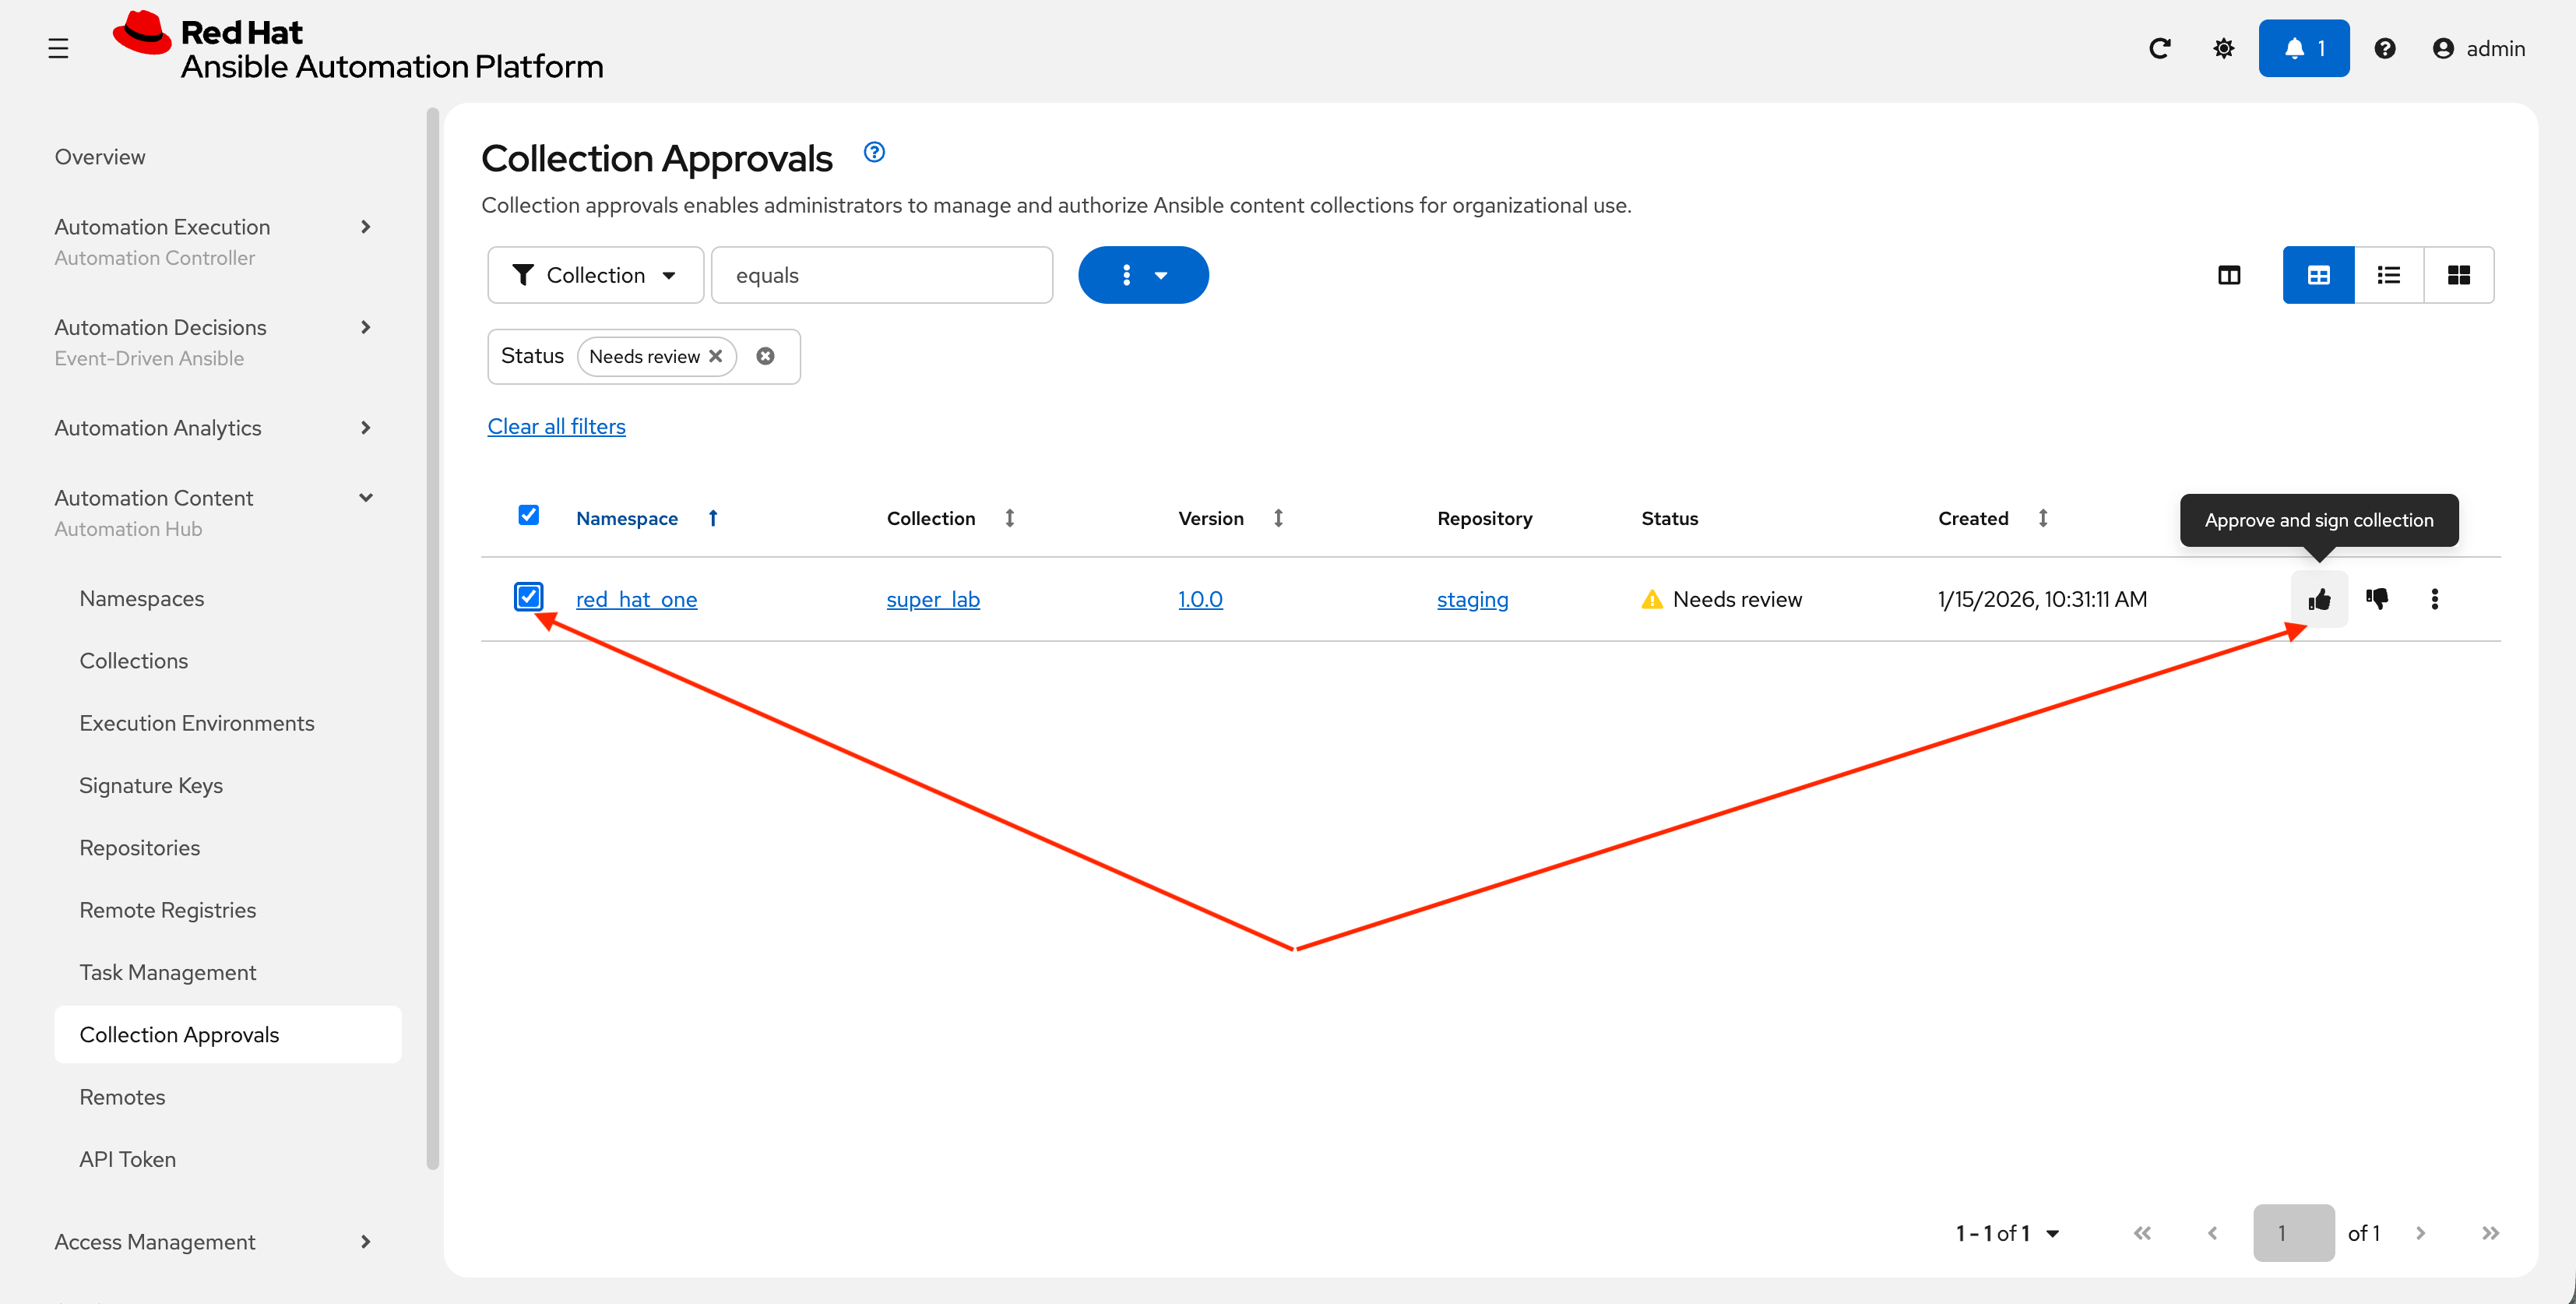
-
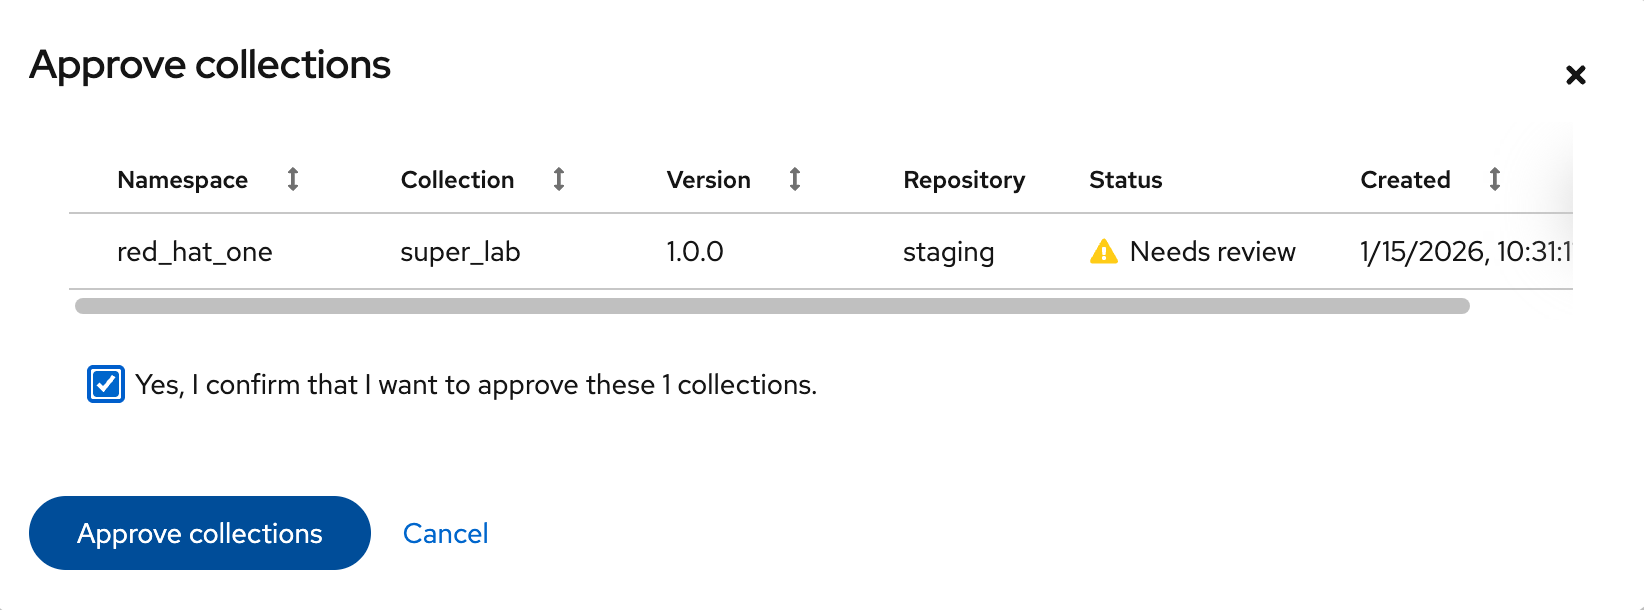
Select the Yes, I confirm that I want to approve these 1 collections. checkbox and click Approve collections button.
-
Navigate to the Collections page in PAH to verify that your collection is published and available.
-
You should see your
red_hat_one.super_labcollection listed and available for use.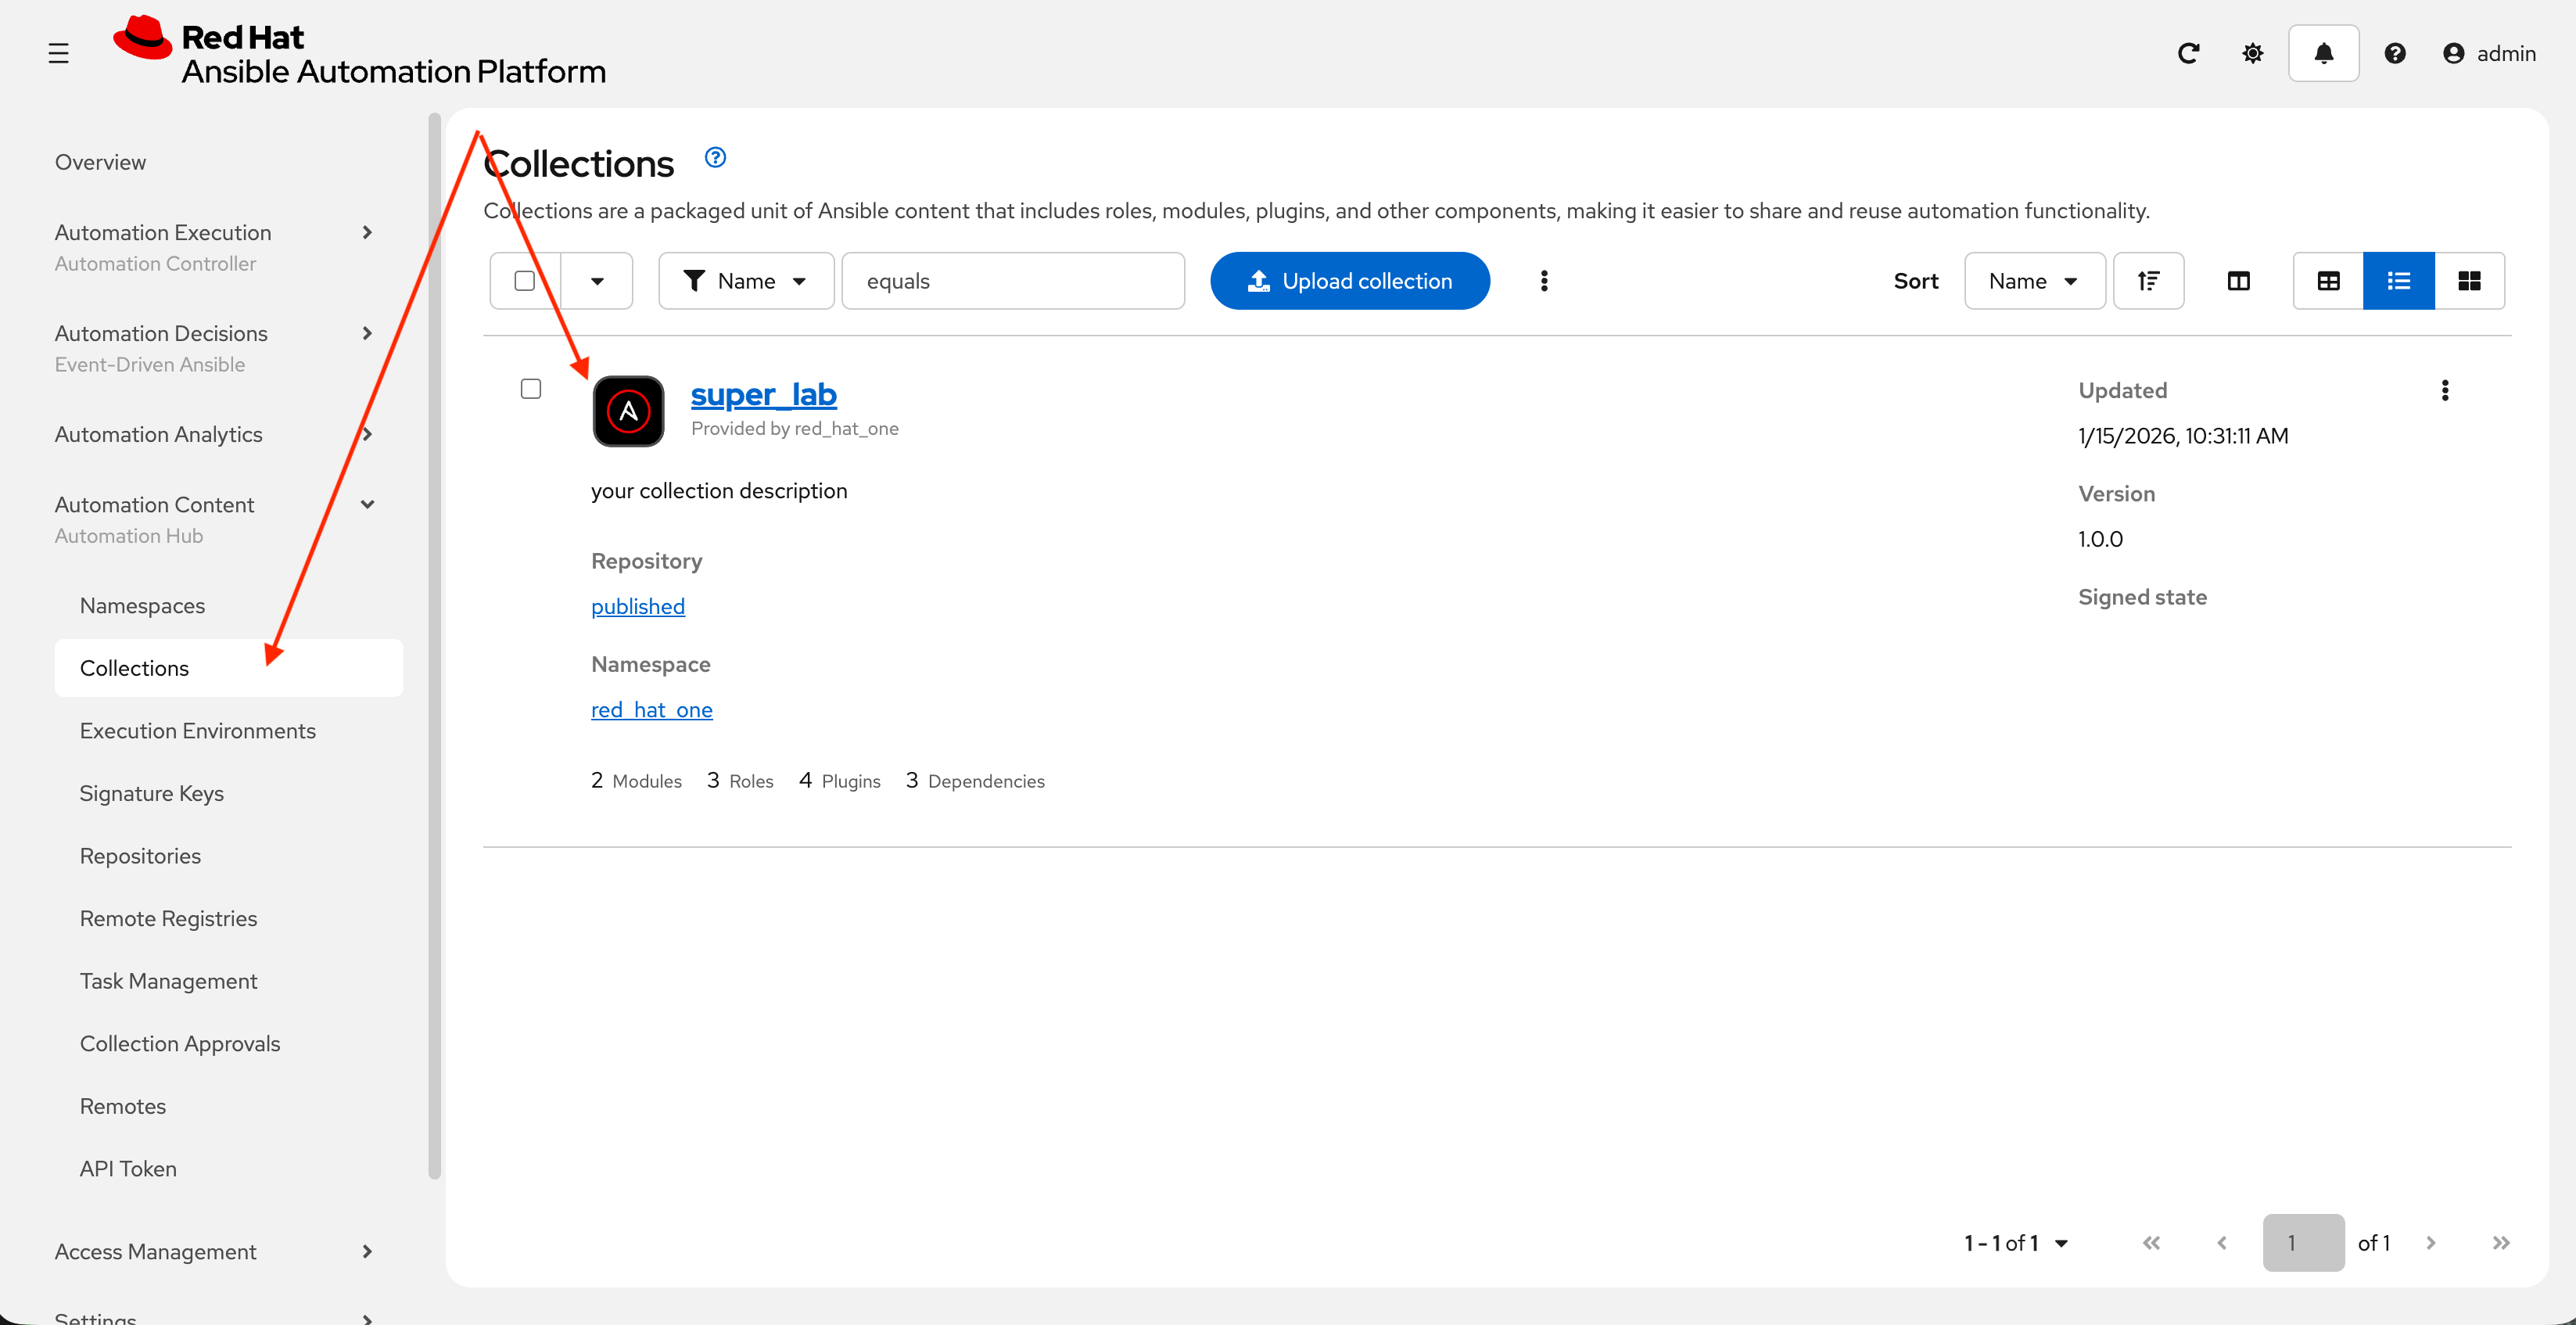
4: Syncing a Base EE from the Red Hat Registry
Before producing our own Execution Environment (EE) in subsequent steps, we’ll configure PAH to pull in a certified base image from Red Hat. Since AAP images within the Red Hat Container Registry are private, we need to configure a credential within PATH to allow for the retrieval of images.
4.1: Configure Remote Registry
-
Launch the Private Automation Hub web interface and login using the credentials from the Environment Details page.
-
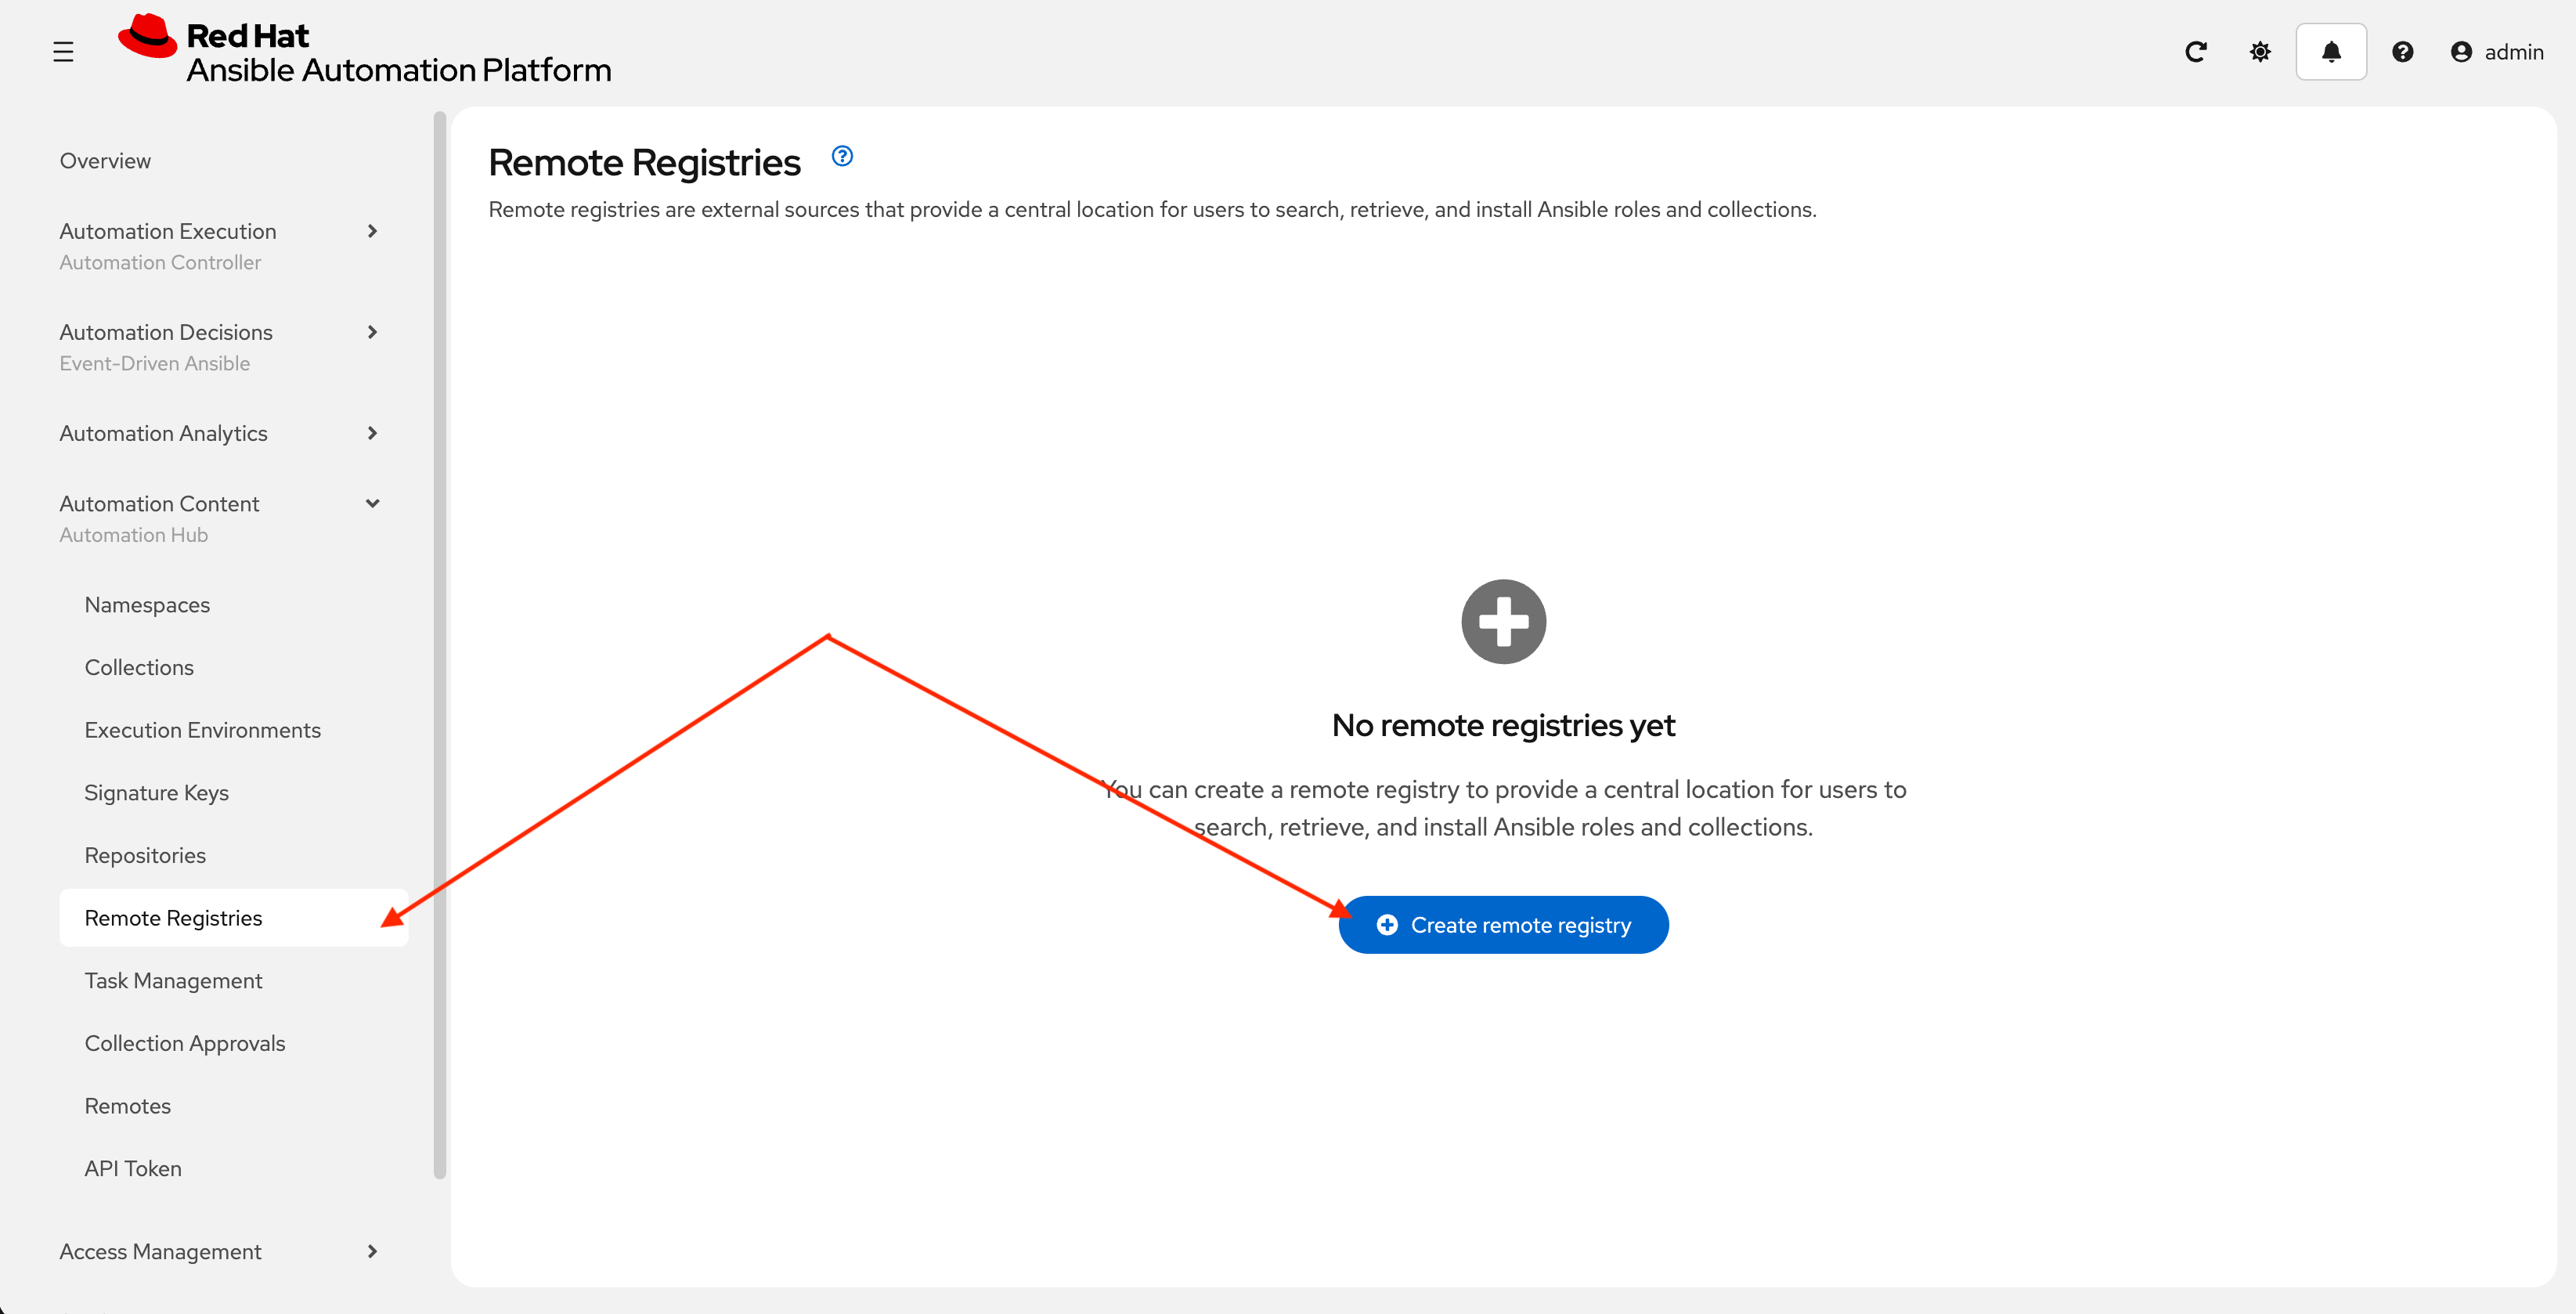
From the navigation menu on the left, expand Automation Content and click on Remote Registries.
-
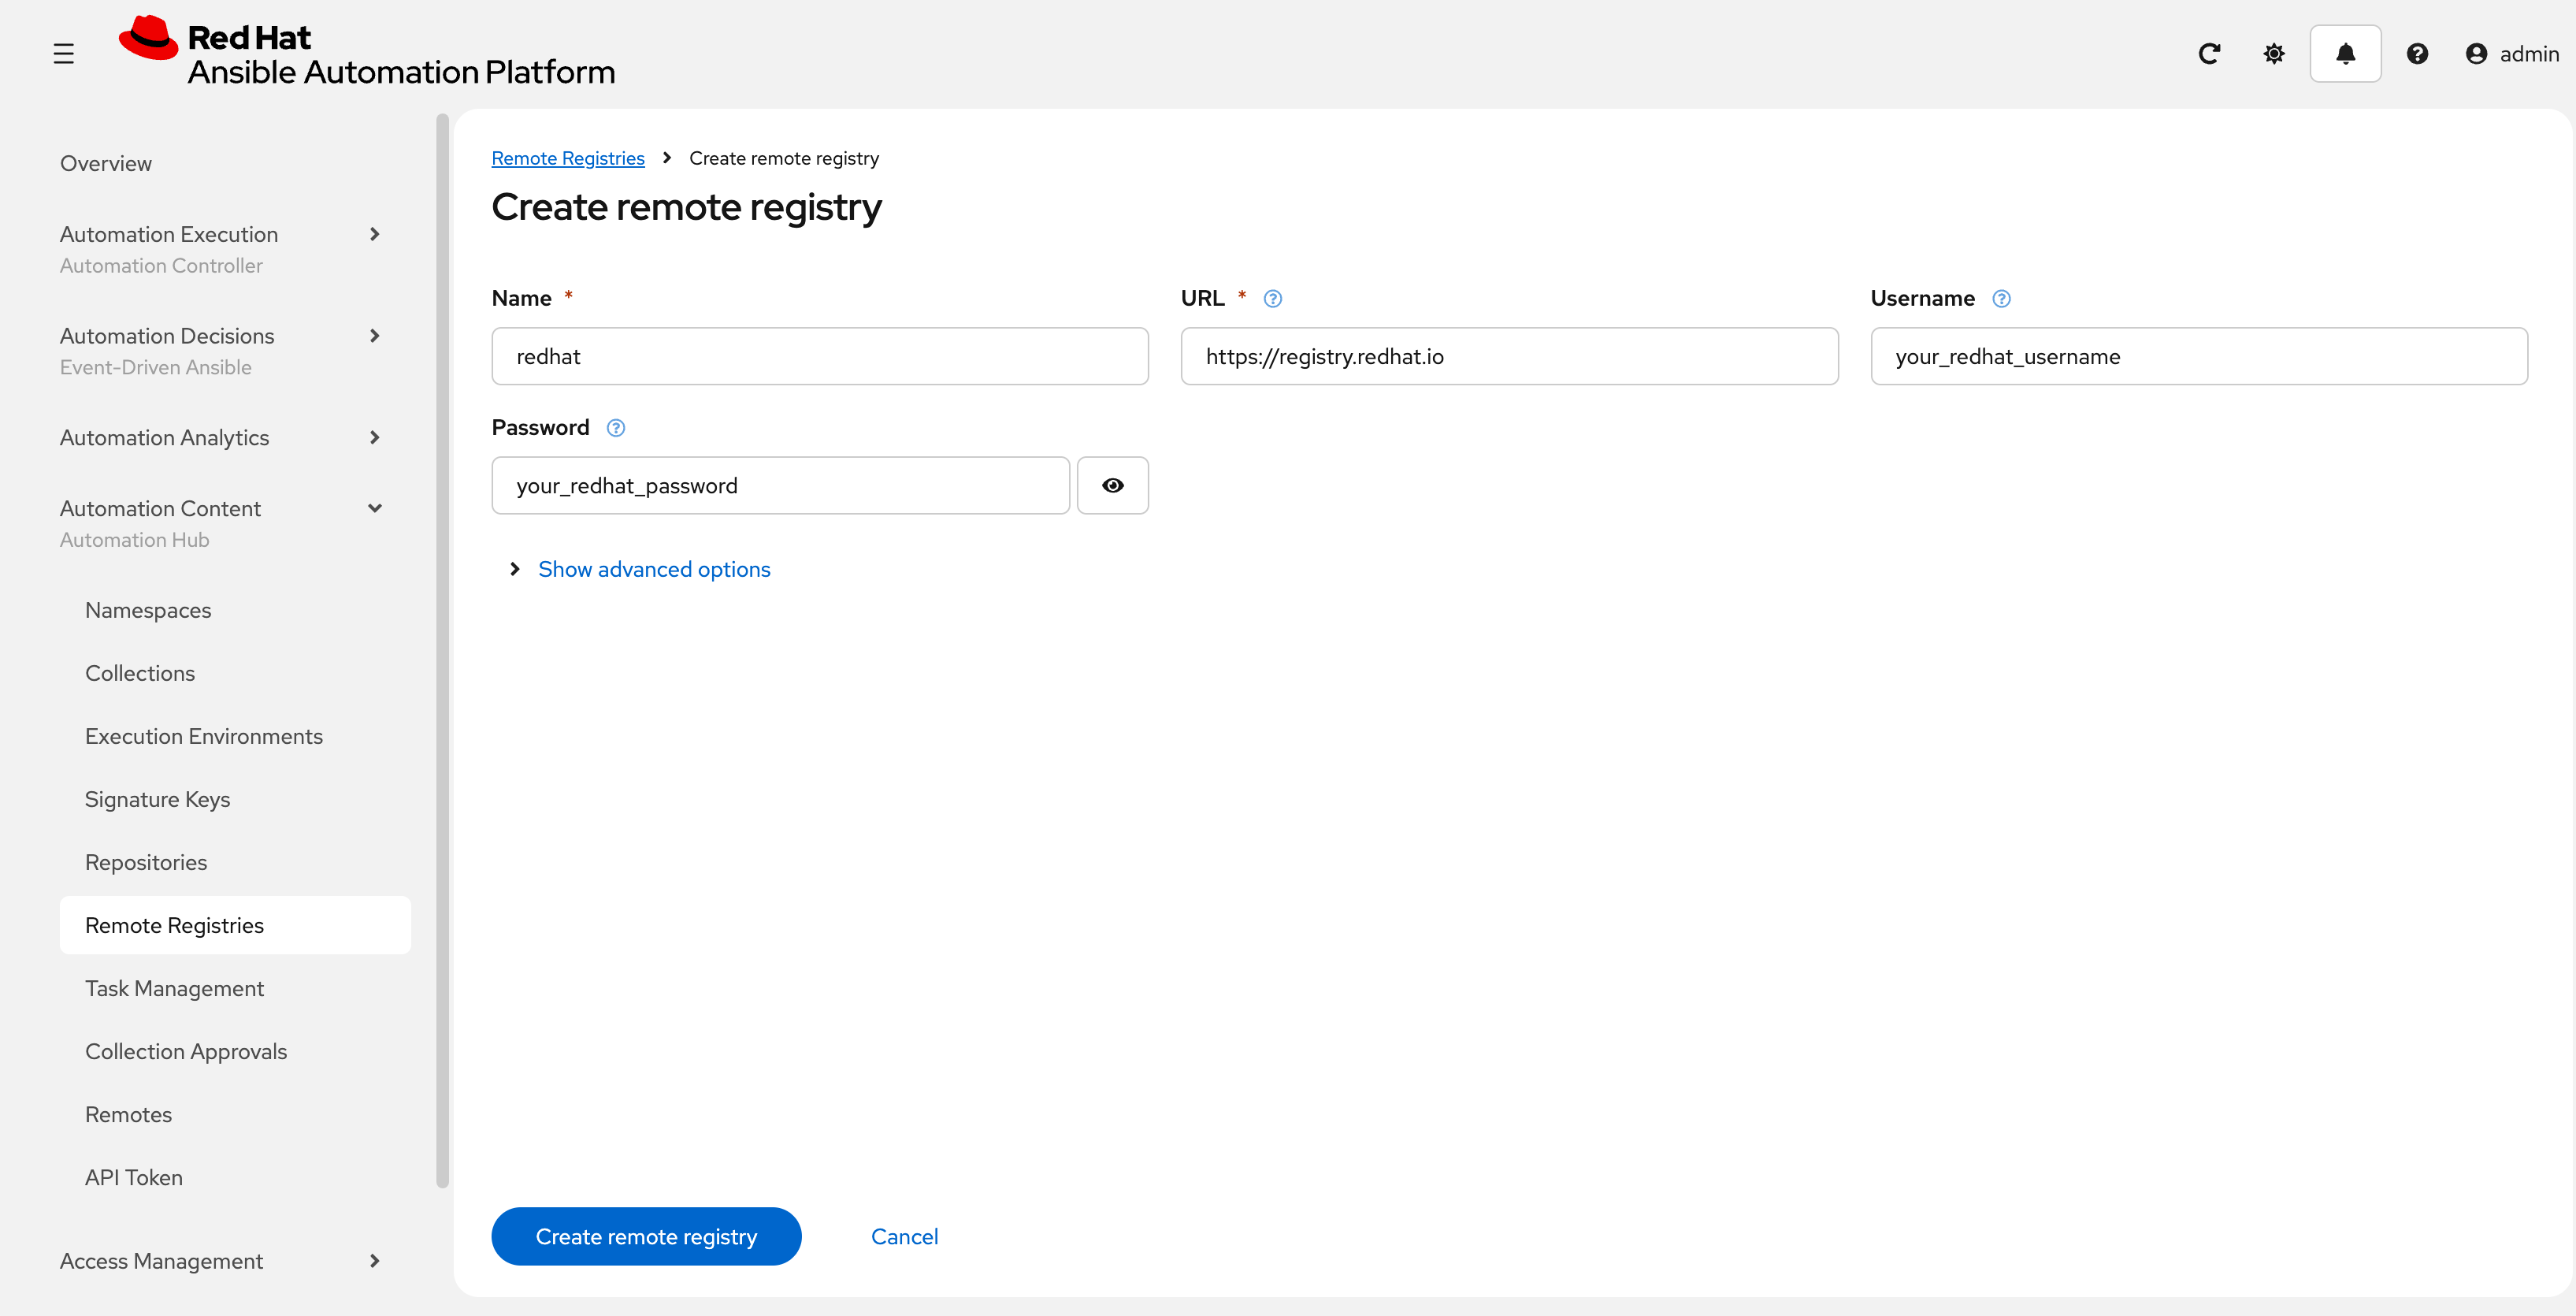
Click the Create remote registry button
-
Enter the following details on the Create Remote Registry page:
-
Name:
redhat -
Username: YOUR_REDHAT_USERNAME
-
Password: YOUR_REDHAT_PASSWORD
-
Click Create remote registry to add the new registry.
You can Create Service Account Credentials in the Red Hat Customer Portal to simplify the management and access to the Red Hat Container Catalog instead of specifying your username and password.
-
4.2: Synchronize base Execution Environment
Now that details related to the Red Hat Container Registry have been added, configure PAH to sync the ee-minimal-rhel9 image
-
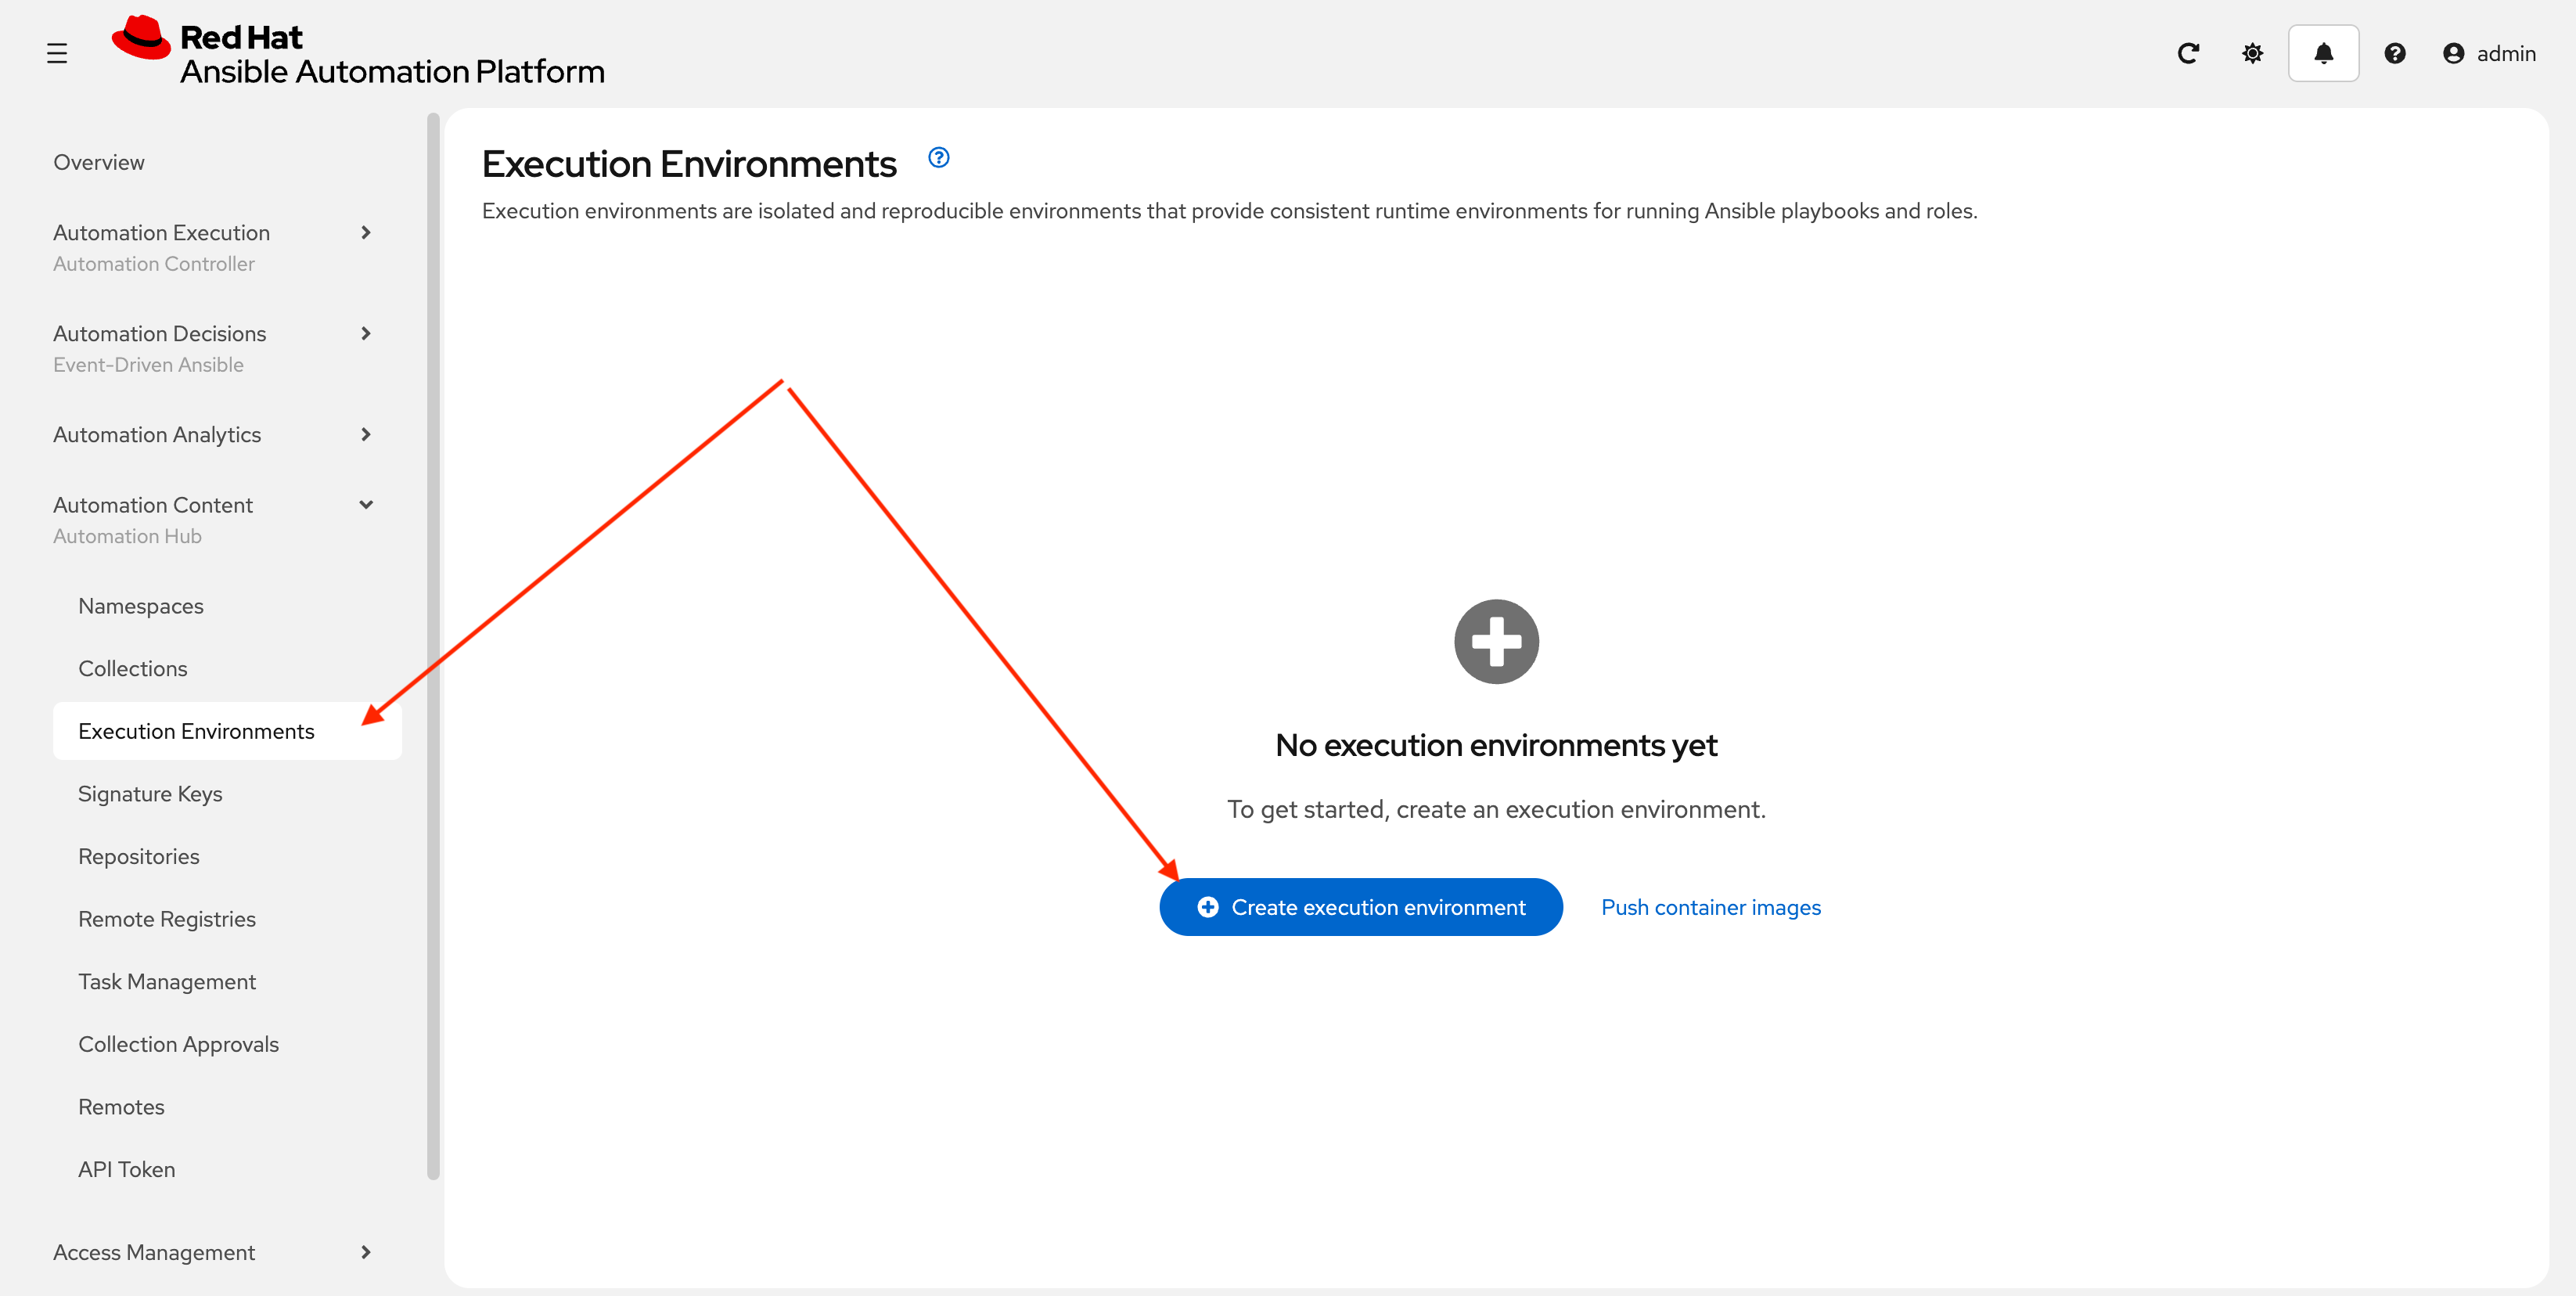
From the navigation menu on the left, expand Automation Content and click on Execution Environments.
-
Click the Create execution environment button.
-
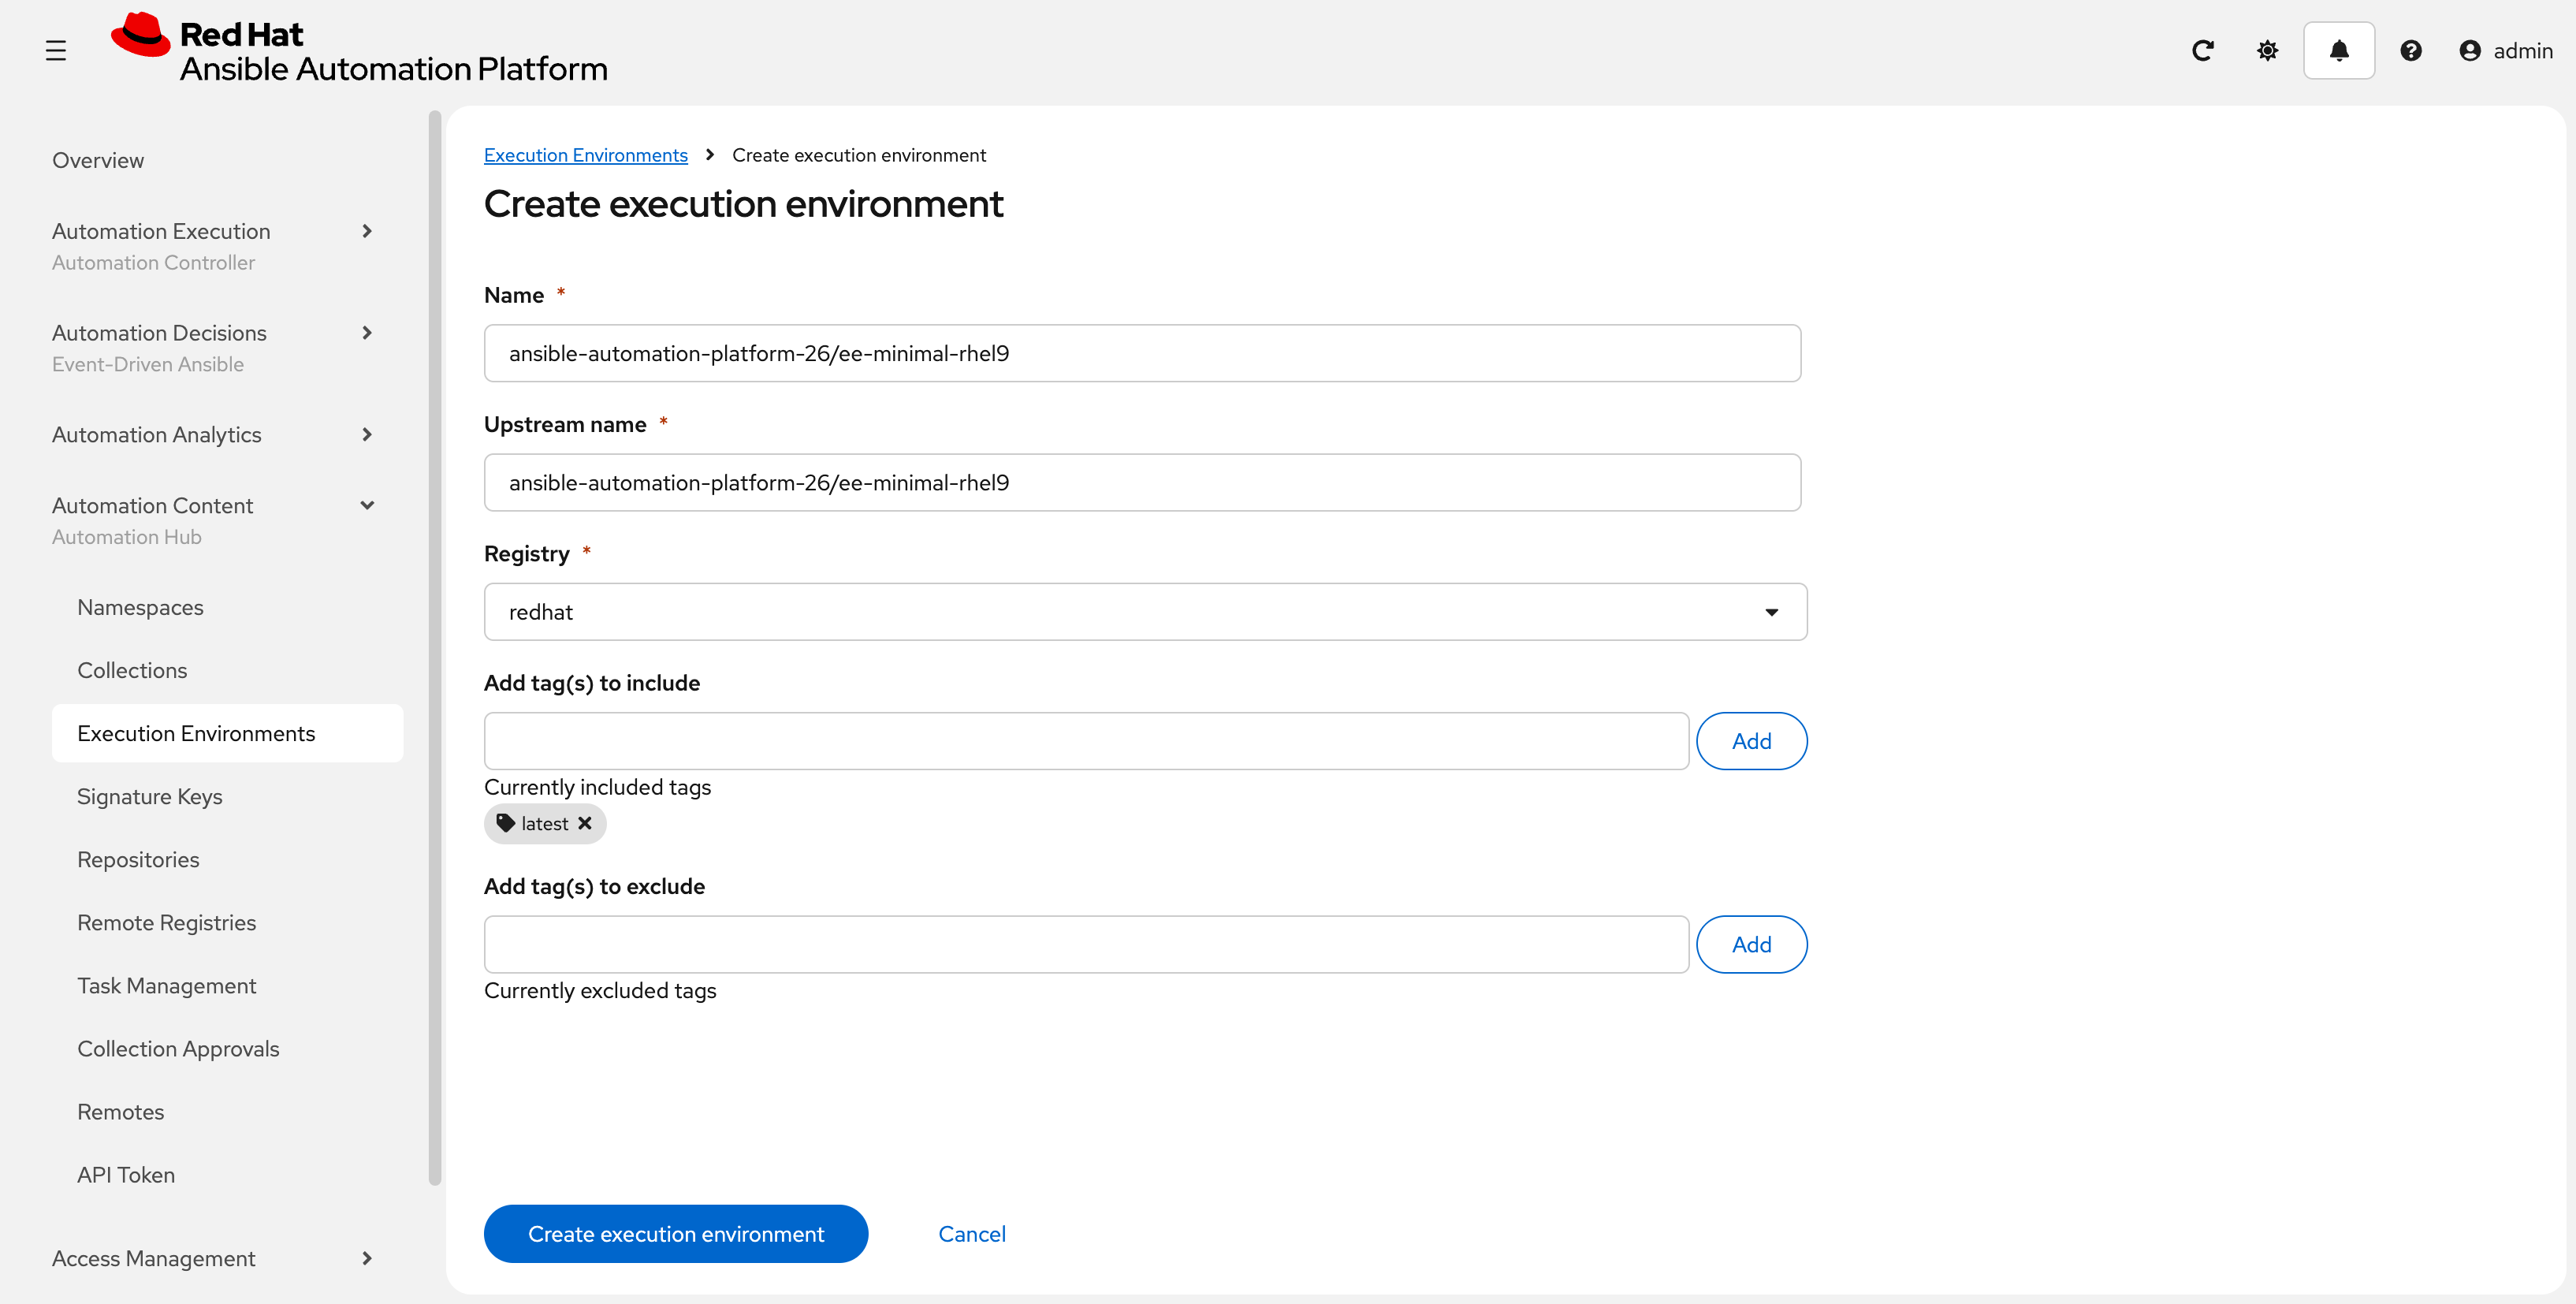
Enter the following details on the Create Execution Environment page:
-
Name:
ansible-automation-platform-26/ee-minimal-rhel9 -
Upstream Name:
ansible-automation-platform-26/ee-minimal-rhel9 -
Remote Registry: Use the drop-down to select
redhatthat was just created. -
To reduce the sync time and storage requirements, enter
latestin the Add tag(s) to include field and click Add -
Click the Create execution environment button to create the new EE.
-
-
Synchronize the Execution Environment into PAH from the Red Hat Container Registry.
-
Next to the
ansible-automation-platform-26/ee-minimal-rhel9Execution Environment, click the kebab menu (three vertical dots) on the right hand side of the entry and select Sync execution environment.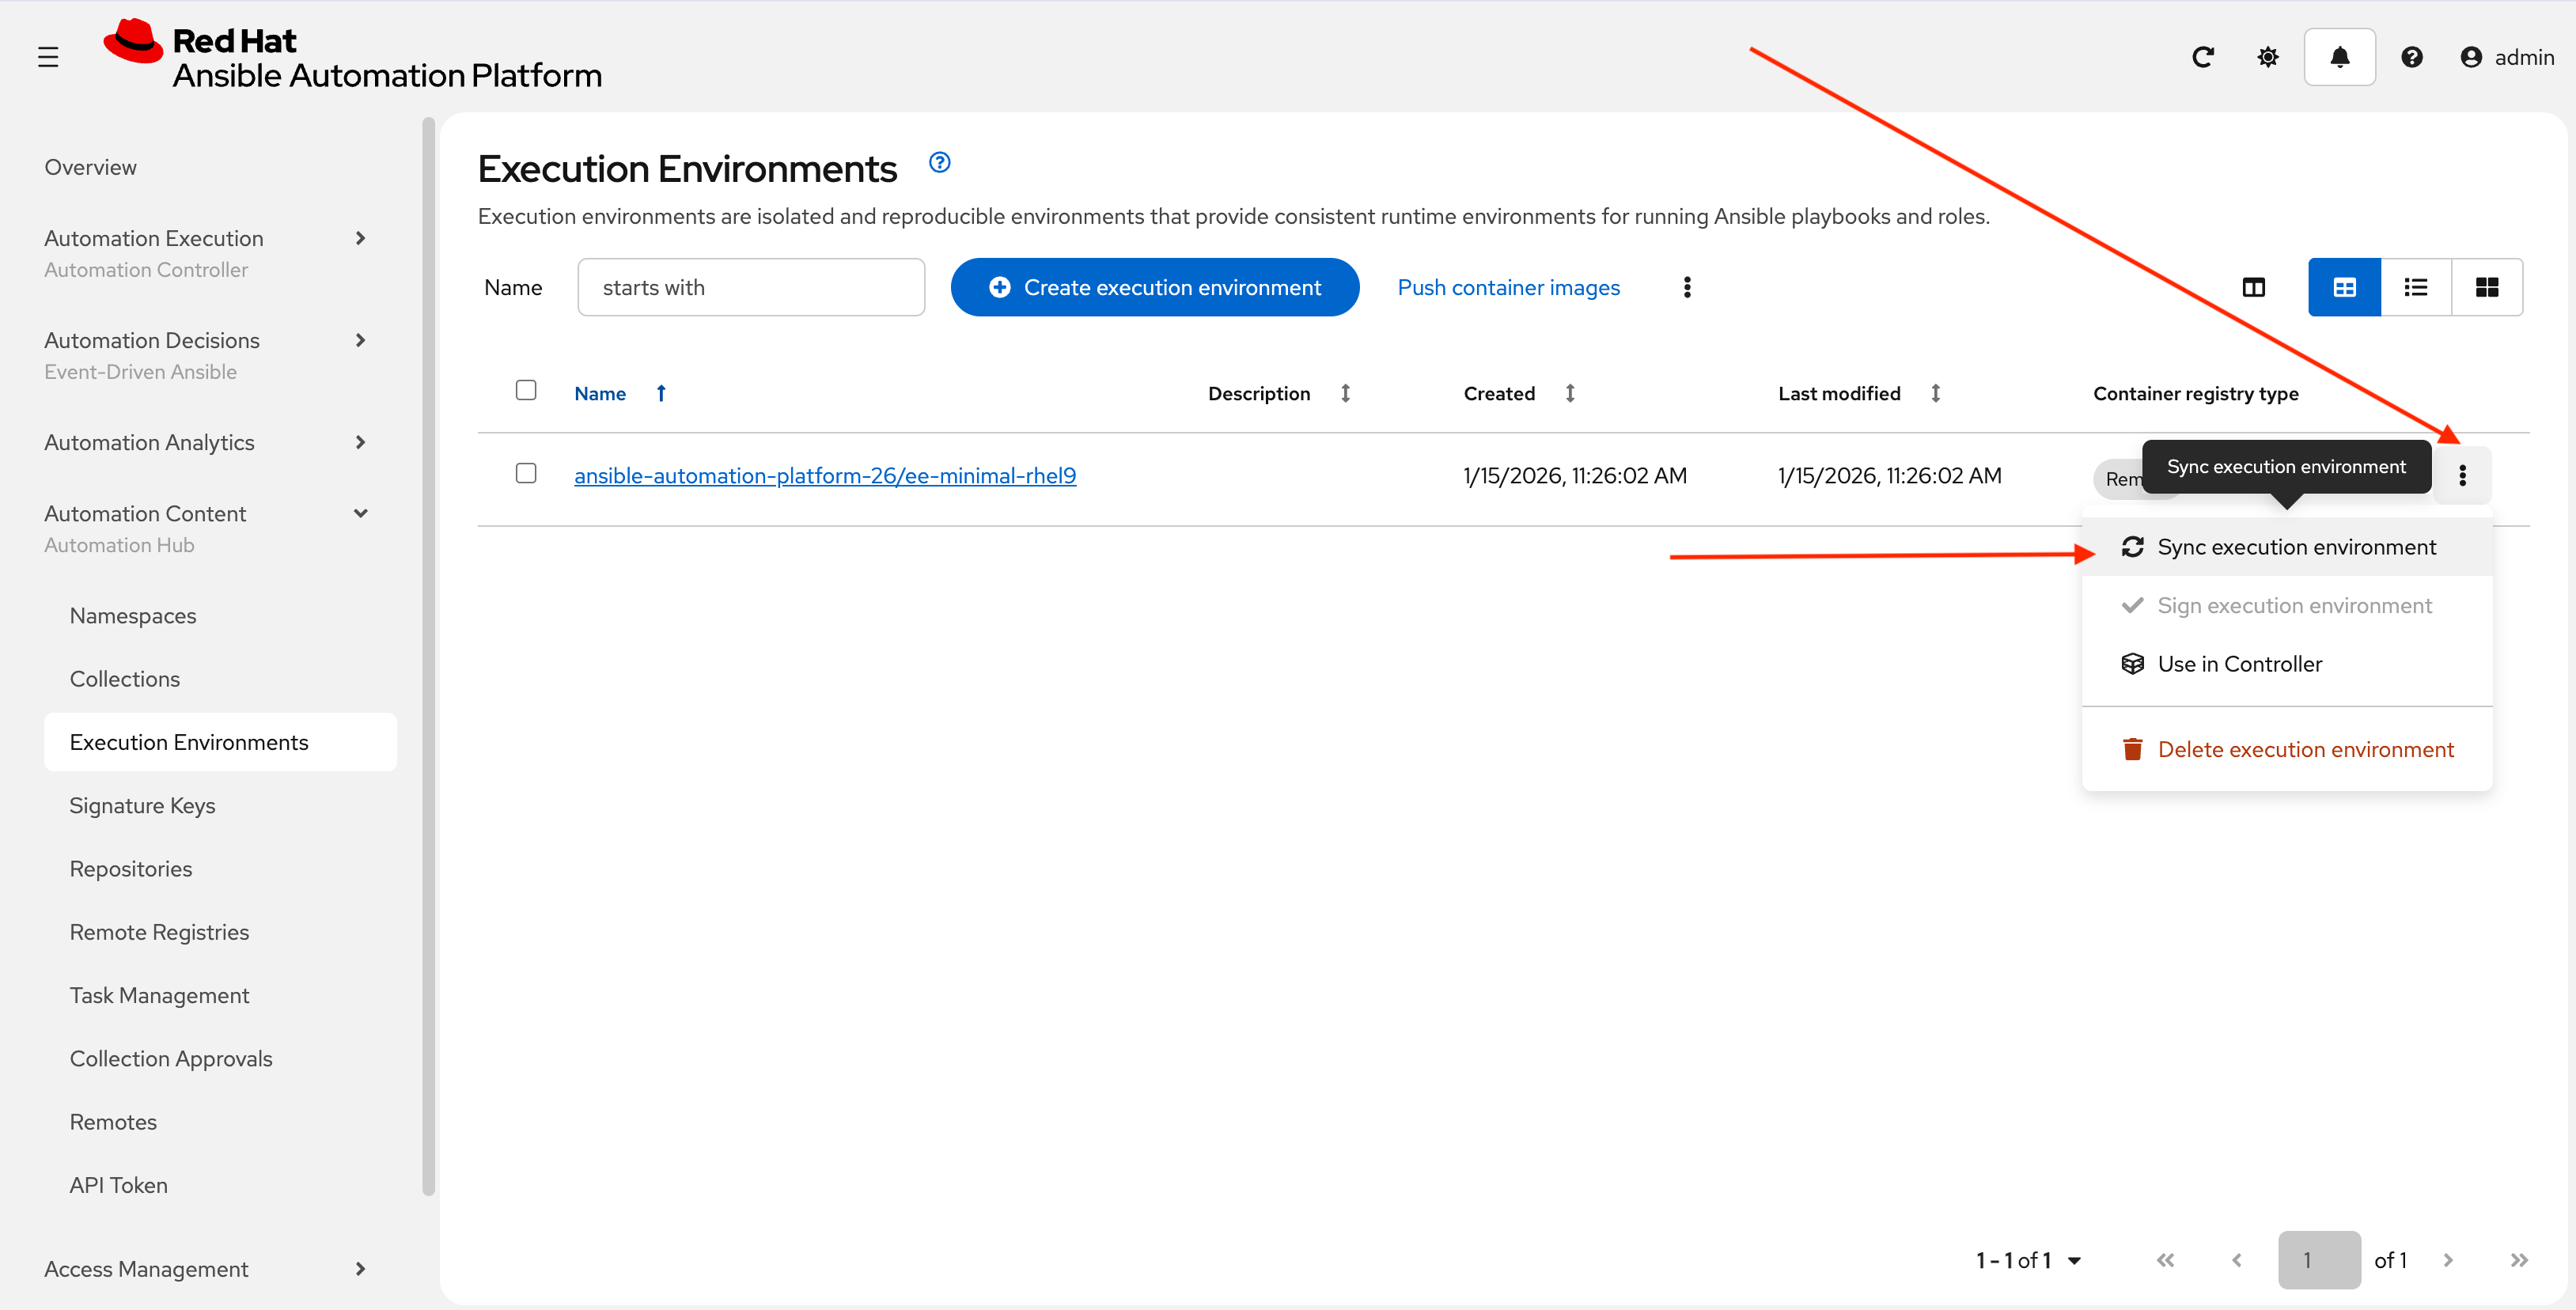
-
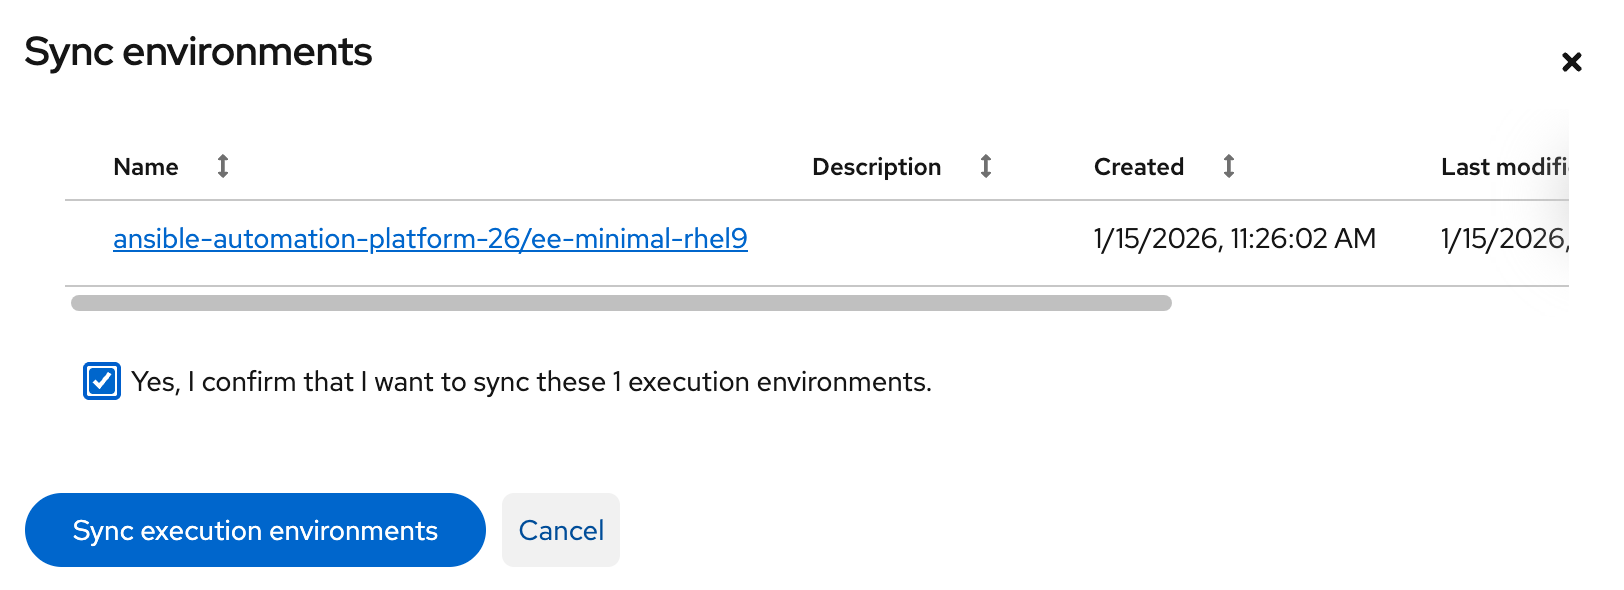
Click the checkbox next to the Yes, I confirm I want to sync these 1 execution environments. the box to confirm and click Sync execution environment.
-
Click the Sync Execution Environments button to start the synchronization process.
-
After the sync is complete, the
ee-minimal-rhel9image will be available in your Private Automation Hub instance. Feel free to explore the details of the newly synchronized Execution Environment as you see fit.
5: Syncing Collections from the Red Hat Automation Hub
The Ansible collection created previously includes dependencies that are sourced from Red Hat Automation Hub. These collections need to be synchronized into your Private Automation Hub instance to ensure that the all required collections are made available.
5.1: Synchronize required collections
-
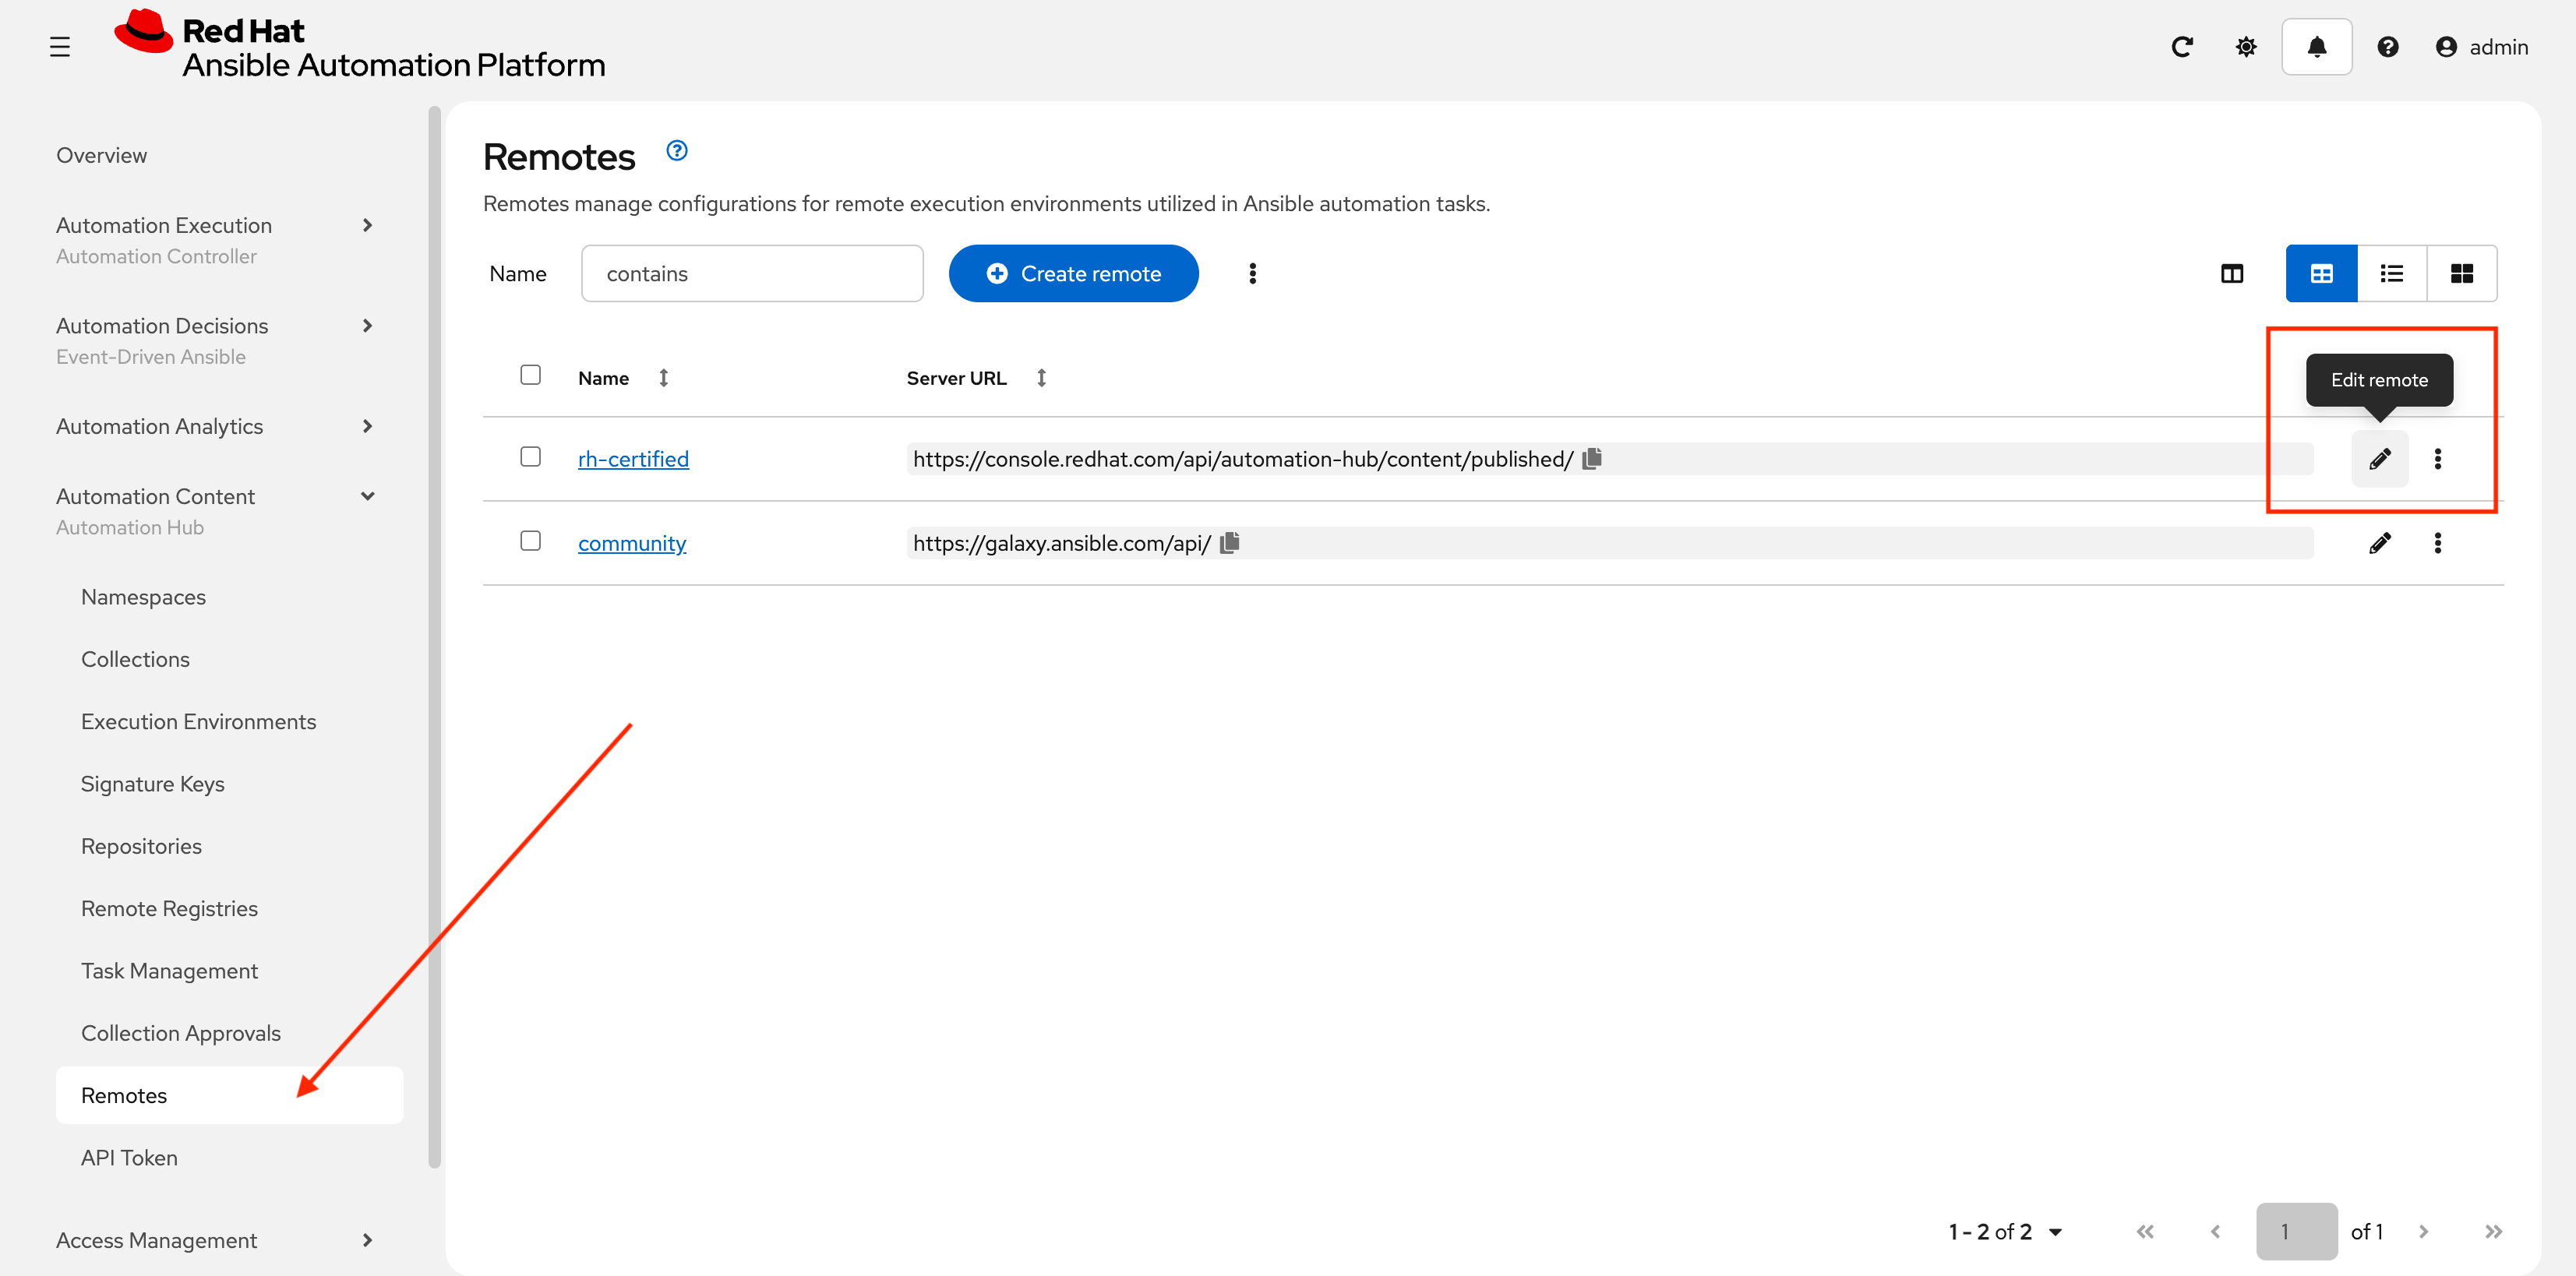
Go to Automation Content → Remotes
-
Click on the edit (pencil) icon next to the rh-certified repository
-
In the Token field, paste the upstream console token obtained in the previous lab for Automation Hub (the several hundred character long UPSTREAM_CONSOLE_HUB_TOKEN)
-
In the Requirements file field, paste the contents of
/projects/lab_playbooks/collections/requirements.ymlcollections: - chocolatey.chocolatey - ansible.windows - microsoft.iis - ansible.posix -
Click Save remote

-
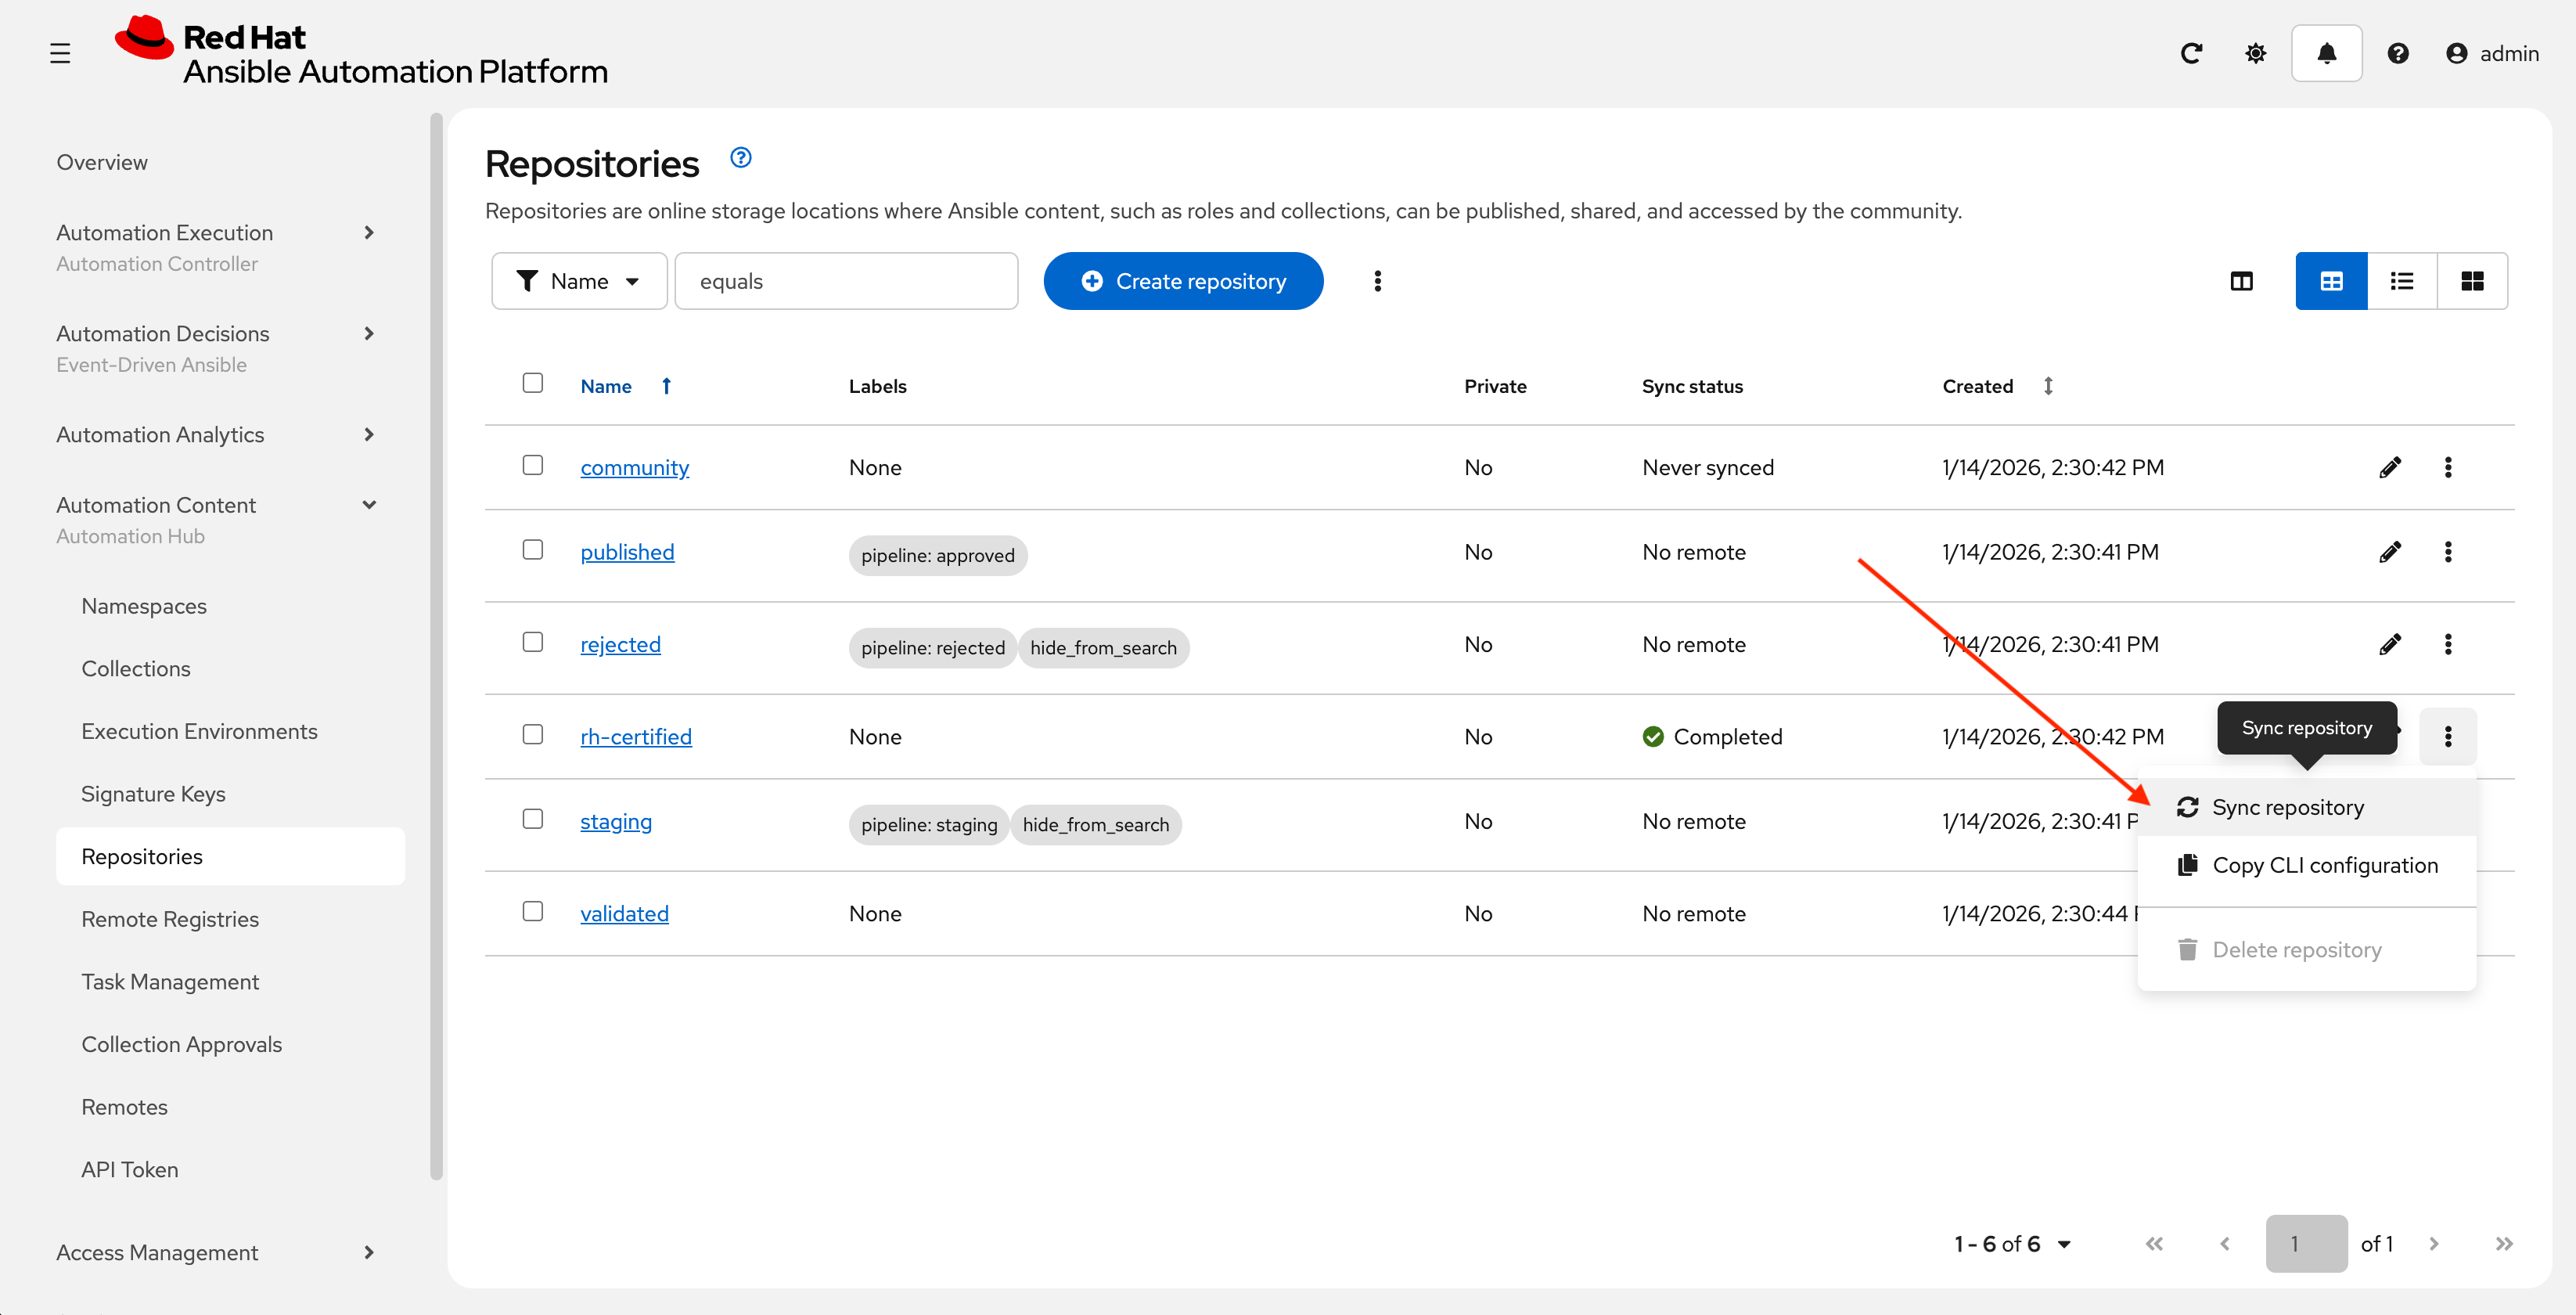
Navigate to Automation Content → Repositories, next to rh-certified click the kebob (3 dots) and select Sync repository
-
In the final dialog, leave the default values and click Sync.

6: Push Collection to Repository
After we’ve published our collection to Private Automation Hub, the next step is to save our work into your lab’s Gitea instance.
6.1: Create Gitea Repository
Create a new repository in your Gitea instance to hold the collection code using the following steps:
-
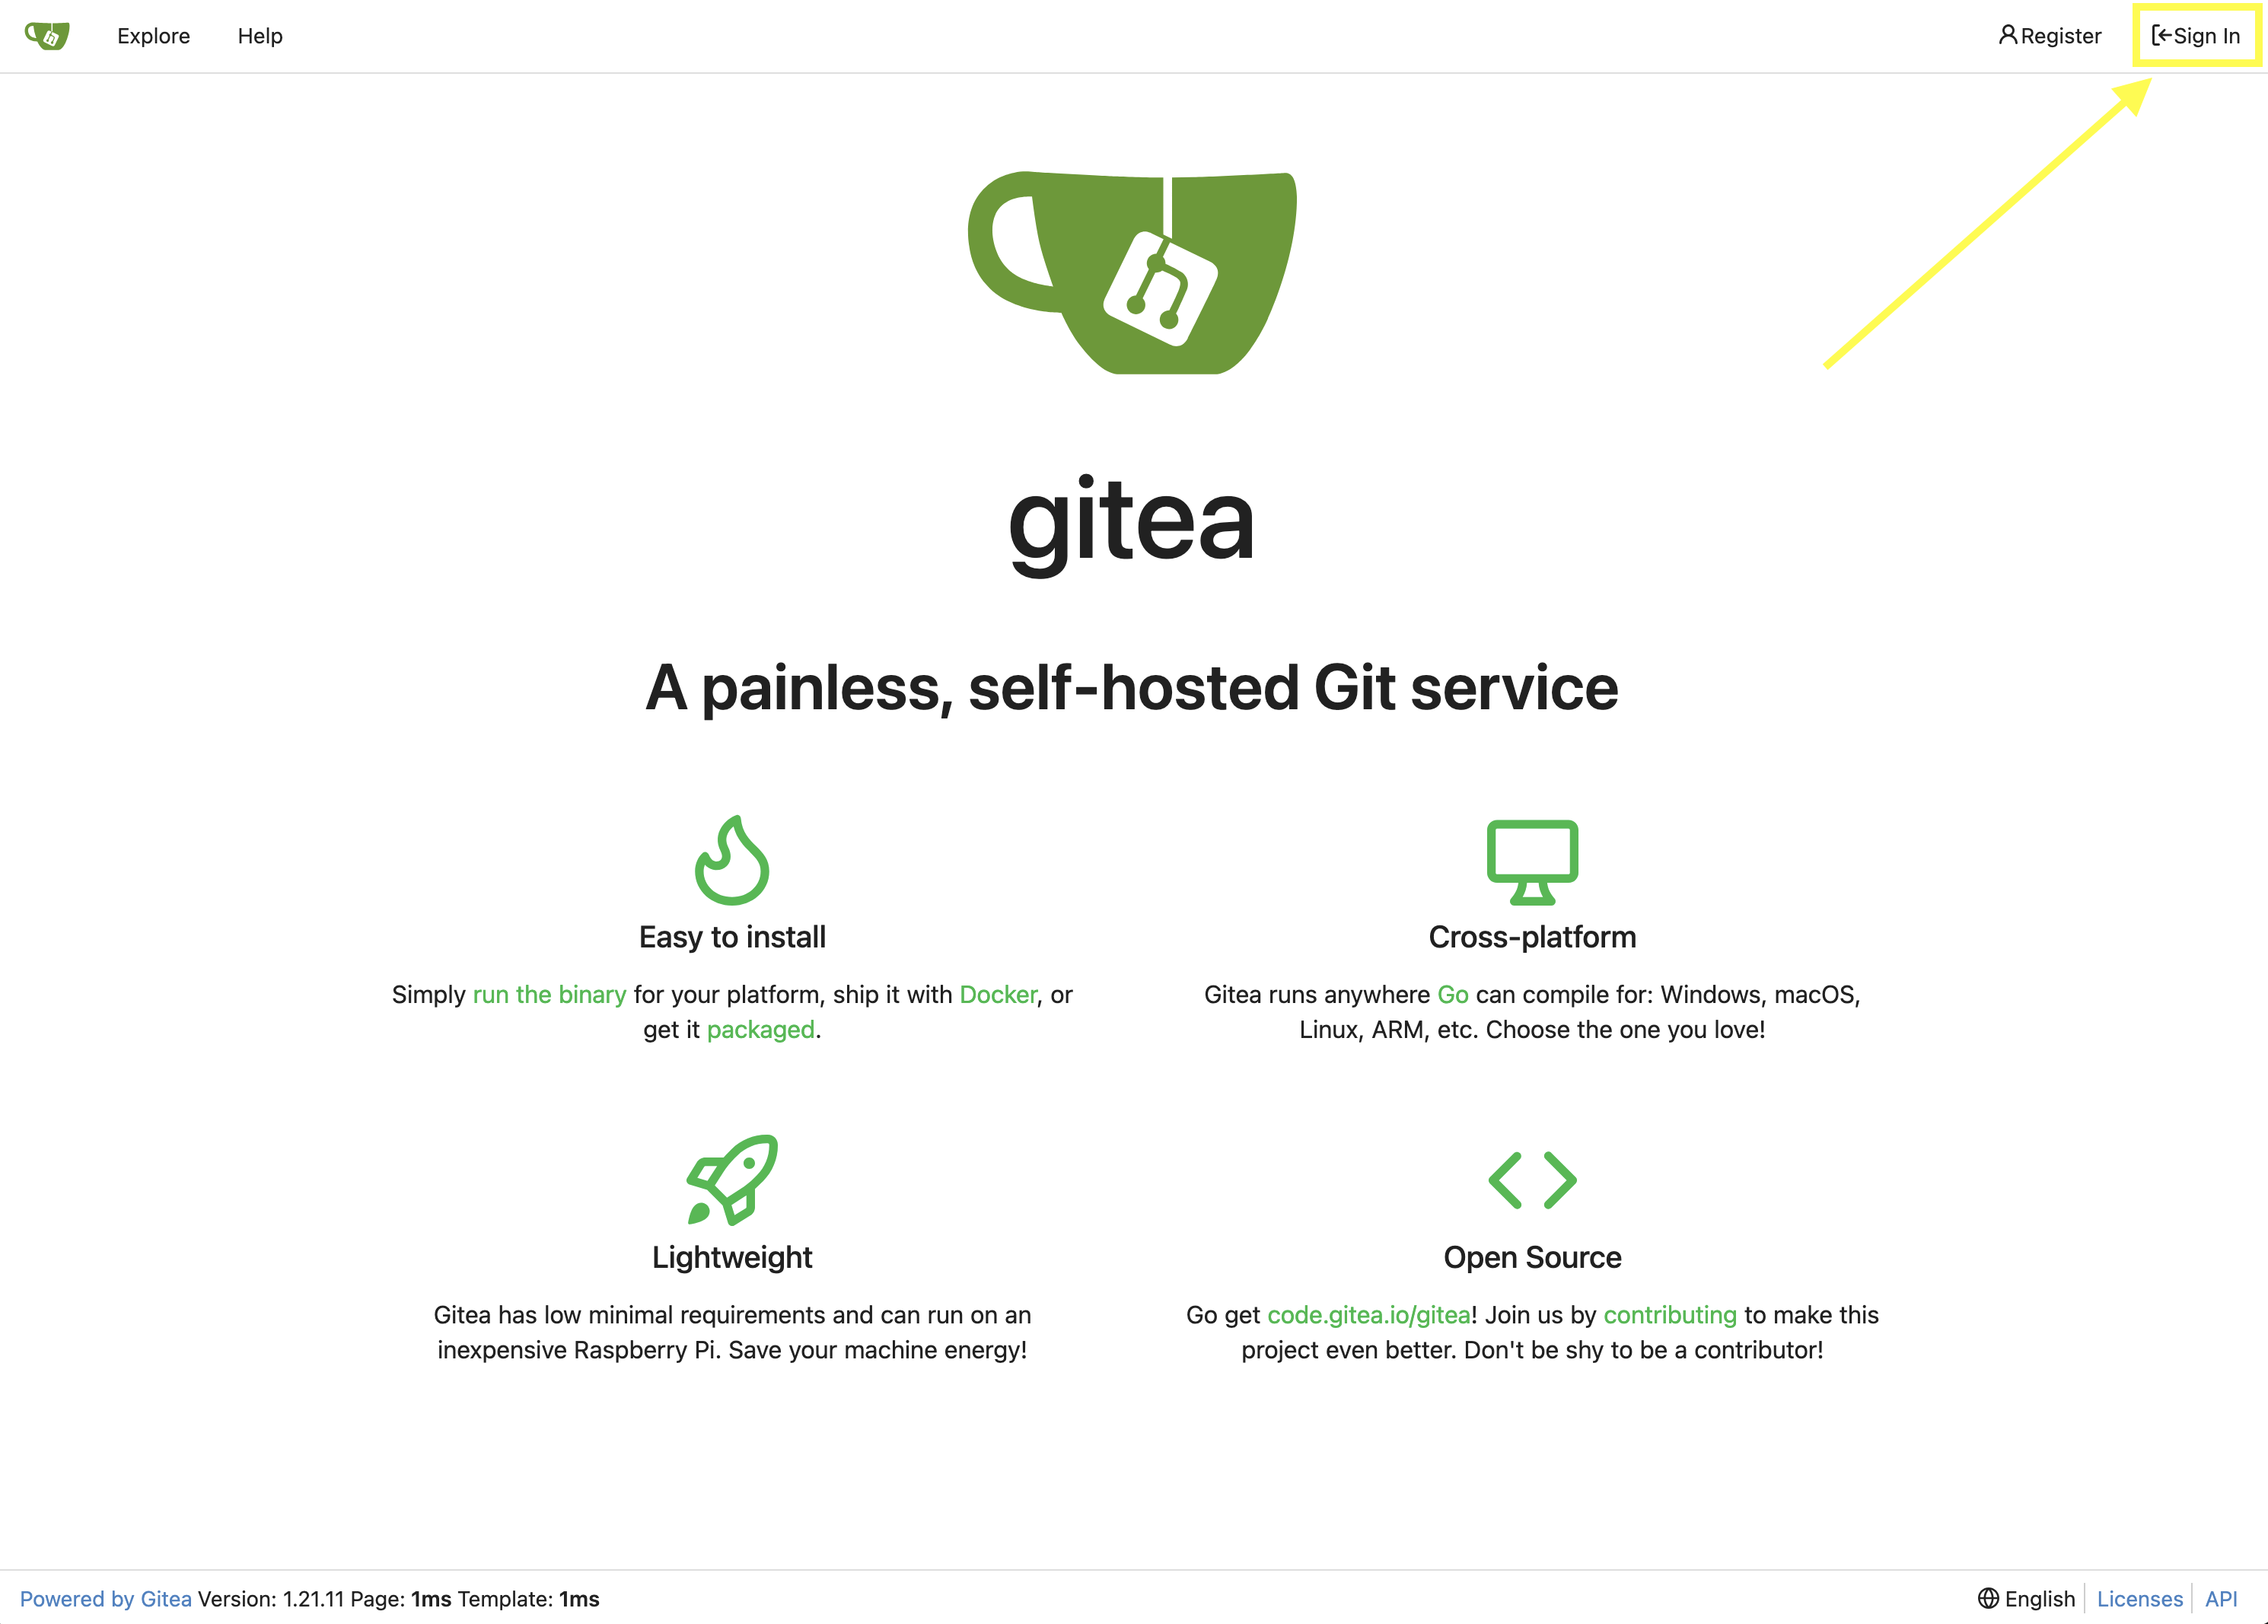
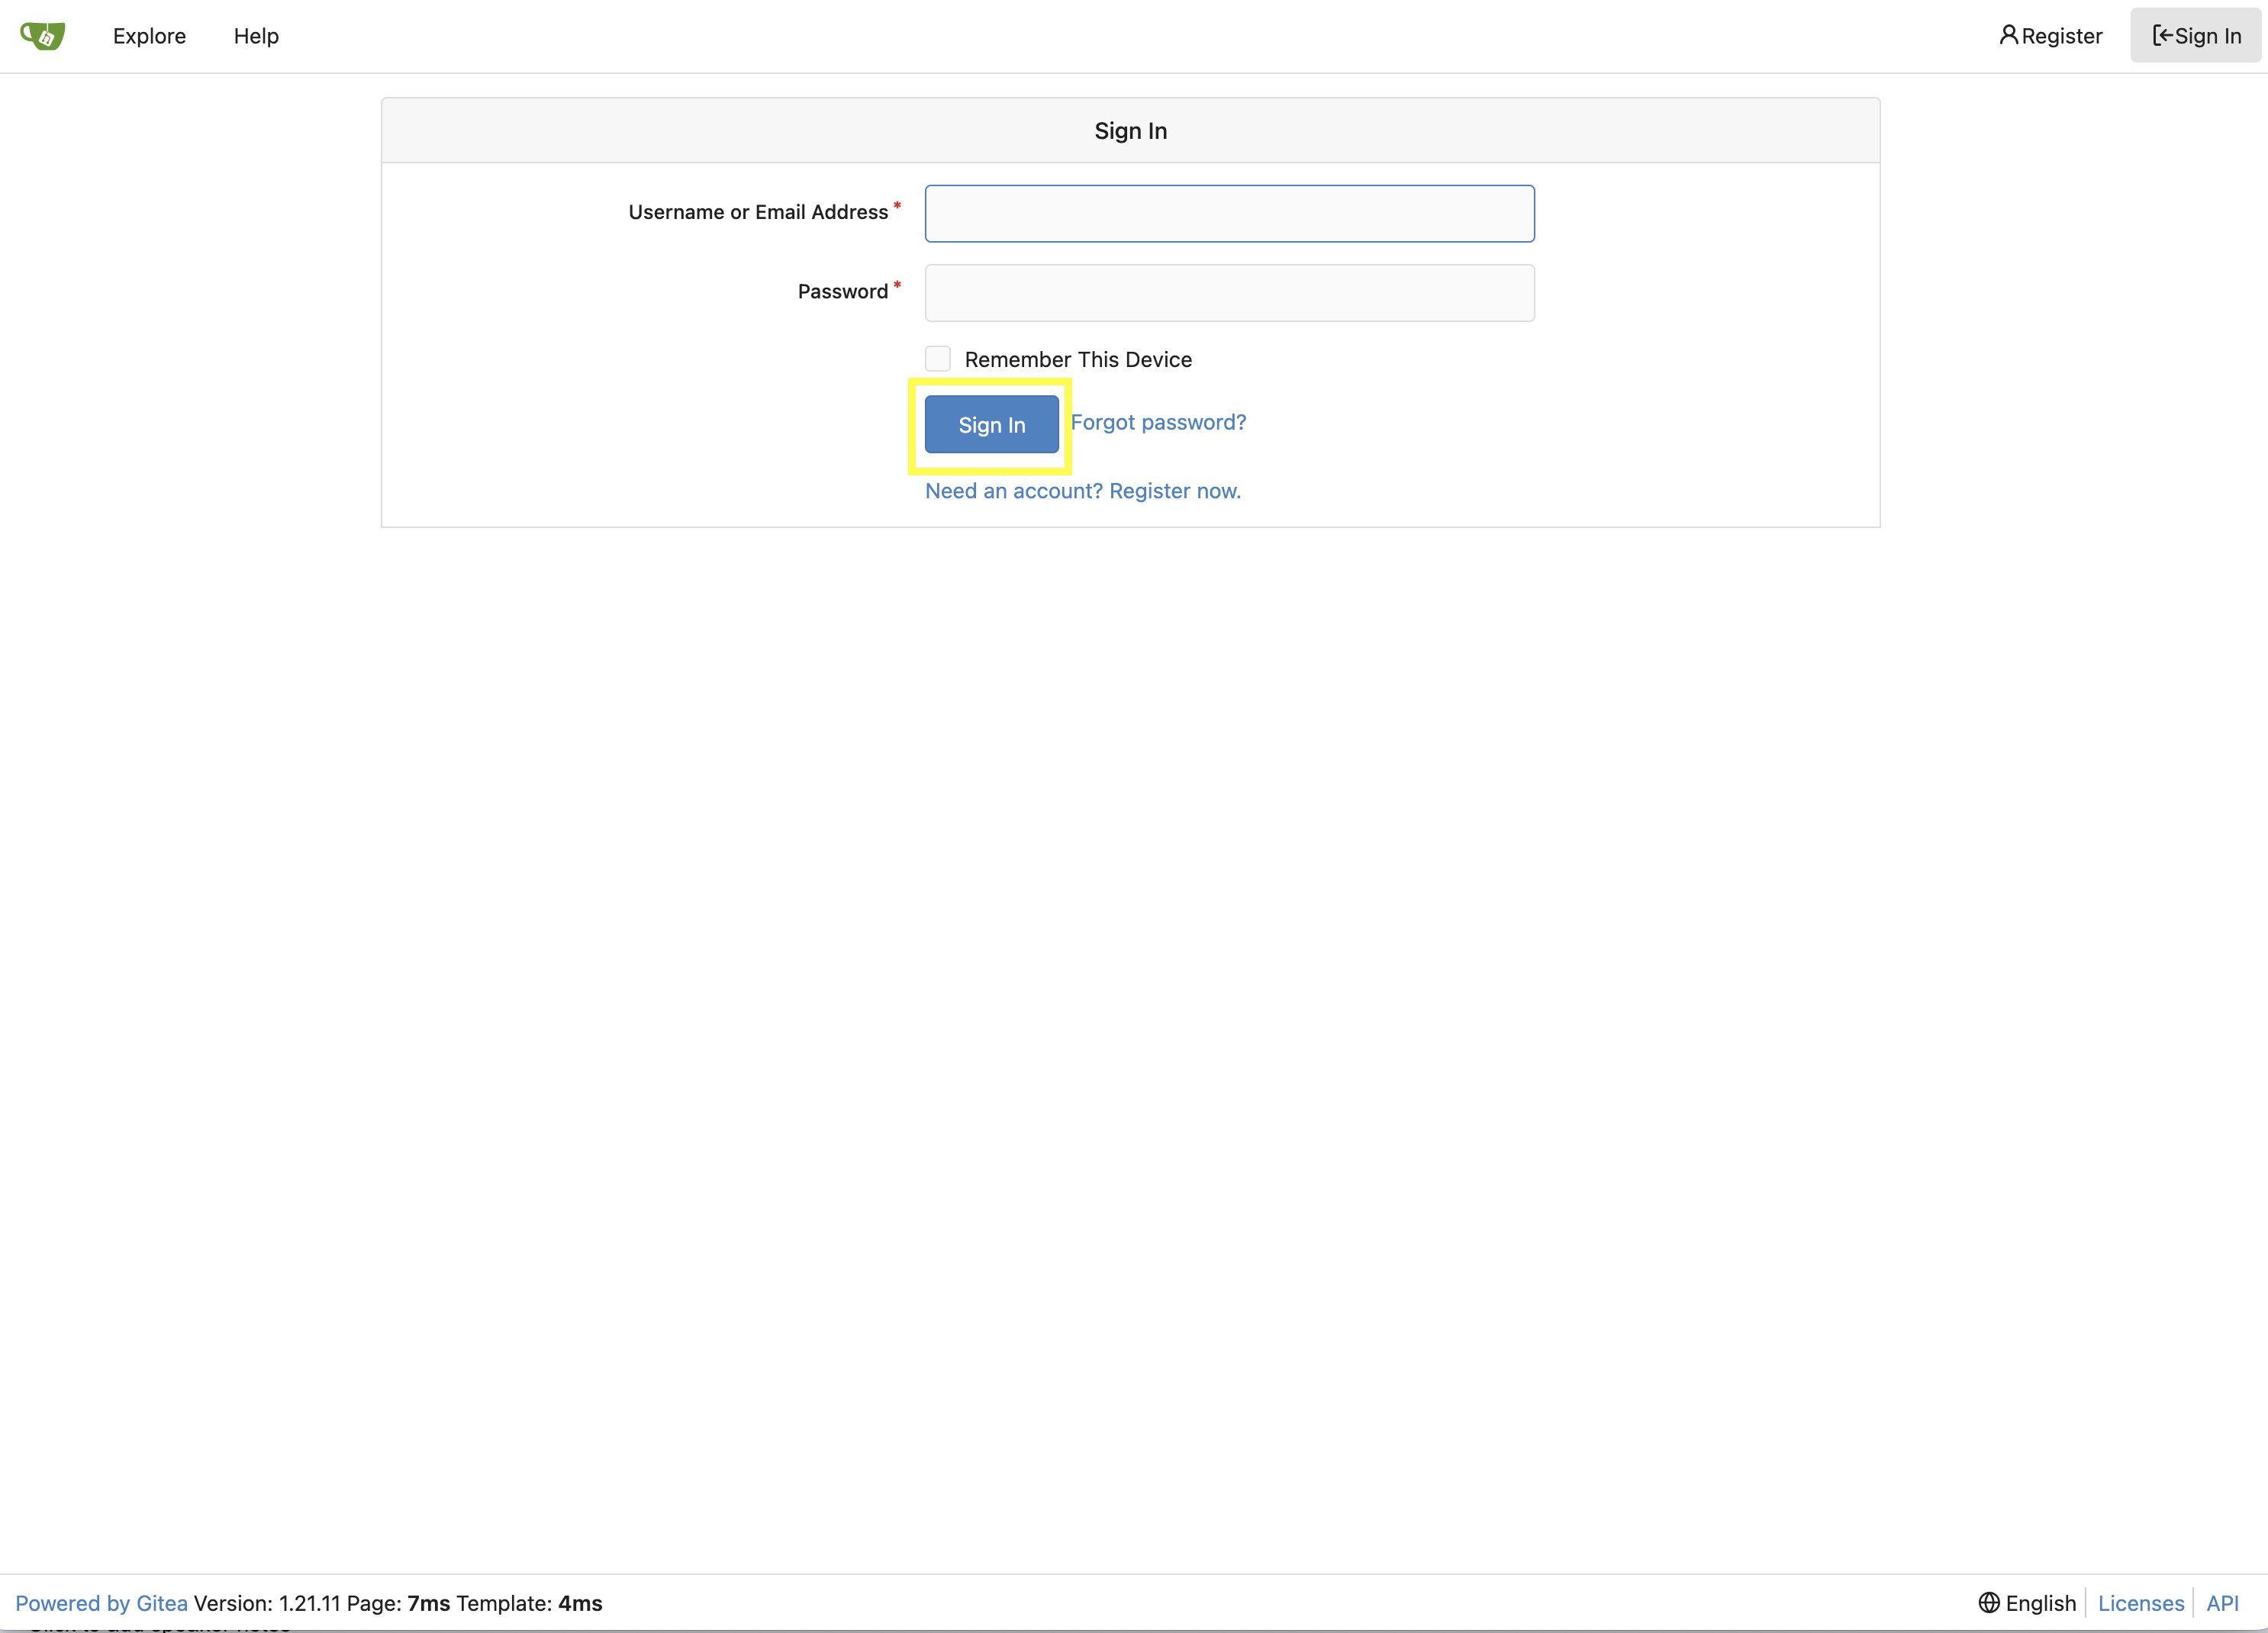
Navigate to your Gitea instance and click the Sign In button on the upper right hand corner
-
Enter the username and password using the credentials provided from the Environment Details page and click the Sign In button
-
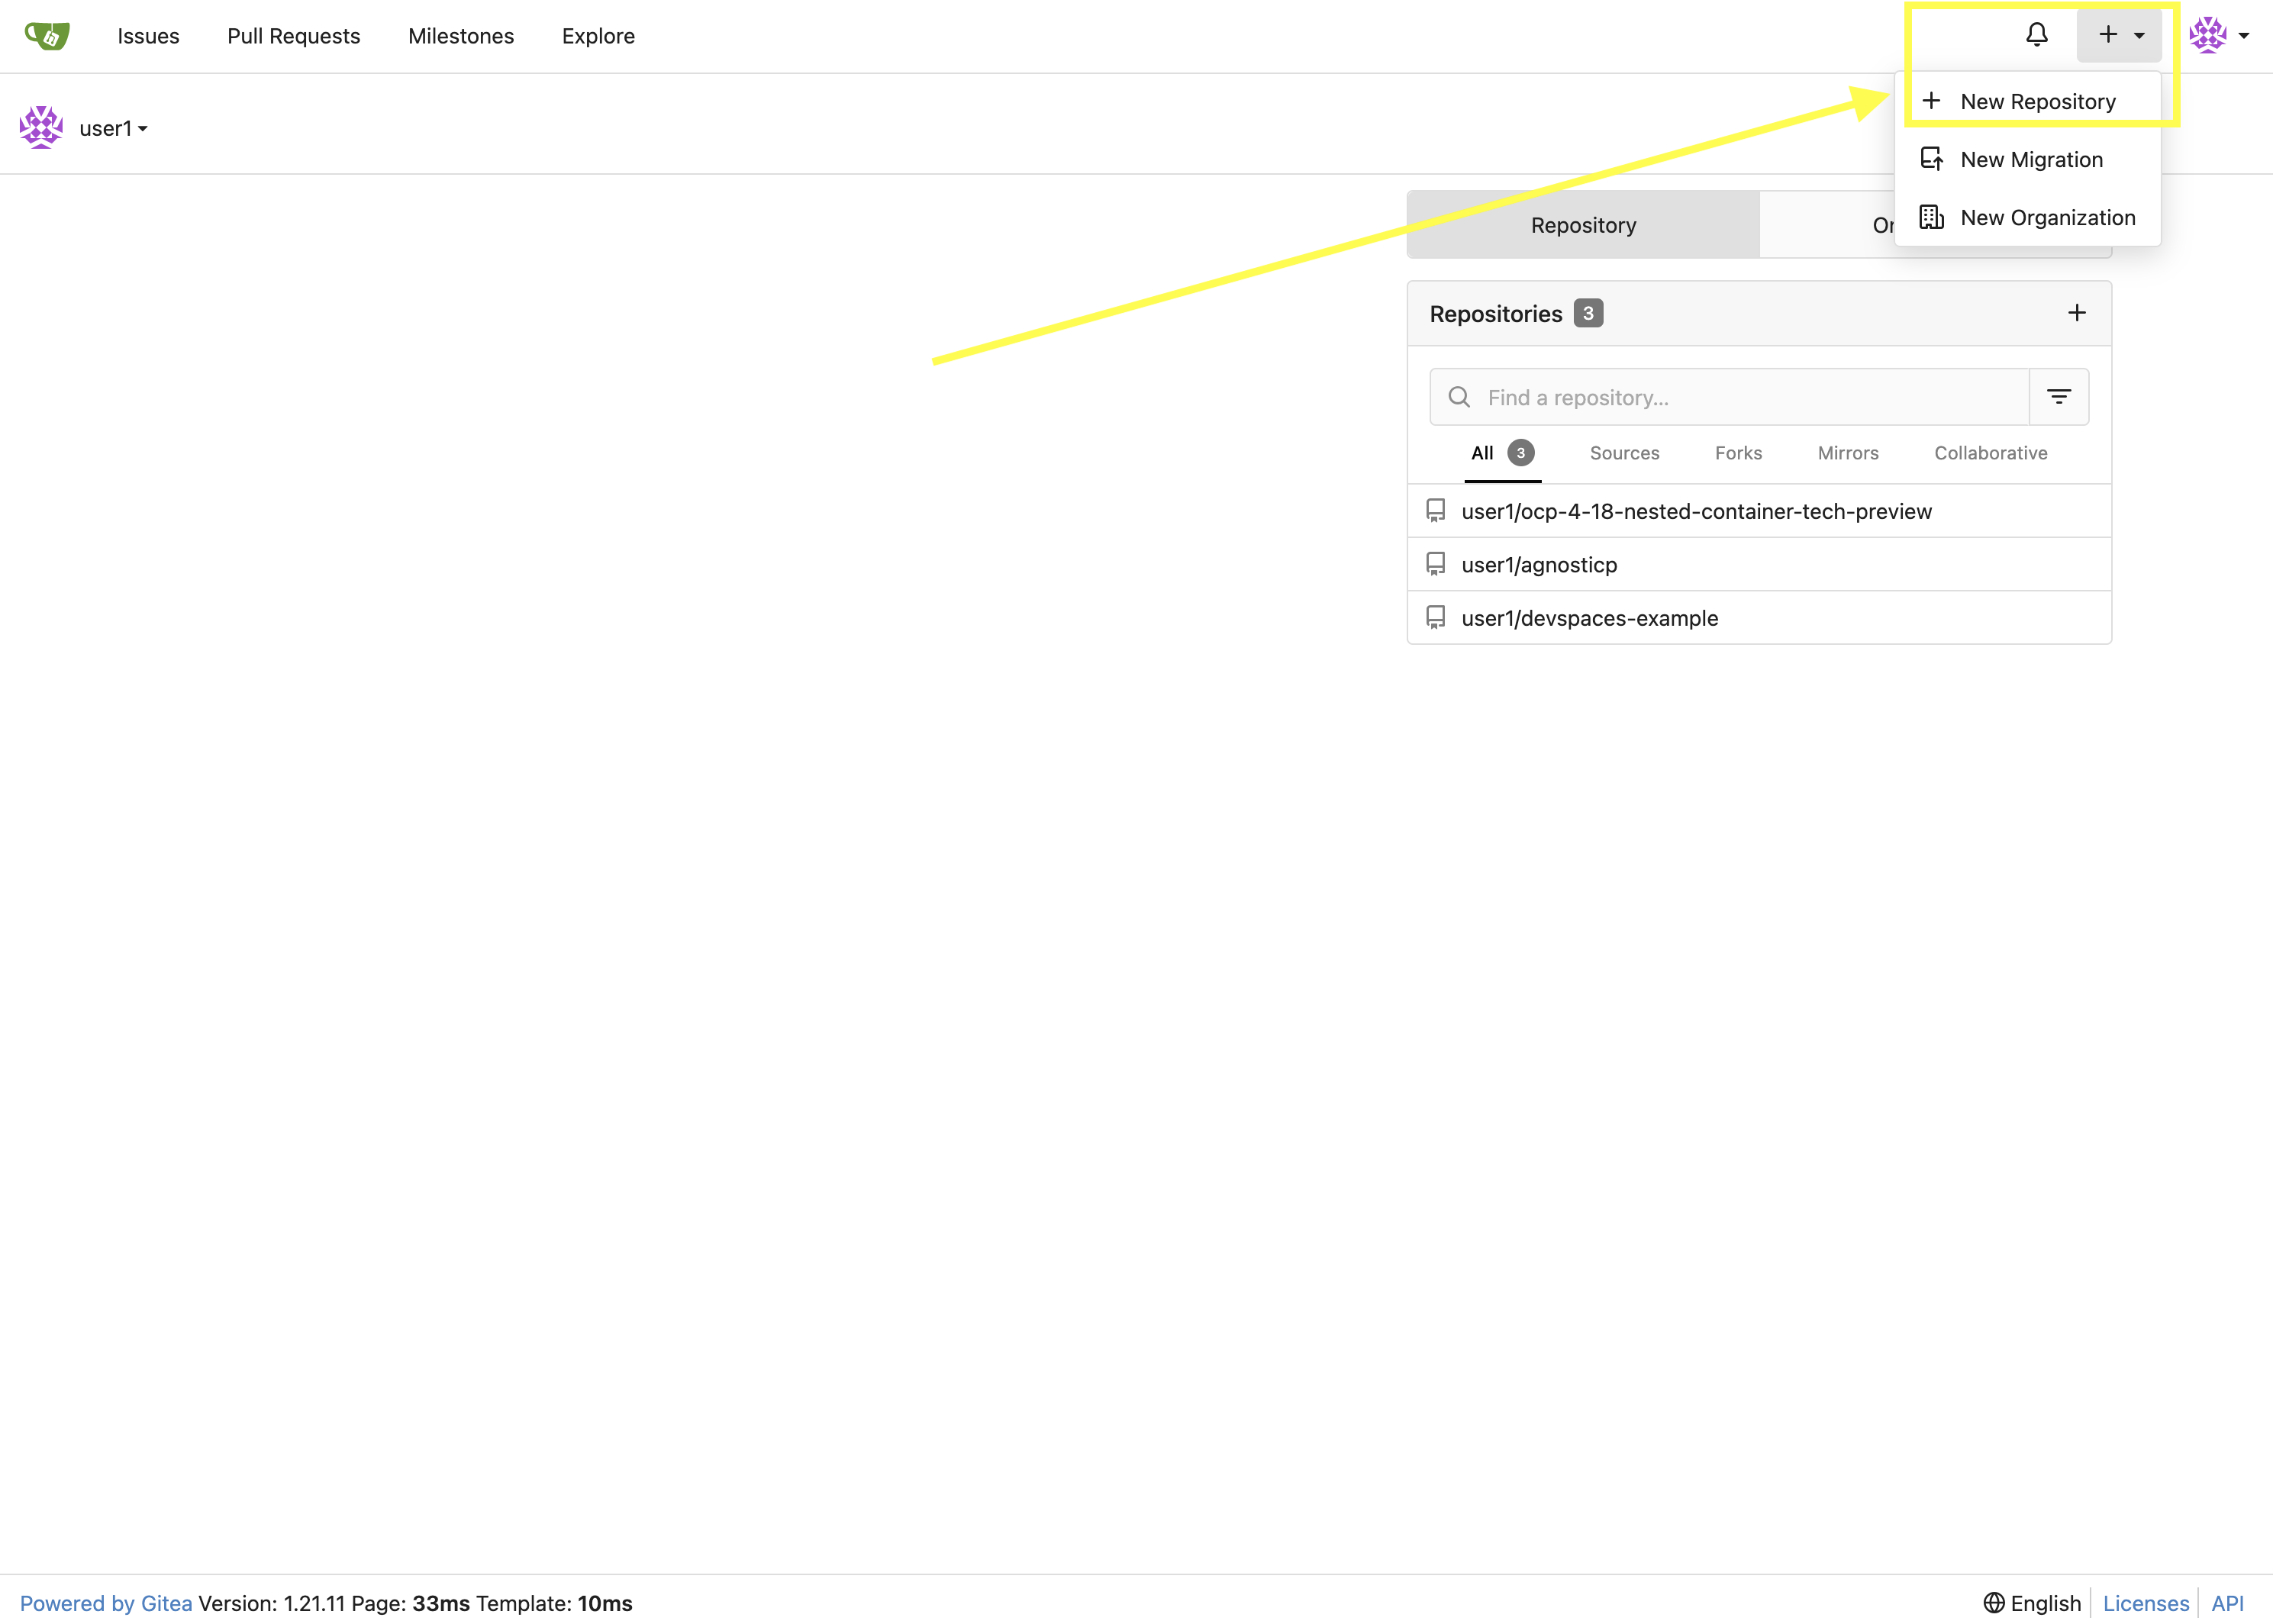
Once authenticated, in the top left of the web interface, click on the + symbol and select New Repository.
-
On the New Repository page, enter
red_hat_one_super_labin the Repository Name field.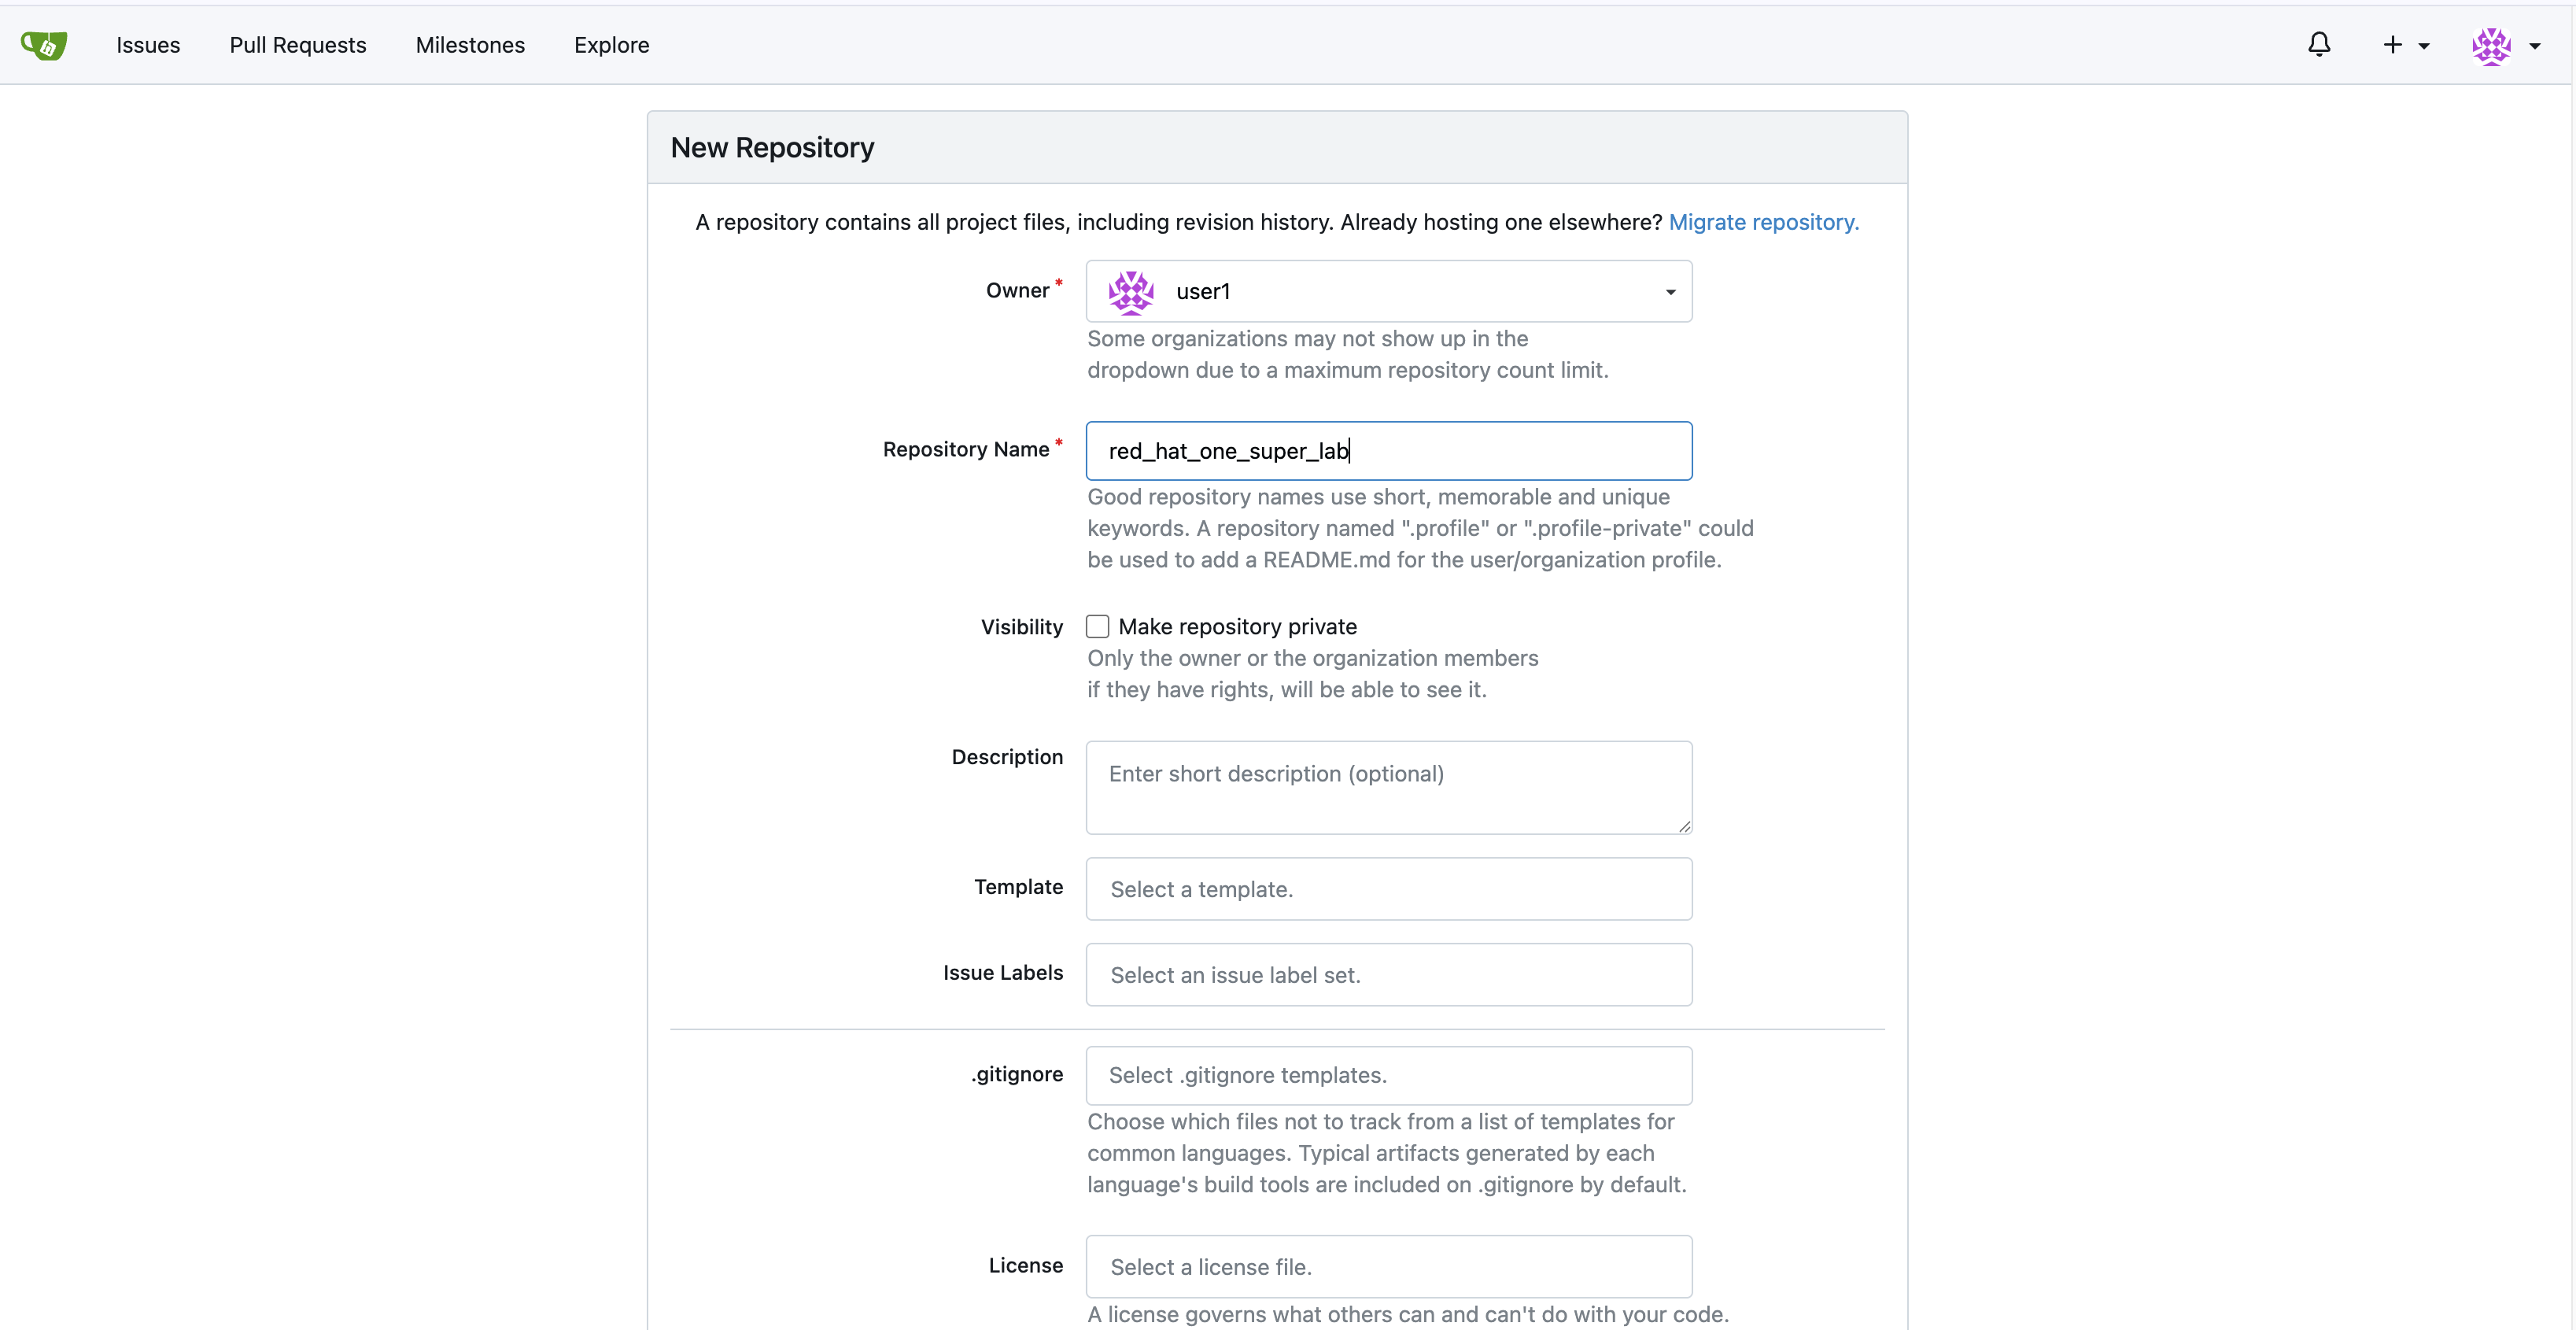
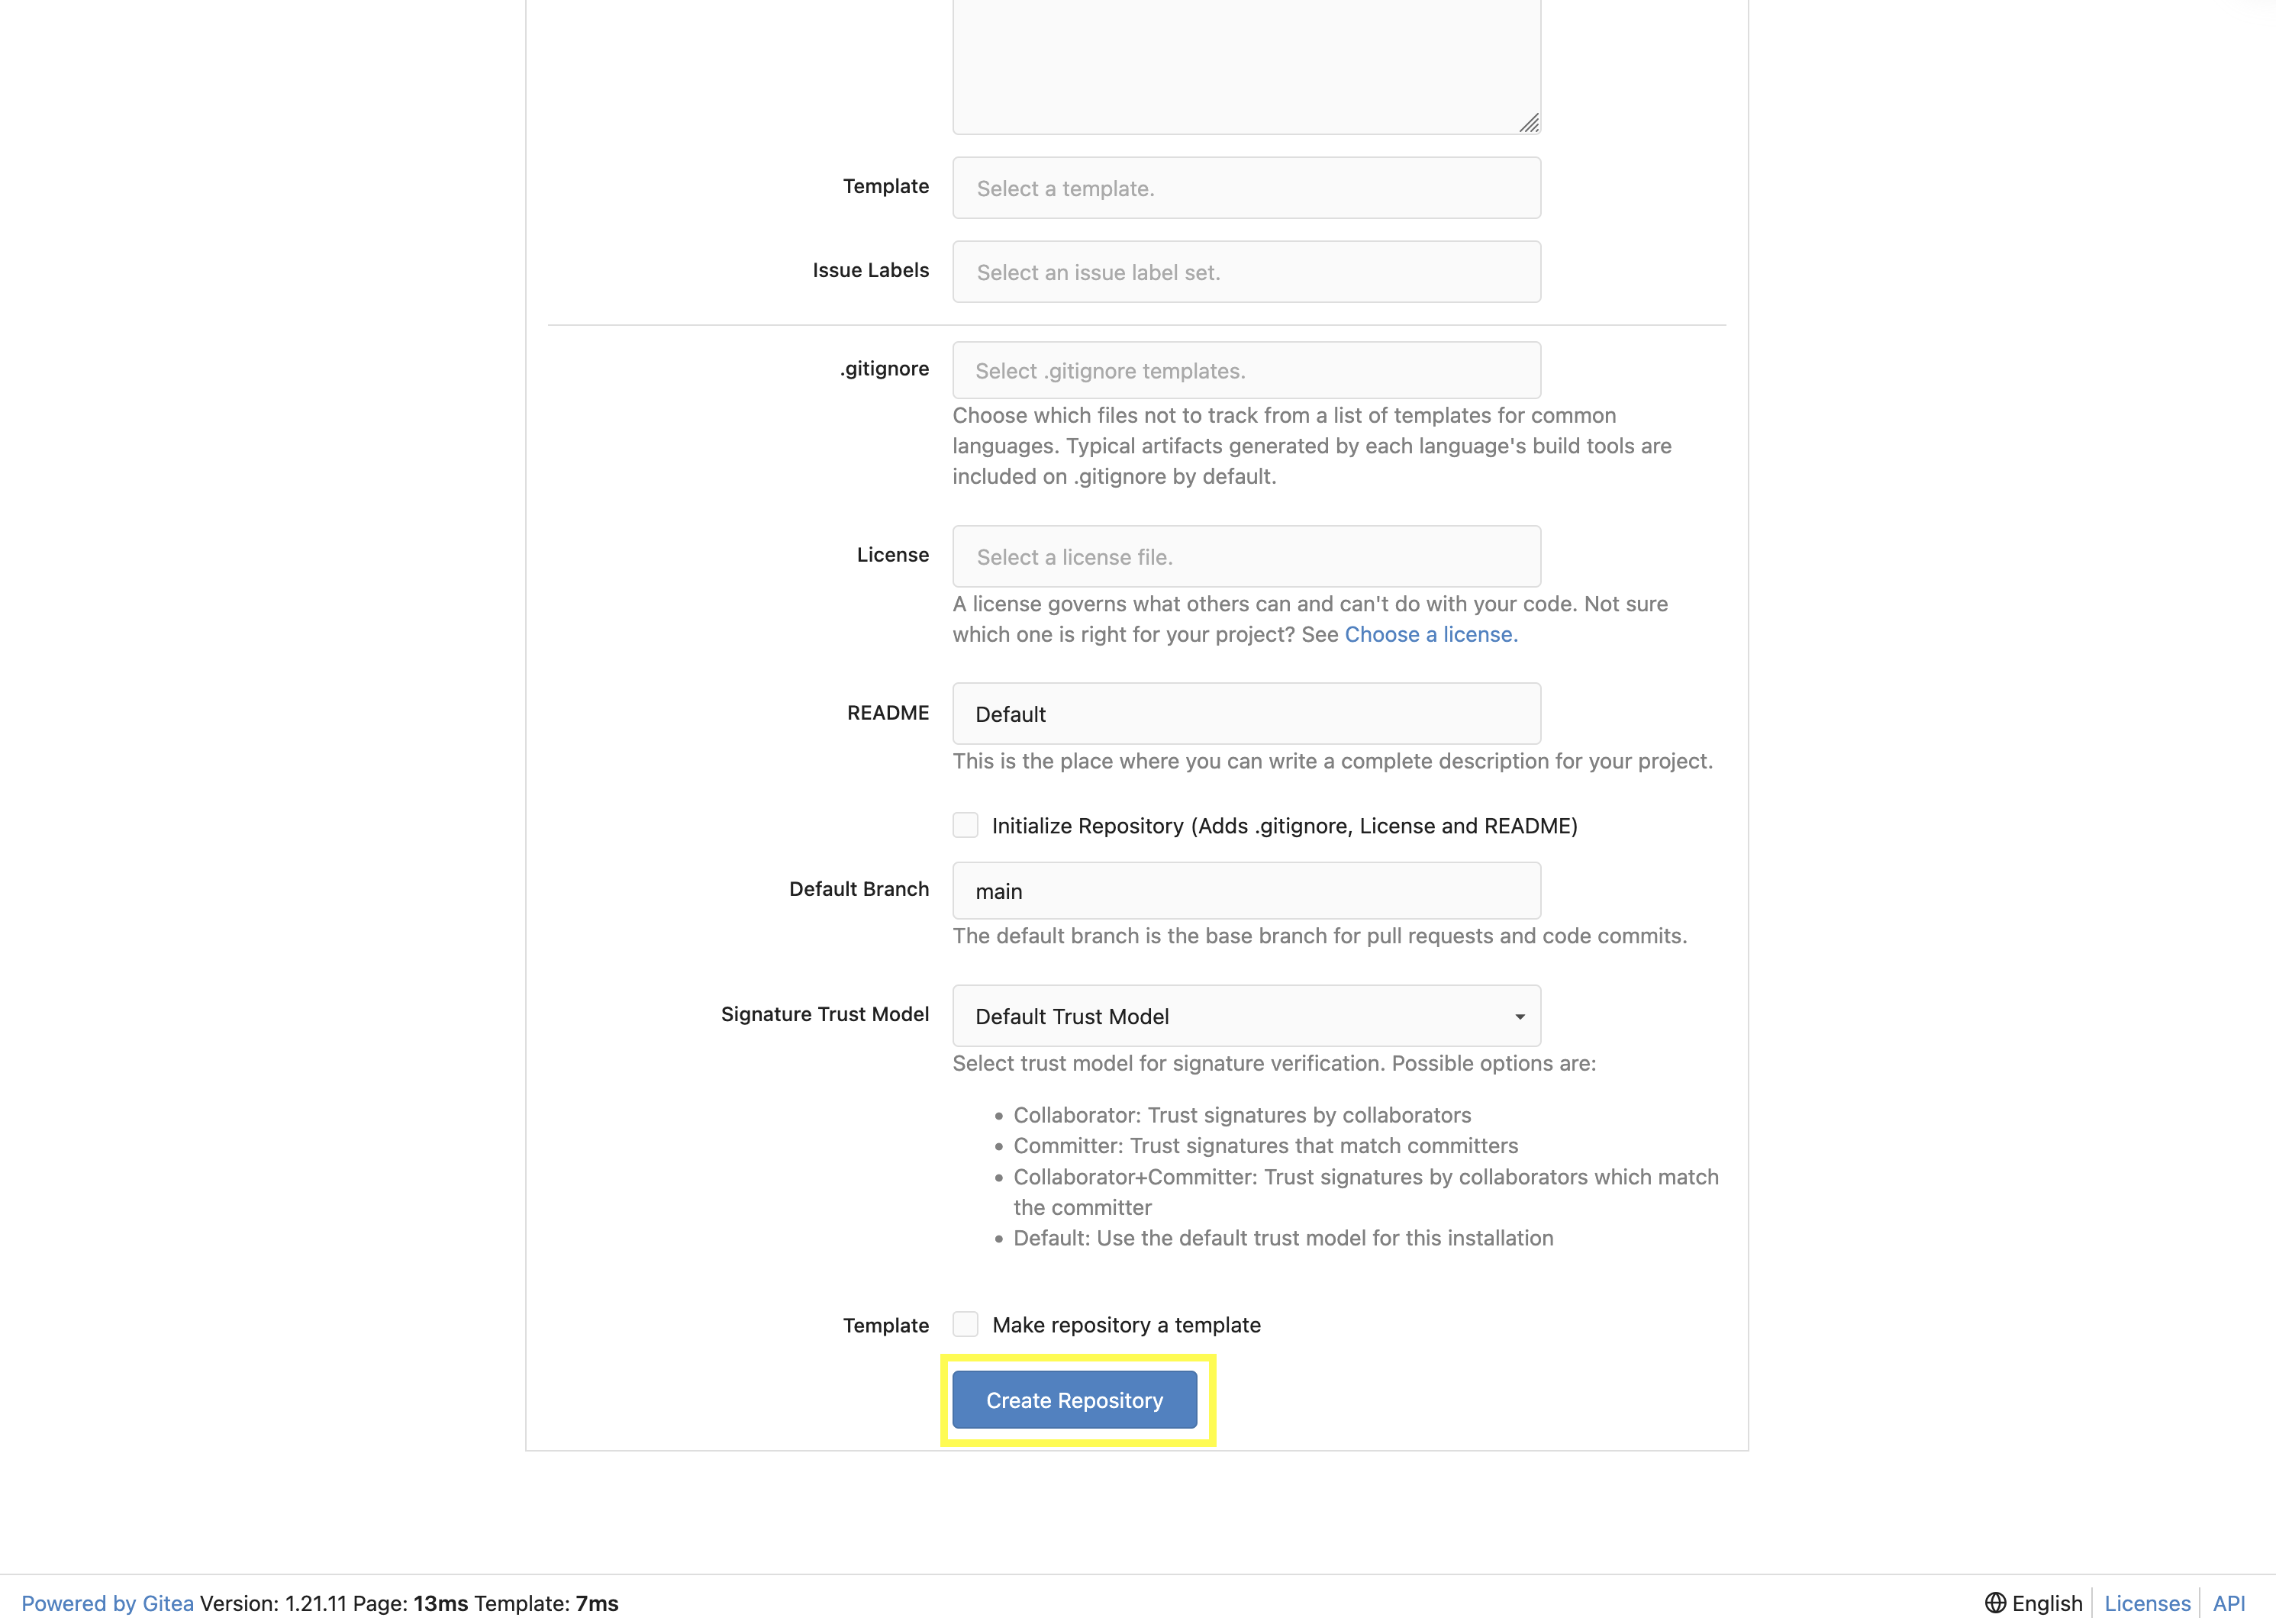
-
Leave everything else as default and click on the button at the bottom, Create Repository.
6.2: Append to the .gitignore file
-
Return to your Dev Spaces terminal.
-
Update the
.gitignorefile within the/projects/lab_collectiondirectory containing the collection and append the following lines to exclude files that should not be committed to the repository./projects/lab_collection/.gitignorecontext/ .password ansible.cfg .vscode/ *.tar.gz *.json secrets.*
6.3: Push collection to new repository
After an empty repository is created on your Gitea instance, the next step is to push the collection to the repository.
-
Navigate to the red_hat_one_super_lab repository.
-
In the section Clone this repository, click the Copy URL icon on the far right to copy Gitea repository URL for the HTTPS protocol option.
-
Ensure you complete this work from within the the terminal of your Dev Spaces instance, within the
/projects/lab_collection/directory:cd /projects/lab_collection/ -
Execute the following commands to initialize a new Git repository and push the content to the Gitea repository.
git inithint: Using 'master' as the name for the initial branch. This default branch name hint: is subject to change. To configure the initial branch name to use in all hint: of your new repositories, which will suppress this warning, call: hint: hint: git config --global init.defaultBranch <name> hint: hint: Names commonly chosen instead of 'master' are 'main', 'trunk' and hint: 'development'. The just-created branch can be renamed via this command: hint: hint: git branch -m <name> Initialized empty Git repository in /projects/lab_collection/.git/ -
Change from the default of
mastertomain:git switch --create mainSwitched to a new branch 'main' -
Stage all the collection files
git add --all -
Commit this to git
git commit --message "Initial collection"[main (root-commit) 13c7c5d] Initial collection 88 files changed, 2326 insertions(+) create mode 100644 .gitignore ... create mode 100644 roles/log_shipper/README.md create mode 100644 roles/log_shipper/defaults/main.yml create mode 100644 roles/log_shipper/files/.keep create mode 100644 roles/log_shipper/handlers/main.yml create mode 100644 roles/log_shipper/meta/argument_specs.yml create mode 100644 roles/log_shipper/meta/main.yml create mode 100644 roles/log_shipper/tasks/chocolatey.yml create mode 100644 roles/log_shipper/tasks/filebeat.yml create mode 100644 roles/log_shipper/tasks/main.yml create mode 100644 roles/log_shipper/tasks/prerequisites.yml create mode 100644 roles/log_shipper/templates/.keep create mode 100644 roles/log_shipper/tests/inventory create mode 100644 roles/log_shipper/vars/main.yml ... create mode 100644 roles/web_server/README.md create mode 100644 roles/web_server/defaults/main.yml create mode 100644 roles/web_server/files/.keep create mode 100644 roles/web_server/files/index.html.j2 create mode 100644 roles/web_server/handlers/main.yml create mode 100644 roles/web_server/meta/argument_specs.yml create mode 100644 roles/web_server/meta/main.yml create mode 100644 roles/web_server/tasks/main.yml create mode 100644 roles/web_server/tasks/setup.yml create mode 100644 roles/web_server/tasks/validate.yml create mode 100644 roles/web_server/tasks/website.yml create mode 100644 roles/web_server/templates/.keep create mode 100644 roles/web_server/tests/inventory create mode 100644 roles/web_server/vars/main.yml ...Ensure the roles created earlier are included -
Add the gitea remote
git remote add origin \
  {gitea_console_url}/{gitea_user}/red_hat_one_super_lab.git(1)
1 This is the URL copied in step 2. above. -
Push the files using the Gitea authentication:
git push origin main-
Username:
{gitea_user} -
Password:
{gitea_password}Since the repository requires authentication, you will be prompted to enter your Gitea username and password at the top of the Dev Spaces window. 
You may use the command git config --global credential.helper storeto allow caching of these credentials. Only use this less secure option in a lab environment like this. You may also want to add this to/projects/env/config.shEnumerating objects: 117, done. Counting objects: 100% (117/117), done. Delta compression using up to 16 threads Compressing objects: 100% (88/88), done. Writing objects: 100% (117/117), 35.90 KiB | 2.39 MiB/s, done. Total 117 (delta 8), reused 0 (delta 0), pack-reused 0 (from 0) remote: Resolving deltas: 100% (8/8), done. remote: . Processing 1 references remote: Processed 1 references in total To {gitea_console_url}/{gitea_user}/red_hat_one_super_lab.git * [new branch] main -> main branch 'main' set up to track 'origin/main'.
-
-
Refresh the
red_hat_one_super_labpage within the Gitea UI to confirm that the collection has been published successfully.
-
This repository will be referenced in later labs.
7: Building a Custom Execution Environment
Now, we’ll define and build a custom Execution Environment (EE) that uses our synced minimal image and our custom collection.
7.1: Define the Execution Environment
Create a file named execution-environment.yml at the root of the lab_collection directory with the following content.
---
version: 3

images:
  base_image:
    name: aap-aap.{openshift_cluster_ingress_domain}/ansible-automation-platform-26/ee-minimal-rhel9:latest

dependencies:
  ansible_core:
    package_pip: ansible-core==2.16.14
  galaxy:
    collections:
      - name: red_hat_one.super_lab
        version: 1.0.0
options:
  package_manager_path: /usr/bin/microdnf

additional_build_steps:
  prepend_galaxy:
    - ARG TOKEN
    - ENV ANSIBLE_GALAXY_SERVER_LIST='published,certified,validated,community'
    - ENV ANSIBLE_GALAXY_SERVER_CERTIFIED_URL='{aap_controller_web_url}/pulp_ansible/galaxy/rh-certified/'
    - ENV ANSIBLE_GALAXY_SERVER_CERTIFIED_TOKEN=${TOKEN}
    - ENV ANSIBLE_GALAXY_SERVER_VALIDATED_URL='{aap_controller_web_url}/pulp_ansible/galaxy/validated/'
    - ENV ANSIBLE_GALAXY_SERVER_VALIDATED_TOKEN=${TOKEN}
    - ENV ANSIBLE_GALAXY_SERVER_COMMUNITY_URL='{aap_controller_web_url}/pulp_ansible/galaxy/community/'
    - ENV ANSIBLE_GALAXY_SERVER_COMMUNITY_TOKEN=${TOKEN}
    - ENV ANSIBLE_GALAXY_SERVER_PUBLISHED_URL='{aap_controller_web_url}/pulp_ansible/galaxy/published/'
    - ENV ANSIBLE_GALAXY_SERVER_PUBLISHED_TOKEN=${TOKEN}
7.2: Build and Publish the Execution Environment
Login to your PAH container registry, build the custom Execution Environment, and push the resulting image to your PAH instance using the following commands:
-
Log in to your PAH container registry with your AAP user credentials:
podman login \ aap-aap.{openshift_cluster_ingress_domain}-
Username:
{aap_controller_admin_user} -
Password:
{aap_controller_admin_password}Username: admin Password: Login Succeeded!
-
-
Ensure you are in the
/projects/lab_collection/directory for the remainder of this section:cd /projects/lab_collection/ -
For reference, check local
podman imagesbefore building to compare after:podman imagesREPOSITORY TAG IMAGE ID CREATED SIZEYou may have images from previous labs, those are not relevant. -
Build the Execution Environment. It will pull the base from PAH, then add our content (this takes just under 5 minutes):
ansible-builder build \
  --tag my-pah-ee:1.0 \
  --build-arg TOKEN=${PAH_API_TOKEN} \
  --verbosity 1
The ${PAH_API_TOKEN}environment variable was set previously containing the value of the API Token from PAH. Set this variable once again if your terminal session has been restarted via the/projects/env/set_pah_vars.envfile.Running command: podman build -f context/Containerfile -t my-pah-ee:1.0 --build-arg=TOKEN=removed context(1) Complete! The build context can be found at: /projects/lab_collection/context1 Token is passed from the CLI and used in the build process, but removed in this output for security. -
The new image is available:
podman imagesREPOSITORY TAG IMAGE ID CREATED SIZE localhost/my-pah-ee 1.0 d6720adf6297 24 seconds ago 365 MB <none> <none> 83b83a0538e8 2 minutes ago 367 MB <none> <none> d512d1529417 2 minutes ago 365 MB aap-aap.apps.cluster-bhmvb.dynamic.redhatworkshops.io/ansible-automation-platform-26/ee-minimal-rhel9 latest 9d130a29338c 5 weeks ago 341 MB -
Tag the image:
podman tag \ localhost/my-pah-ee:1.0 aap-aap.{openshift_cluster_ingress_domain}/my-pah-ee:1.0 -
Check for the new tag:
podman imagesREPOSITORY TAG IMAGE ID CREATED SIZE aap-aap.apps.cluster-bhmvb.dynamic.redhatworkshops.io/my-pah-ee 1.0 d6720adf6297 About a minute ago 365 MB localhost/my-pah-ee 1.0 d6720adf6297 About a minute ago 365 MB <none> <none> 83b83a0538e8 3 minutes ago 367 MB <none> <none> d512d1529417 3 minutes ago 365 MB aap-aap.apps.cluster-bhmvb.dynamic.redhatworkshops.io/ansible-automation-platform-26/ee-minimal-rhel9 latest 9d130a29338c 5 weeks ago 341 MB -
Push the newly built Execution Environment image to PAH:
podman push \
  aap-aap.{openshift_cluster_ingress_domain}/my-pah-ee:1.0
Getting image source signatures Copying blob 8d7002e6f5a3 done | Copying blob deebe6823303 done | Copying blob 07f03aaea22a done | Copying blob 53cd9a4d07b1 done | Copying blob 8e88ef553a8b done | Copying blob aa5eefe60148 skipped: already exists Copying blob e6db9dbd3832 done | Copying blob 8693db968fb4 done | Copying blob 79e63427b552 done | Copying blob 5f70bf18a086 done | Copying blob 1903d60376d1 done | Copying blob f129e8539ece done | Copying blob 972bd7578ec1 done | Copying config 2ee9809c70 done | Writing manifest to image destination -
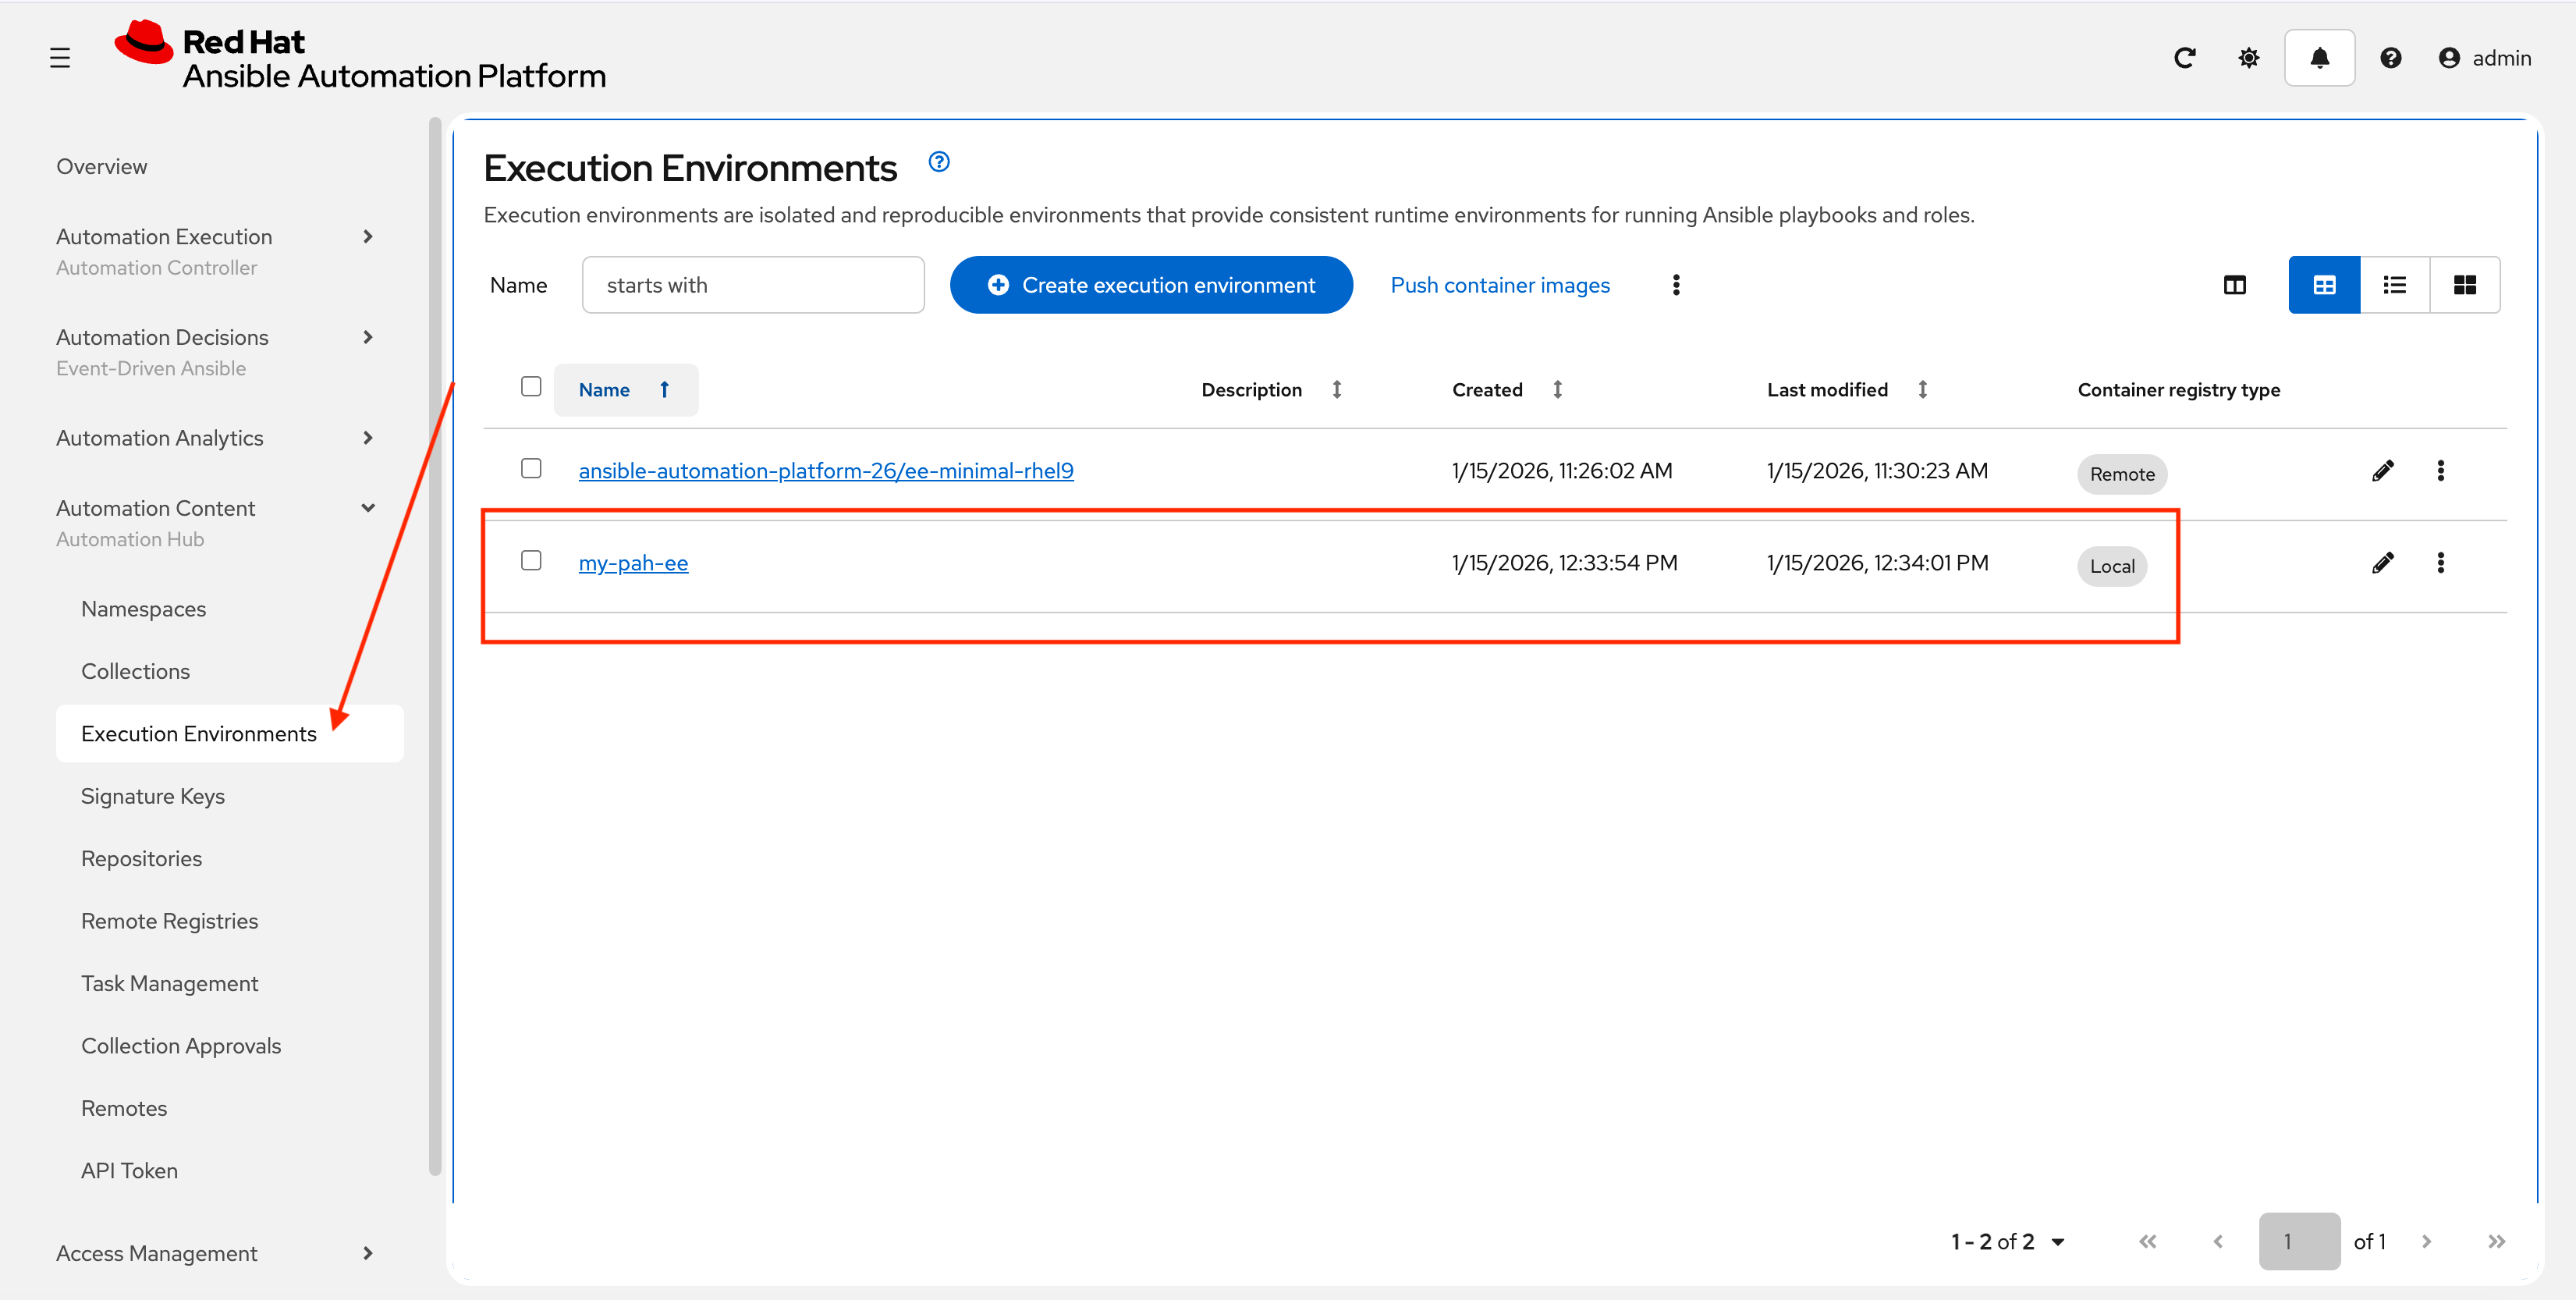
Return to the AAP controller and select Automation Content → Execution Environments. Verify your EE is present:
8: Adding a Custom Filter Plugin
Now that we have a working EE, let’s iterate by adding a custom Filter plugin to our collection.
8.1: Create the Custom Filter Plugin
Create a file at plugins/filter/cowsay_filter.py with the following content:
from __future__ import (absolute_import, division, print_function)
__metaclass__ = type

DOCUMENTATION = '''
    name: cowsay
    short_description: A filter to wrap text in a cowsay bubble.
    description:
        - This filter takes a string and returns it formatted by the cowsay library.
    requirements:
      - The `cowsay` python library must be installed.
'''

try:
    import cowsay
except ImportError:
    cowsay = None

def cowsay_filter(text):
    if not cowsay:
        raise AnsibleFilterError("The 'cowsay' Python library is not installed. Cannot use filter.")
    return cowsay.cow(text)

class FilterModule(object):
    def filters(self):
        return {
            'cowsay': cowsay_filter
        }
Step 8.2: Update the EE Definition for the Plugin Dependency
Our new plugin requires the cowsay Python library, and we need to ensure our EE is pulling the new version of our collection. Modify the execution-environment.yml to include both changes.
---
version: 3

images:
  base_image:
    name: aap-aap.{openshift_cluster_ingress_domain}/ansible-automation-platform-26/ee-minimal-rhel9:latest

dependencies:
  ansible_core:
    package_pip: ansible-core==2.16.14
  galaxy:
    collections:
      - name: red_hat_one.super_lab
        version: 1.0.1(1)
  python:(2)
    - cowsay
options:
  package_manager_path: /usr/bin/microdnf

additional_build_steps:
  prepend_galaxy:
    - ARG TOKEN
    - ENV ANSIBLE_GALAXY_SERVER_LIST='published,certified,validated,community'
    - ENV ANSIBLE_GALAXY_SERVER_CERTIFIED_URL='{aap_controller_web_url}/pulp_ansible/galaxy/rh-certified/'
    - ENV ANSIBLE_GALAXY_SERVER_CERTIFIED_TOKEN=${TOKEN}
    - ENV ANSIBLE_GALAXY_SERVER_VALIDATED_URL='{aap_controller_web_url}/pulp_ansible/galaxy/validated/'
    - ENV ANSIBLE_GALAXY_SERVER_VALIDATED_TOKEN=${TOKEN}
    - ENV ANSIBLE_GALAXY_SERVER_COMMUNITY_URL='{aap_controller_web_url}/pulp_ansible/galaxy/community/'
    - ENV ANSIBLE_GALAXY_SERVER_COMMUNITY_TOKEN=${TOKEN}
    - ENV ANSIBLE_GALAXY_SERVER_PUBLISHED_URL='{aap_controller_web_url}/pulp_ansible/galaxy/published/'
- ENV ANSIBLE_GALAXY_SERVER_PUBLISHED_TOKEN=${TOKEN}| 1 | Increment the collection version. |
| 2 | Add the python section to include the cowsay dependency. Ensure this lines up properly with galaxy and NOT collections. |
8.3: Increment Collection and Version and Republish
Now, we publish a new version of the collection and a new version of the EE that includes the updated collection and dependency.
-
First, edit
galaxy.ymland change the version from1.0.0to1.0.1. -
Rebuild the collection:
ansible-galaxy collection buildNo config file found; using defaults Created collection for red_hat_one.super_lab at /projects/lab_collection/red_hat_one-super_lab-1.0.1.tar.gz -
Publish the new version:
ansible-galaxy collection publish \
  --server {aap_controller_web_url}/api/galaxy/ \
  red_hat_one-super_lab-1.0.1.tar.gz \
  --token ${PAH_API_TOKEN} \
  --verbose
No config file found; using defaults Publishing collection artifact '/projects/lab_collection/red_hat_one-super_lab-1.0.1.tar.gz' to cmd_arg https://aap-aap.apps.cluster-gtjkm.dynamic.redhatworkshops.io/api/galaxy/ Collection has been published to the Galaxy server cmd_arg https://aap-aap.apps.cluster-gtjkm.dynamic.redhatworkshops.io/api/galaxy/ Waiting until Galaxy import task https://aap-aap.apps.cluster-gtjkm.dynamic.redhatworkshops.io/api/galaxy/v3/imports/collections/019bc7a3-5699-720a-b074-40f6be11761e/ has completed Collection has been successfully published and imported to the Galaxy server cmd_arg https://aap-aap.apps.cluster-gtjkm.dynamic.redhatworkshops.io/api/galaxy/ -
Approve collection in the PAH web interface as described previously.
-
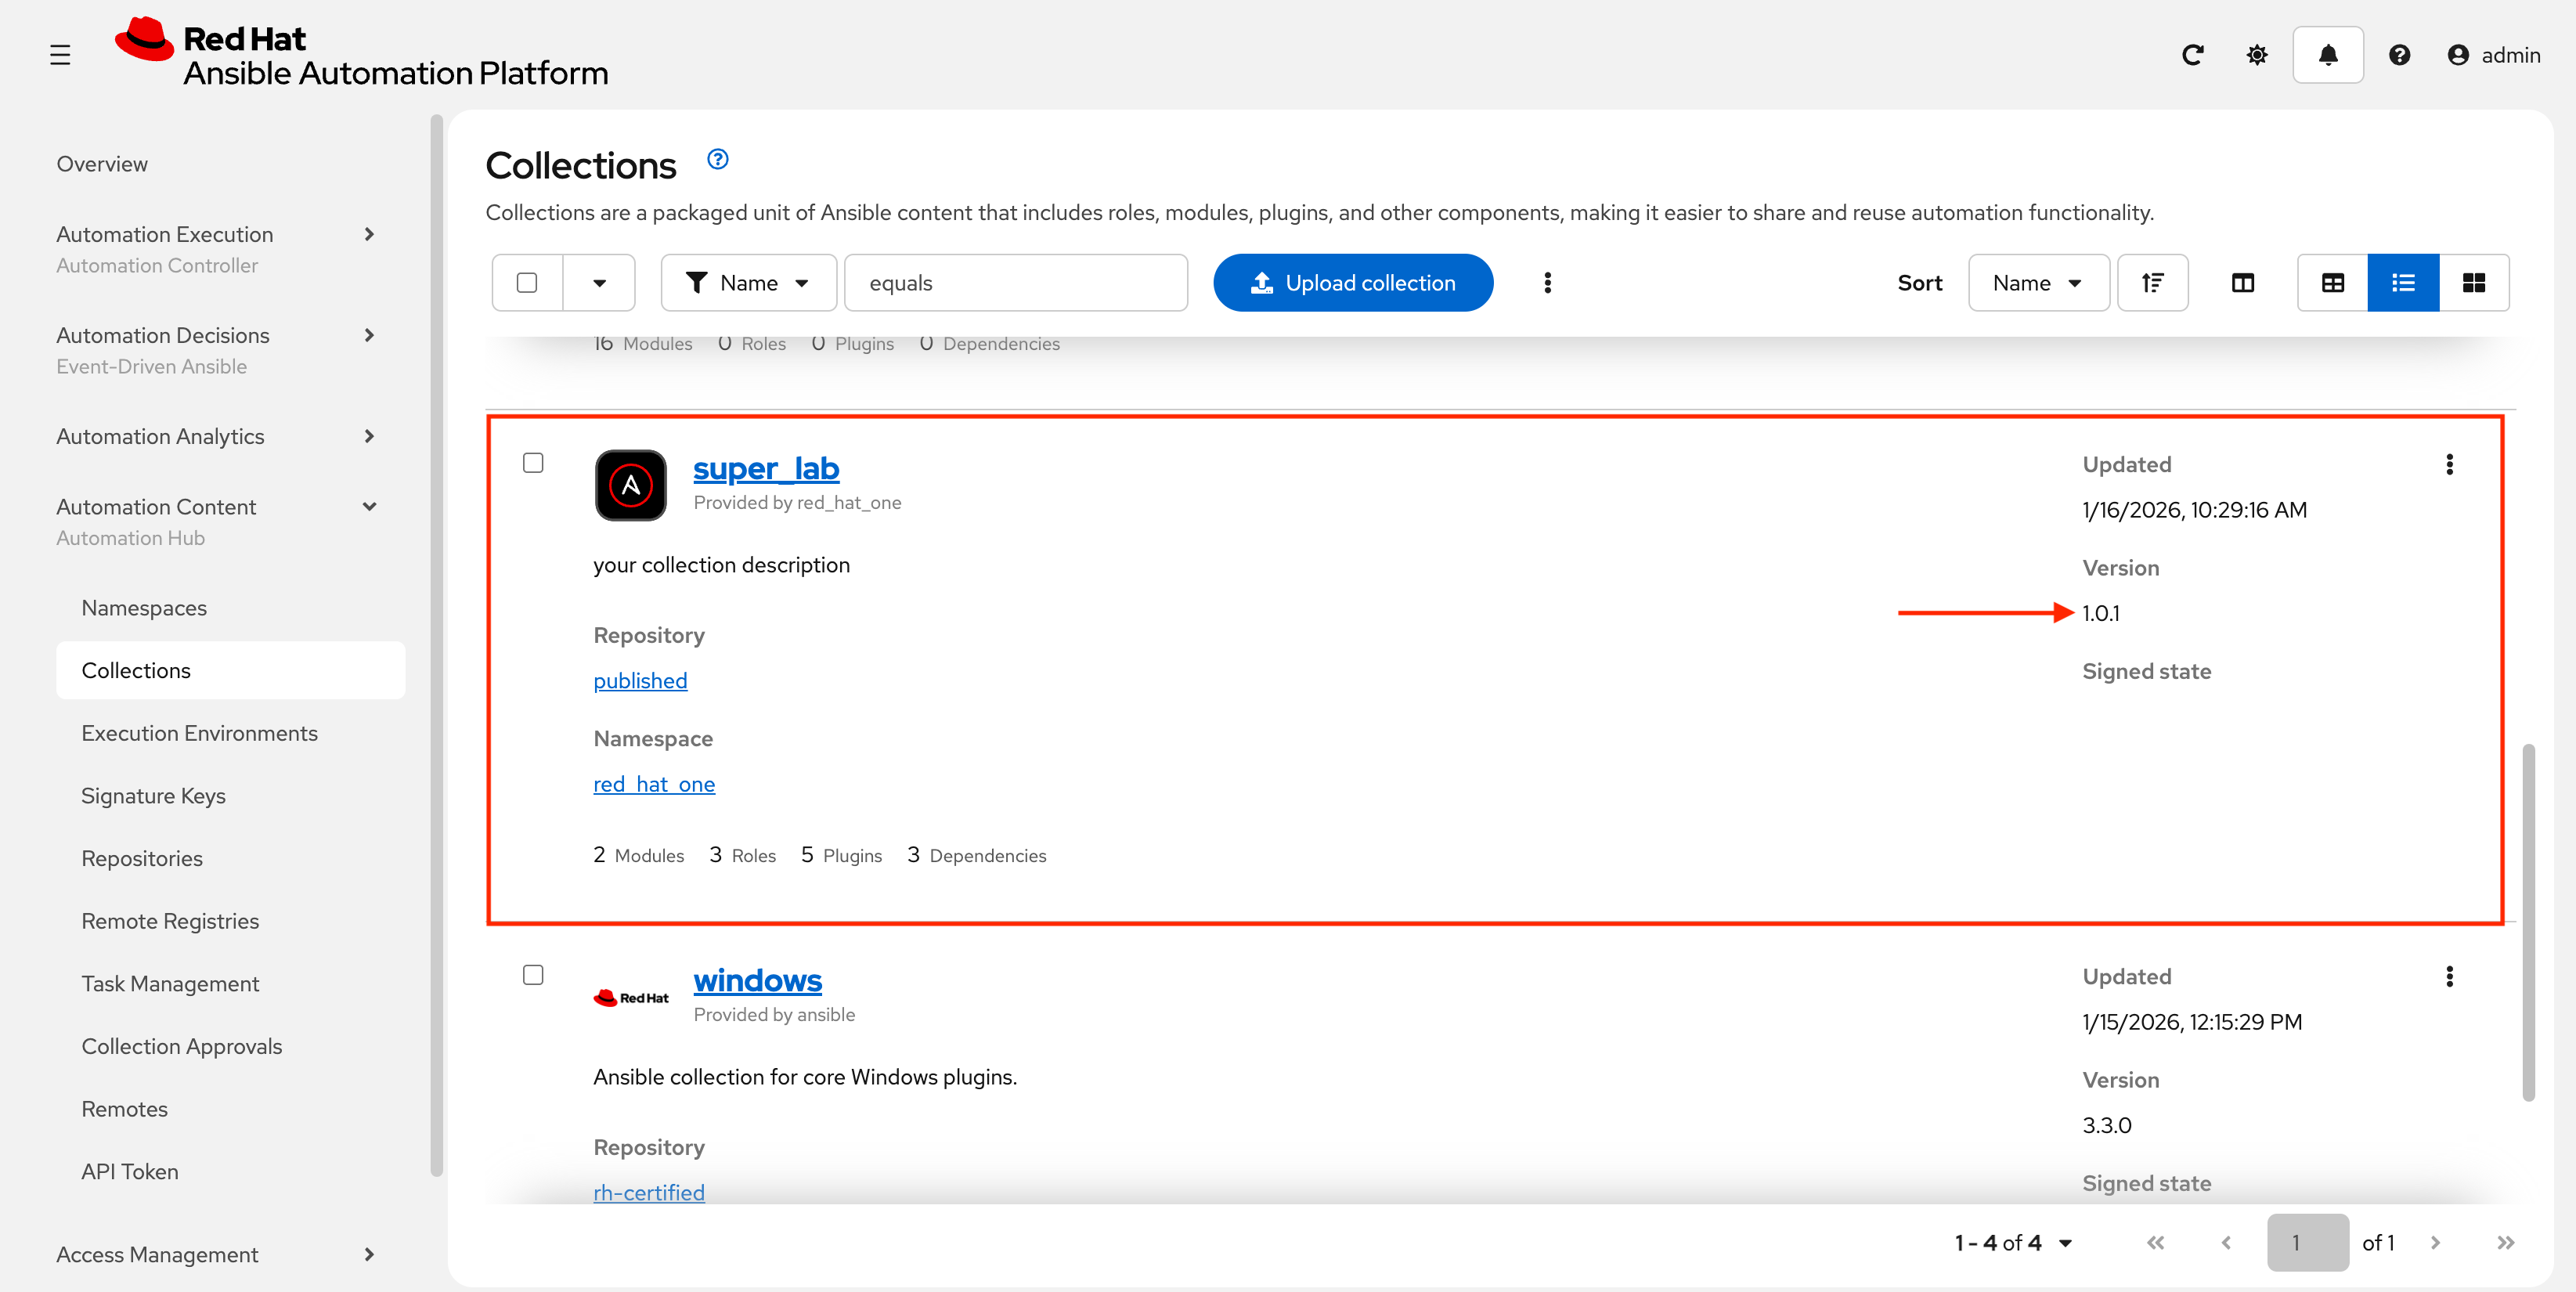
Verify new version in PAH:
8.4: Build and push new Execution Environment
Finally, build and push the new EE version:
-
Rebuild a new execution environment version:
ansible-builder build \
  --tag my-pah-ee:1.1 \
  --build-arg TOKEN=${PAH_API_TOKEN} \
  --verbosity 1
File context/_build/requirements.yml had modifications and will be rewritten Complete! The build context can be found at: /projects/lab_collection/context -
The new image will be available locally:
podman imagesREPOSITORY TAG IMAGE ID CREATED SIZE localhost/my-pah-ee 1.1 81a91a3d03da 18 minutes ago 365 MB <none> <none> 88d70b0fdb27 20 minutes ago 367 MB <none> <none> 162996cdd48c 20 minutes ago 365 MB localhost/my-pah-ee 1.0 40aee109e507 46 minutes ago 365 MB <none> <none> 0cd7b6b90811 47 minutes ago 367 MB <none> <none> 749921c9ce7b 48 minutes ago 365 MB aap-aap.apps.cluster-gtjkm.dynamic.redhatworkshops.io/ansible-automation-platform-26/ee-minimal-rhel9 latest 9d130a29338c 4 weeks ago 341 MB -
Tag the new EE:
podman tag \ localhost/my-pah-ee:1.1 aap-aap.{openshift_cluster_ingress_domain}/my-pah-ee:1.1 -
You can verify by listing images again:
podman imagesREPOSITORY TAG IMAGE ID CREATED SIZE aap-aap.apps.cluster-gtjkm.dynamic.redhatworkshops.io/my-pah-ee 1.1 81a91a3d03da 22 minutes ago 365 MB localhost/my-pah-ee 1.1 81a91a3d03da 22 minutes ago 365 MB88d70b0fdb27 24 minutes ago 367 MB 162996cdd48c 25 minutes ago 365 MB localhost/my-pah-ee 1.0 40aee109e507 50 minutes ago 365 MB 0cd7b6b90811 52 minutes ago 367 MB 749921c9ce7b 52 minutes ago 365 MB aap-aap.apps.cluster-gtjkm.dynamic.redhatworkshops.io/ansible-automation-platform-26/ee-minimal-rhel9 latest 9d130a29338c 4 weeks ago 341 MB -
Publish the new EE version:
podman push \
  aap-aap.{openshift_cluster_ingress_domain}/my-pah-ee:1.1
Getting image source signatures Copying blob 8b3622468abf skipped: already exists Copying blob 446e5adca0ed skipped: already exists Copying blob cfe476cd6f0a skipped: already exists Copying blob 0dd7080ba30c skipped: already exists Copying blob 635e97f40bc2 done | Copying blob 4a5530a62f36 skipped: already exists Copying blob aa5eefe60148 skipped: already exists Copying blob 444e1771b734 done | Copying blob d7c5bfb583a7 done | Copying blob ef036adaa1ae done | Copying blob a077e3cef78f done | Copying blob bd9ddc54bea9 skipped: already exists Copying blob 1294811d53dd done | Copying config 3c074f28f0 done | Writing manifest to image destination -
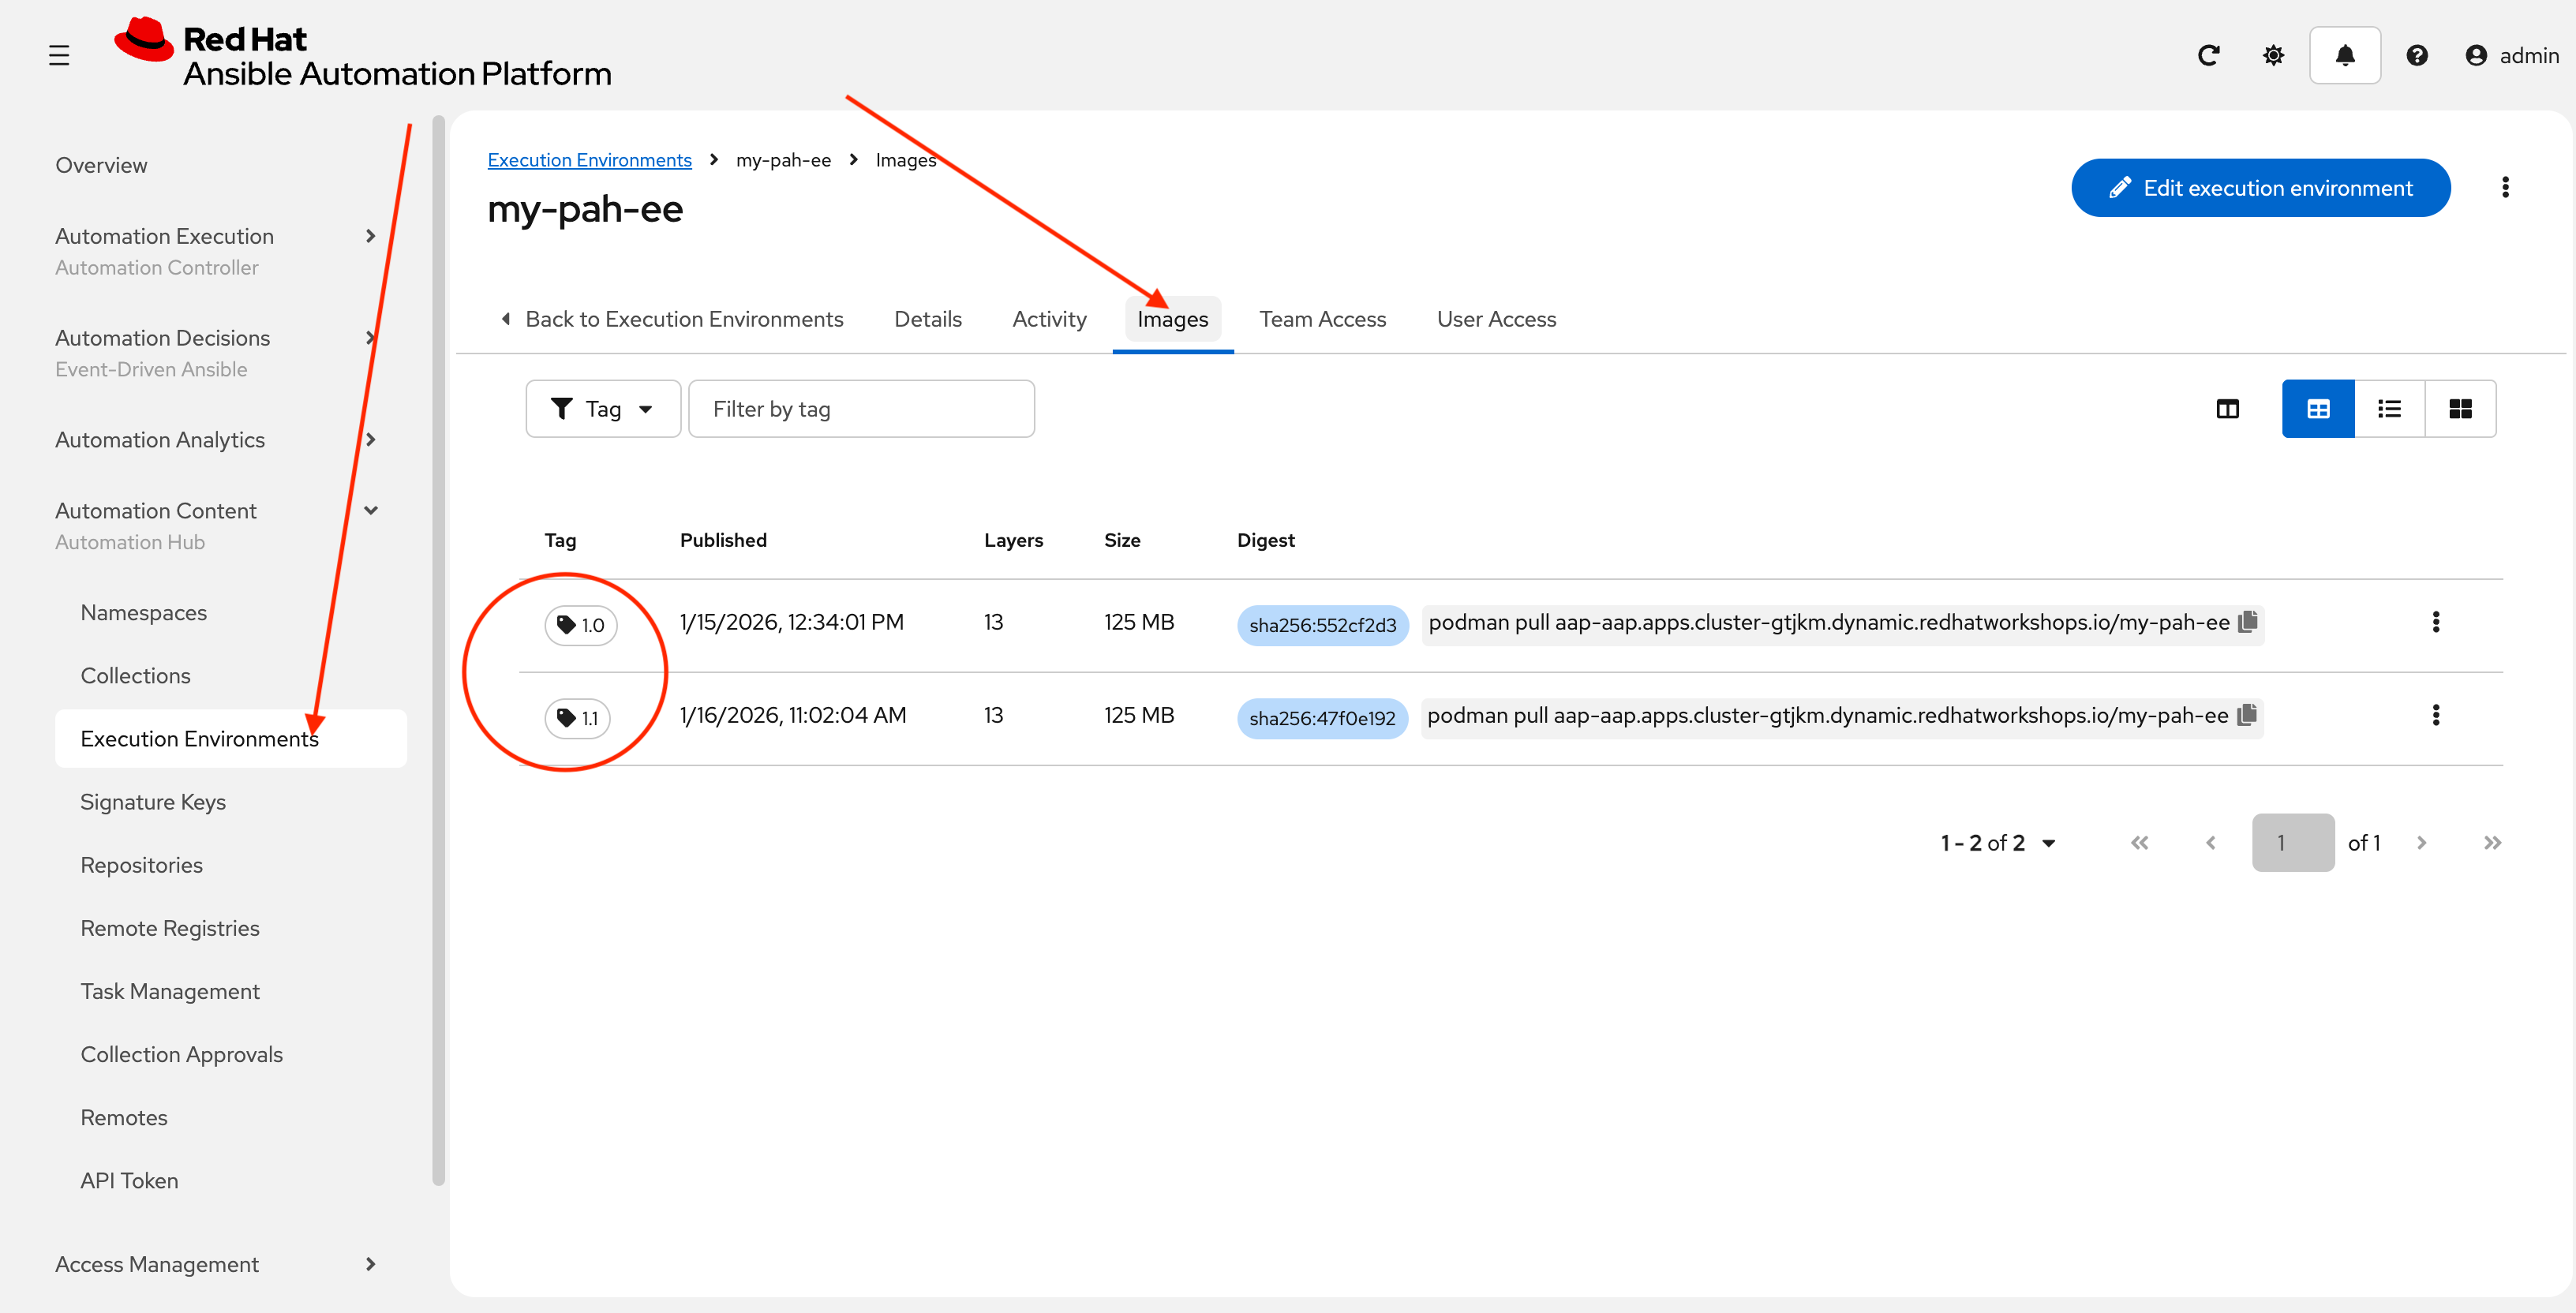
Verify by navigating in AAP controller to Automation Content → Execution Environments → my-pah-ee → Images
Conclusion
Congratulations! You have successfully mastered the complete lifecycle of managing Ansible content in enterprise environments:
-
Environment Setup: Configured your local environment to connect to a Private Automation Hub
-
Content Creation: Built and published custom collections with advanced functionality (including filter plugins)
-
Environment Management: Created custom Execution Environments with specific toolsets and dependencies
-
Hub Integration: Configured Private Automation Hub for content distribution and management
This foundation enables you to create, manage, and distribute automation content at enterprise scale while maintaining security, compliance, and governance standards. The skills learned here are essential for managing automation in large organizations where content needs to be curated, controlled, and distributed efficiently.
Appendix
For your convenience here are the main commands used in this lab.
config.sh
This script needs to be run in Dev Spaces if your workspace restarts.
source /projects/env/unset_pah_vars.env
cd /projects/lab_playbooks/
ansible-galaxy collection install --requirements-file collections/requirements.yml
pip install pypsrp
git config --global credential.helper store
Script to release a new collection
These are the commands used to release a new collection.
cd /projects/lab_collection/
ansible-galaxy collection build --verbose
ansible-galaxy collection publish --server {aap_controller_web_url}/api/galaxy/ red_hat_one-super_lab-1.0.0.tar.gz --token ${PAH_API_TOKEN} --verbose
Script to release new Execution Environment
These are the commands used to release a new execution environment.
podman login aap-aap.{openshift_cluster_ingress_domain}
ansible-builder build --tag my-pah-ee:1.0 --build-arg TOKEN=${PAH_API_TOKEN} --verbosity 1
podman images
podman tag localhost/my-pah-ee:1.0 aap-aap.{openshift_cluster_ingress_domain}/my-pah-ee:1.0
podman images
podman push aap-aap.{openshift_cluster_ingress_domain}/my-pah-ee:1.0
Enhanced Script
Try using something like Gemini to create a better version of these scripts for more practical use. Copy and paste both of the previous sets of commands into a prompt in Gemini with something like the following:
Take the following bash script and add a proper shebang, pull the hard-coded filenames out and define them as variables at the top so this can be re-used. The variables should define the collection name, execution environment name and versions as separate vars. Leave ${PAH_API_TOKEN} alone.