Module 2 Lab 3: Content - Develop Playbook and Execute within AAP
In this lab we will configure AAP to execute the automation content created in previous labs. We will also learn some additional activities around collection management.
Learning Objectives
After completing this module, you will be able to:
-
Understand the how to create objects in AAP using the assets previously created
-
Executing job templates using the collection and Execution Environment
-
Customizing components in AAP
Prerequisites
-
Access to OpenShift Dev Spaces
-
Automation Controller and Automation Hub
-
Windows managed host
-
Custom collection and execution environment built and published to Automation Hub
1: Test content in Dev Spaces
Now that both the collection and Execution Environment have been created and published to Private Automation hub, we’ll create a playbook to use the filter contained within the red_hat_one.super_lab collection.
1.1: Create a Playbook
Since we already have a plabyook directory at /projects/lab_playbooks/ we will use this.
-
Create a new playbook in a file named
test_pah_ee.yml. This playbook uses thedebugmodule to print a message that has been formatted by our customcowsayfilter:/projects/lab_playbooks/test_pah_ee.yml--- - name: Test custom filter from Private Automation Hub hosts: localhost connection: local gather_facts: false tasks: - name: Print a message using the cowsay filter ansible.builtin.debug: msg: "{{ 'Hello from my custom filter!' | red_hat_one.super_lab.cowsay }}" ...
1.3: Run playbook locally
-
Attempt to run this in Dev Spaces.
-
First change to the
/projects/lab_playbooks/directory:cd /projects/lab_playbooks/ -
Execute this with
ansible-playbook. It will fail. Do you know why?ansible-playbook test_pah_ee.ymlansible-playbook [core 2.19.3](1) config file = /projects/lab_playbooks/ansible.cfg configured module search path = ['/home/user/.ansible/plugins/modules', '/usr/share/ansible/plugins/modules'] ansible python module location = /usr/local/lib/python3.11/site-packages/ansible ansible collection location = /home/user/.ansible/collections:/usr/share/ansible/collections executable location = /usr/local/bin/ansible-playbook python version = 3.11.13 (main, Aug 21 2025, 00:00:00) [GCC 11.5.0 20240719 (Red Hat 11.5.0-11)] (/usr/bin/python3.11) jinja version = 3.1.6 pyyaml version = 6.0.3 (with libyaml v0.2.5) Using /projects/lab_playbooks/ansible.cfg as config file [WARNING]: Found both group and host with same name: windows Skipping callback 'minimal', as we already have a stdout callback. Skipping callback 'oneline', as we already have a stdout callback. PLAY [Test custom filter from Private Automation Hub] ***************************************************************************************************************************************************** TASK [Print a message using the cowsay filter] ************************************************************************************************************************************************************ task path: /projects/lab_playbooks/test_pah_ee.yml:8 [ERROR]: Task failed: Finalization of task args for 'ansible.builtin.debug' failed: Error while resolving value for 'msg': The filter plugin 'red_hat_one.super_lab.cowsay' failed: name 'AnsibleFilterError' is not defined Task failed. Origin: /projects/lab_playbooks/test_pah_ee.yml:8:7 6 7 tasks: 8 - name: Print a message using the cowsay filter ^ column 7 <<< caused by >>> Finalization of task args for 'ansible.builtin.debug' failed. Origin: /projects/lab_playbooks/test_pah_ee.yml:9:7 7 tasks: 8 - name: Print a message using the cowsay filter 9 ansible.builtin.debug: ^ column 7 <<< caused by >>> Error while resolving value for 'msg': The filter plugin 'red_hat_one.super_lab.cowsay' failed: name 'AnsibleFilterError' is not defined Origin: /projects/lab_playbooks/test_pah_ee.yml:10:14 8 - name: Print a message using the cowsay filter 9 ansible.builtin.debug: 10 msg: "{{ 'Hello from my custom filter!' | red_hat_one.super_lab.cowsay }}" ^ column 14 fatal: [localhost]: FAILED! => {"msg": "Task failed: Finalization of task args for 'ansible.builtin.debug' failed: Error while resolving value for 'msg': The filter plugin 'red_hat_one.super_lab.cowsay' failed: name 'AnsibleFilterError' is not defined"} PLAY RECAP ************************************************************************************************************************************************************************************************ localhost : ok=0 changed=0 unreachable=0 failed=1 skipped=0 rescued=0 ignored=01 Notice this version of ansible-corevs what is in the execution environment.Using ansible-playbookwill merely use the local environment, not the execution environment we just created. In order to utilize it properly, we must useansible-navigator. -
This time use
ansible-navigatorand specify the execution environment:ansible-navigator \ --execution-environment-image aap-aap.{openshift_cluster_ingress_domain}/my-pah-ee:1.1 \ run test_pah_ee.yml \ --mode stdoutansible-playbook [core 2.16.14](1) config file = /projects/lab_playbooks/ansible.cfg configured module search path = ['/root/.ansible/plugins/modules', '/usr/share/ansible/plugins/modules'] ansible python module location = /usr/local/lib/python3.11/site-packages/ansible ansible collection location = /root/.ansible/collections:/usr/share/ansible/collections executable location = /usr/local/bin/ansible-playbook python version = 3.11.13 (main, Aug 21 2025, 00:00:00) [GCC 11.5.0 20240719 (Red Hat 11.5.0-11)] (/usr/bin/python3) jinja version = 3.1.6 libyaml = True Using /projects/lab_playbooks/ansible.cfg as config file [WARNING]: Found both group and host with same name: windows Skipping callback 'awx_display', as we already have a stdout callback. Skipping callback 'default', as we already have a stdout callback. Skipping callback 'minimal', as we already have a stdout callback. Skipping callback 'oneline', as we already have a stdout callback. PLAYBOOK: test_pah_ee.yml ****************************************************** 1 plays in /projects/lab_playbooks/test_pah_ee.yml PLAY [Test custom filter from Private Automation Hub] ************************** TASK [Print a message using the cowsay filter] ********************************* task path: /projects/lab_playbooks/test_pah_ee.yml:8 ____________________________ | Hello from my custom filter! | ============================ \ \ ^__^ (oo)\_______ (__)\ )\/\ ||----w | || ||(2) ok: [localhost] => { "msg": "" } PLAY RECAP ********************************************************************* localhost : ok=1 changed=0 unreachable=0 failed=0 skipped=0 rescued=0 ignored=01 Notice this supported version of ansible-core2 Moo! It worked!
2: Integration with Automation Controller
Now that we have confirmed the execution environment and custom filter work, let’s bring everything together in AAP.
2.1: Push Playbook Project Files to Git
With the changes to incorporate the updated collection (filter plugin and version) and the Execution Environment, publish all of the changes to your git repository.
-
Navigate to the Gitea instance and create a new repository called
lab_playbooksusing the steps provided in the prior lab. -
Copy the URL to clone this repository
-
Return to Dev Spaces and change to the
/projects/lab_playbooks/directorycd /projects/lab_playbooks/ -
Initialize the
lab_playbooksdirectorygit inithint: Using 'master' as the name for the initial branch. This default branch name hint: is subject to change. To configure the initial branch name to use in all hint: of your new repositories, which will suppress this warning, call: hint: hint: git config --global init.defaultBranch <name> hint: hint: Names commonly chosen instead of 'master' are 'main', 'trunk' and hint: 'development'. The just-created branch can be renamed via this command: hint: hint: git branch -m <name> Initialized empty Git repository in /projects/lab_playbooks/.git/ -
Change to
mainper best practices:git checkout -b mainSwitched to a new branch 'main' -
Add specific relevant files (not all of the scaffold files):
git add site.yml test_pah_ee.yml collections/requirements.yml inventory/hosts.yml -
Next, add the new remote:
git remote add origin {gitea_console_url}/{gitea_user}/lab_playbooks.git -
Finally, commit them to the new repository:
git commit --message "Initial commit of playbook files"[main (root-commit) f2a144b] Initial commit of playbook files 4 files changed, 38 insertions(+) create mode 100644 collections/requirements.yml create mode 100644 inventory/hosts.yml create mode 100644 site.yml create mode 100644 test_pah_ee.yml -
Lastly, push commit to the new repository:
git push origin mainEnumerating objects: 6, done. Counting objects: 100% (6/6), done. Delta compression using up to 16 threads Compressing objects: 100% (5/5), done. Writing objects: 100% (6/6), 779 bytes | 779.00 KiB/s, done. Total 6 (delta 0), reused 0 (delta 0), pack-reused 0 (from 0) remote: . Processing 1 references remote: Processed 1 references in total To https://gitea.apps.cluster-866kv.dyn.redhatworkshops.io/user1/lab_playbooks.git * [new branch] main -> main -
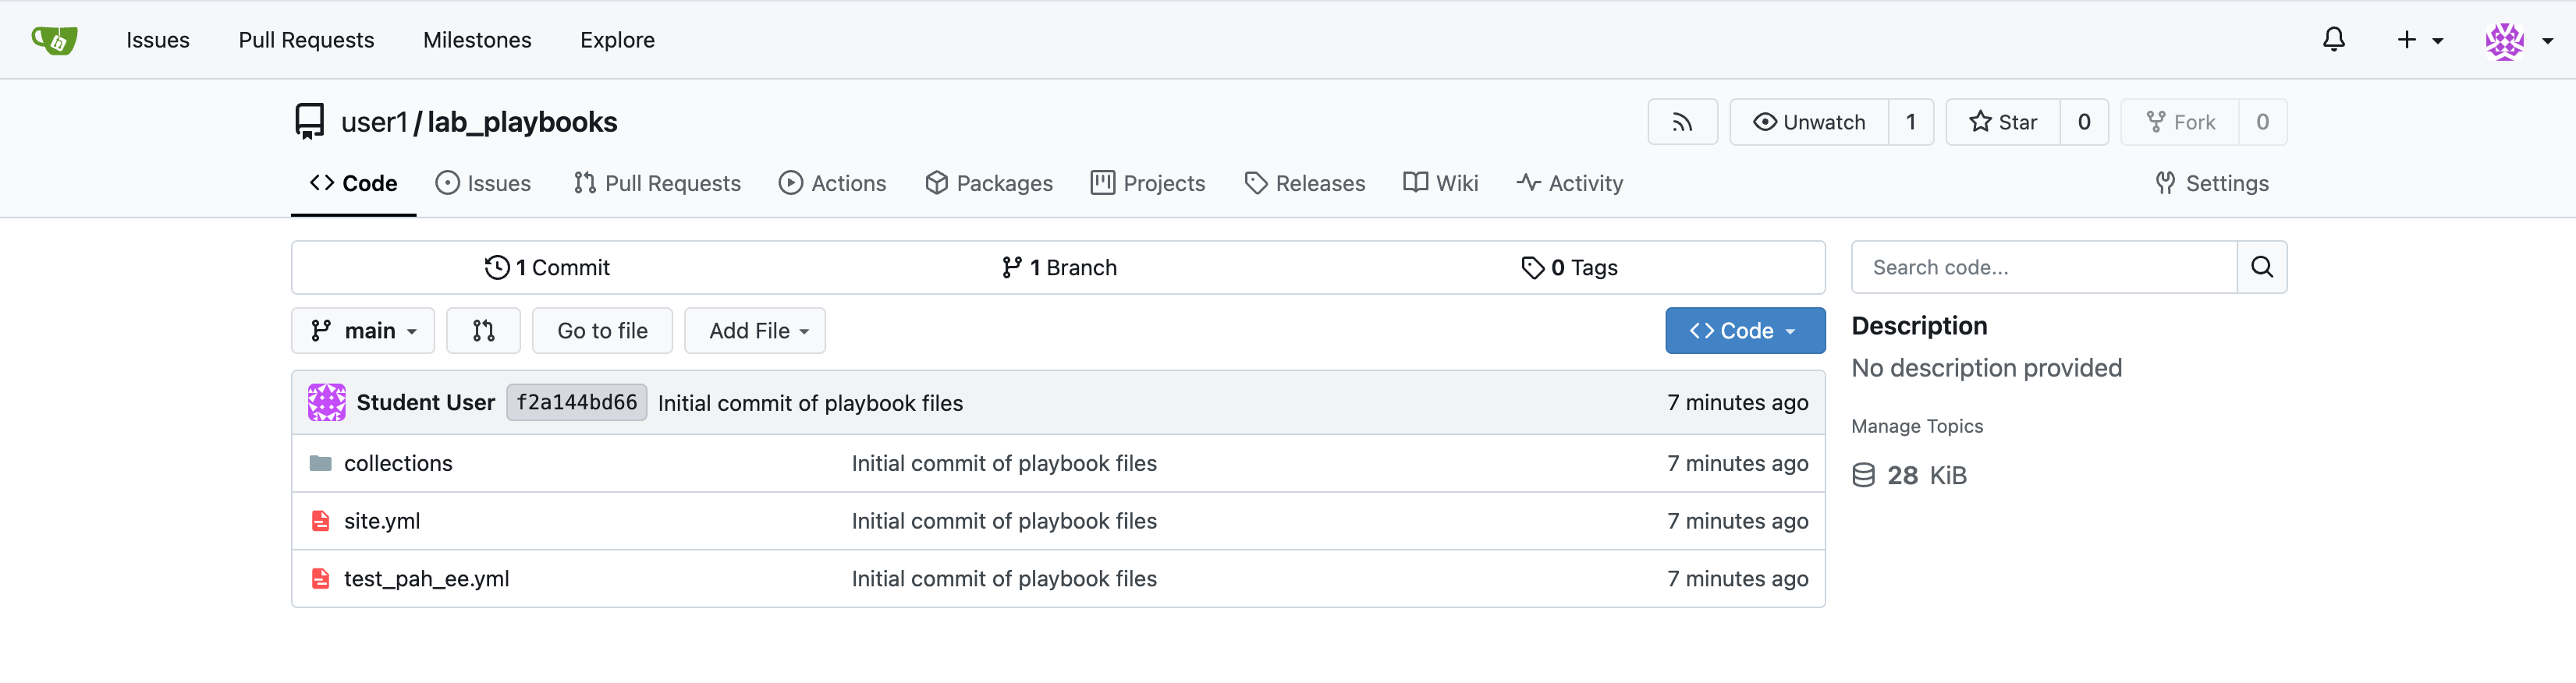
Verify the files appear in Gitea
2.2: Create a Credential for Hub Container Registry
Now, crete a series of resources in Automation Controller to integrate with the components we have created so far.
First, create a new credential to allow Automation Controller to pull the custom Execution Environment from Private Automation Hub.
-
Launch the Automation Controller web interface and login using the credentials from the Environment Details page.
-
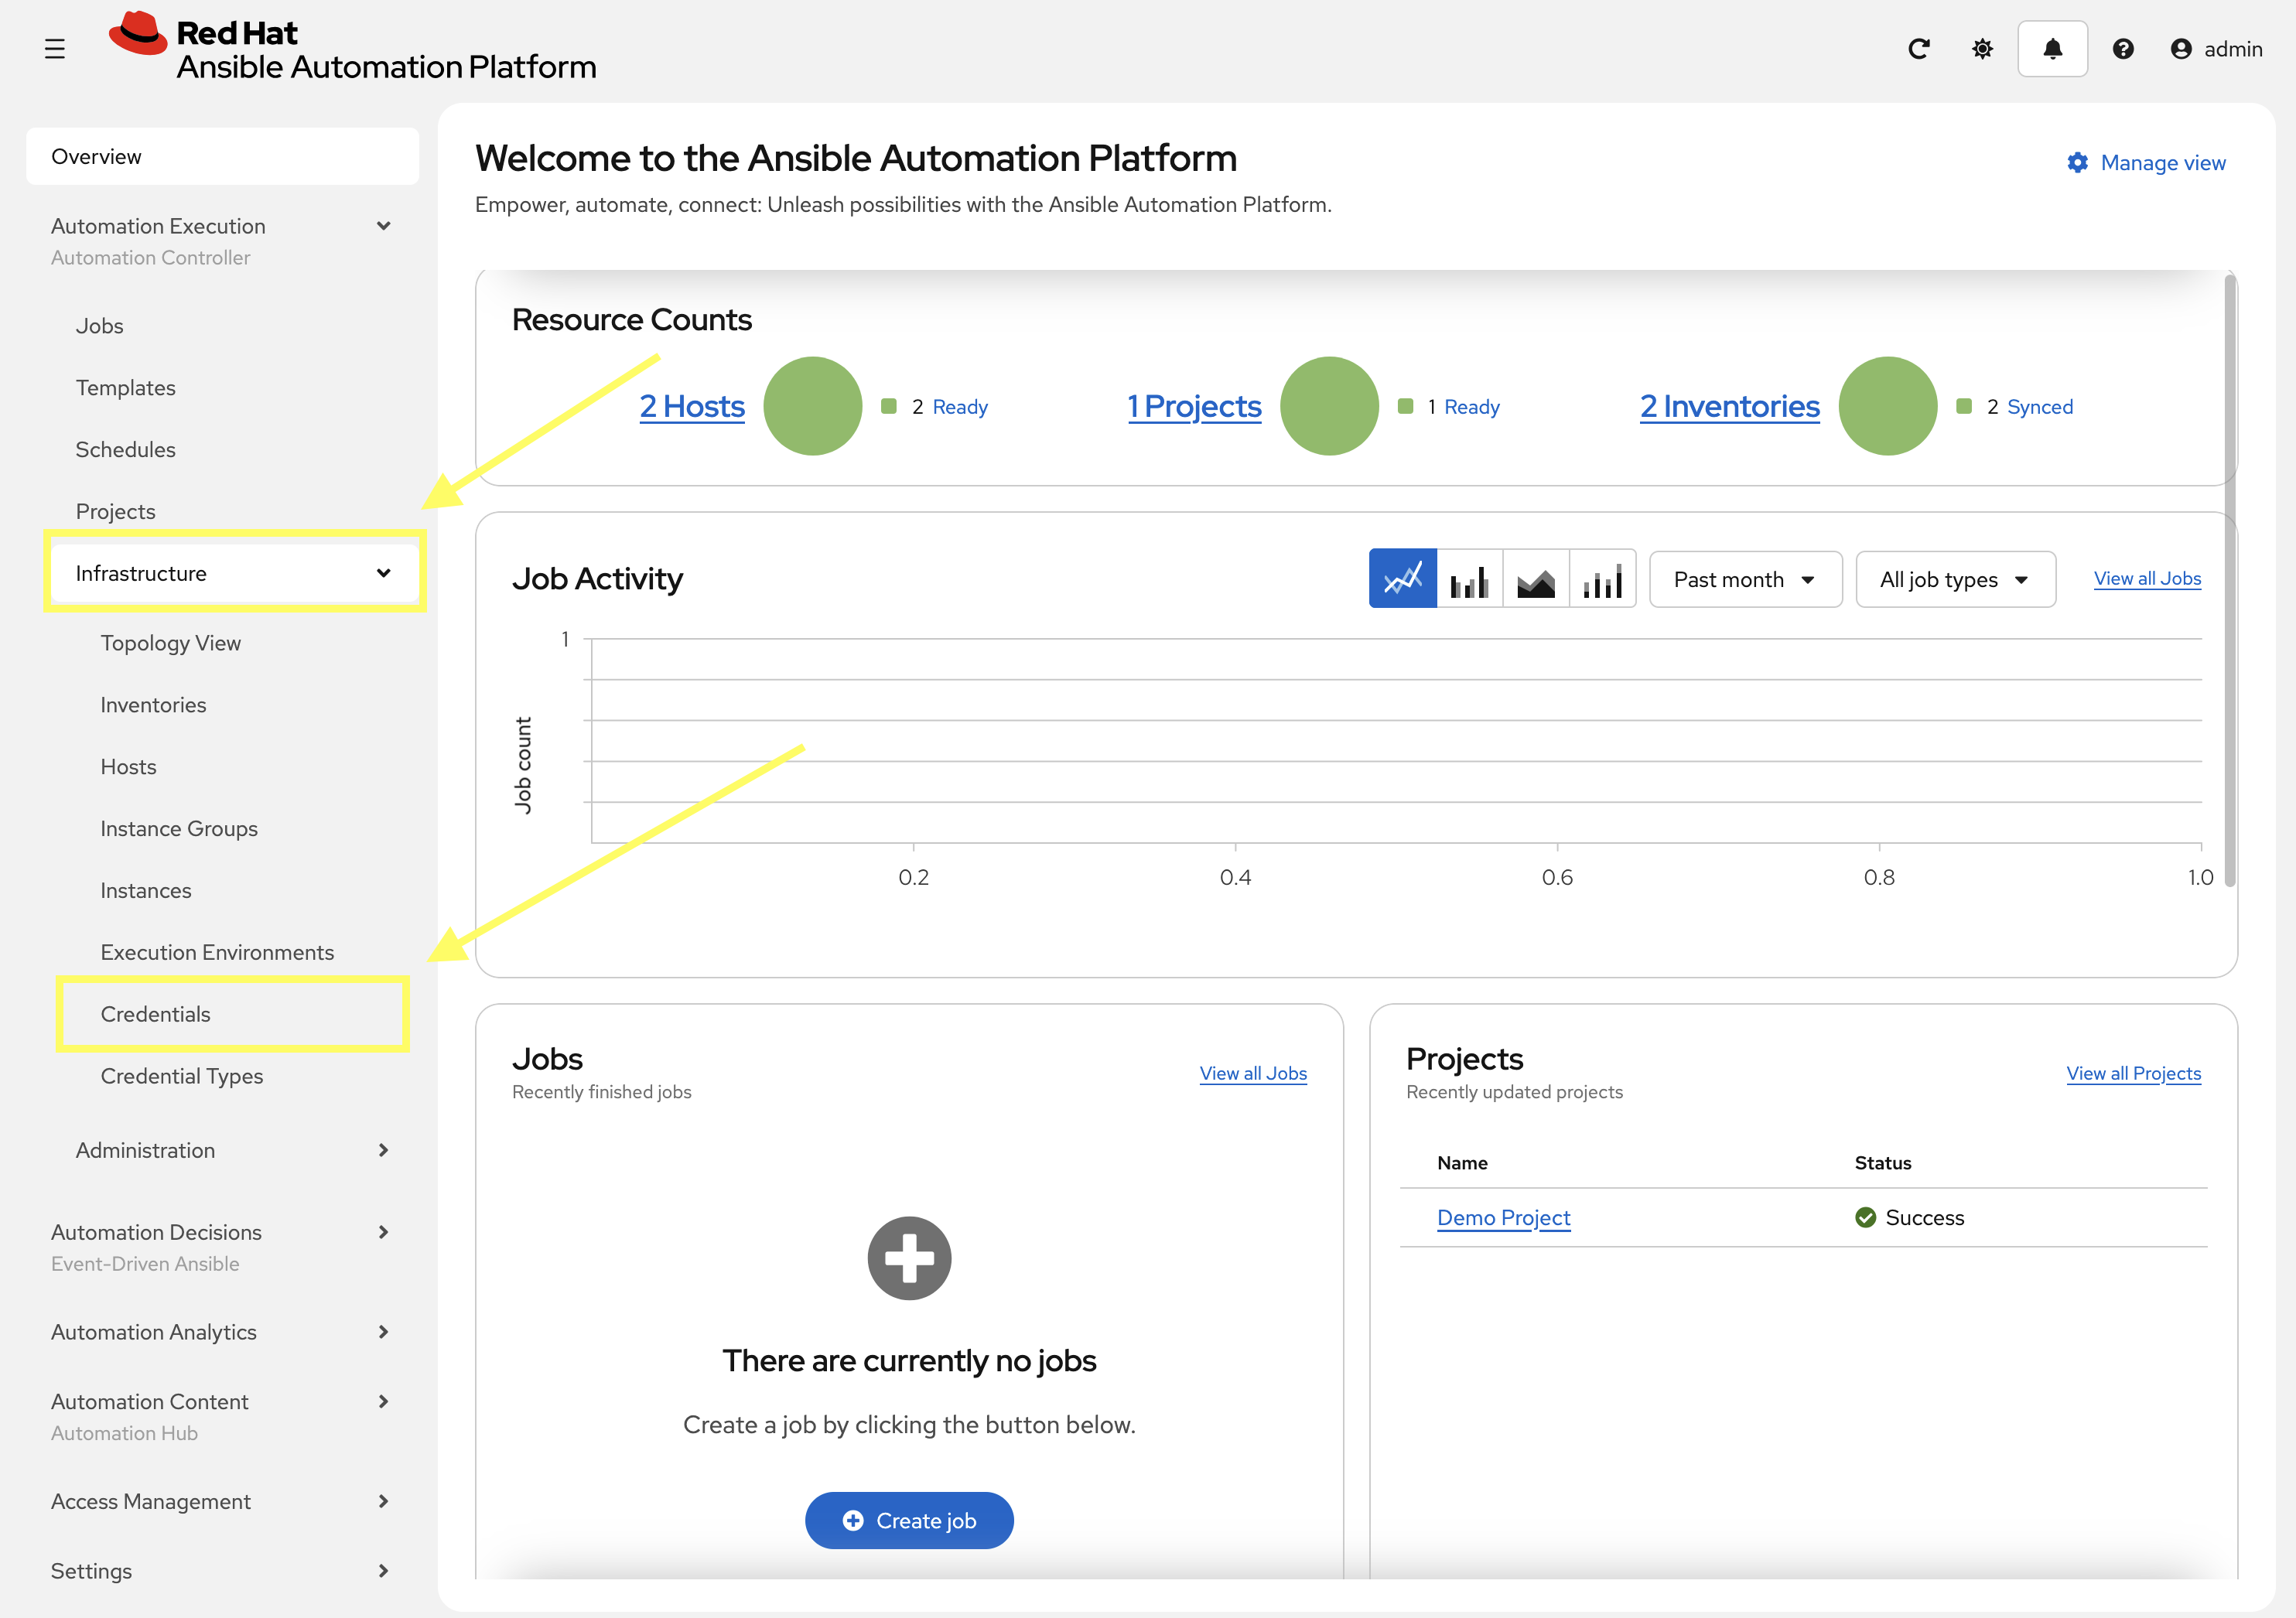
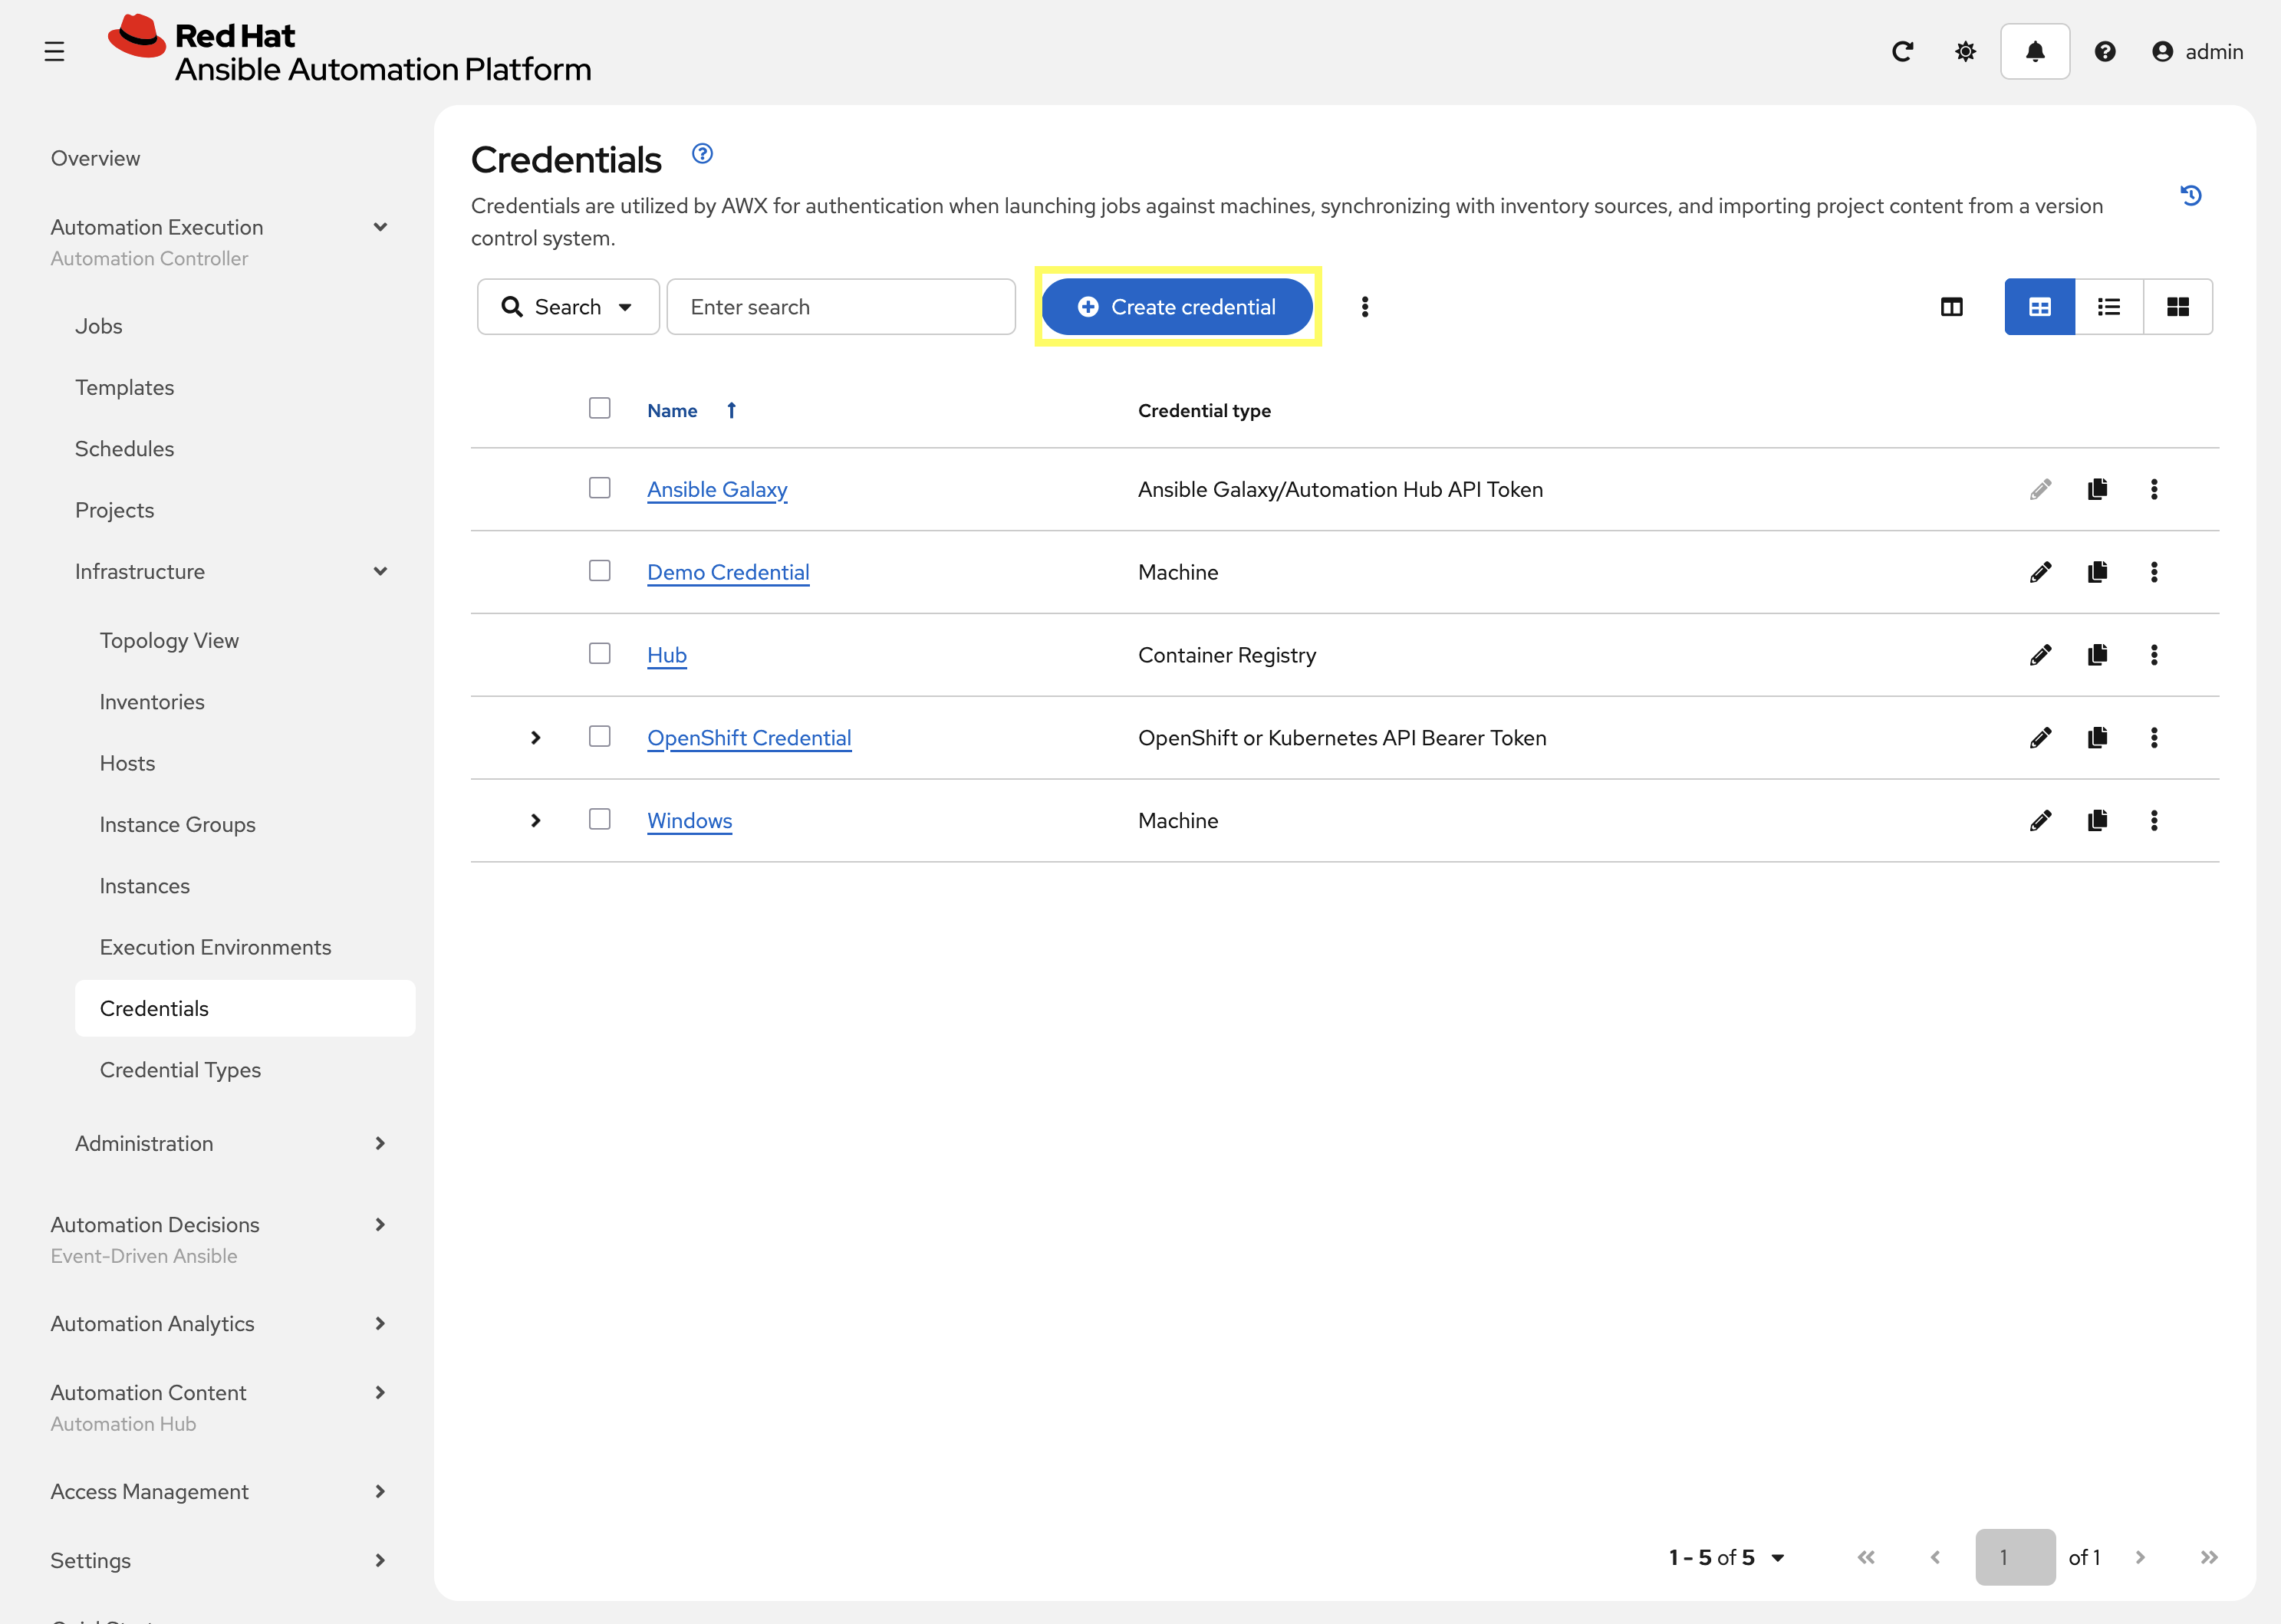
From the navigation menu on the left, expand Automation Execution and expand Infrastructure and click on Credentials.
-
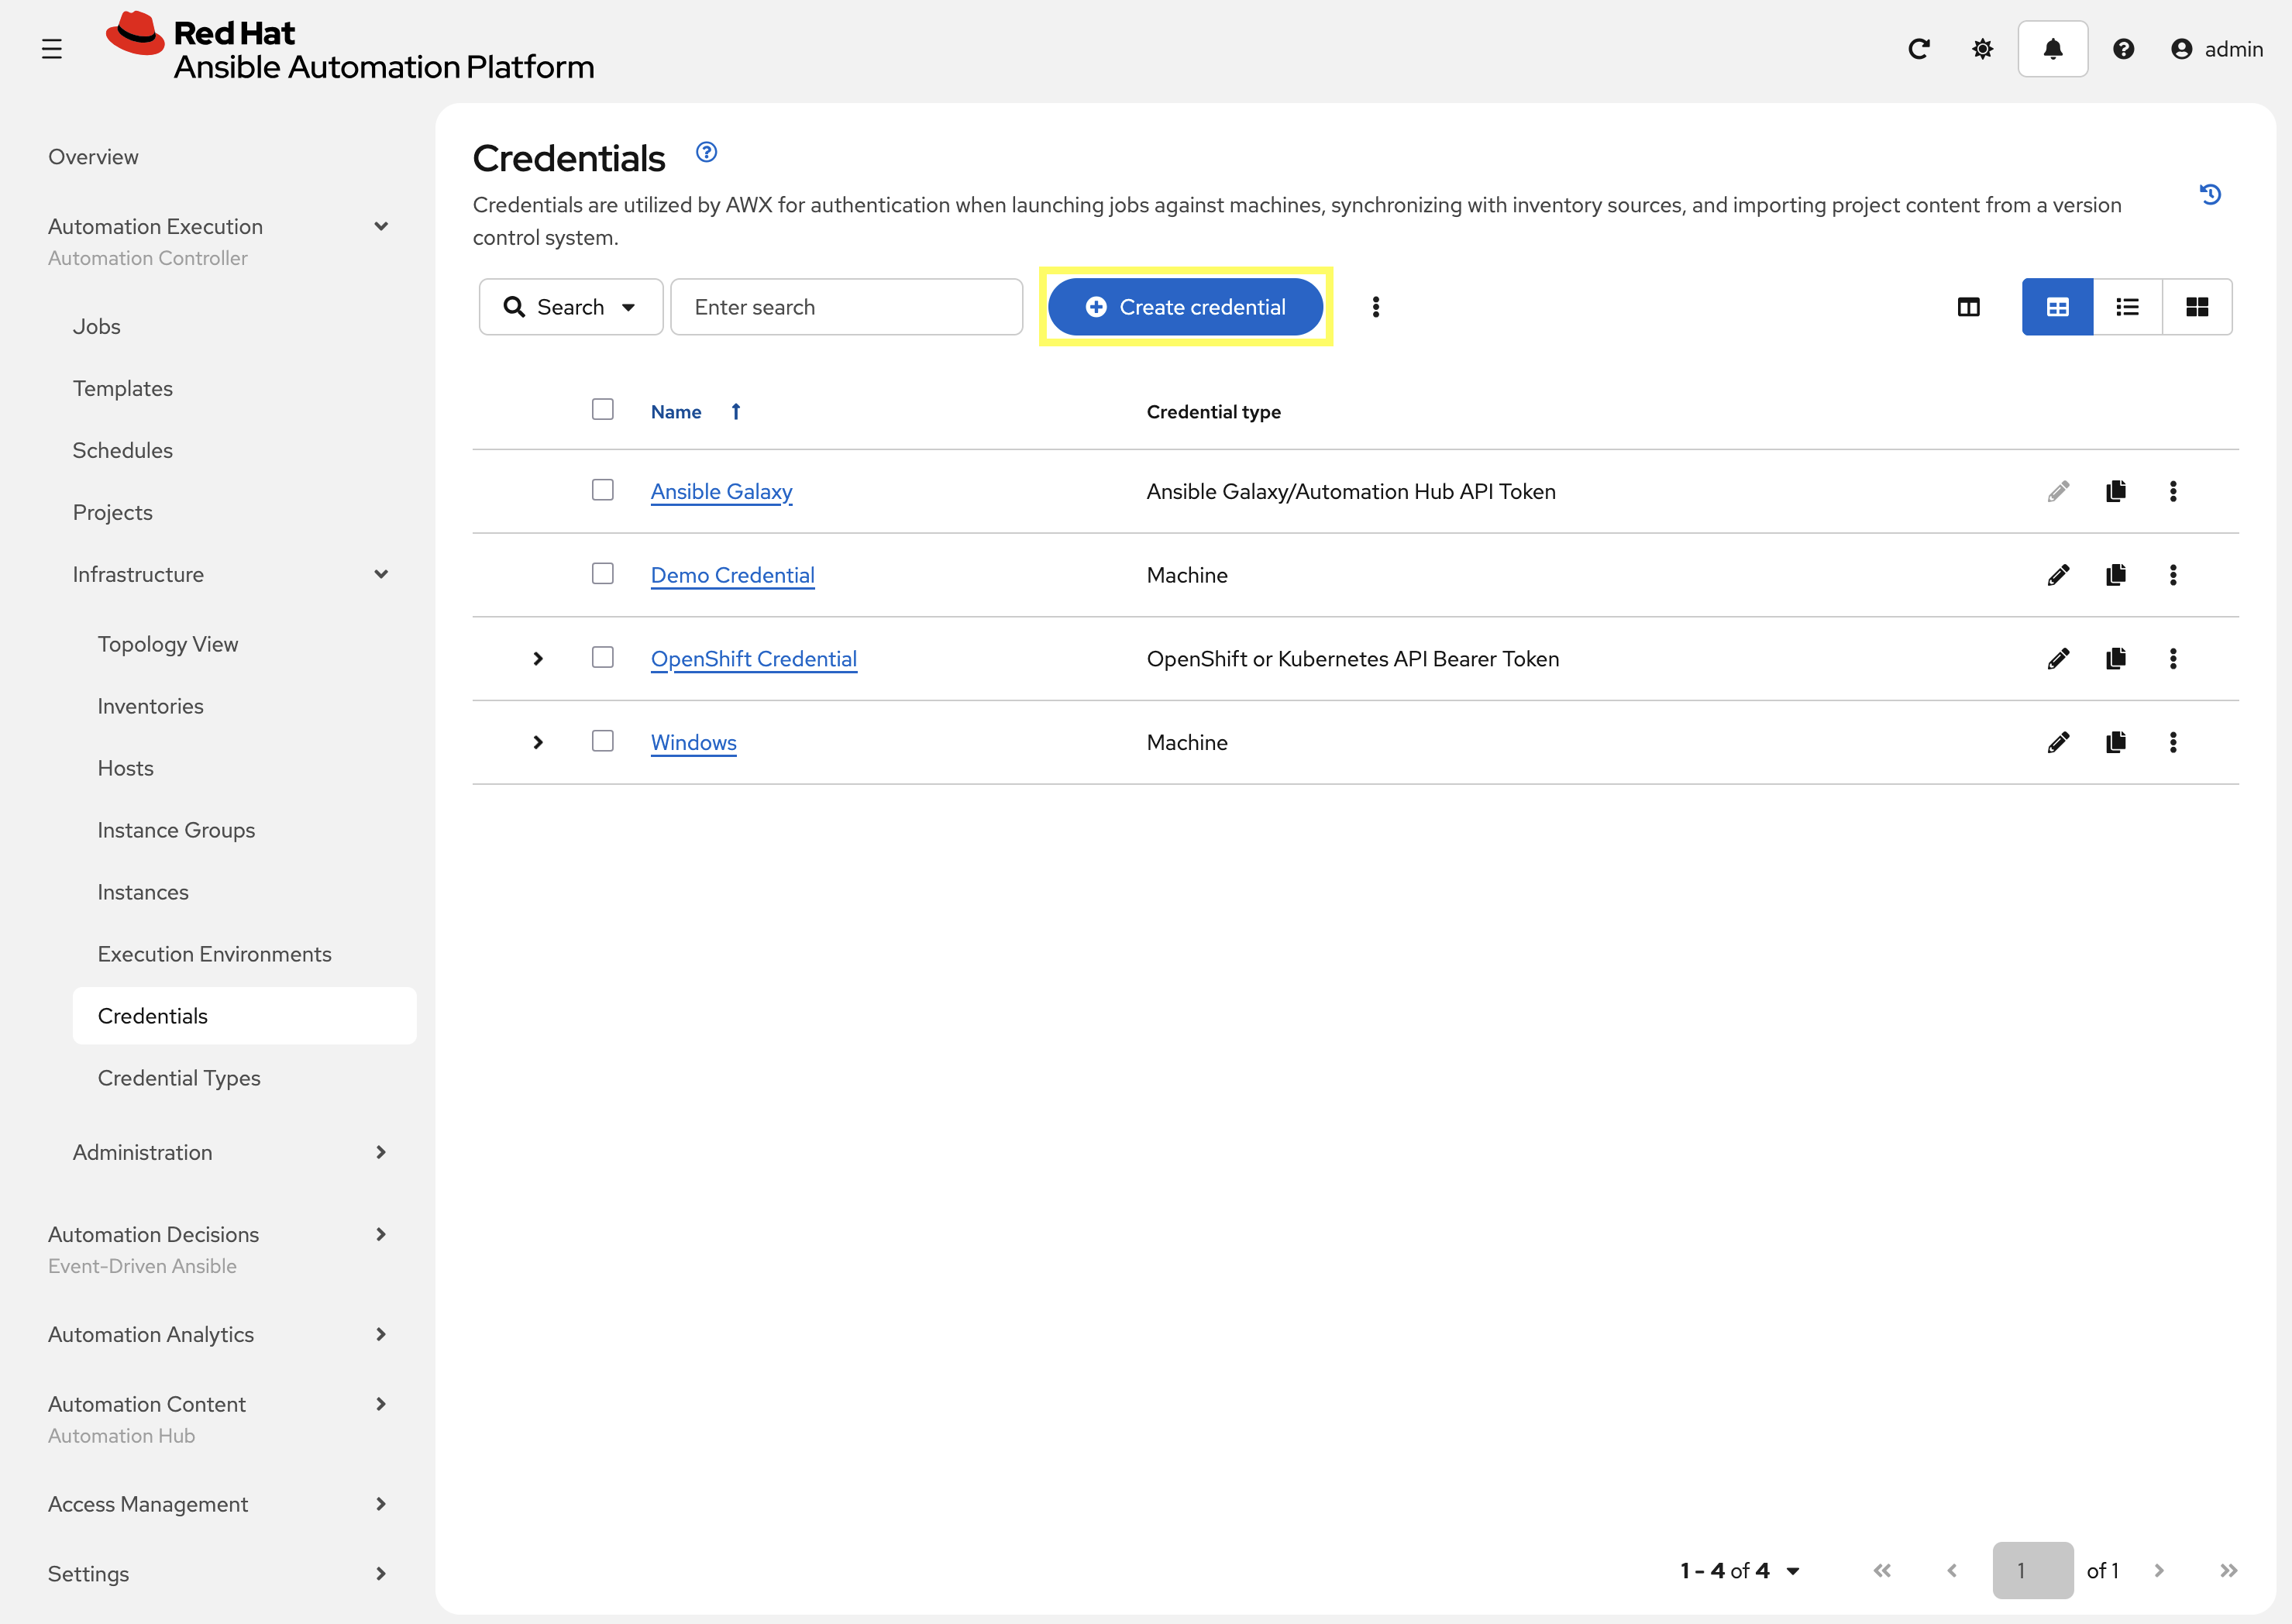
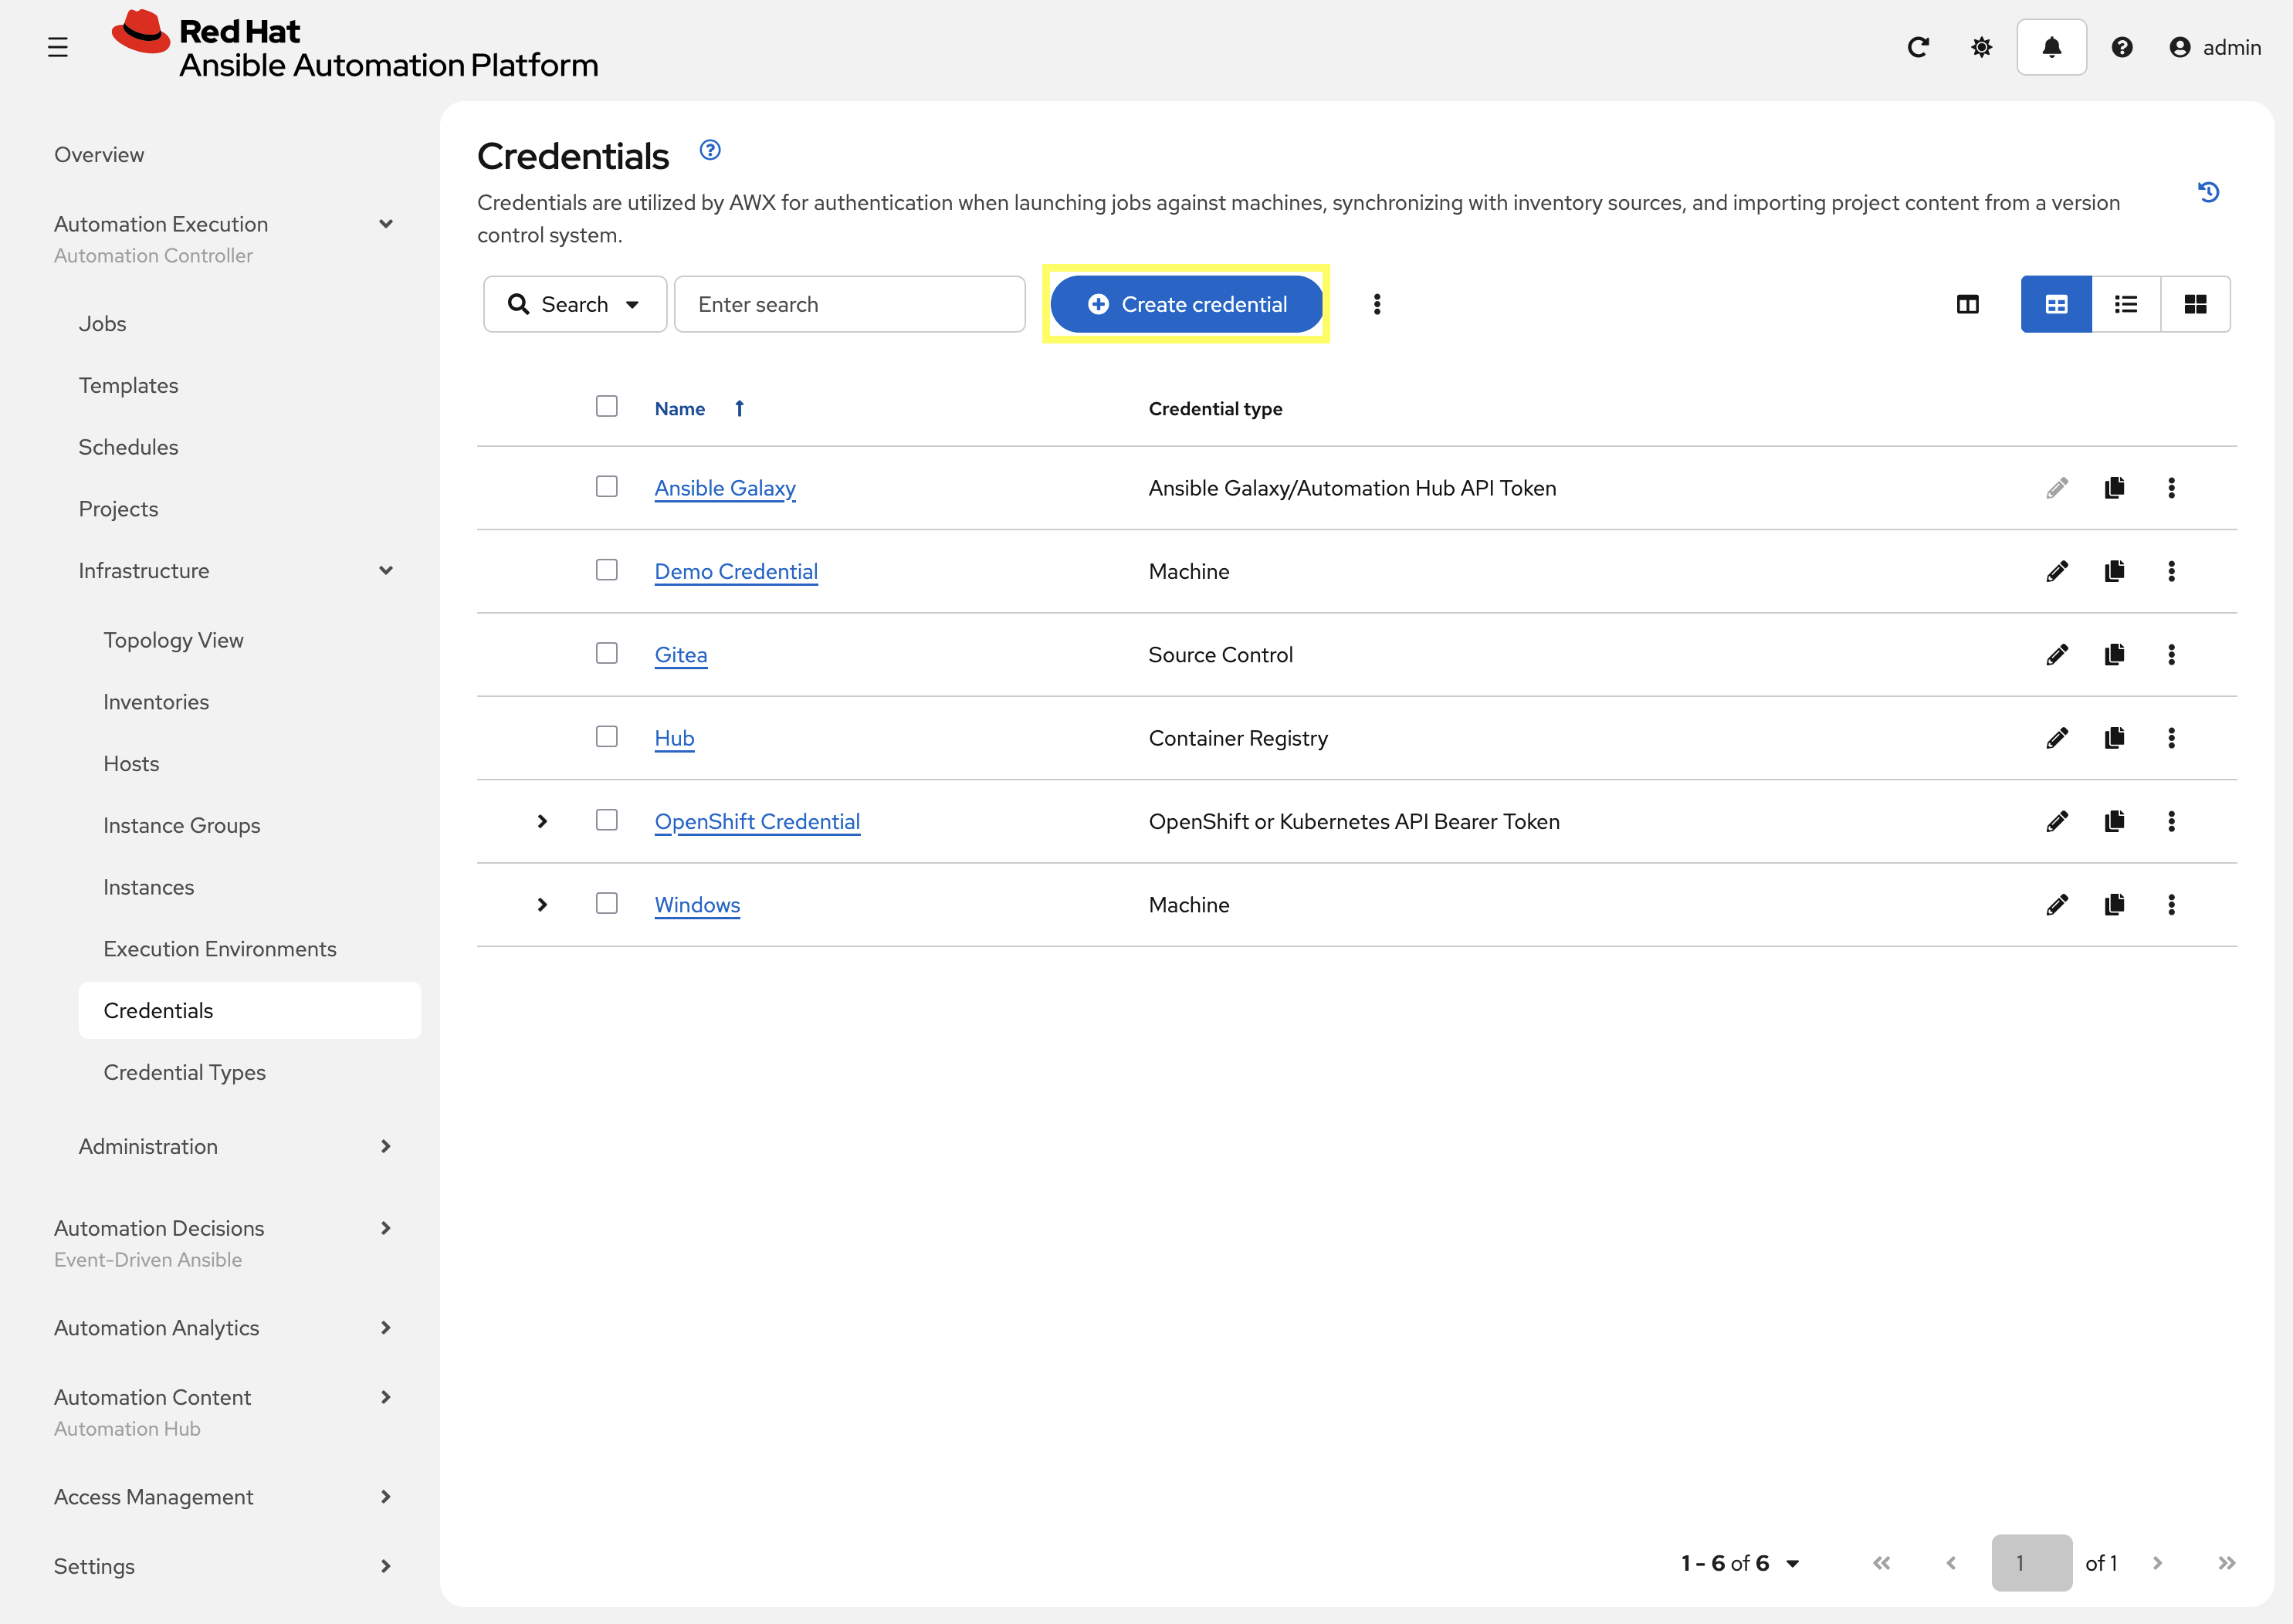
Click Create credential to add a new credential.
-
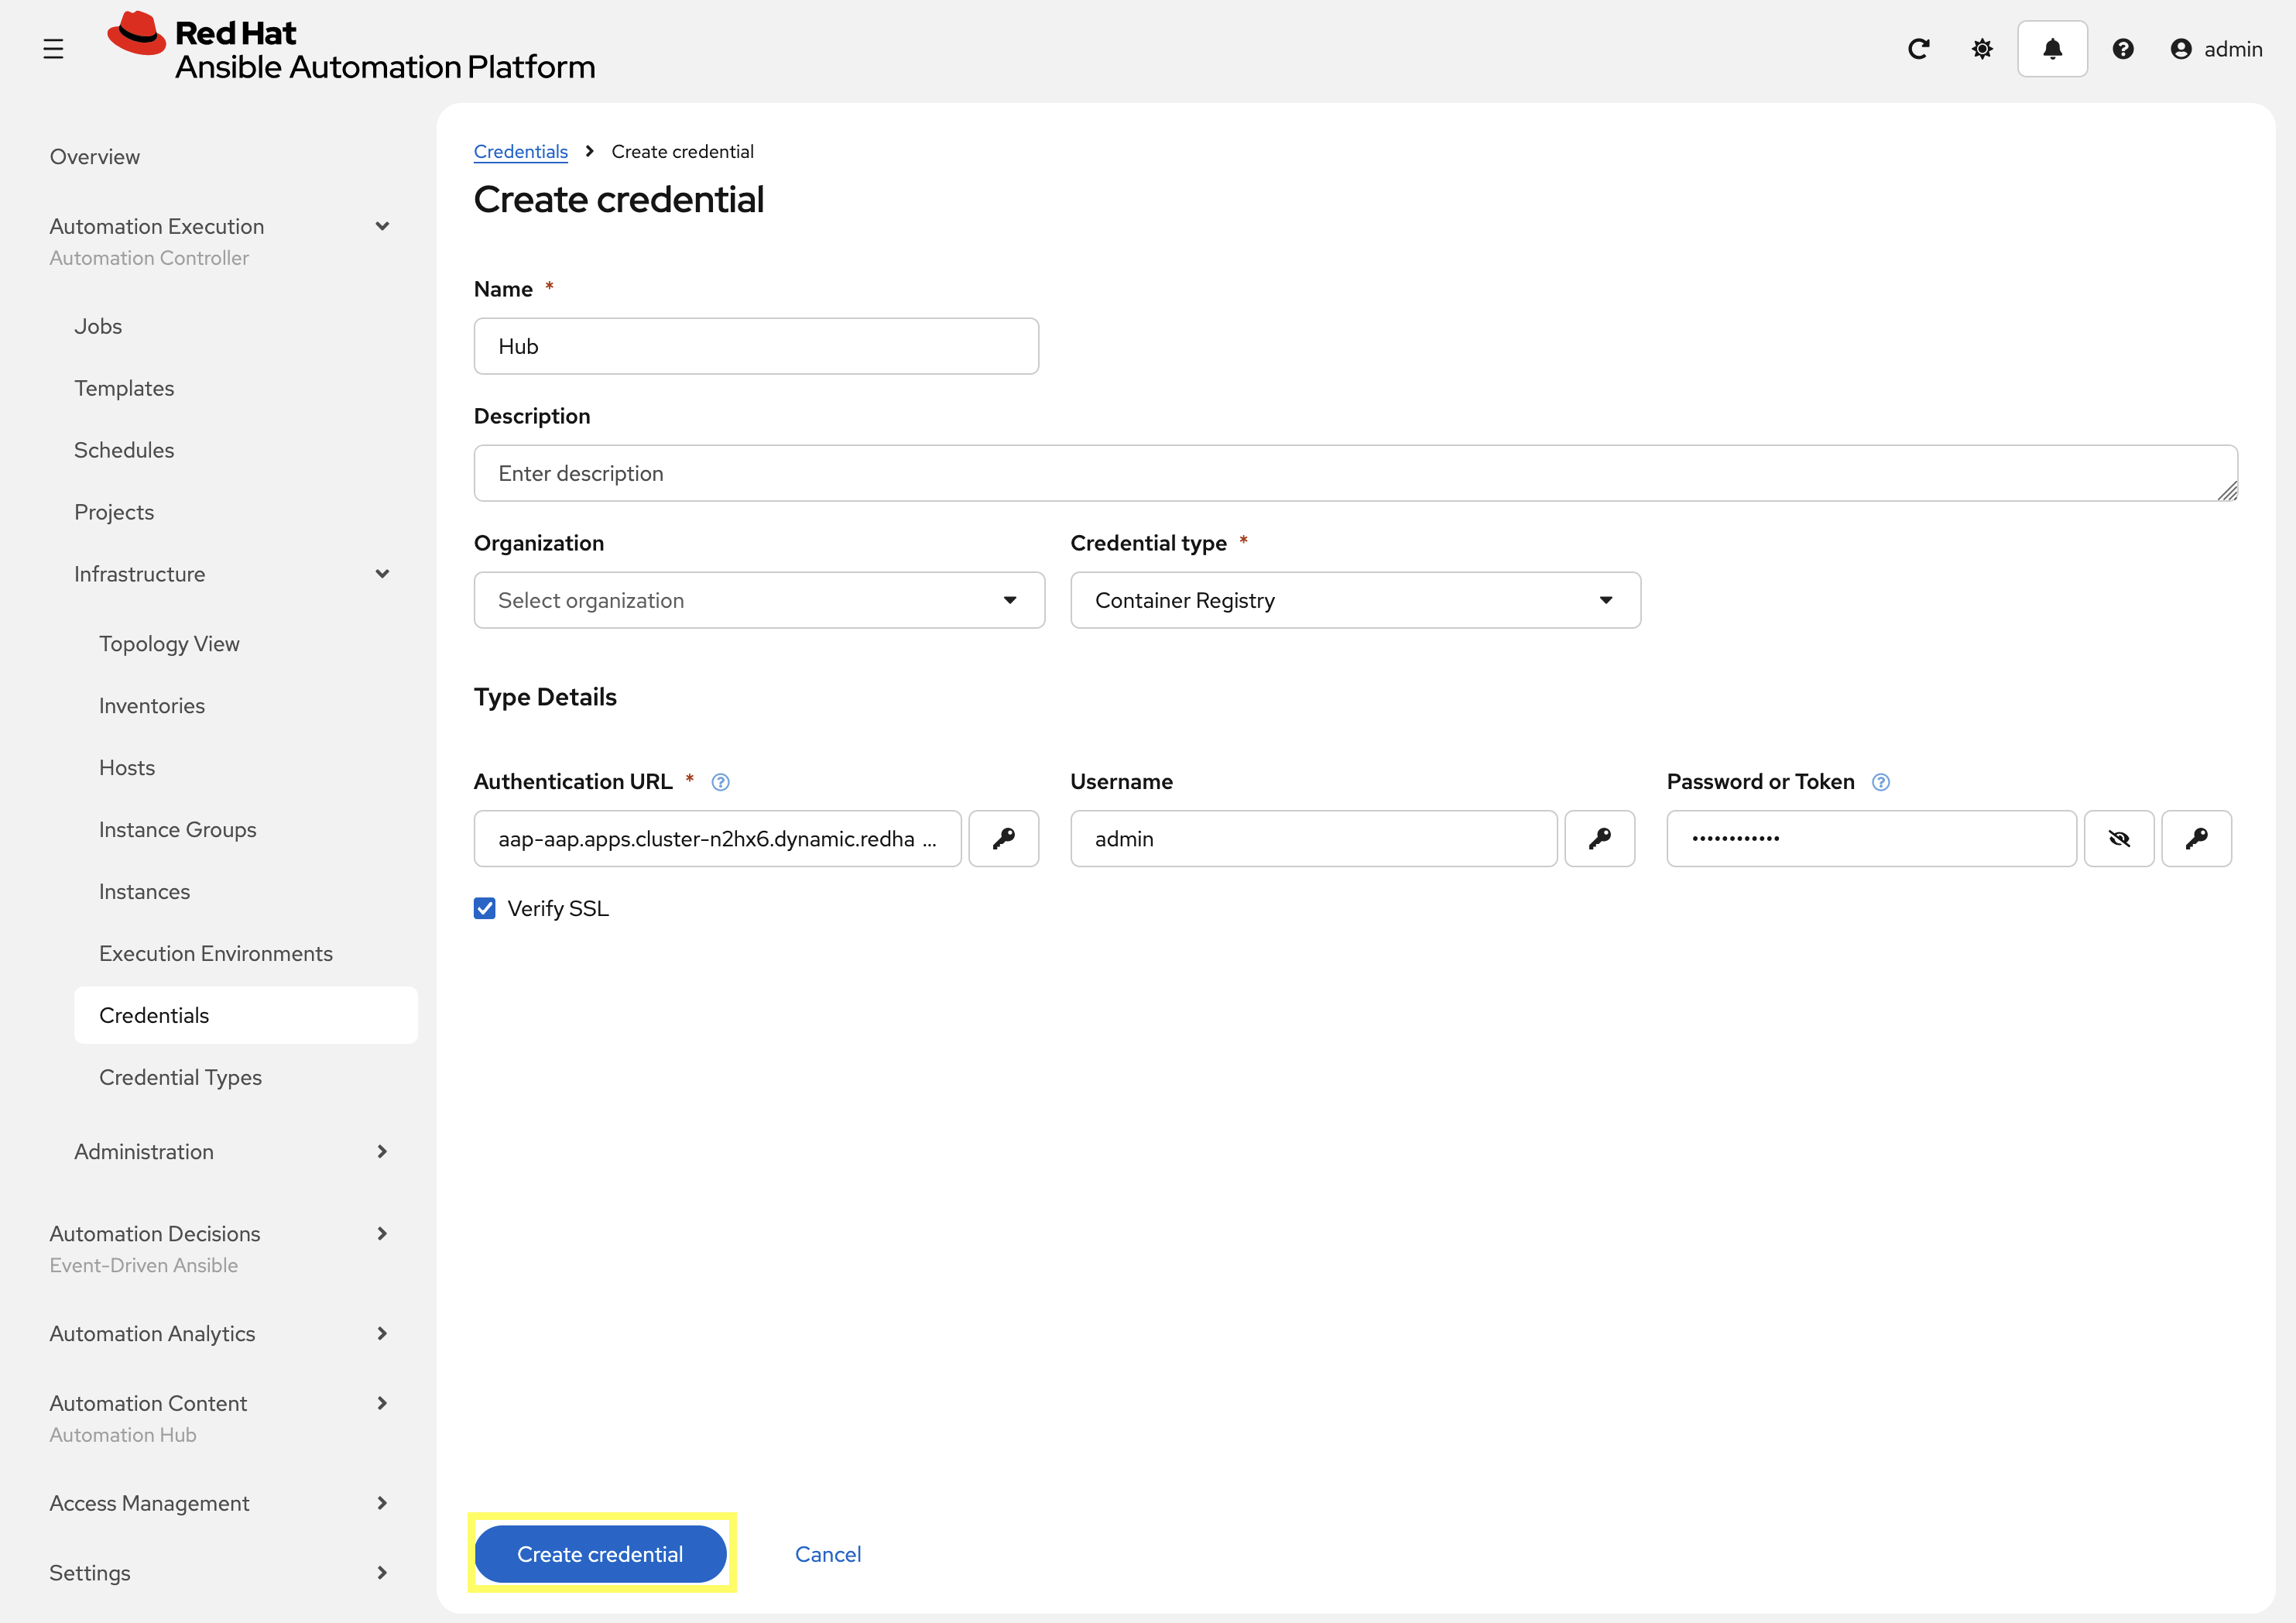
Enter the following details on the Create Credential page:
-
Name:
Hub -
Credential type:
Container Registry -
Authentication URL:
aap-aap.{openshift_cluster_ingress_domain} -
Username:
{aap_controller_admin_user} -
Password:
{aap_controller_admin_password} -
Verify SSL: Checked
-
-
Click Create credential to save the new credential.
2.3: Create a Credential for the Git Repository
Next, create a new credential to retrieve the source code from the Gitea repository.
-
From the Credentials page in Automation Controller, click Create credential once again to add a new credential.
-
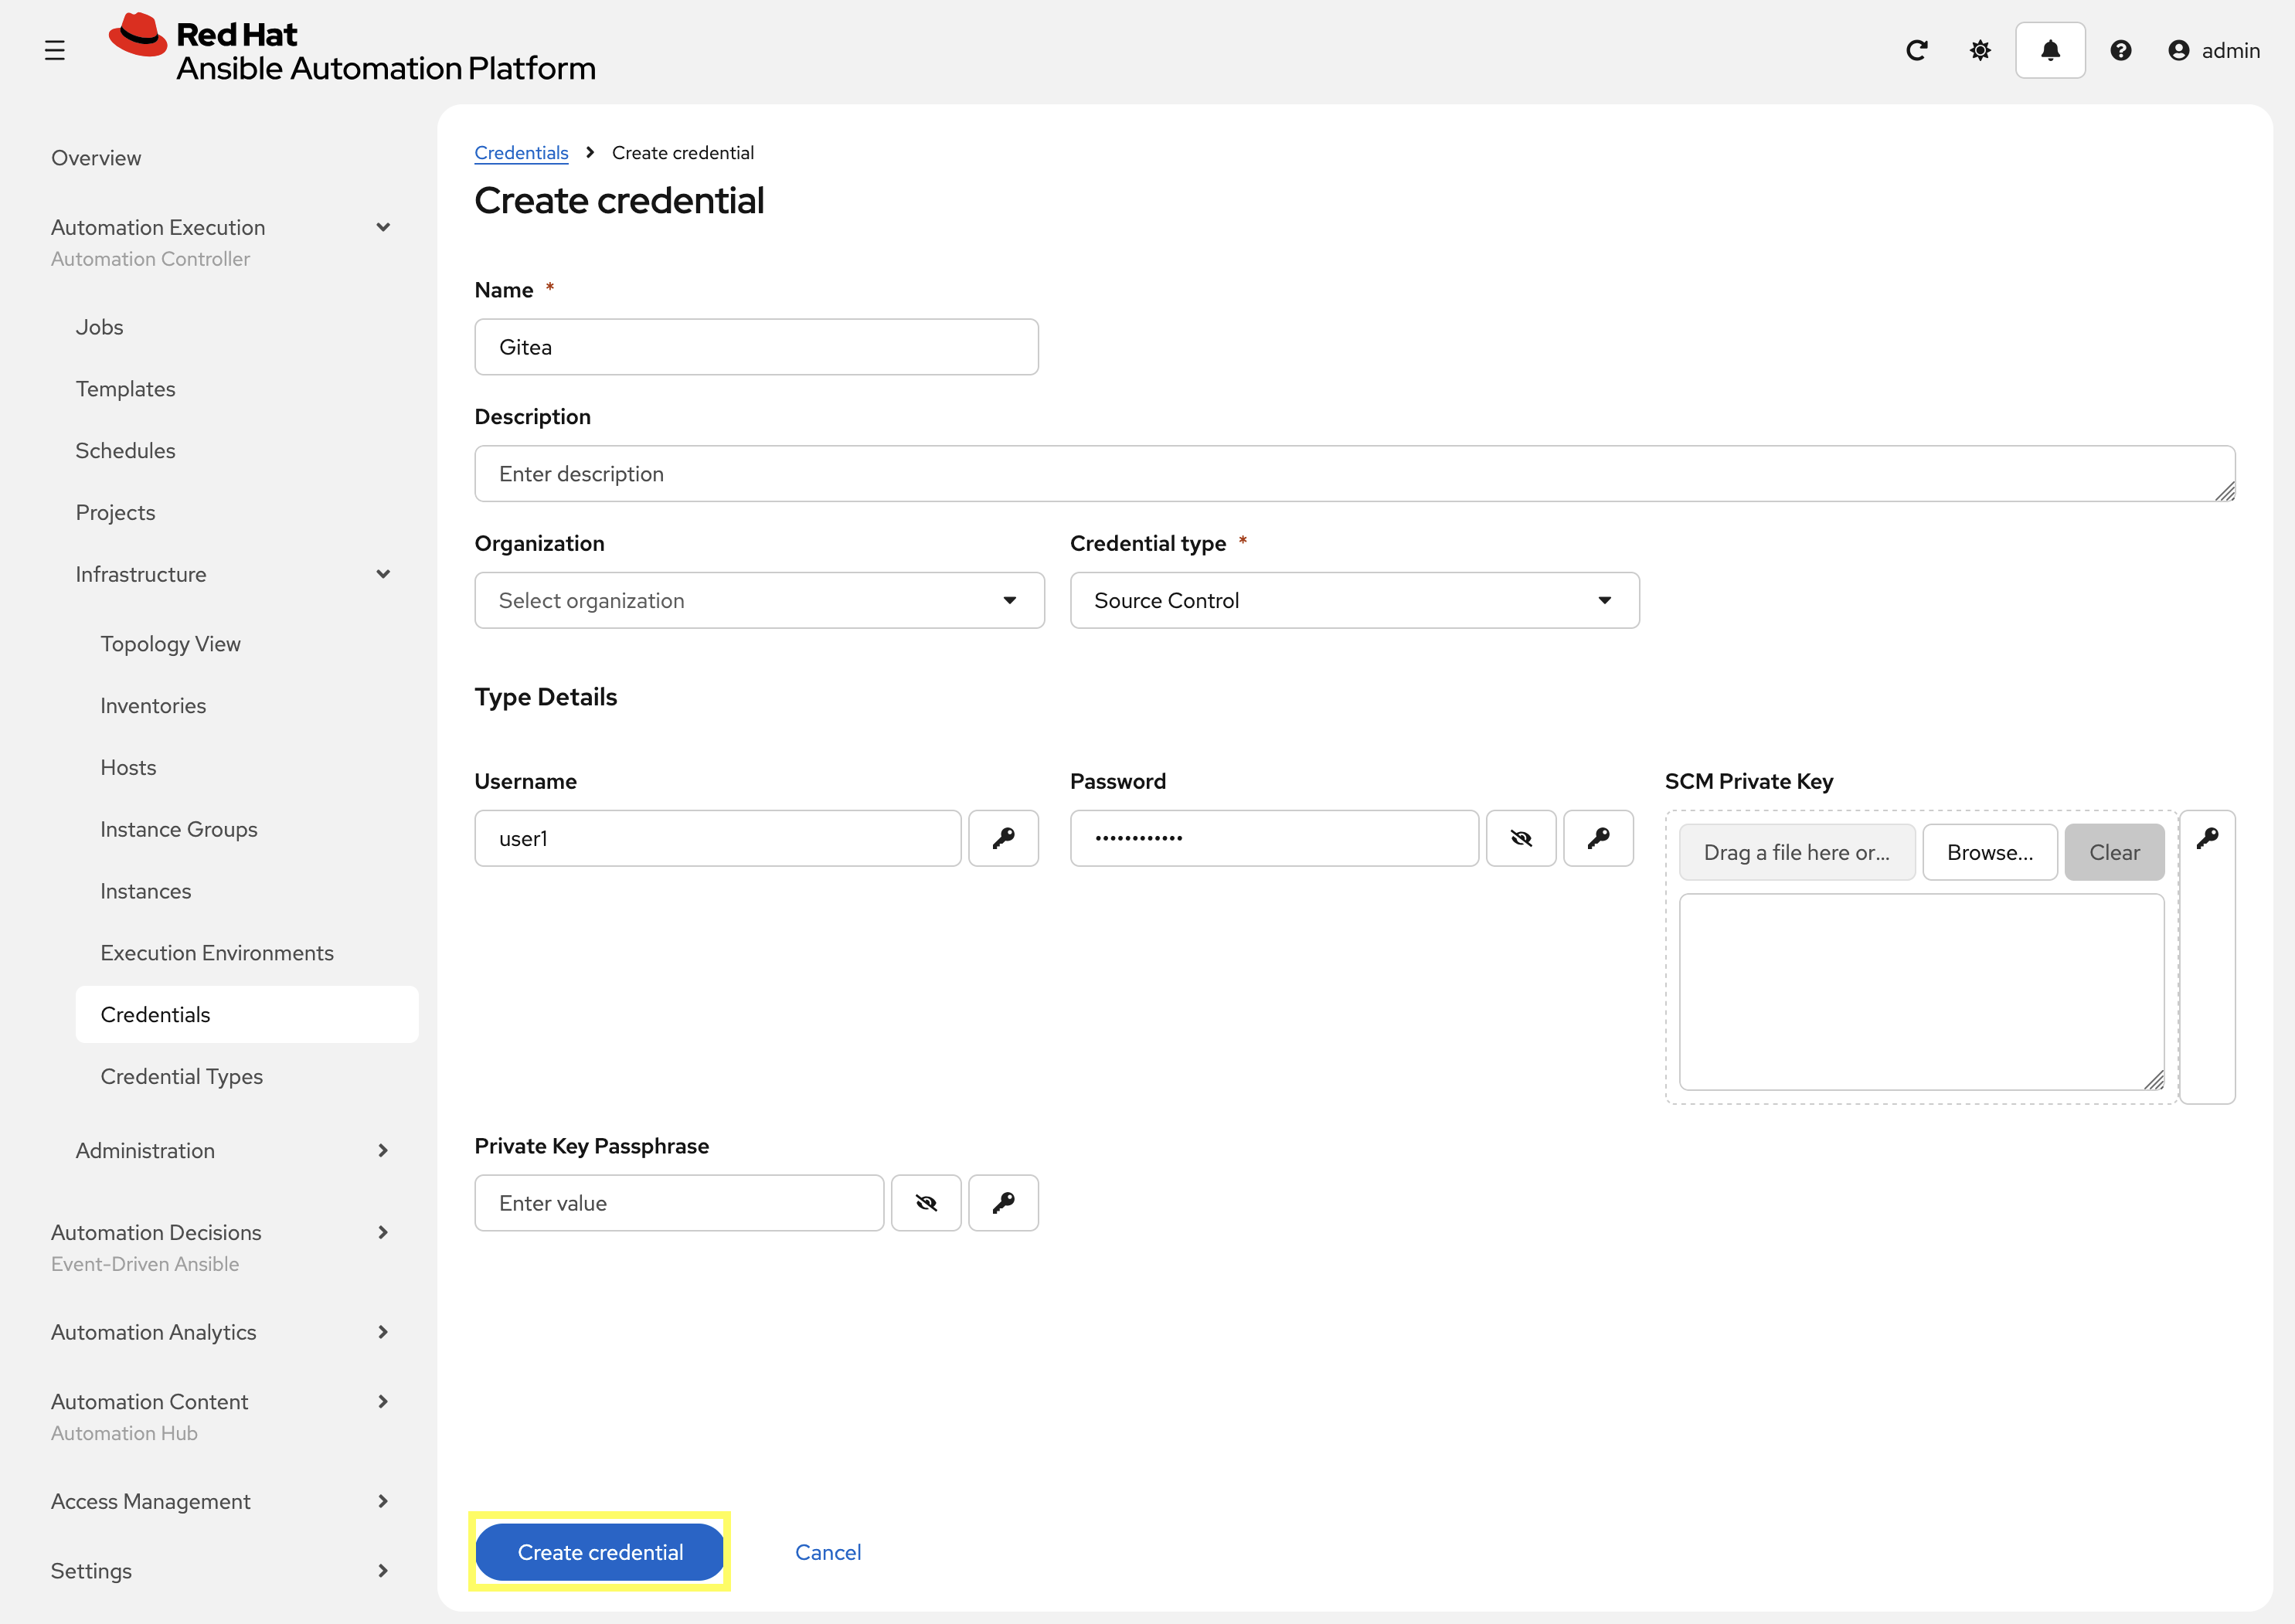
Enter the following details on the Create Credential page:
-
Name:
Gitea -
Credential type:
Source Control -
Username:
{gitea_user} -
Password:
{gitea_password}
-
-
Click Create credential to save the new credential.
2.4: Add the Execution Environment to Controller
Next, add the custom Execution Environment that we published previously to Automation Controller.
-
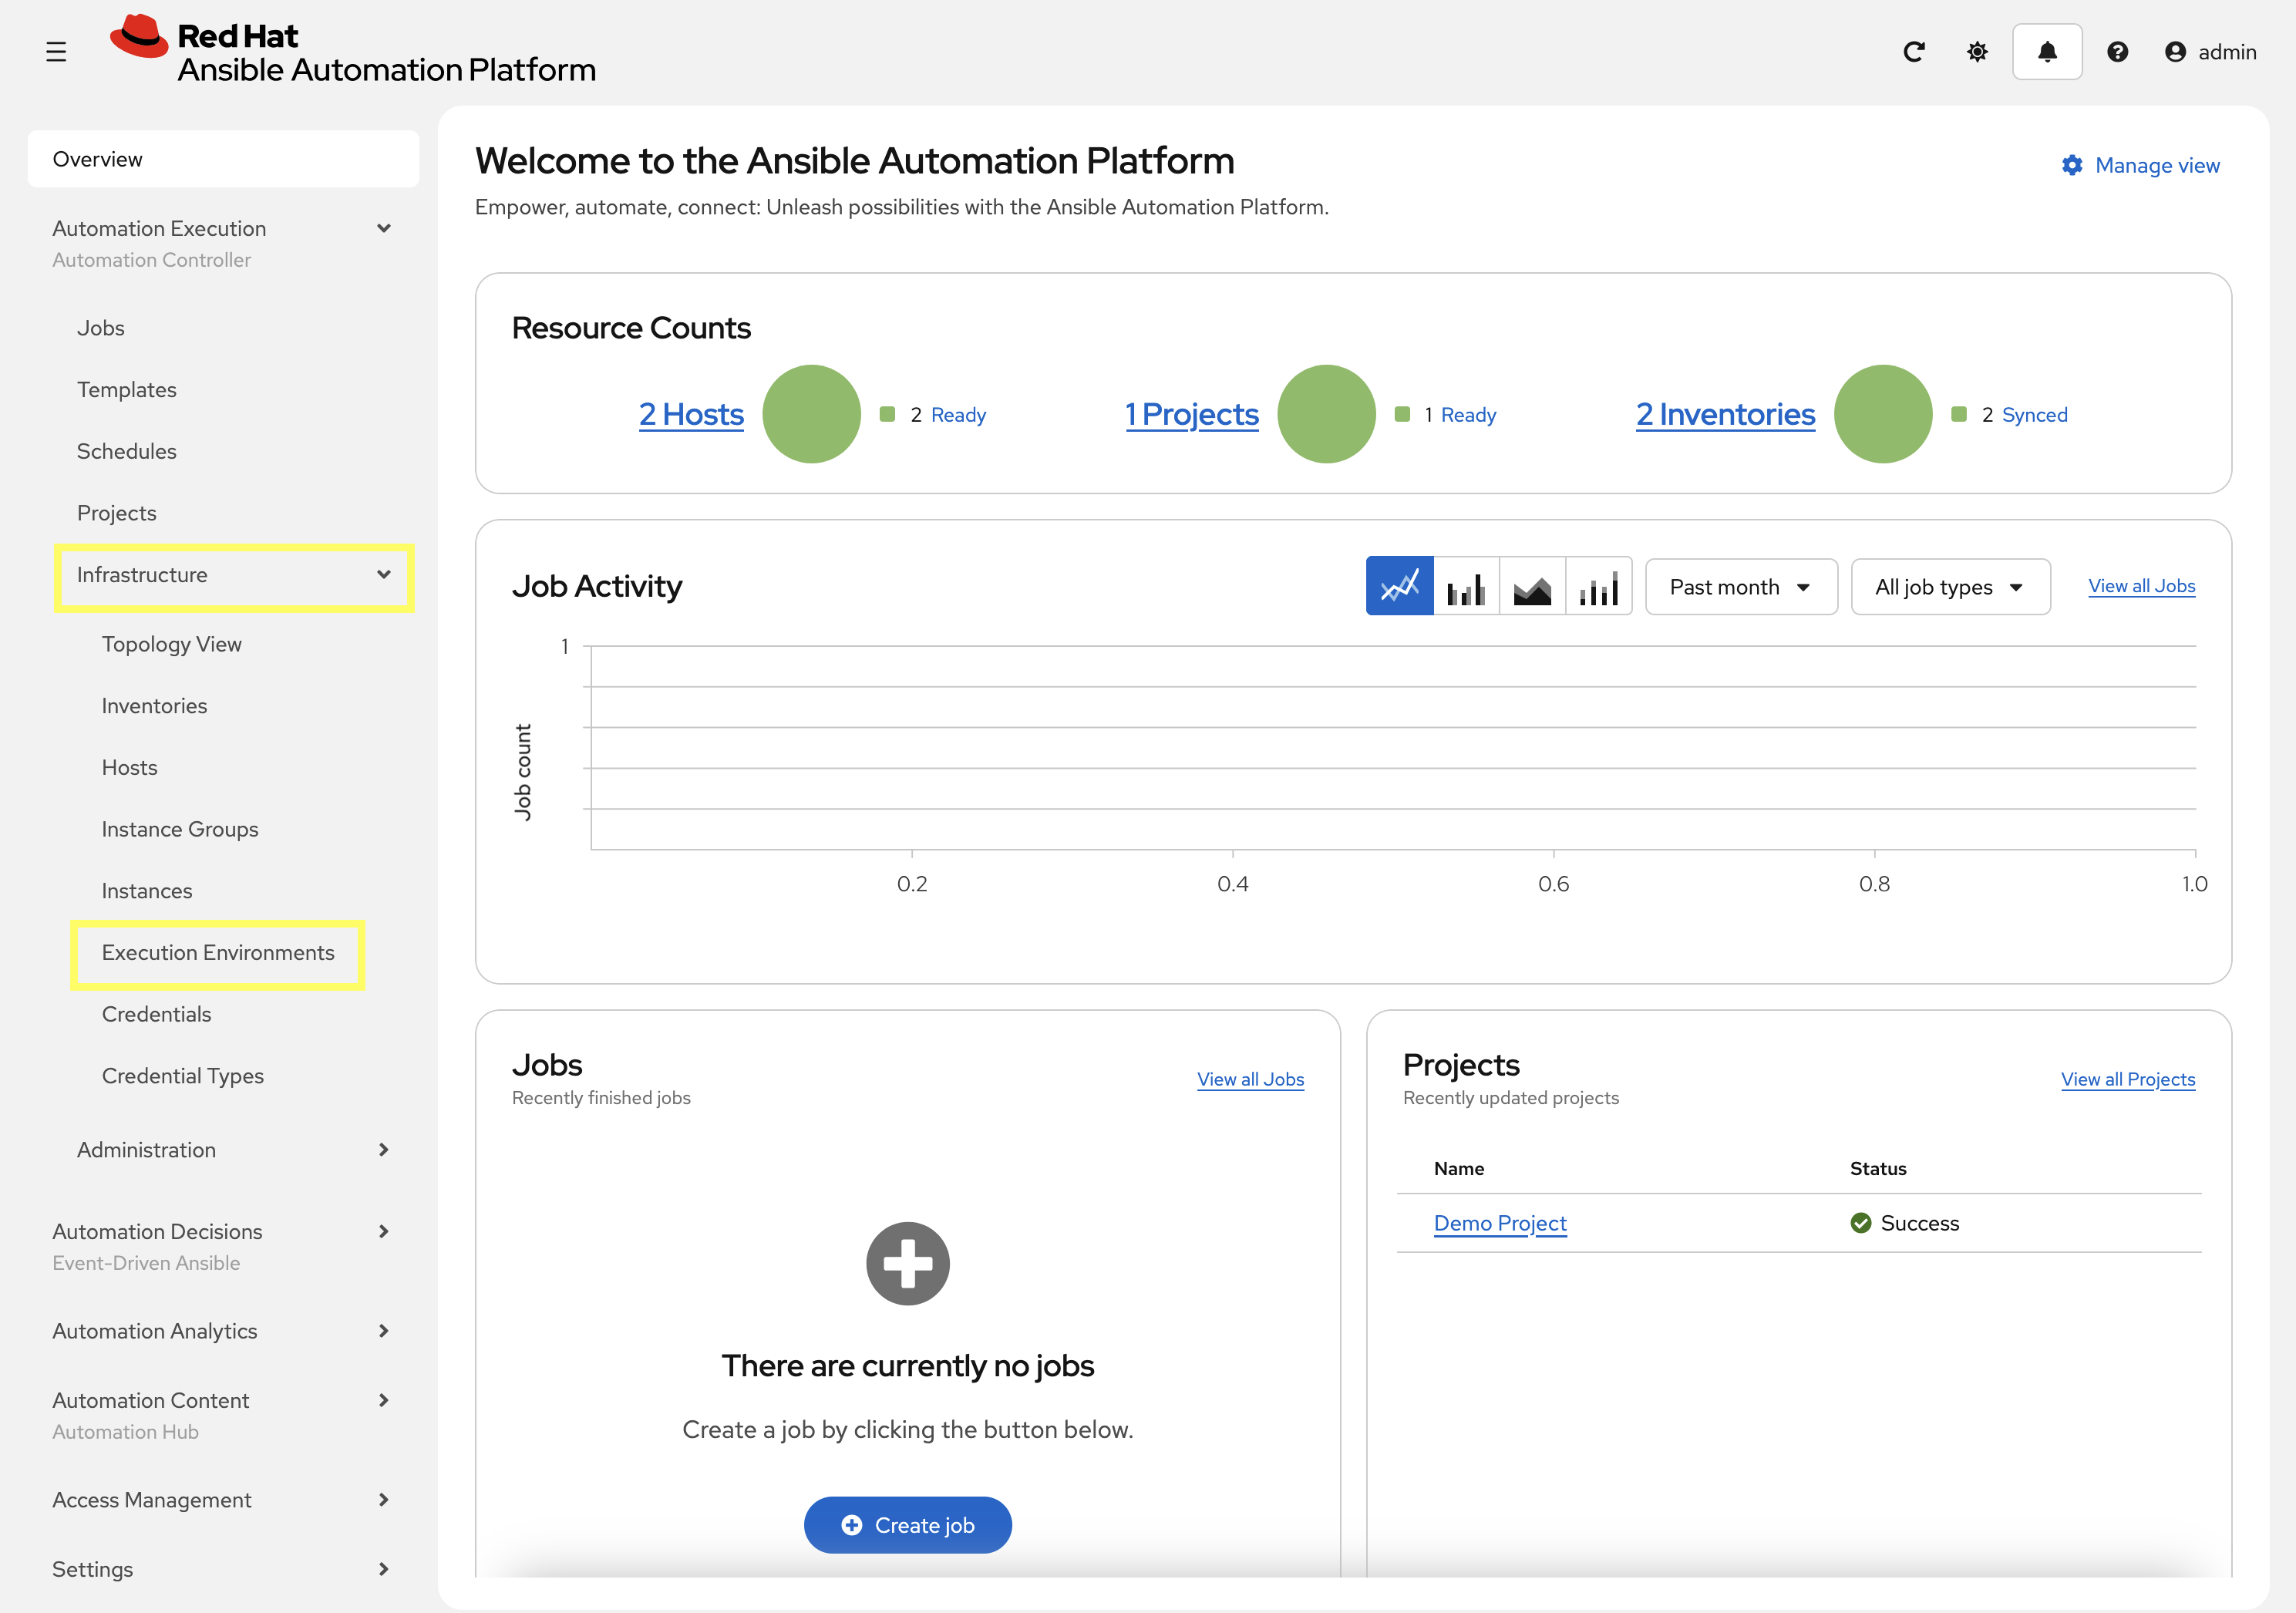
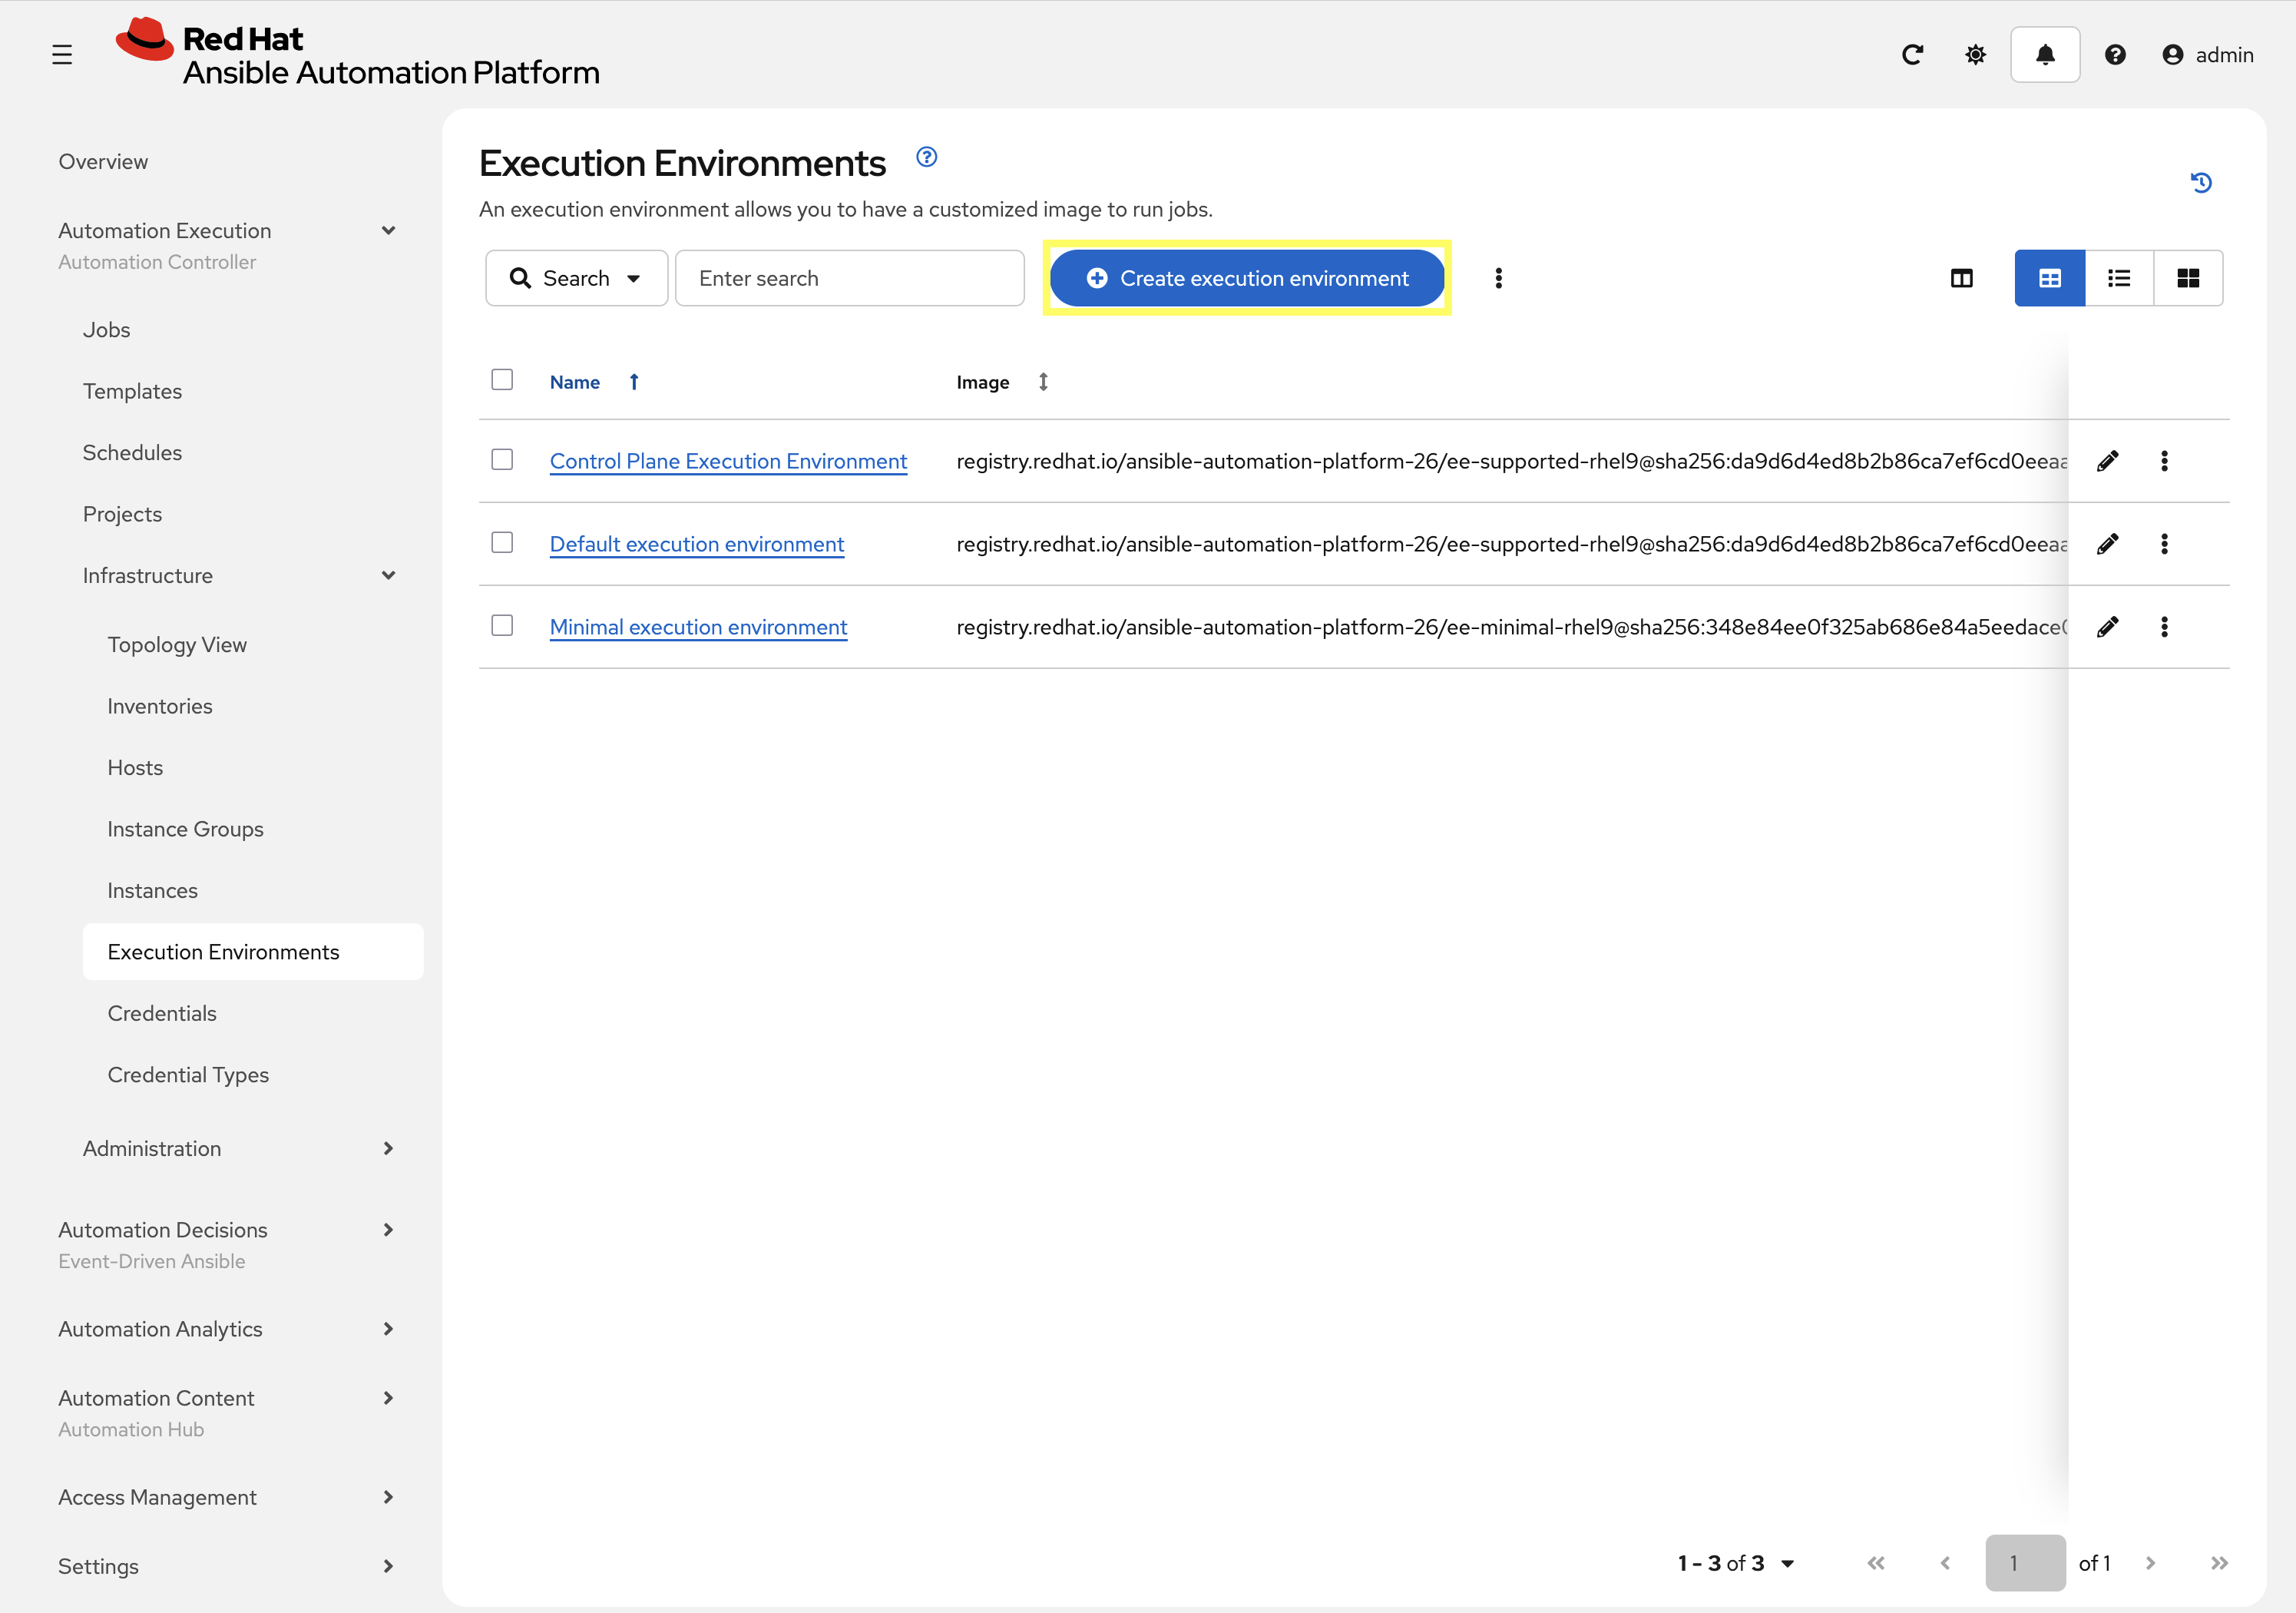
From the navigation menu on the left, expand Automation Execution and expand Infrastructure and click on Execution Environments.
-
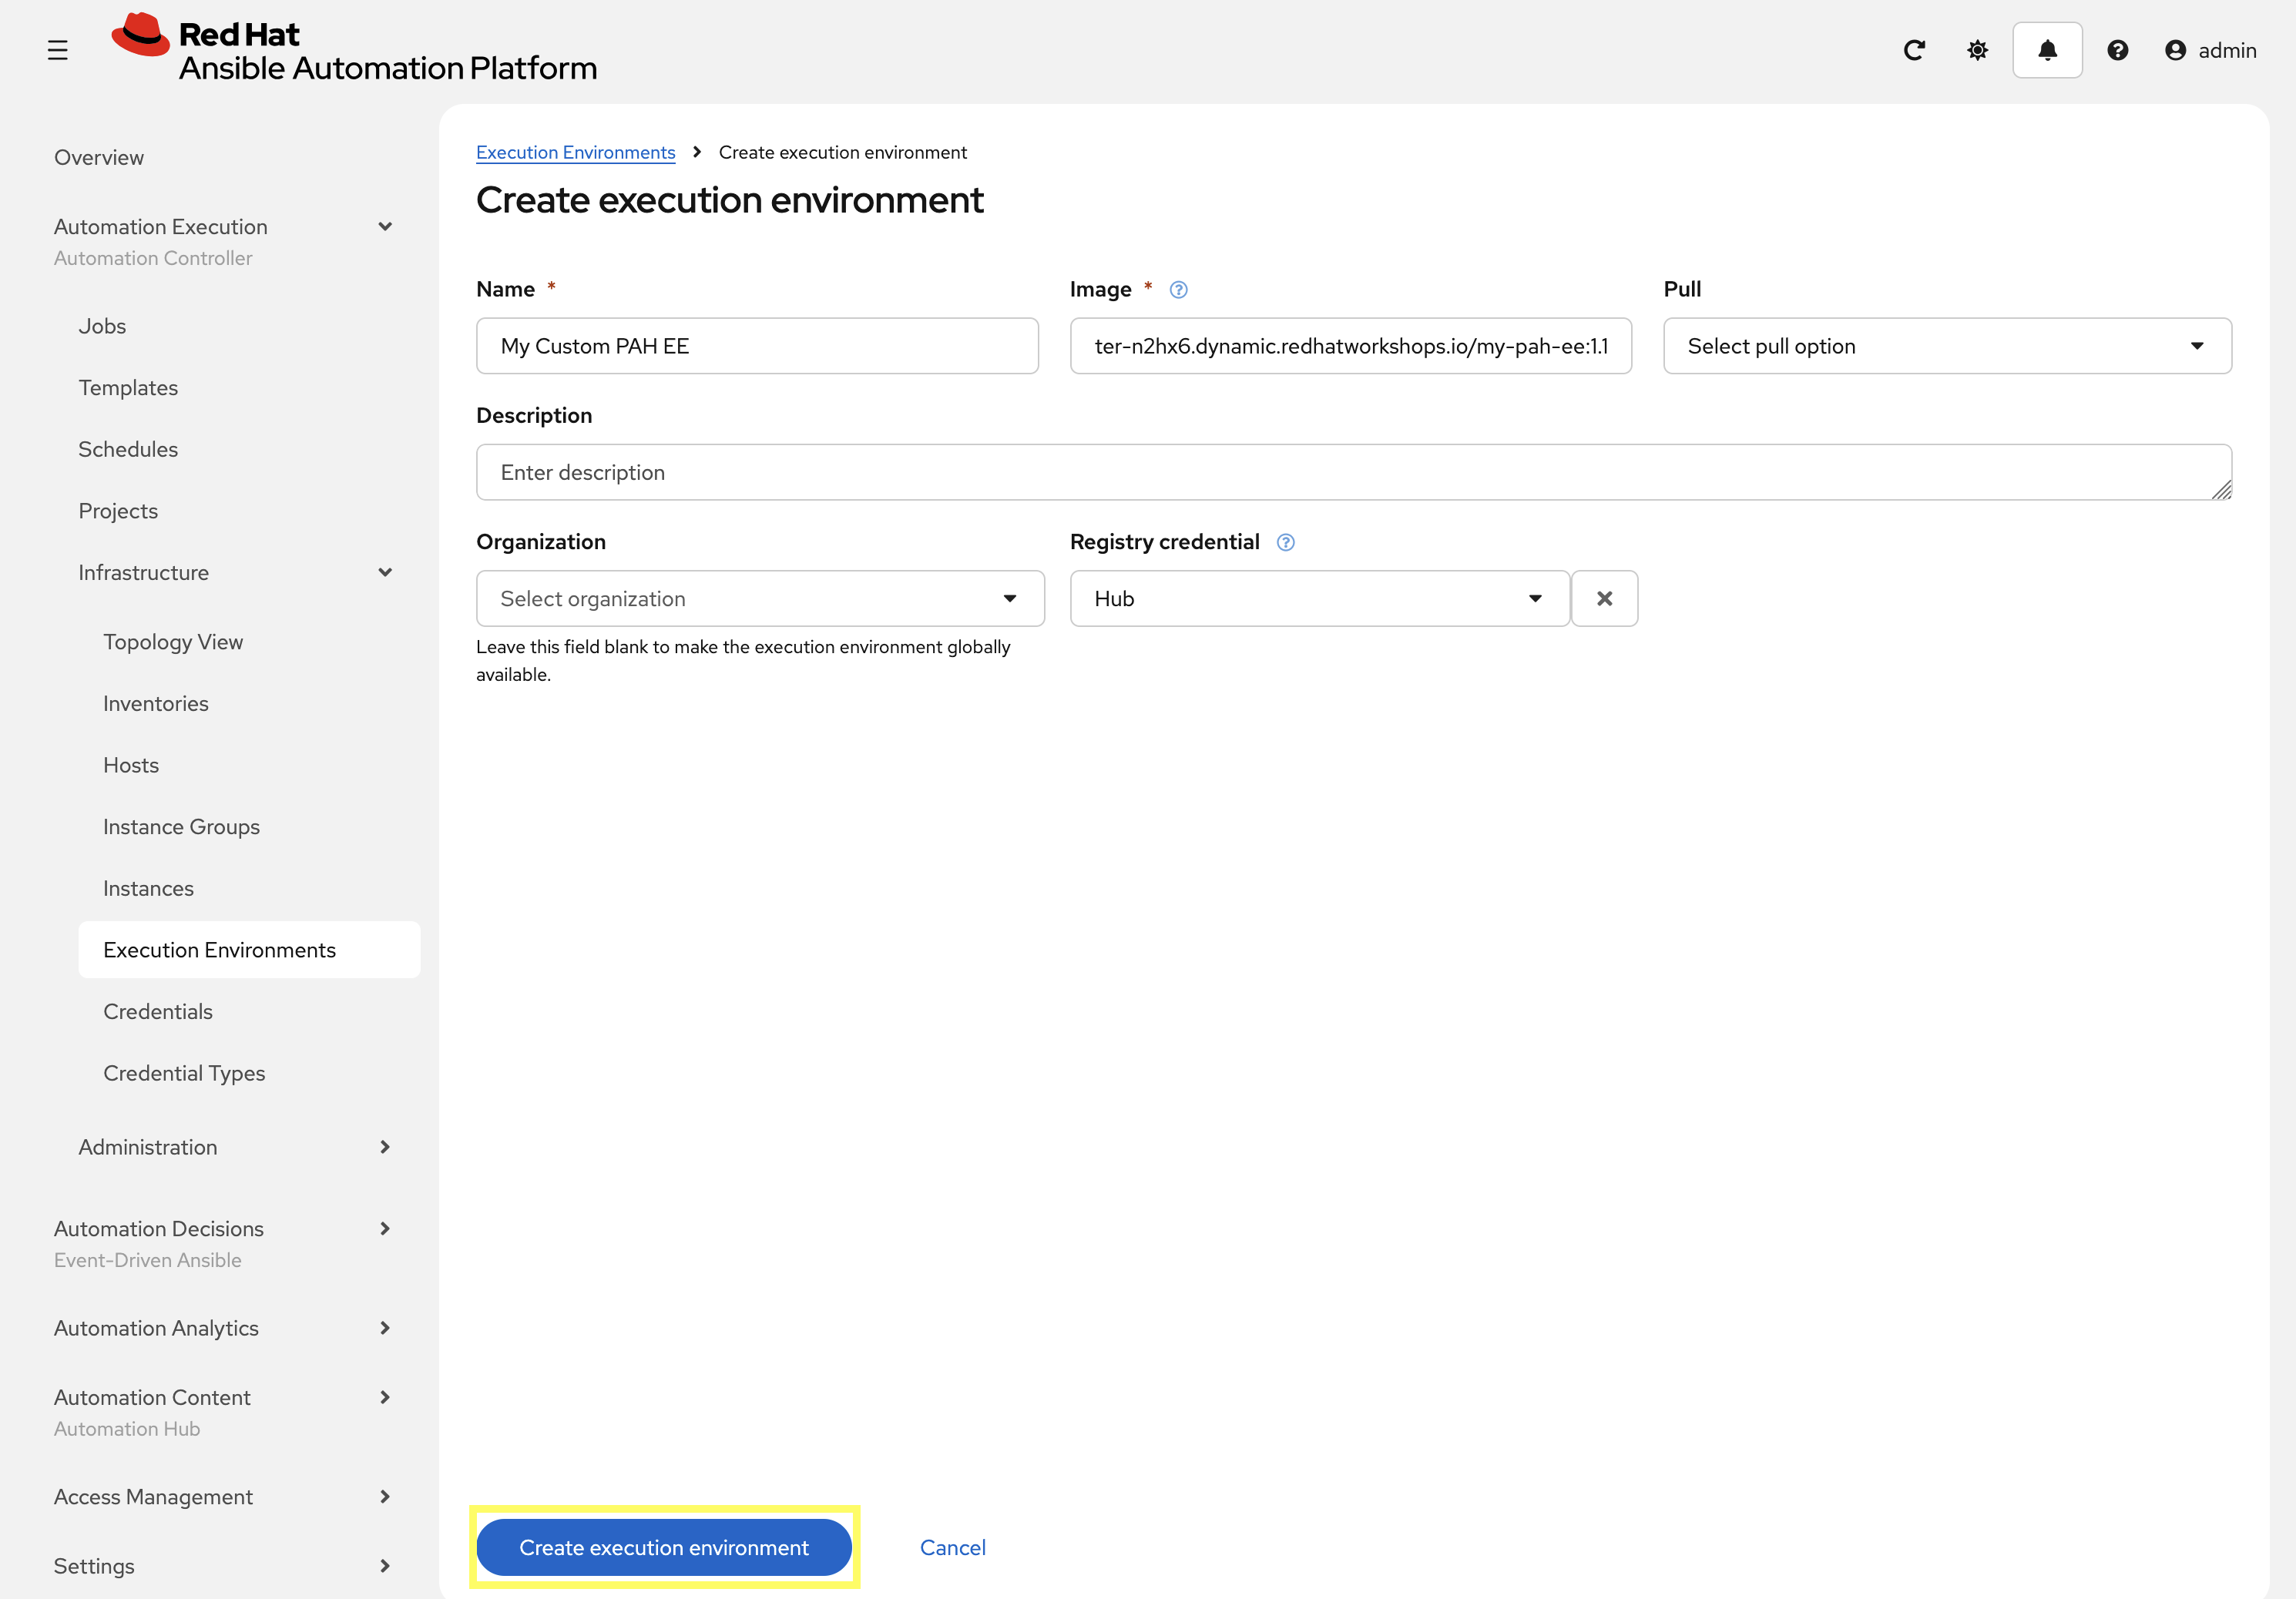
Click Create execution environment to add a new execution environment.
-
Enter the following details on the Create Execution Environment page:
-
Name:
My Custom PAH EE -
Image:
aap-aap.{openshift_cluster_ingress_domain}/my-pah-ee:1.1 -
Registry Credential: Select the
Hubcredential created previously.
-
-
Click Create execution environment to create the new EE.
2.5: Create PAH Credentials
In order for Automation Controller to pull collections from Private Automation Hub, we need to create a Credential for each of the repositories containing collections we wish to use in our automation.
-
From the Credentials page in Automation Controller, click Create credential once again to add a new credential.
-
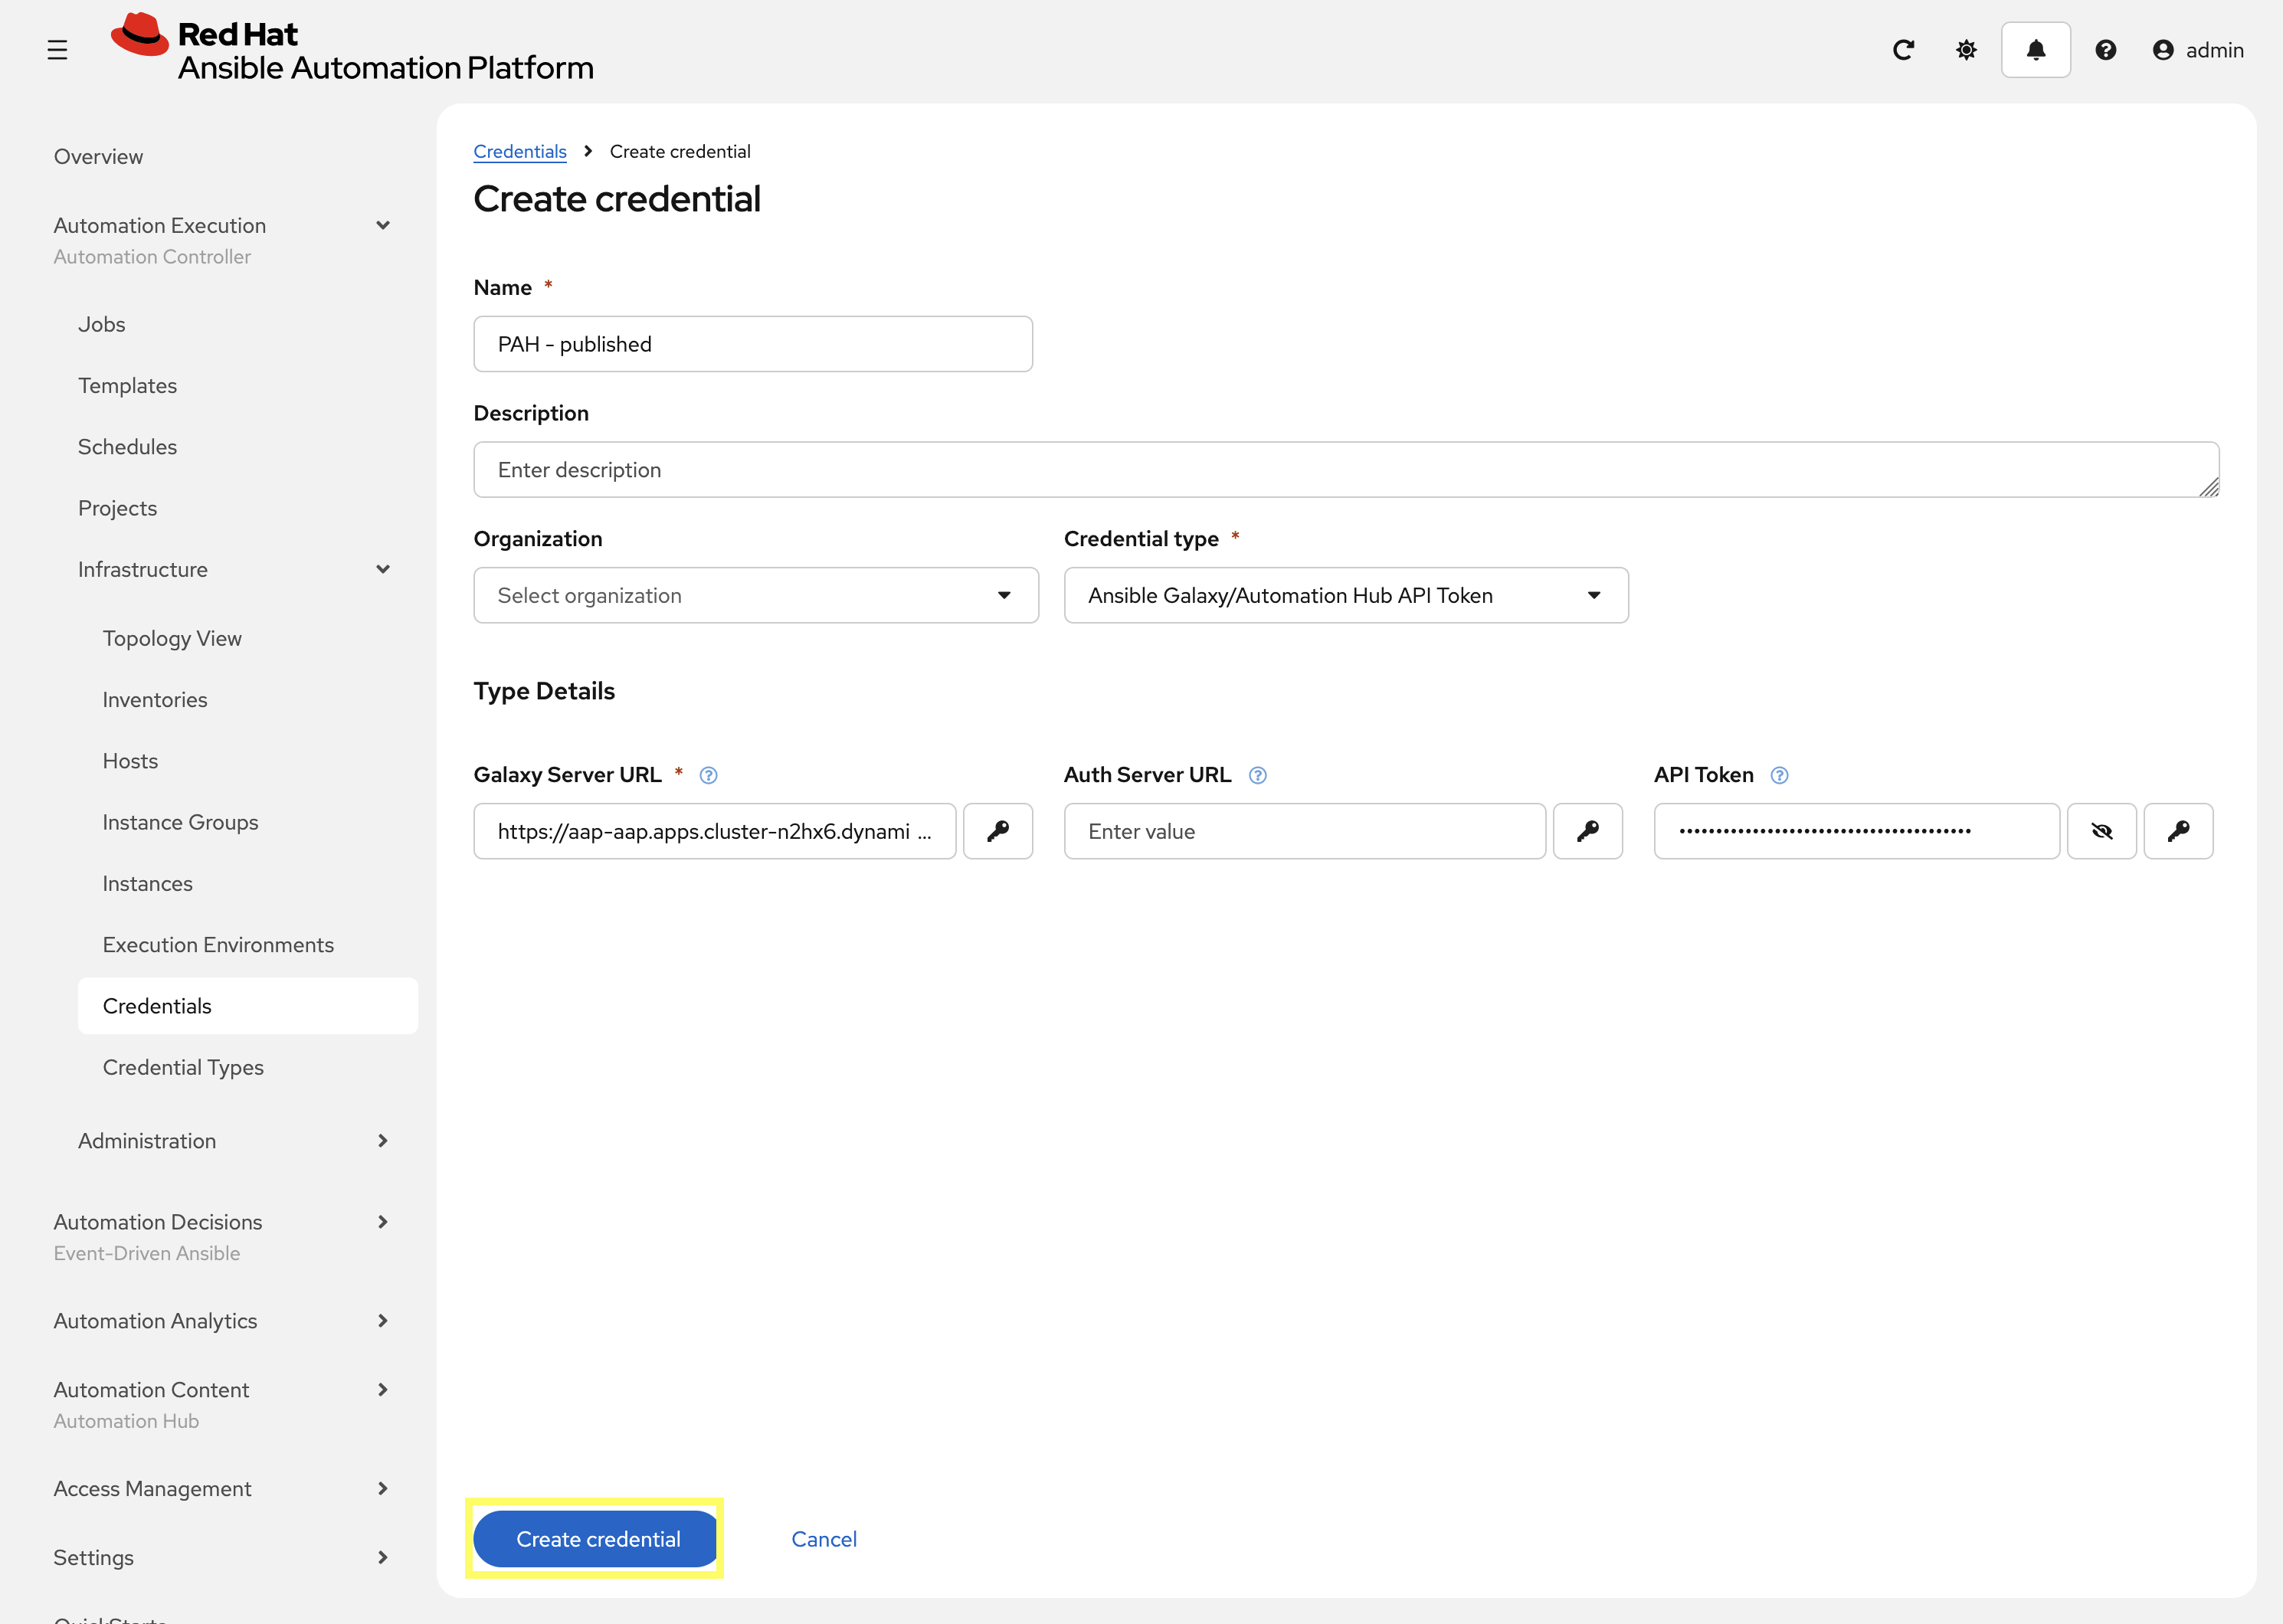
Enter the following details on the Create Credential page to create a credential for the published repository in Private Automation Hub. Use the API token obtained in the prior lab (this is the shorter 40 character token):
-
Name:
PAH - published -
Credential type:
Ansible Galaxy/Automation Hub API Token -
Galaxy Server URL:
{aap_controller_web_url}/pulp_ansible/galaxy/published/ -
API Token:
PAH_API_TOKEN
-
-
Click Create credential to save the new credential.
Perform the same steps to create a second credential for the rh-certified repository in Private Automation Hub.
-
From the Credentials page in Automation Controller, click Create credential once again to add a new credential.
-
Enter the following details on the Create Credential page to create a credential for the published repository in Private Automation Hub. Use the API token obtained in the prior lab (this is the shorter 40 character token):
-
Name:
PAH - rh-certified -
Credential type:
Ansible Galaxy/Automation Hub API Token -
Galaxy Server URL:
{aap_controller_web_url}/pulp_ansible/galaxy/rh-certified/ -
API Token:
PAH_API_TOKEN
-
-
Click Create credential to save the new credential.
2.6: Add Credentials to the Default Organization
For the Credentials that are associated with Private Automation Hub repositories to be utilized, they must be associated with the Organization that wishes to use them. In our case, this is the Default organization.
-
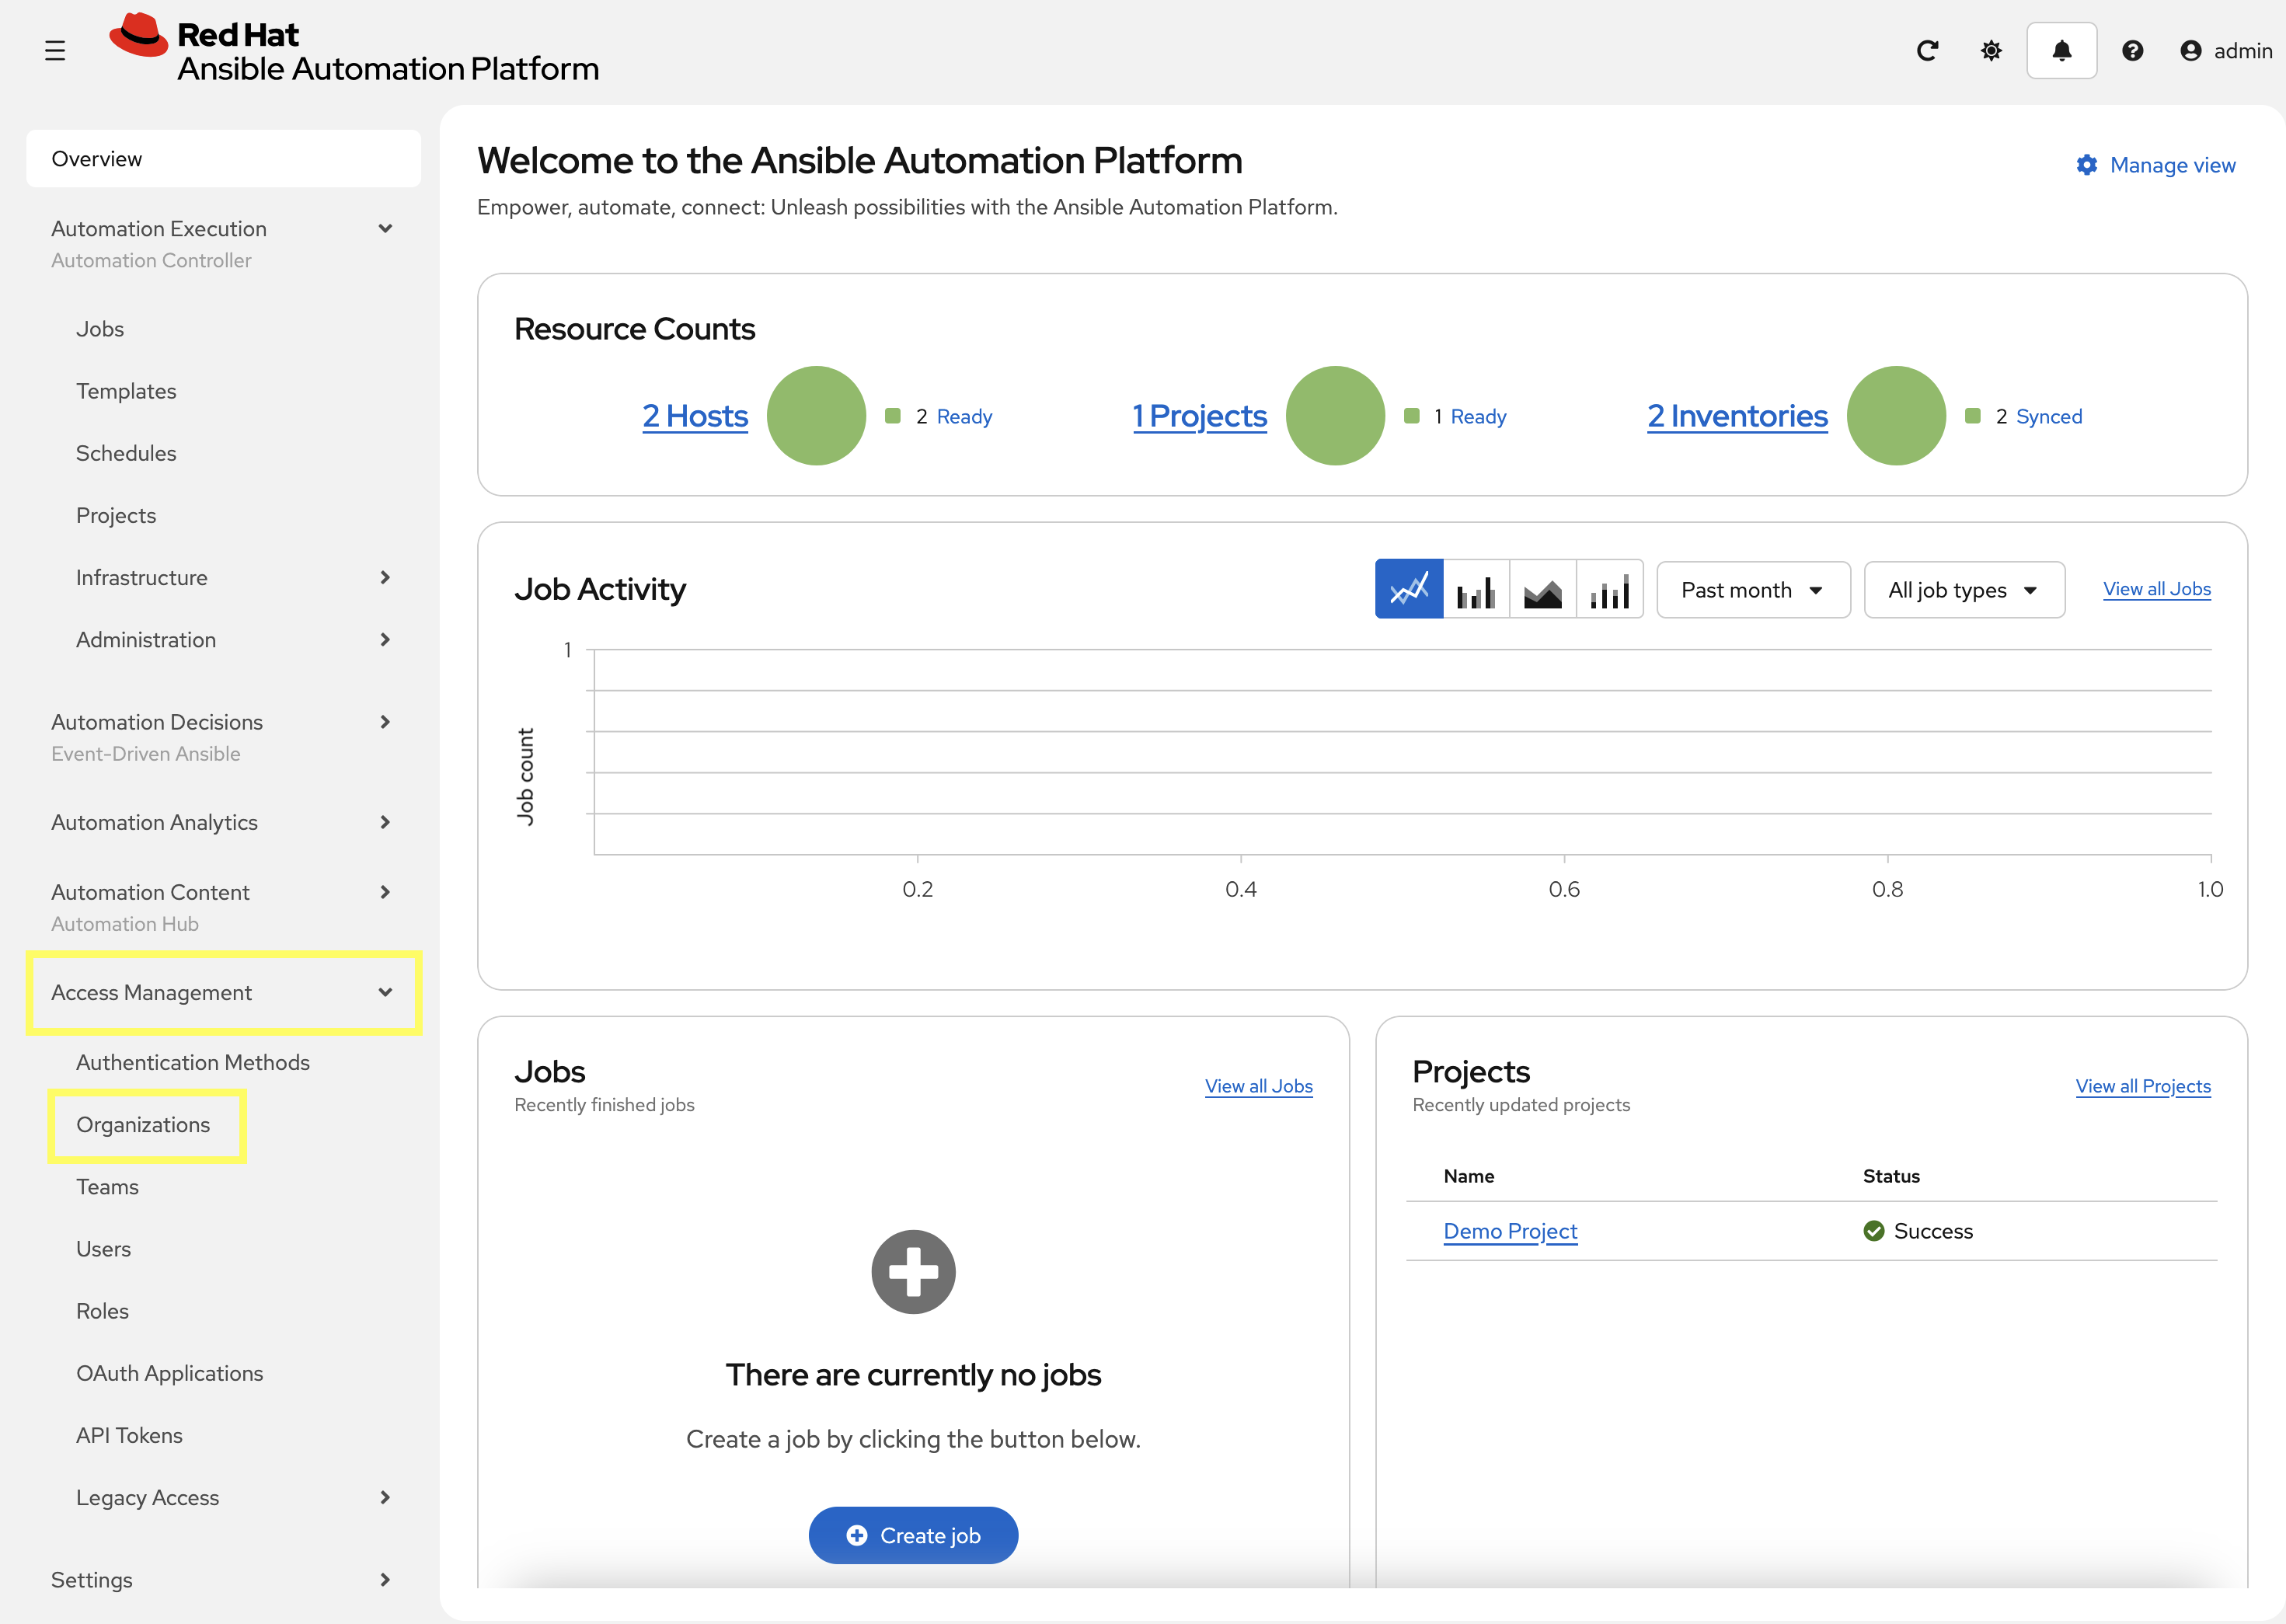
From the navigation menu on the left, expand Access Management and click on Organizations.
-
Next to the Default organization, click the pencil icon to edit the organization.
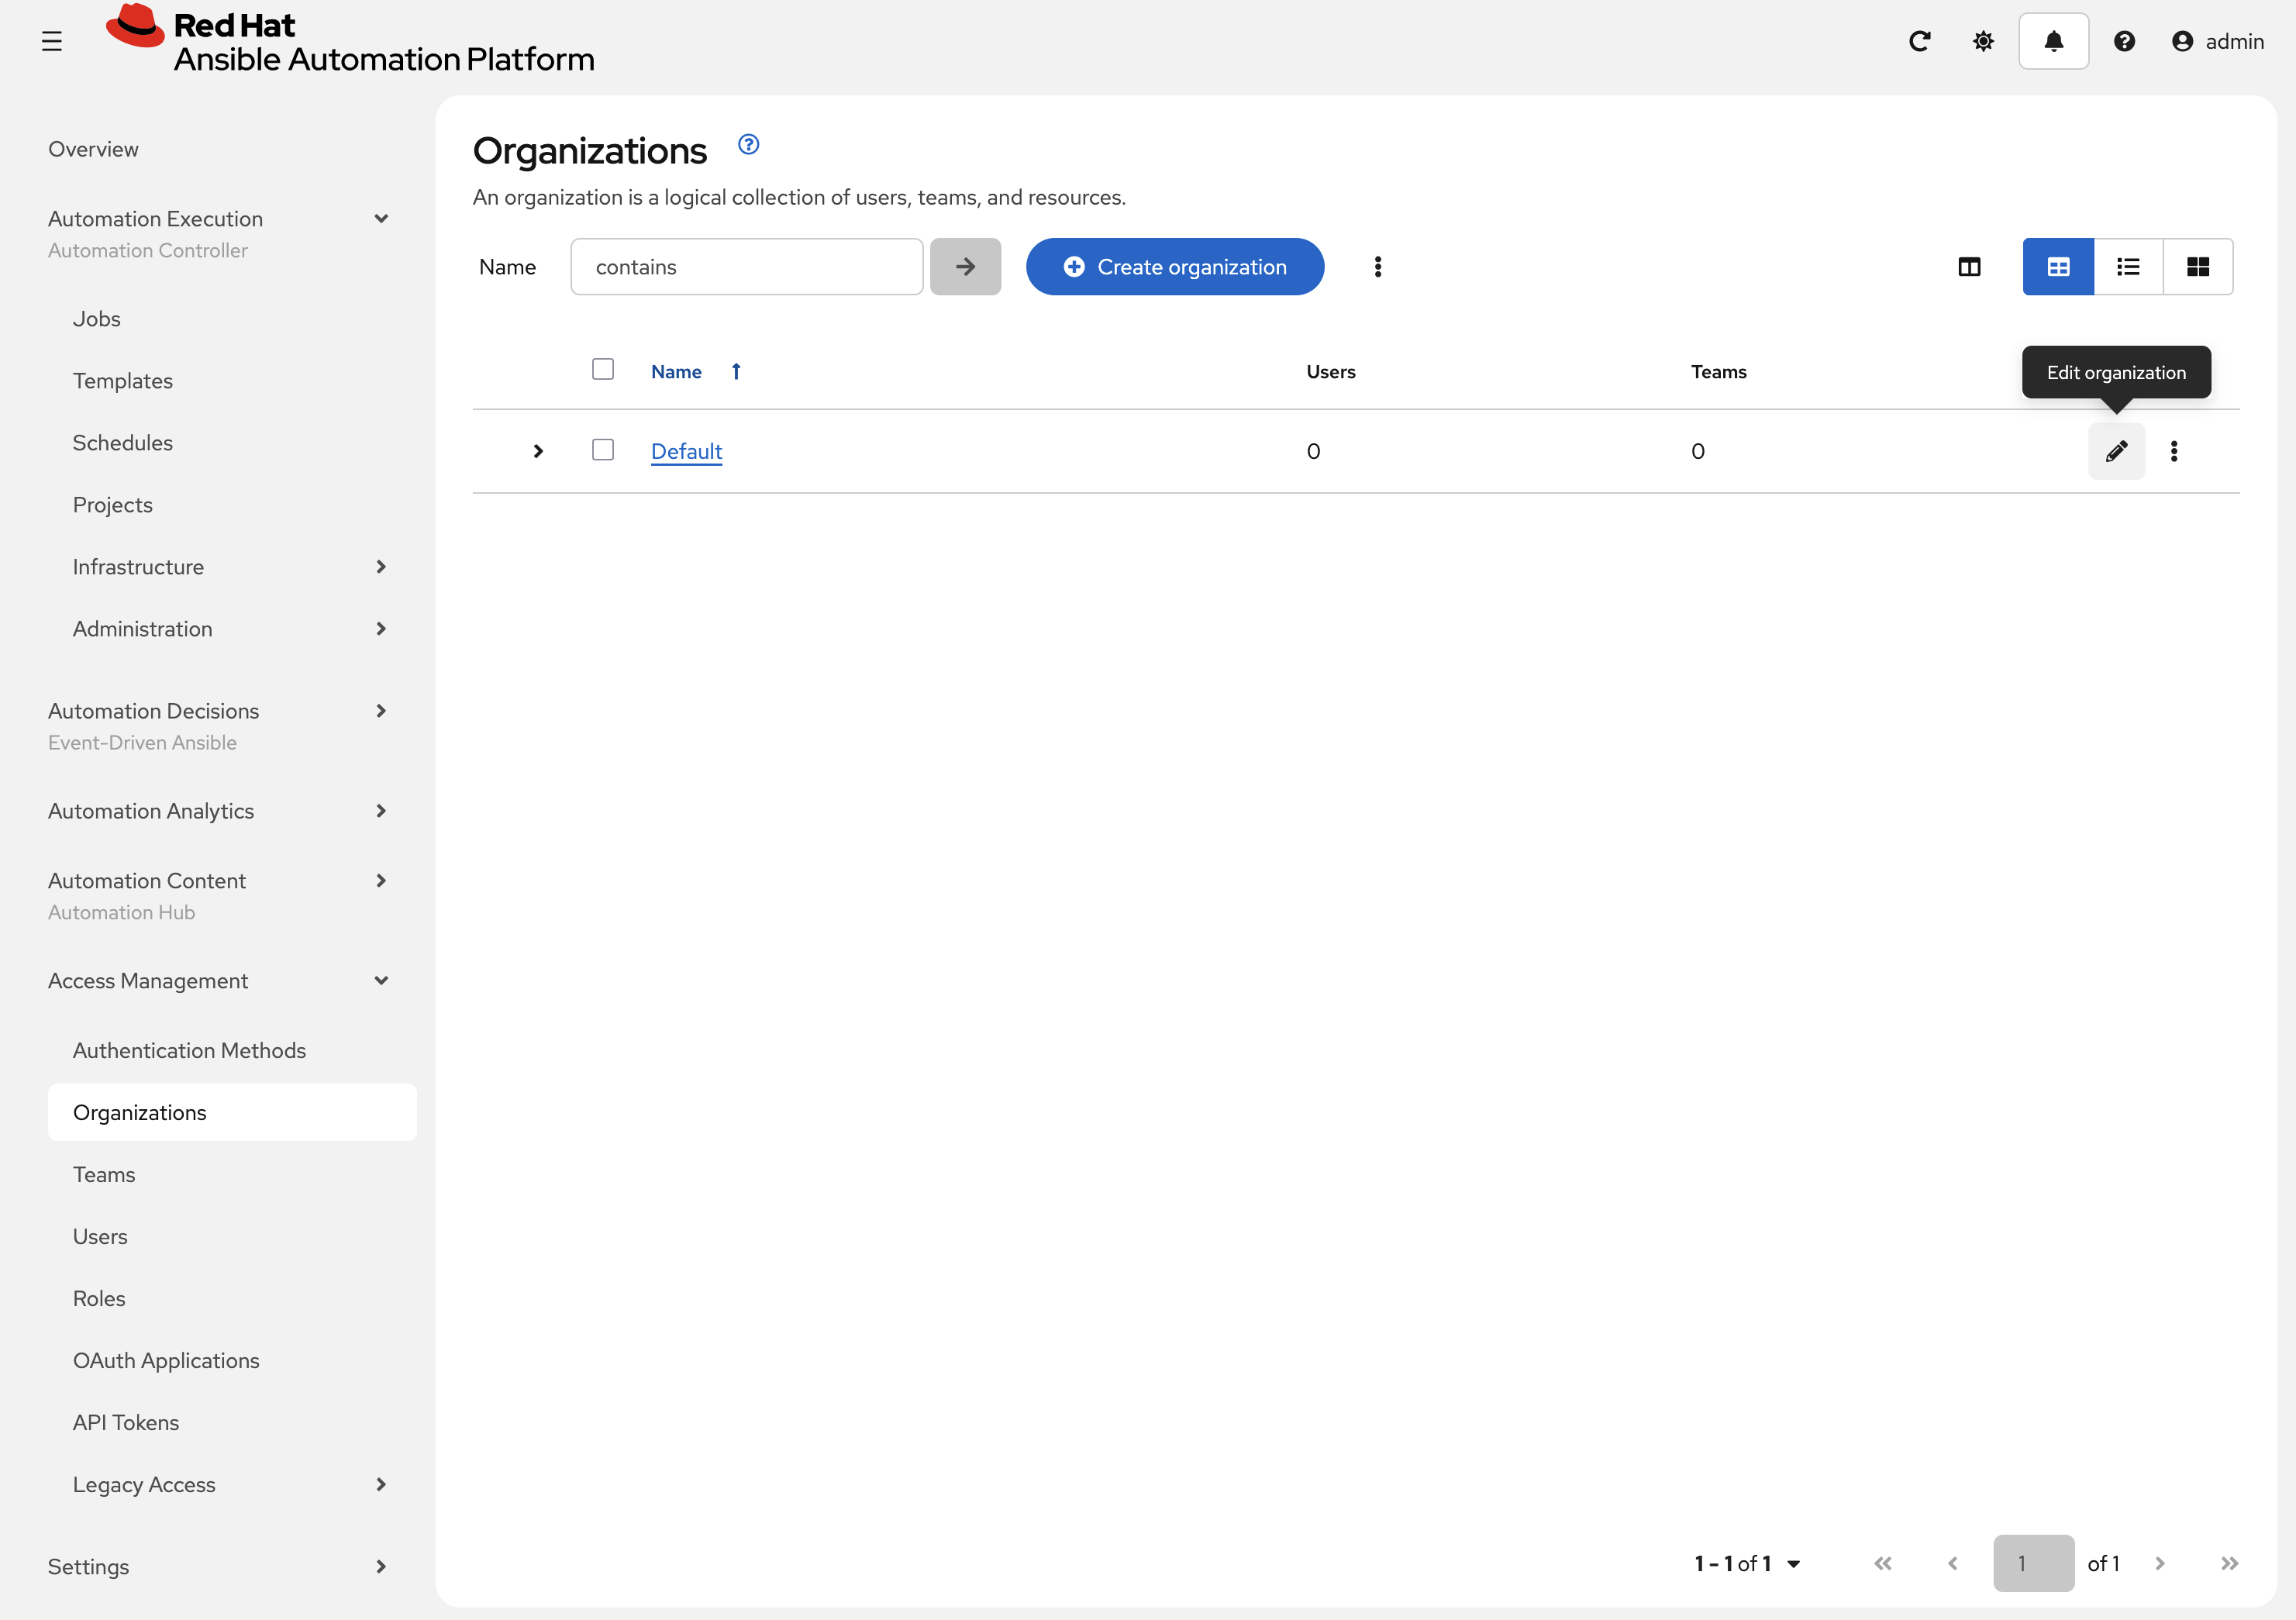
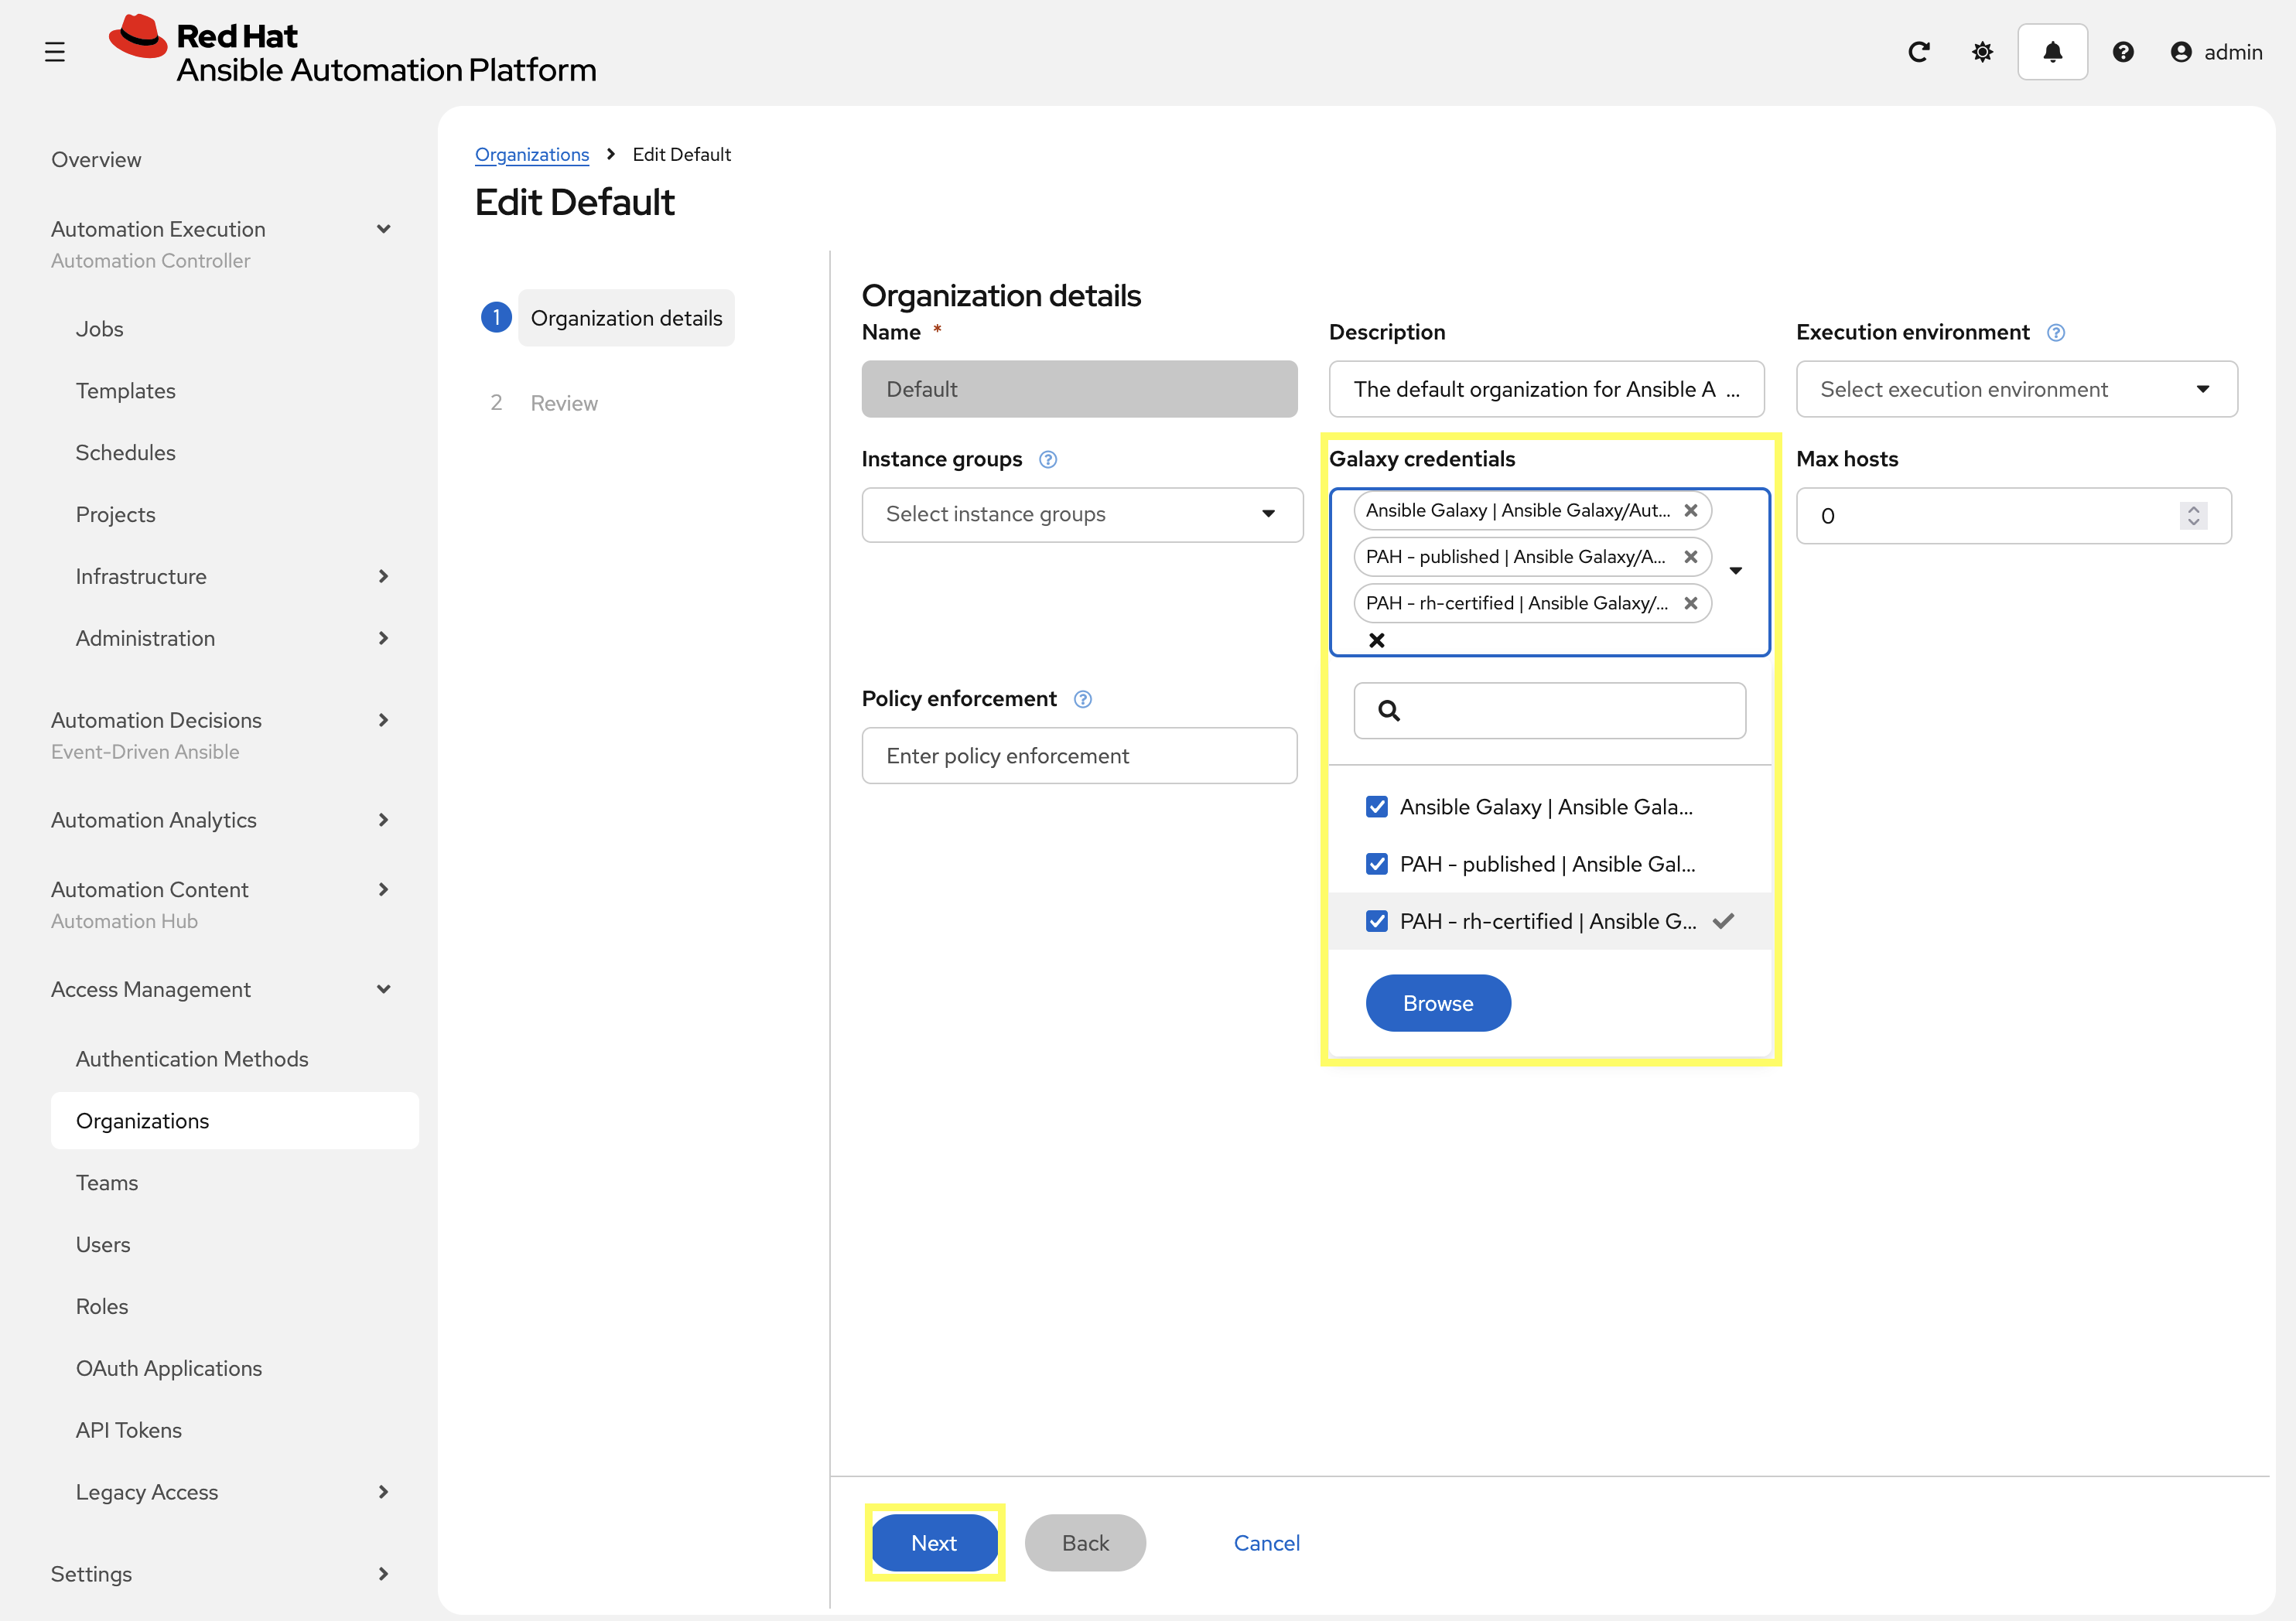
-
Click on the Galaxy Credentials section and add both of the PAH credentials created previously by selecting the checkbox next to them.
-
PAH - published | Ansible Galaxy/Automation Hub API Token
-
PAH - rh-certified | Ansible Galaxy/Automation Hub API Token
-
-
Click Next at the bottom of the page, then Next and finally Finish to save change to the Organization.
2.7: Create a Project
Create a new Project in Automation Controller that points to your Git repository containing the playbook.
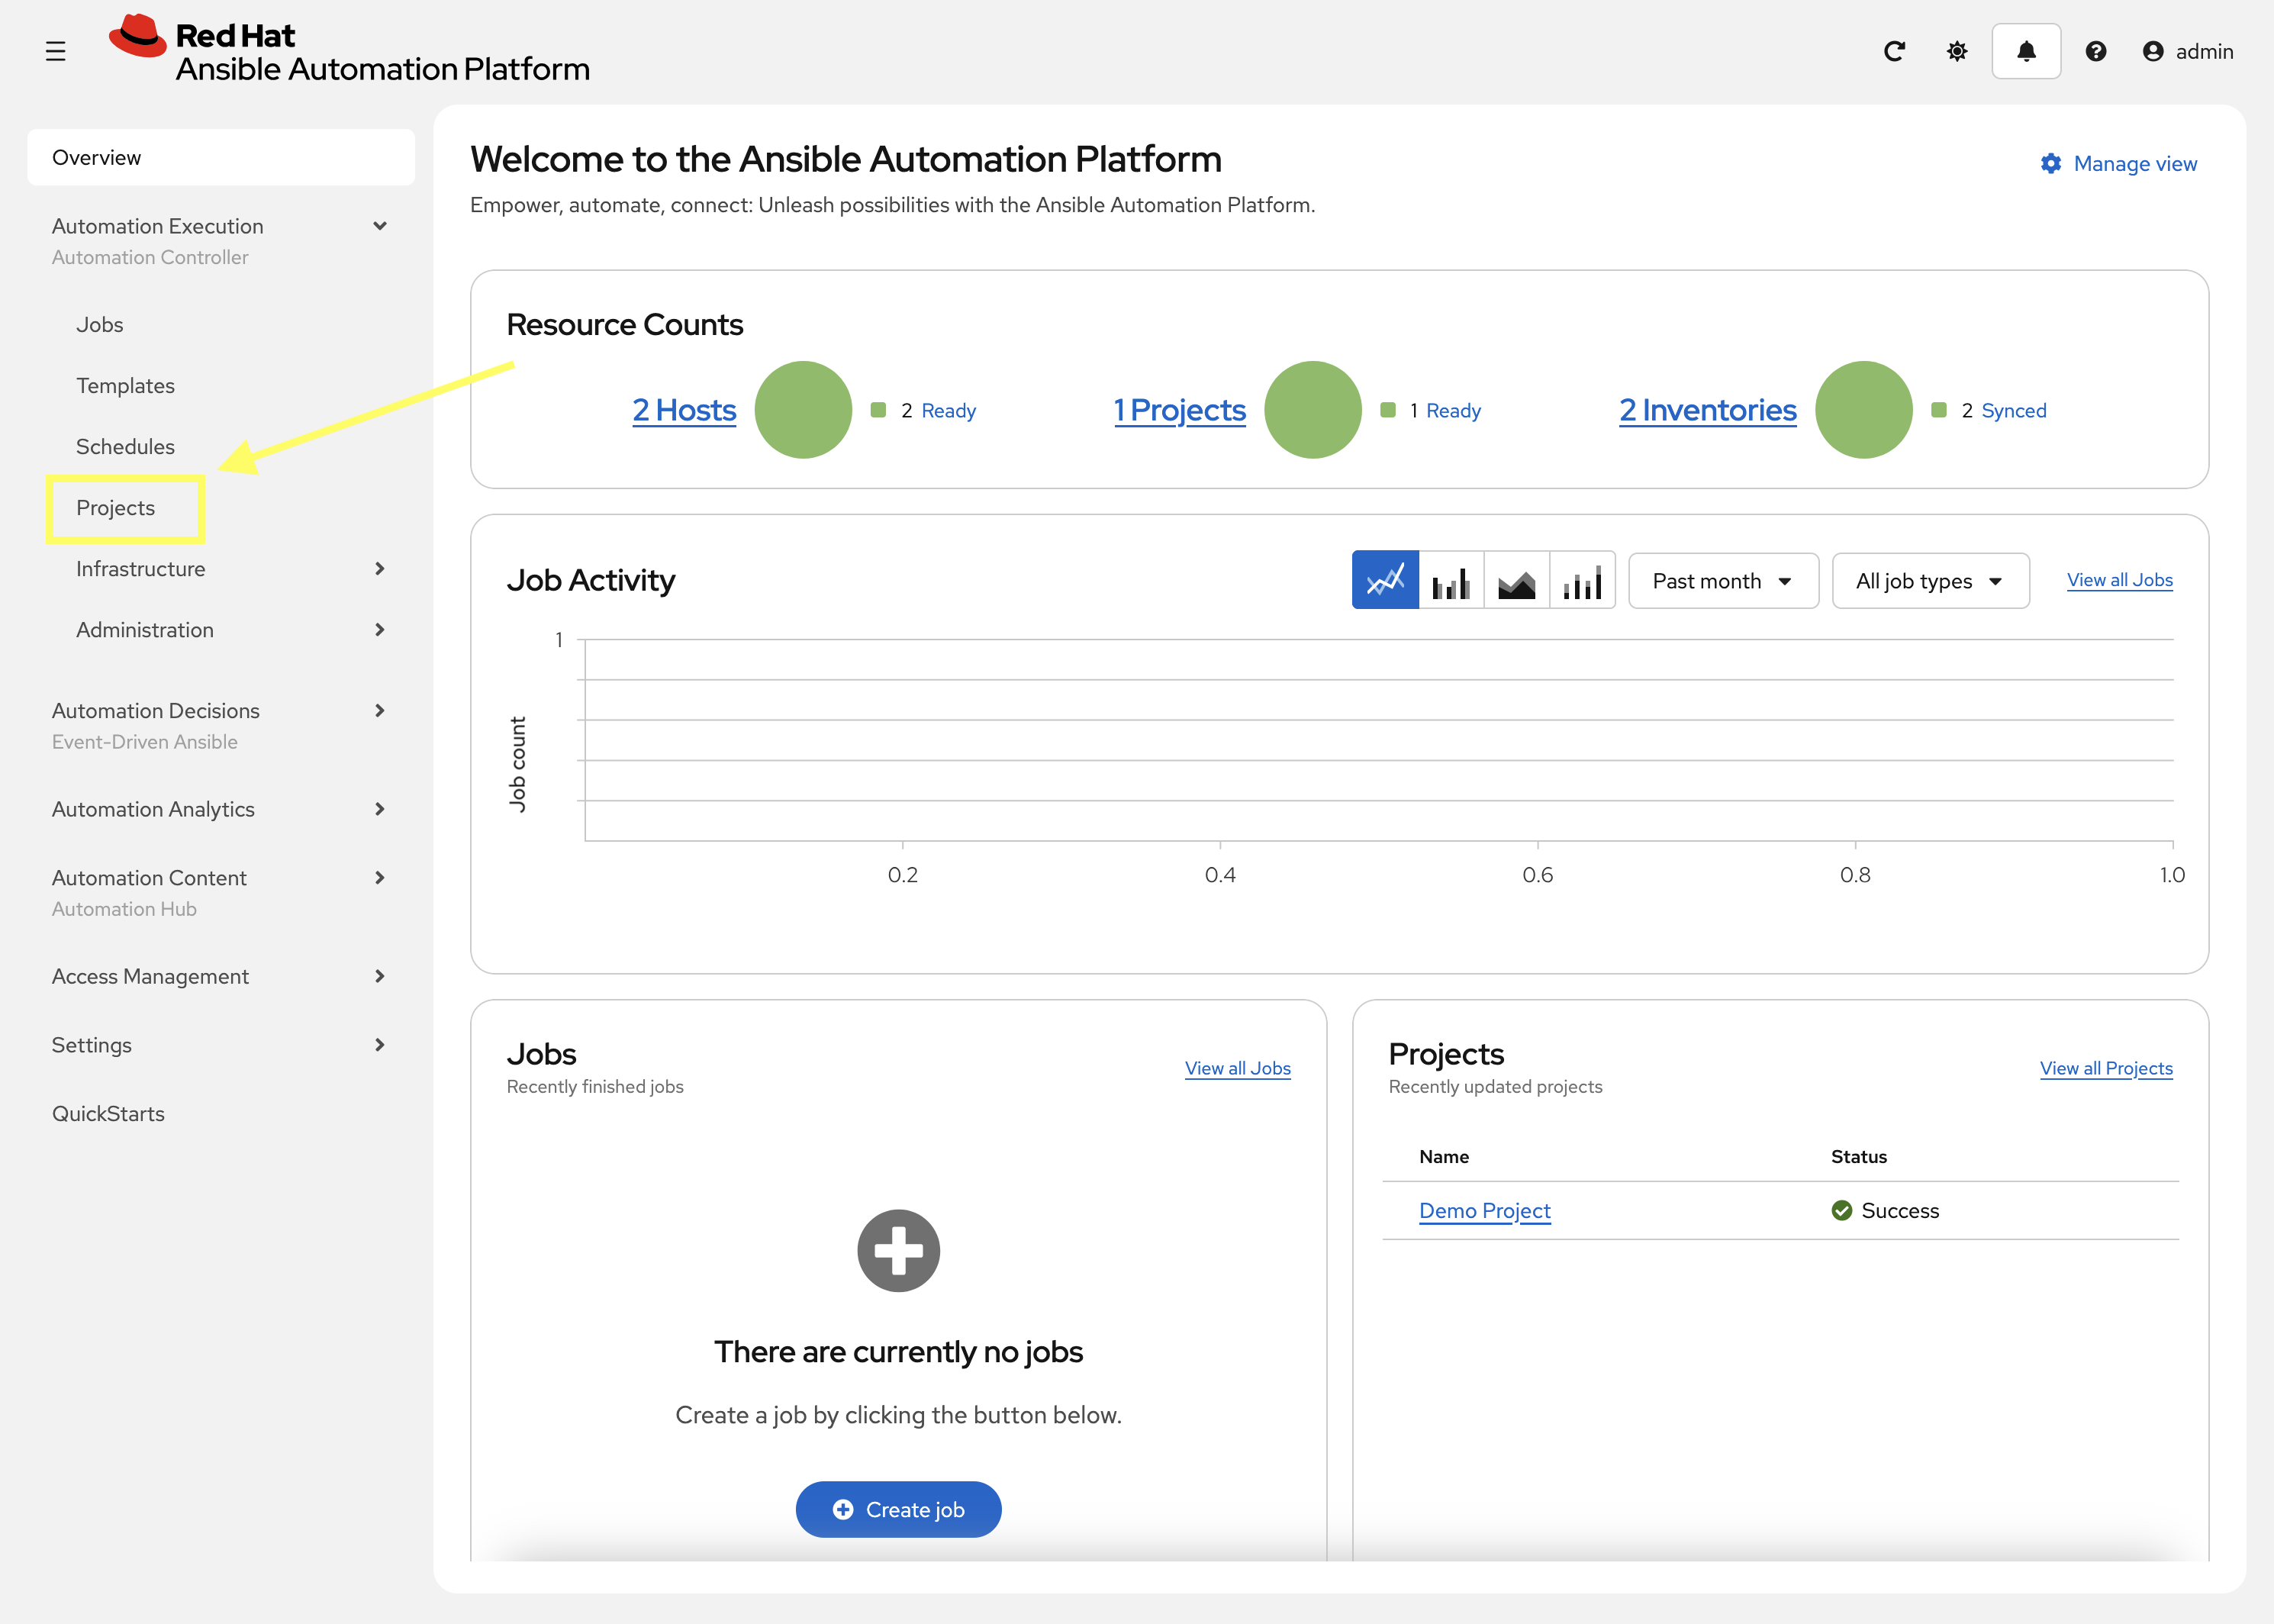
-
From the navigation menu on the left, expand Automation Execution and click on Projects.
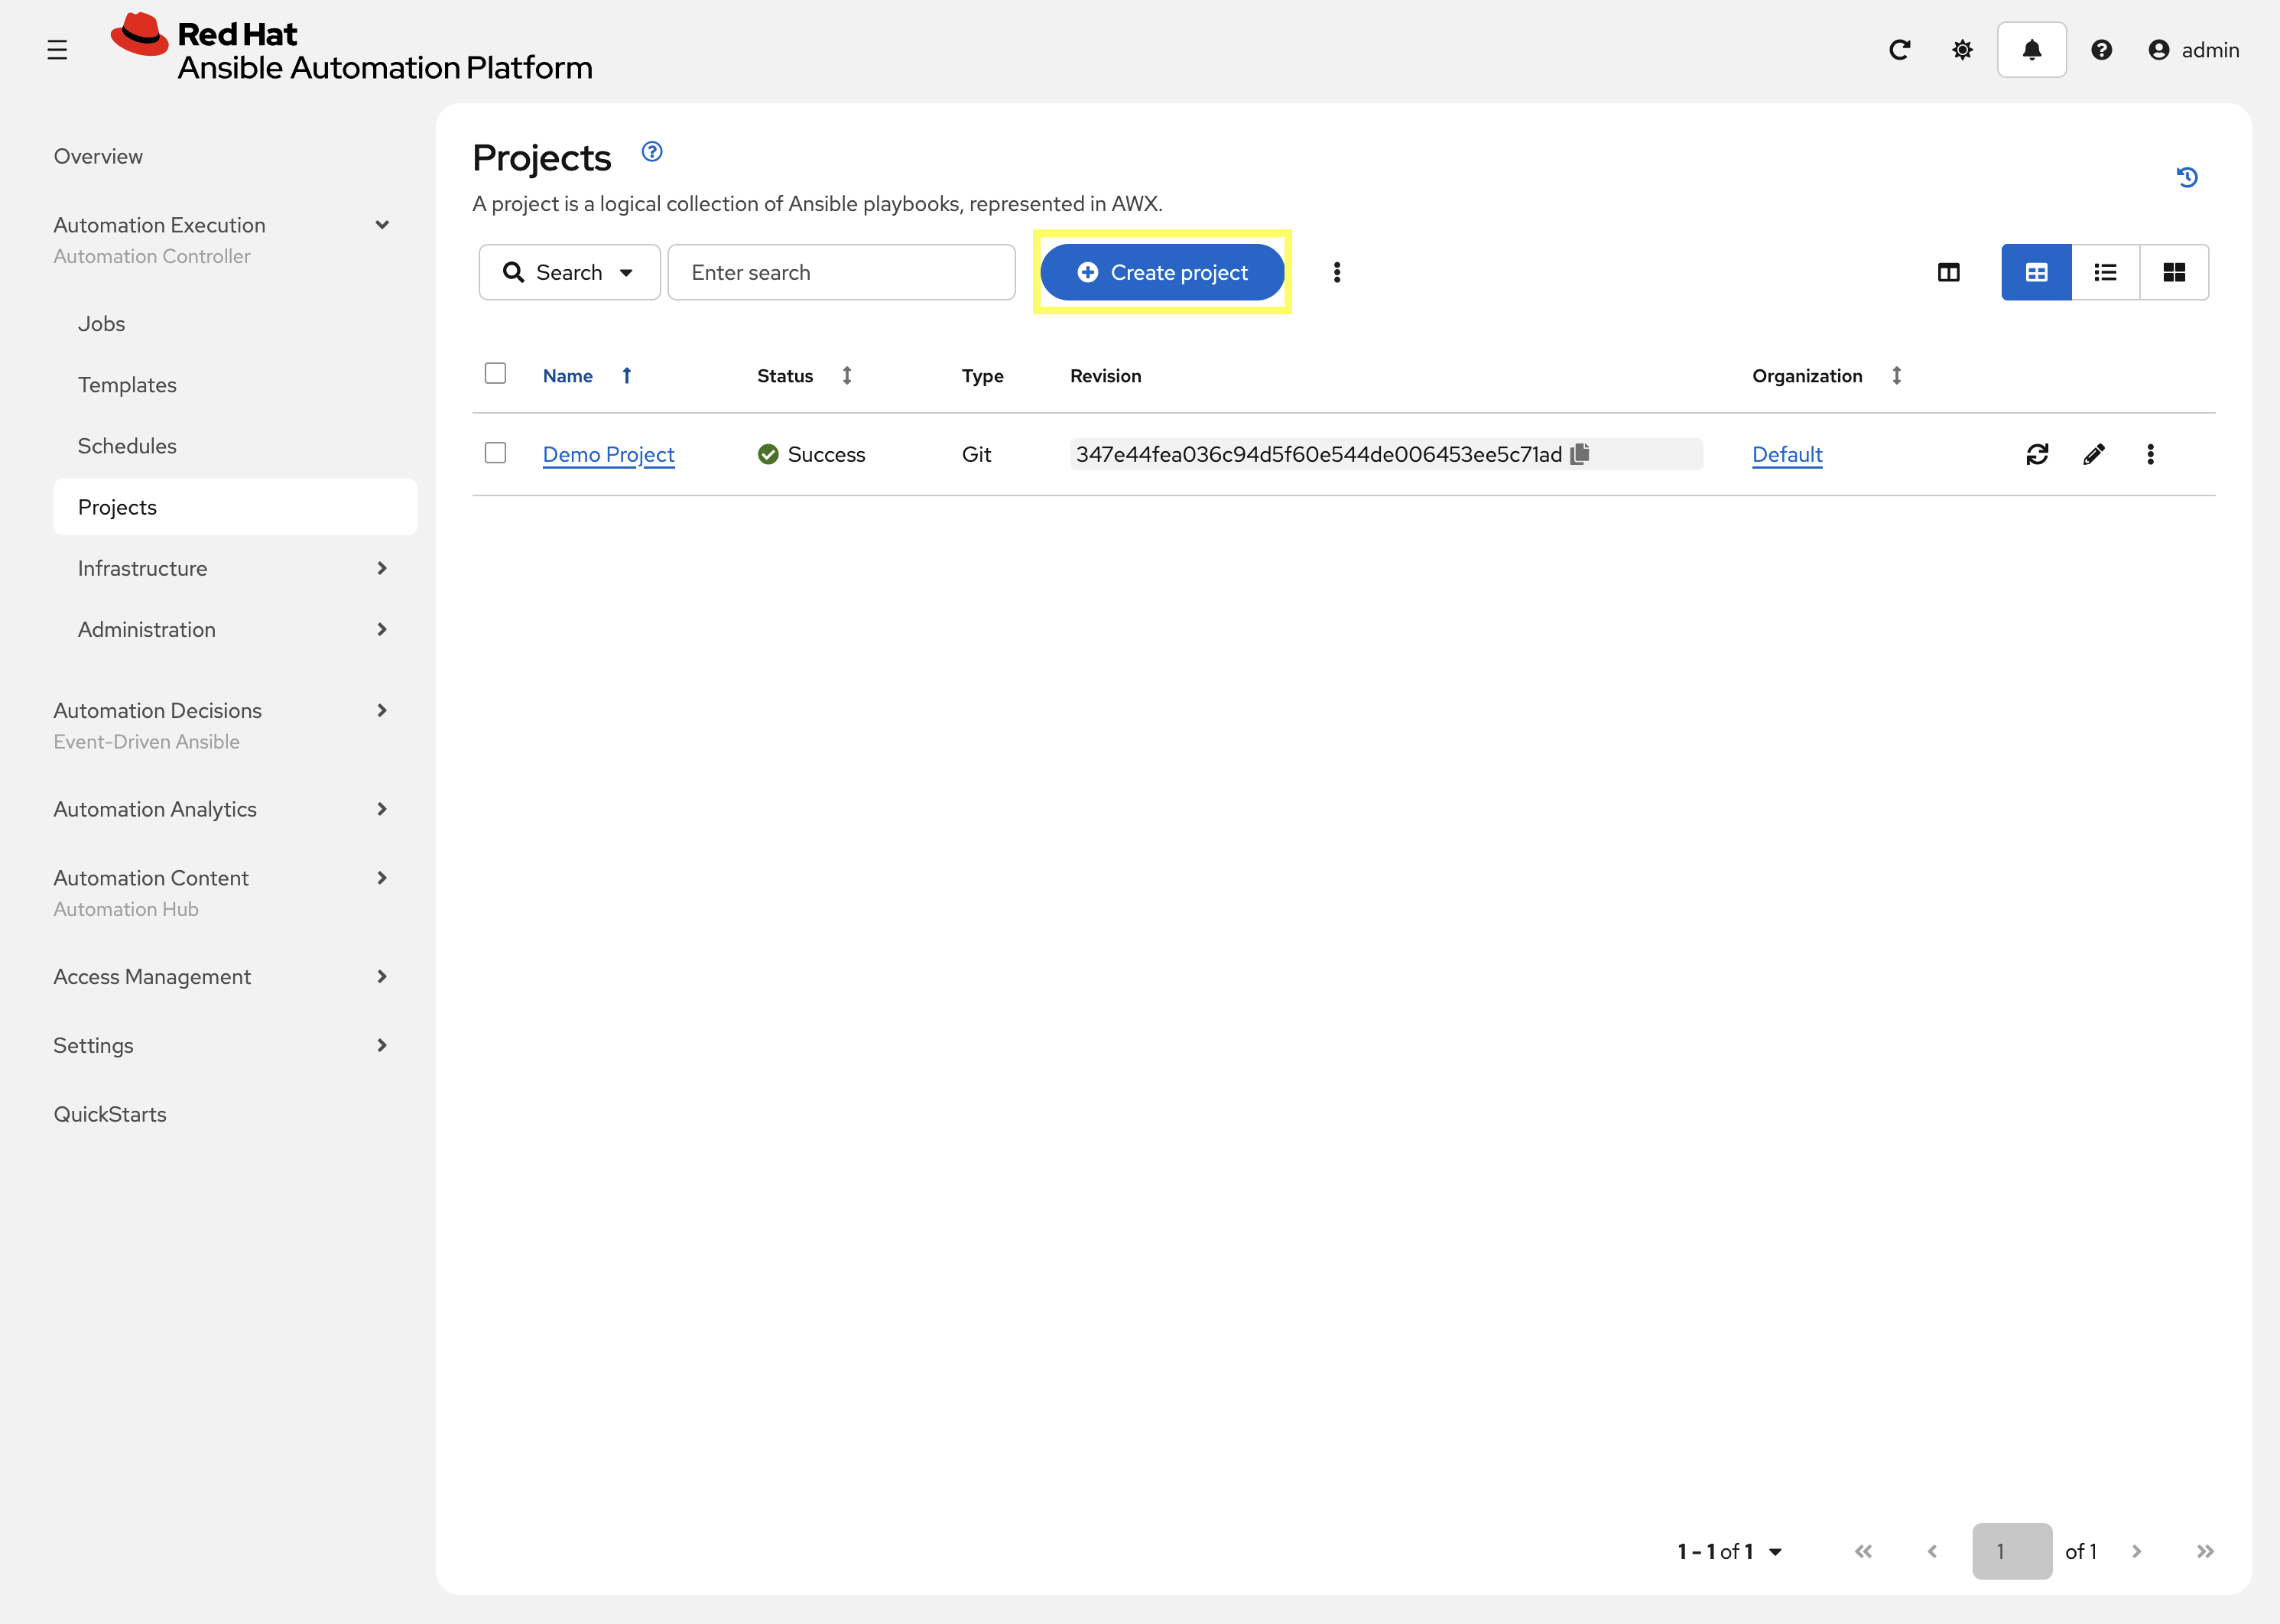
-
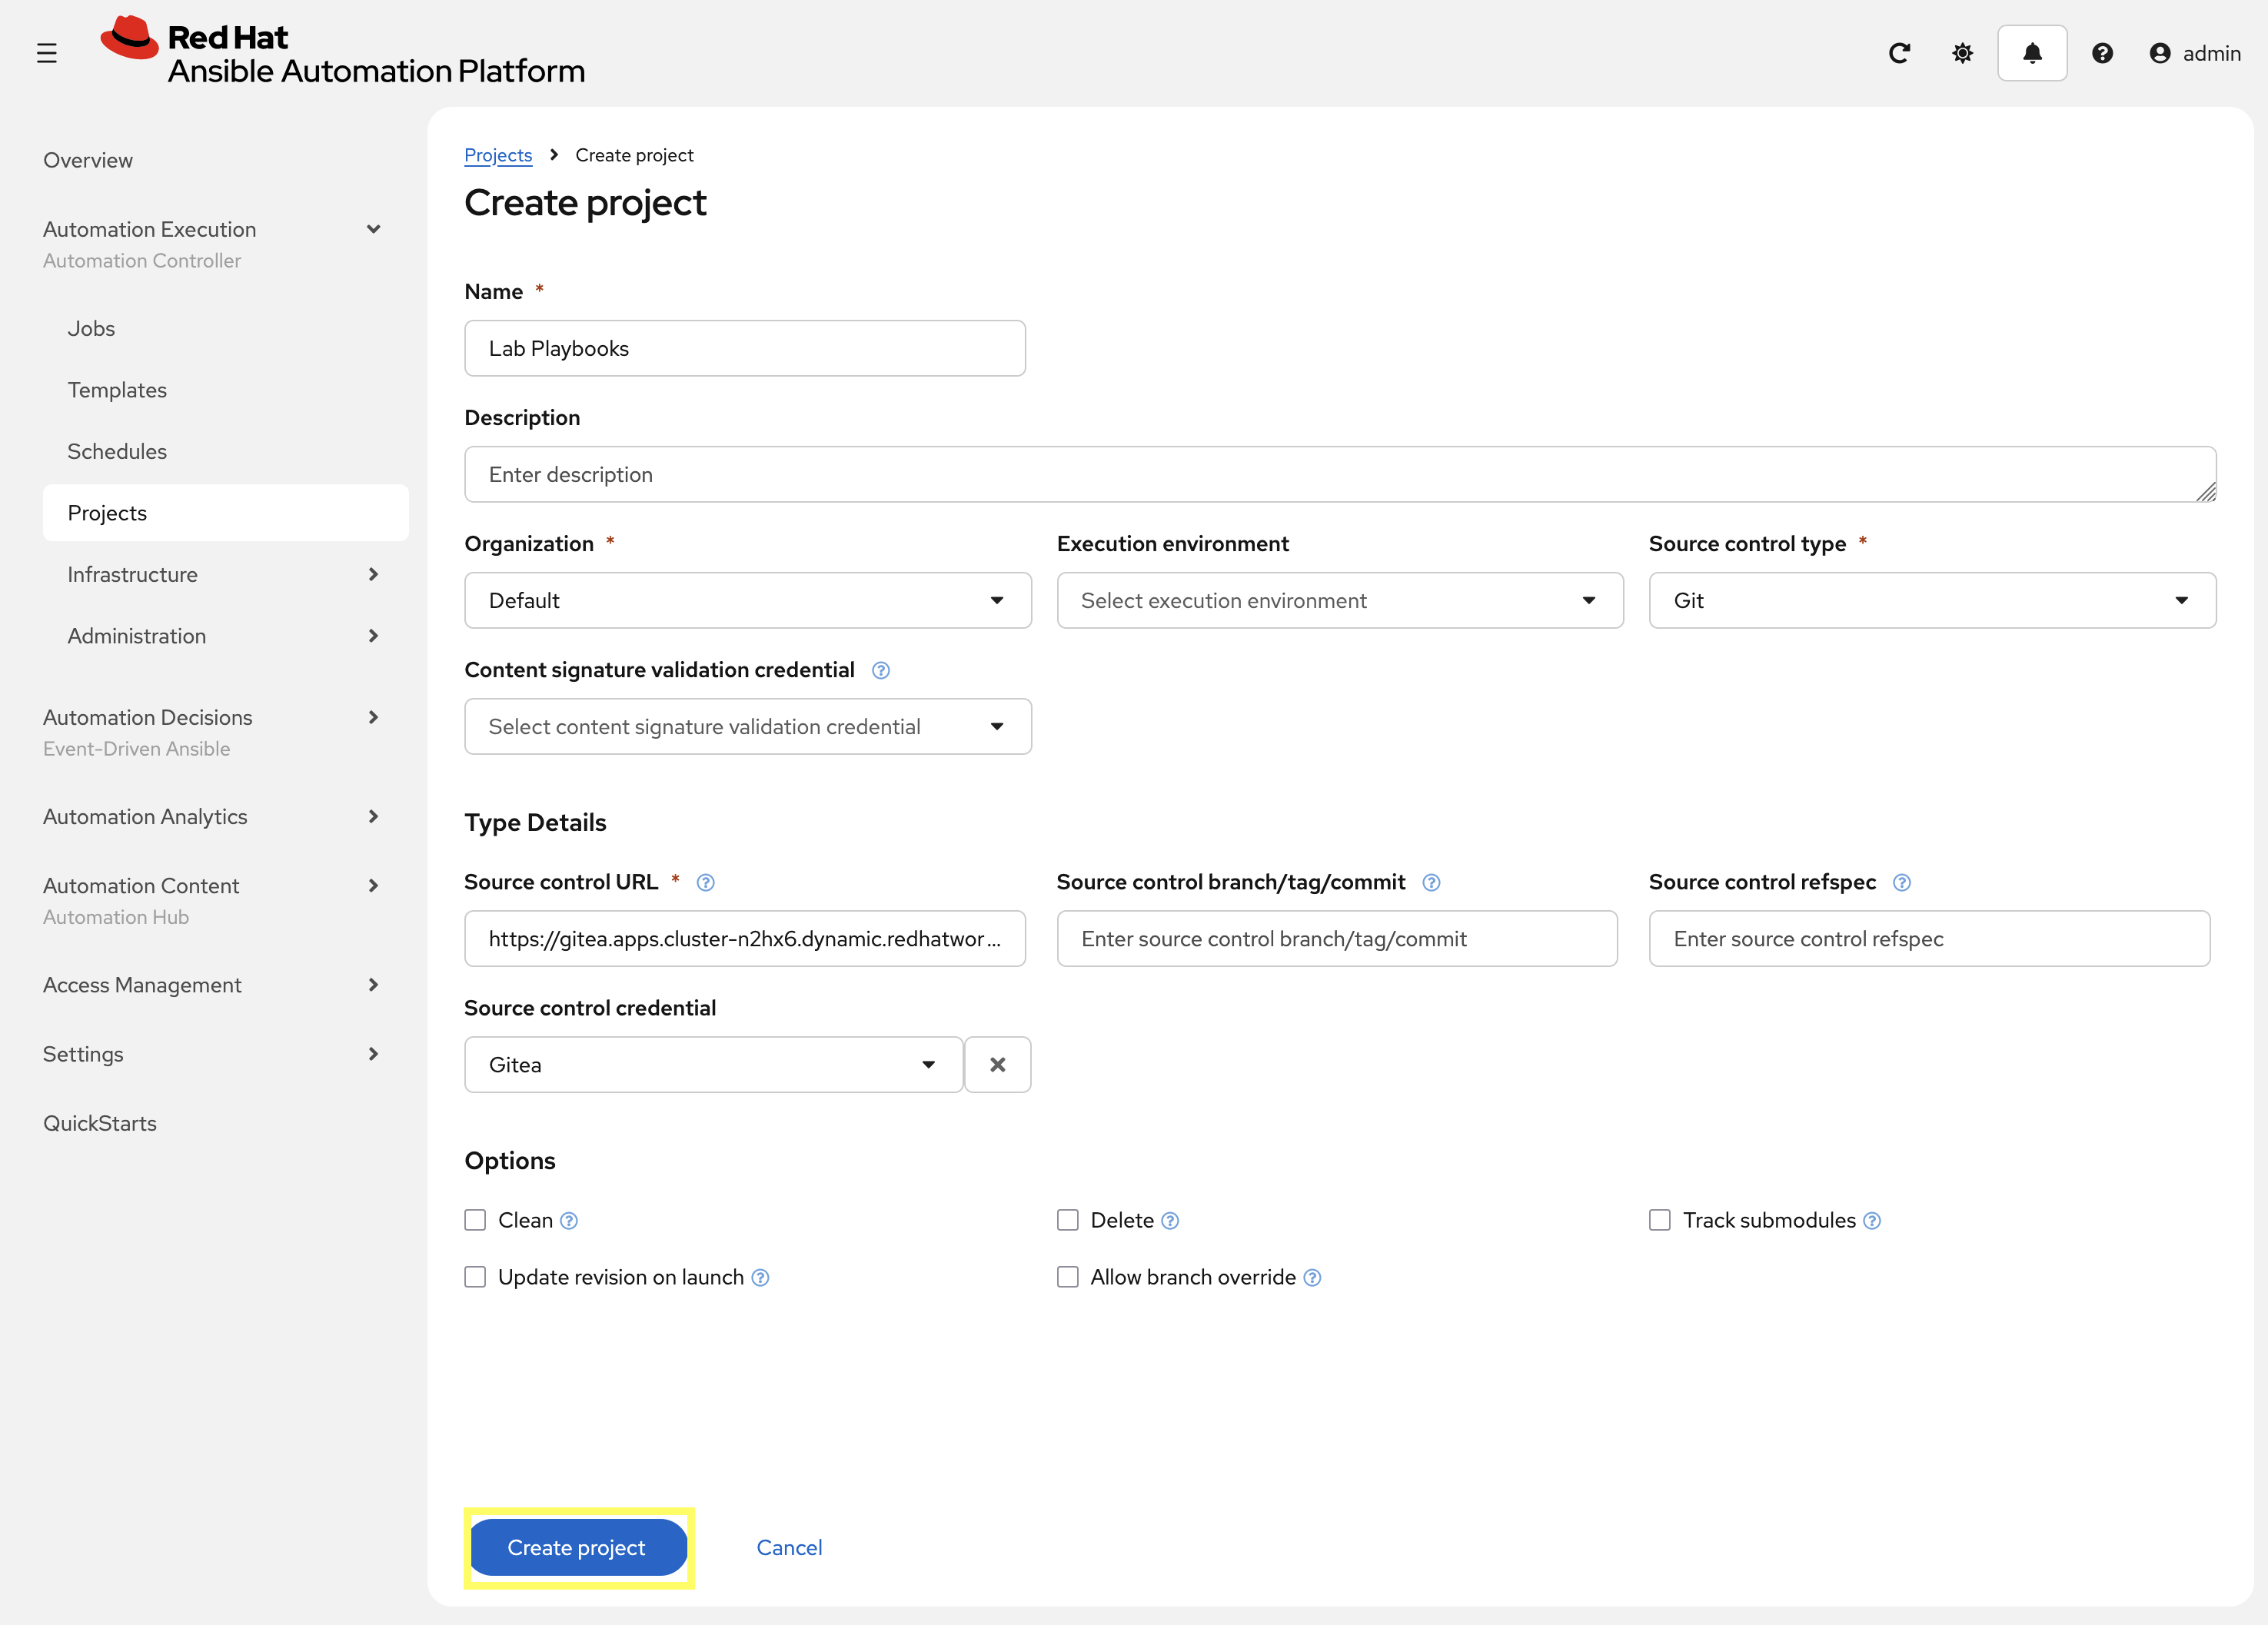
Click Create project to add a new project.
-
Enter the following details on the Create Project page:
-
Name:
Lab Playbooks -
Organization:
Default -
Source Control Type:
Git -
Source control URL:
{gitea_console_url}/{gitea_user}/lab_playbooks.git -
Source code credential: Select the
Giteacredential created previously.
-
-
Click Create project to create the new Project.
-
Confirm that the project has been synced successfully by looking Success underneath Last job status.

2.6: Create a Job Template
With the Execution Environment and Project created, the final step is to create a Job Template that uses both components.
-
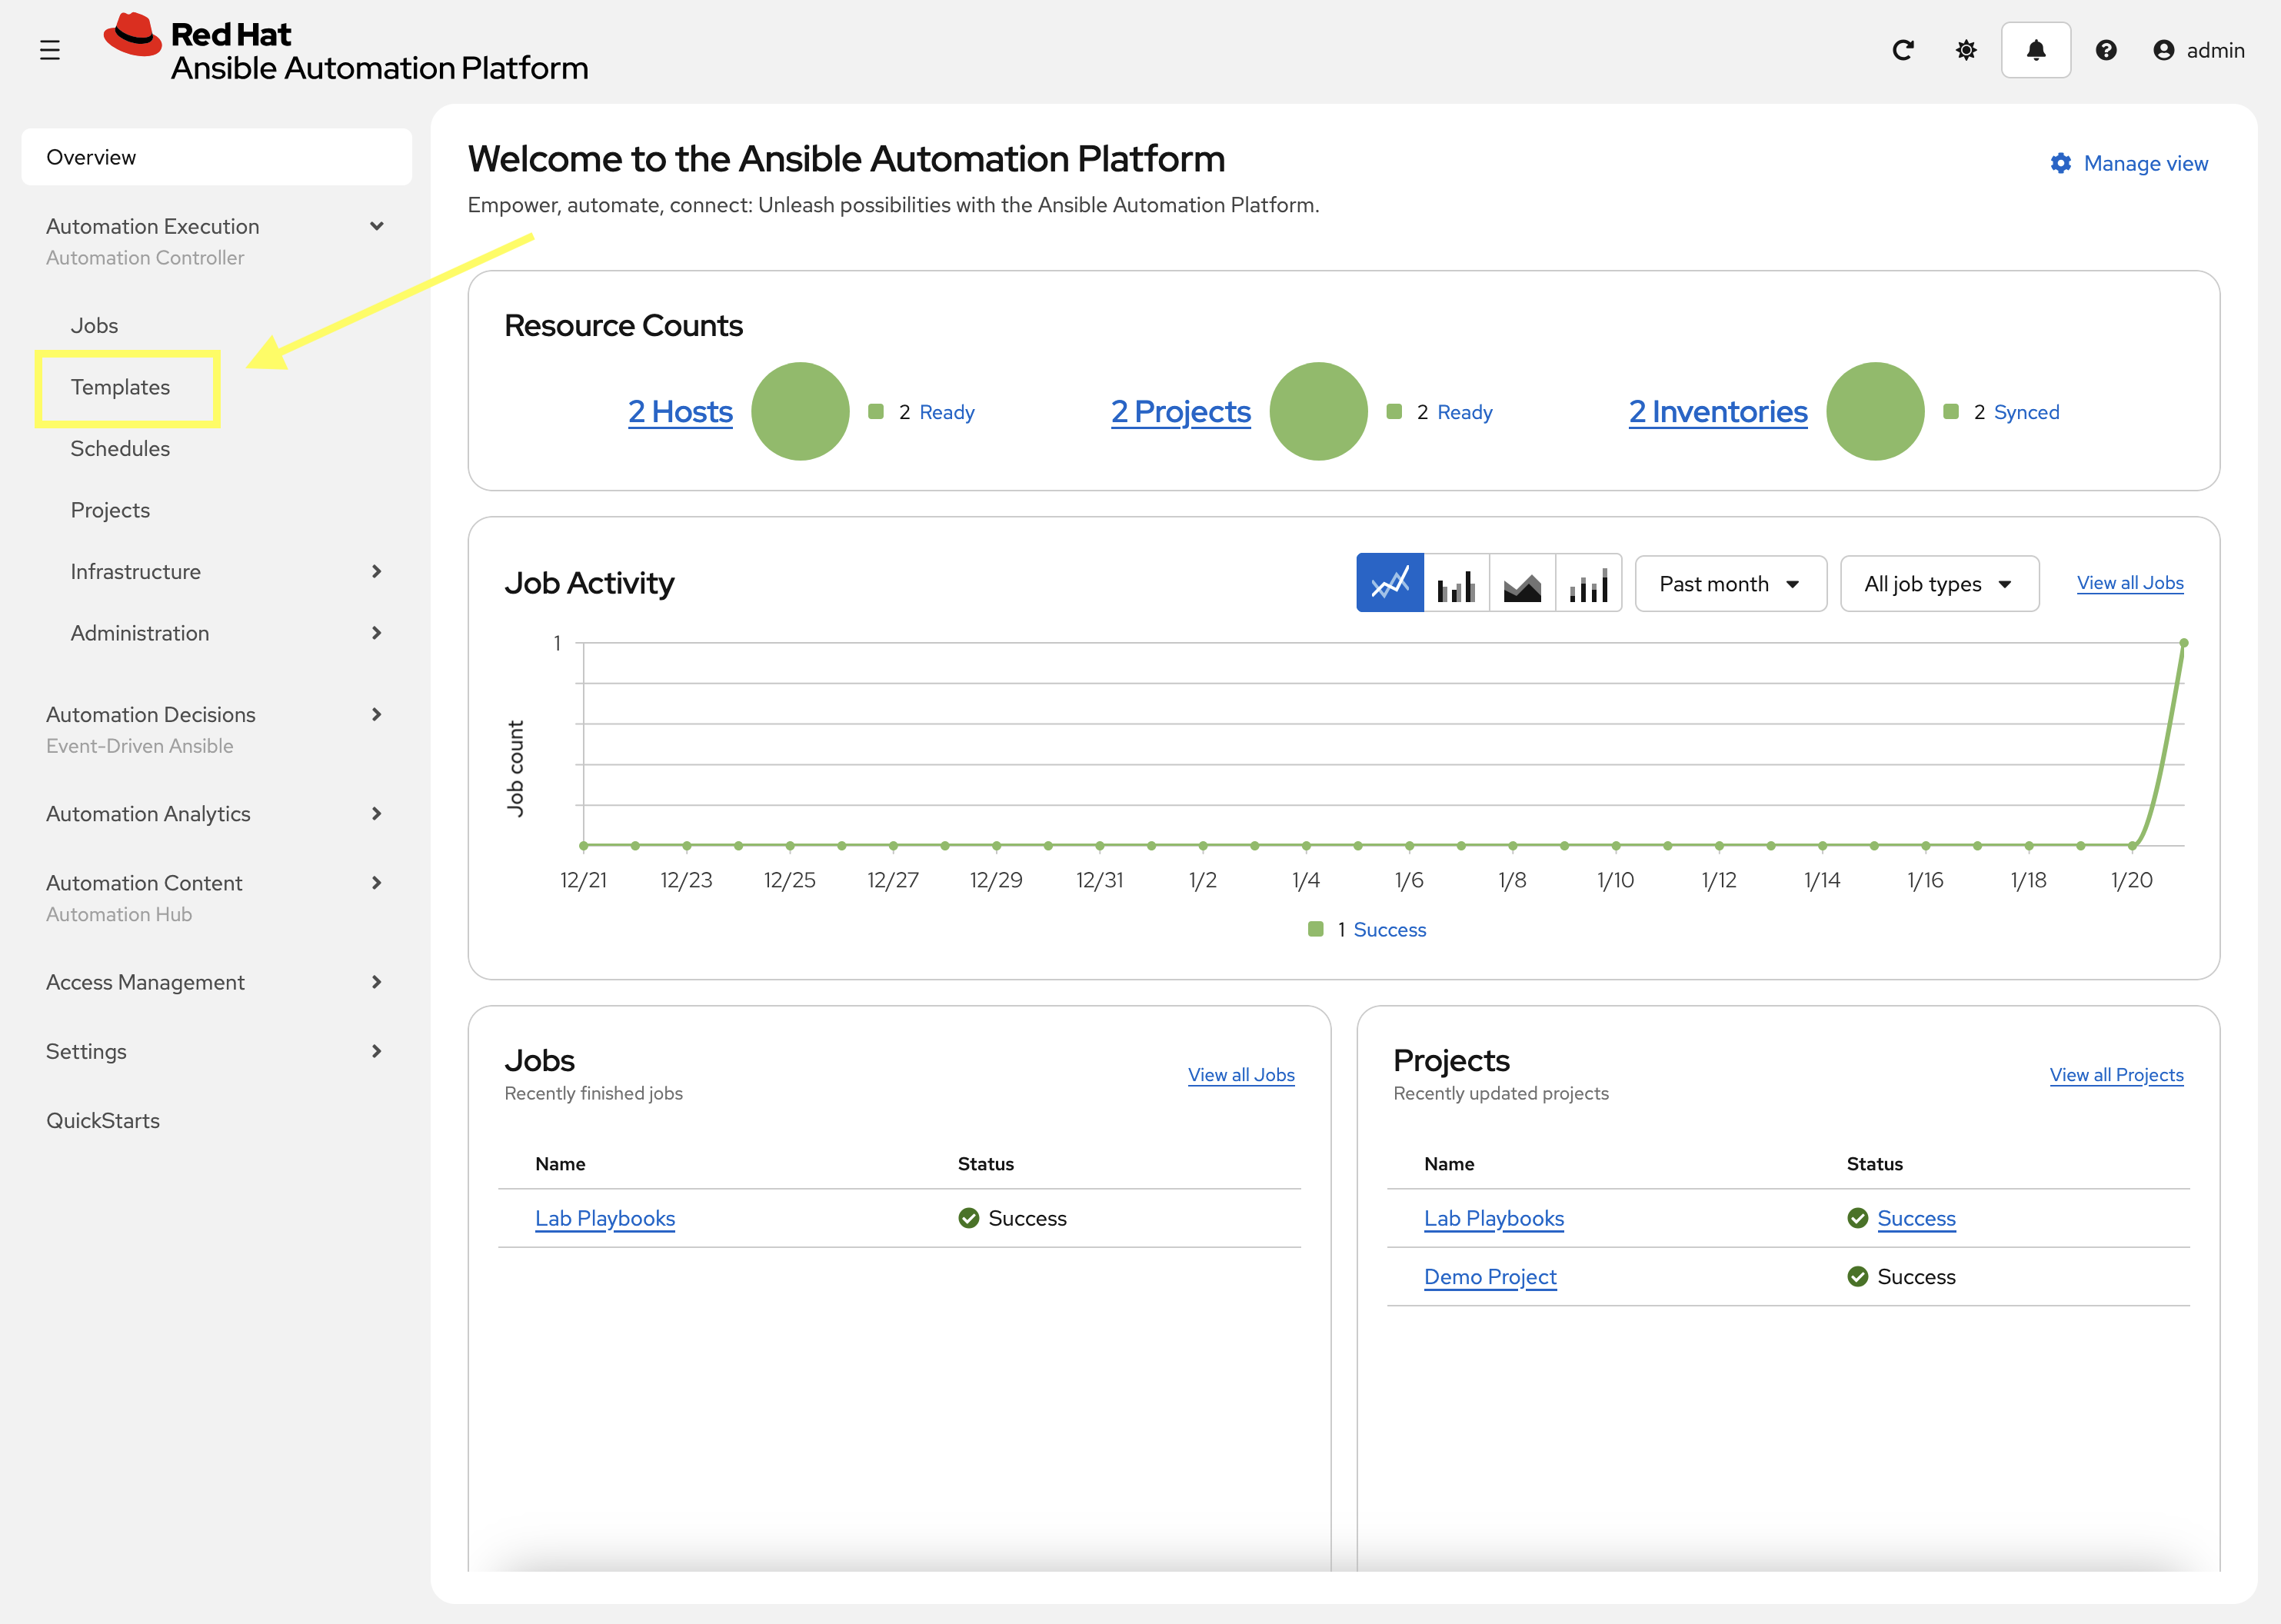
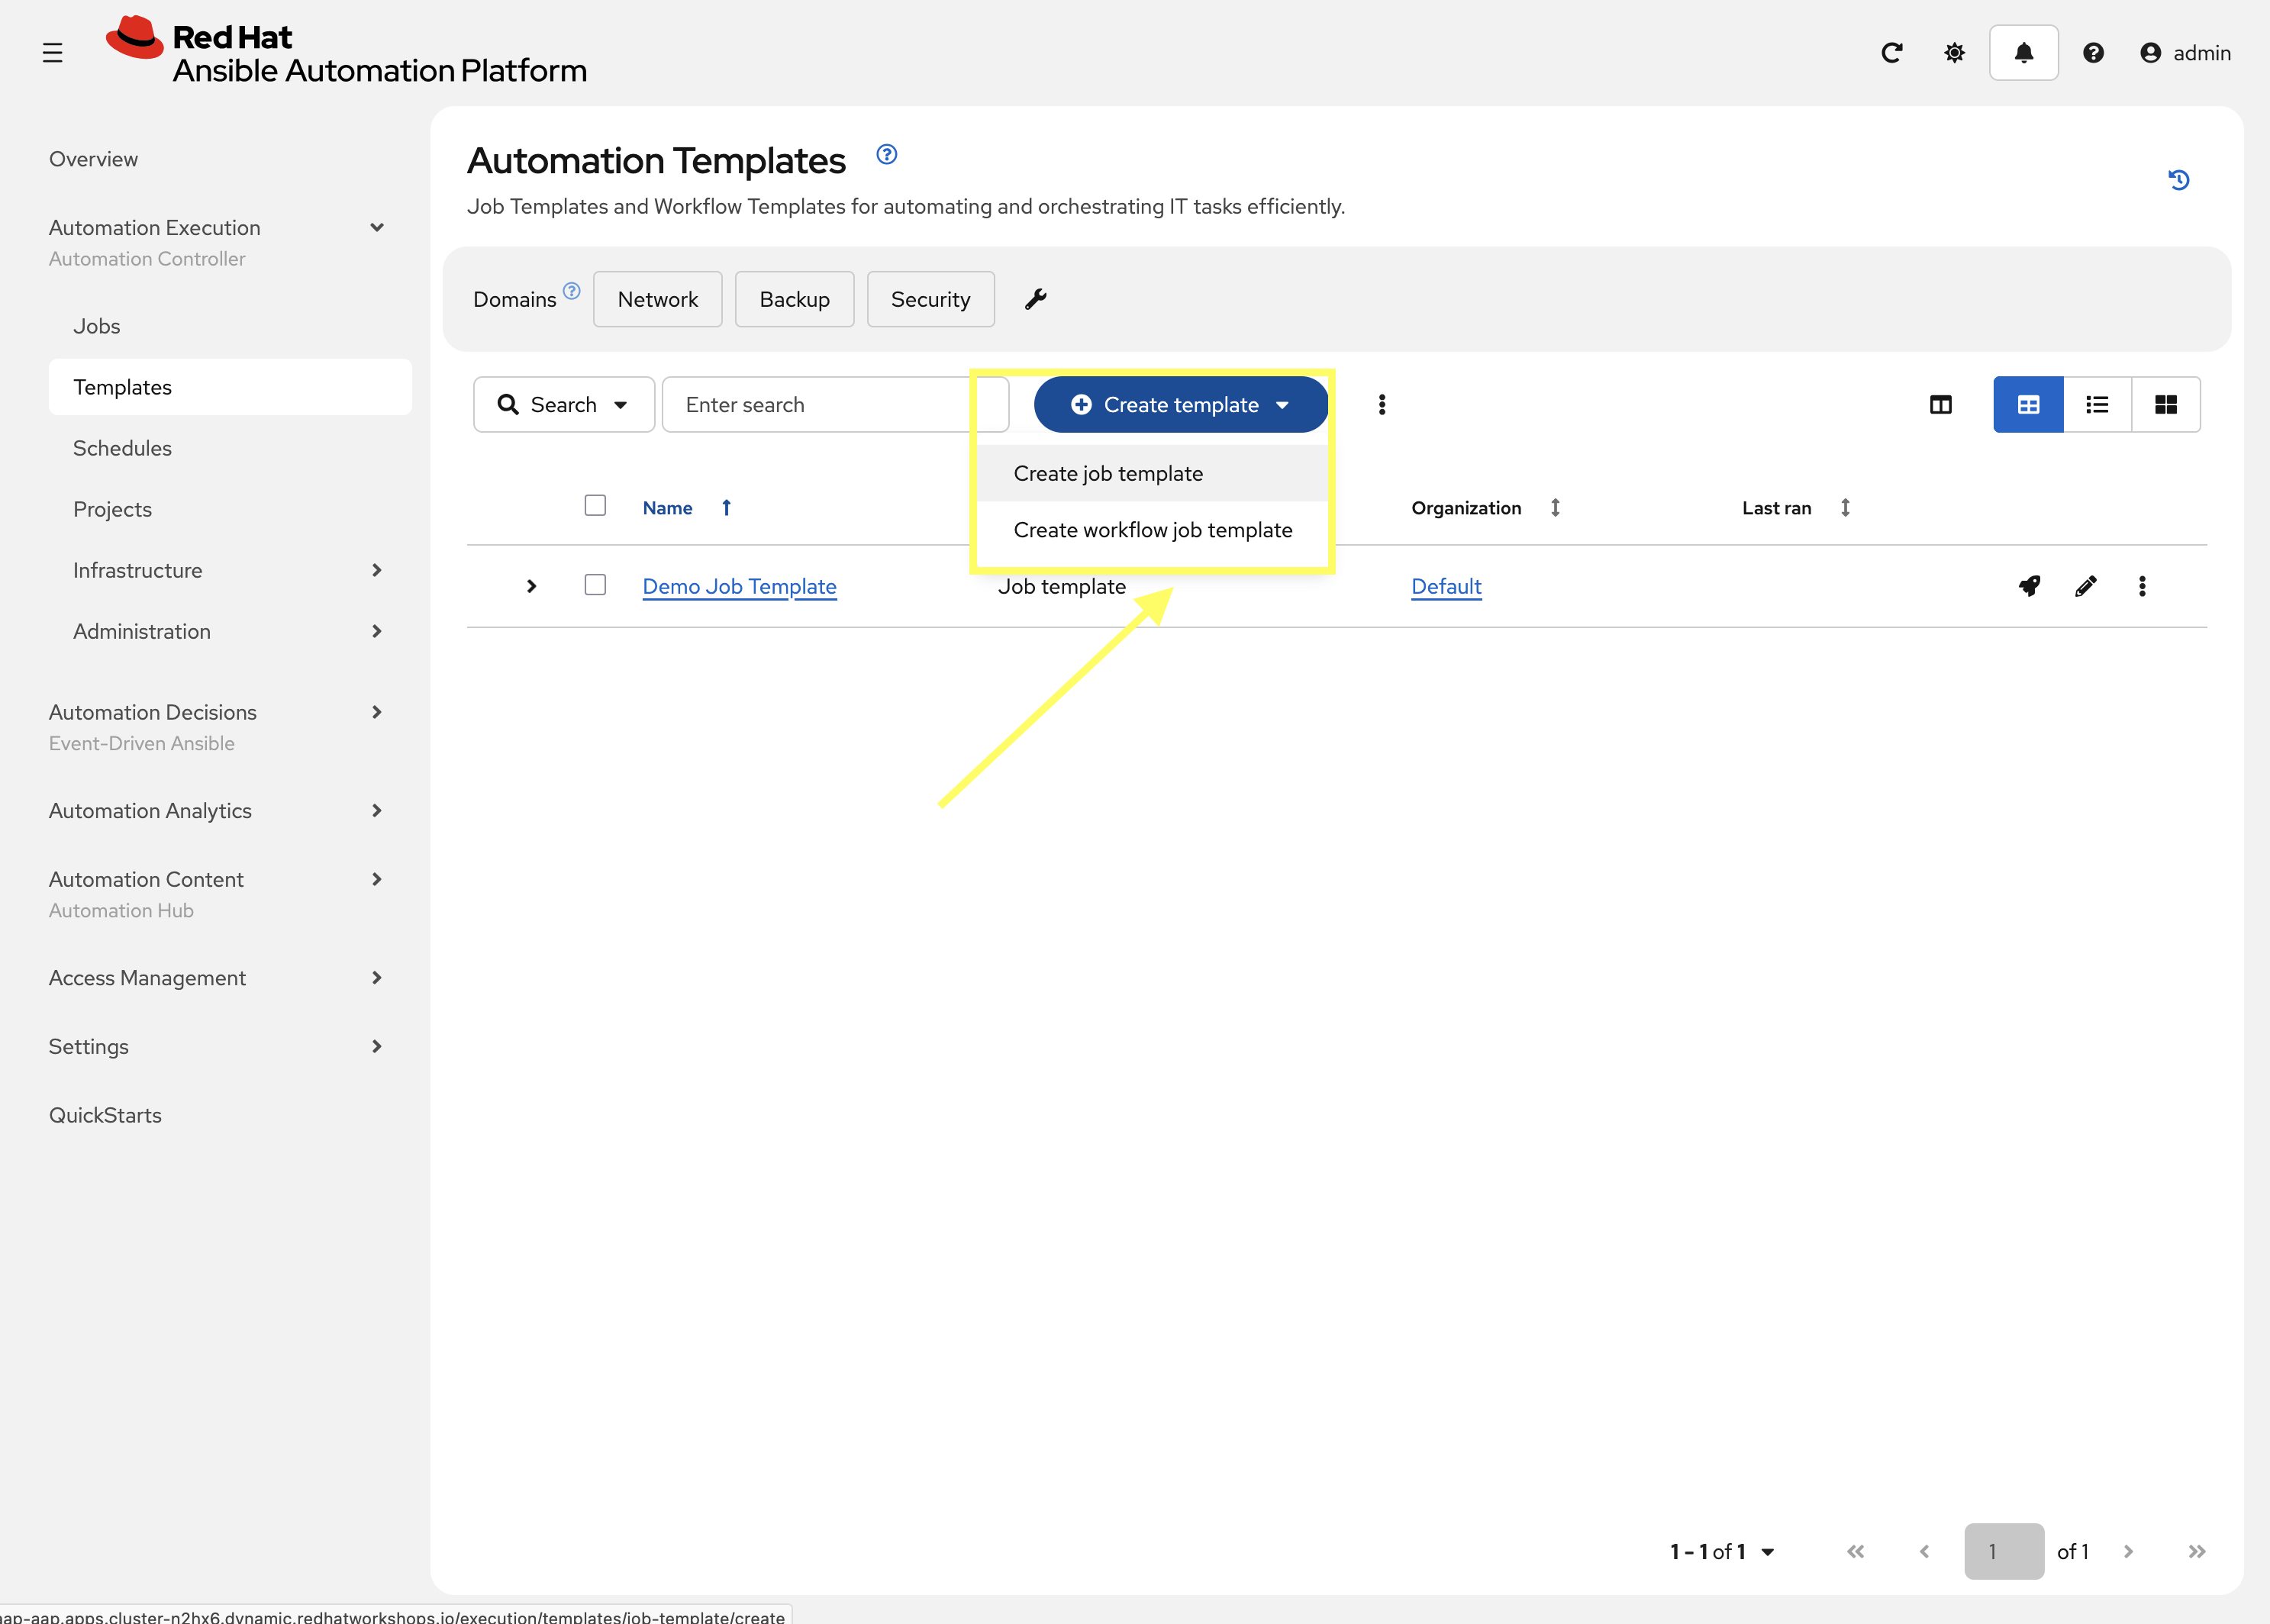
From the navigation menu on the left, expand Automation Execution and click on Templates.
-
Click the Create template dropdown and select Create job template.
-
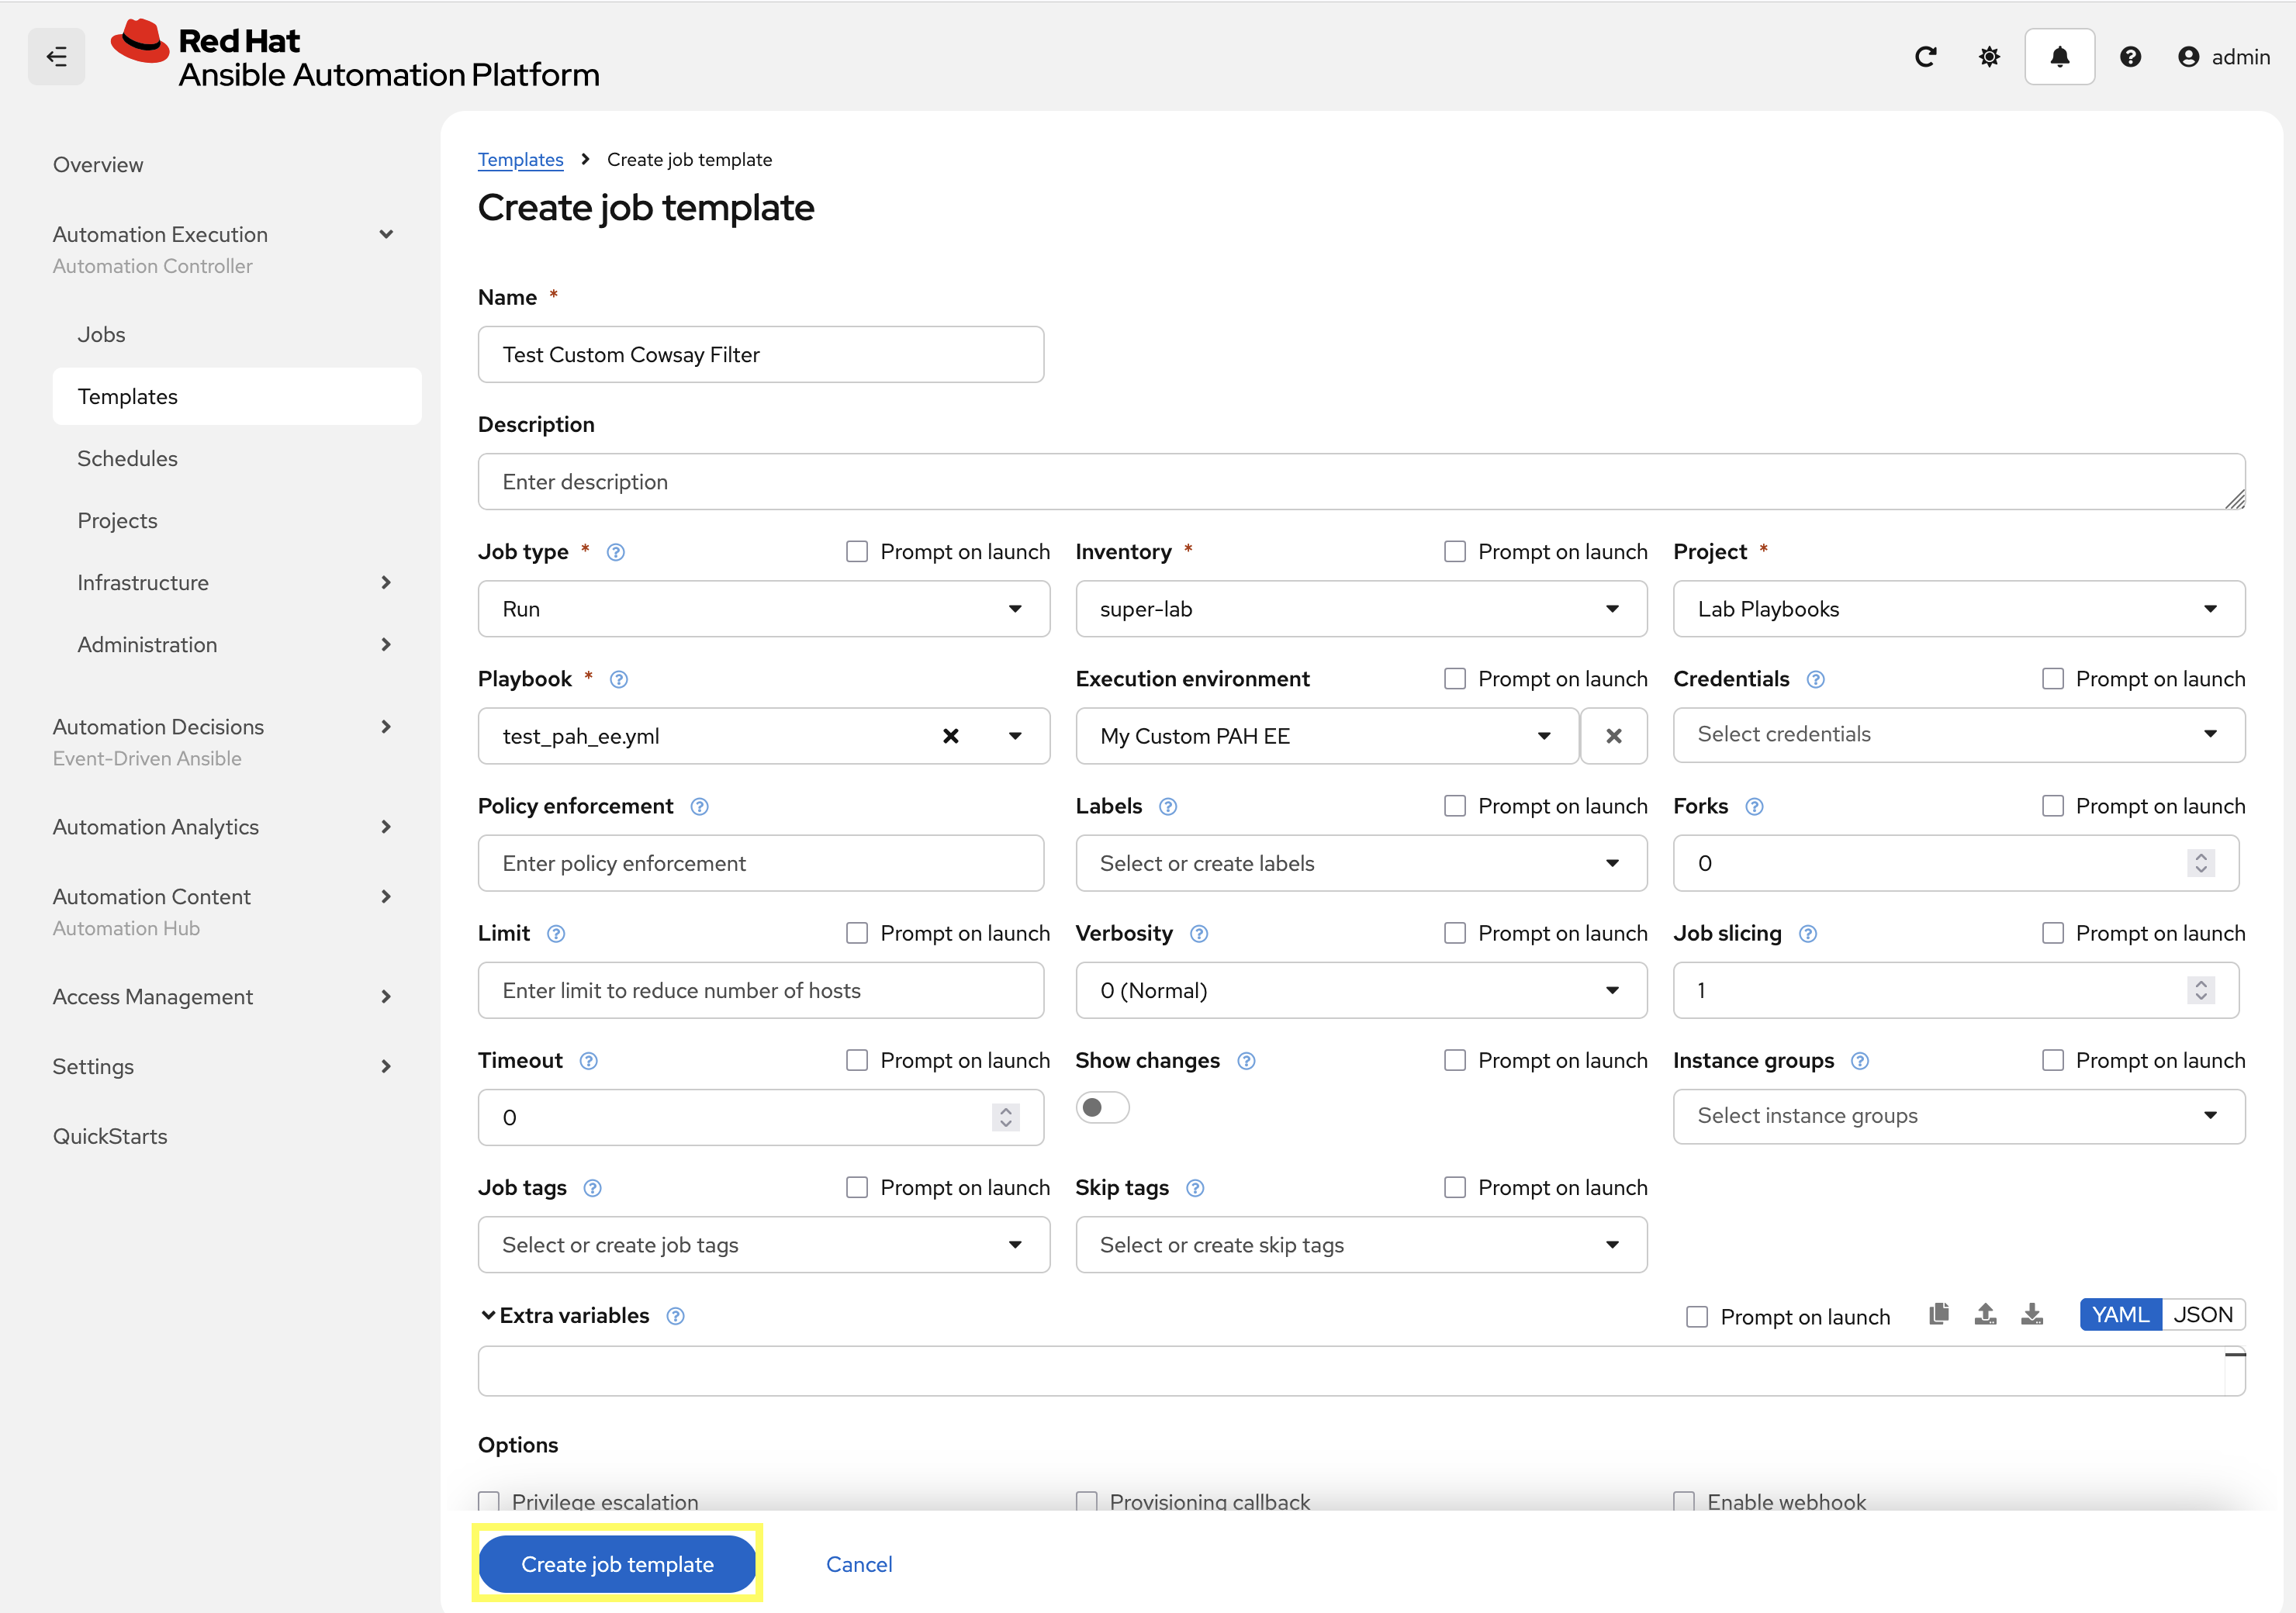
Enter the following details on the Create job template page:
-
Name:
Test Custom Cowsay Filter -
Inventory:
super-lab -
Project:
Lab Playbooks -
Playbook:
test_pah_ee.yml -
Execution Environment:
My Custom PAH EE
-
-
Click Create job template to create the new Job Template.
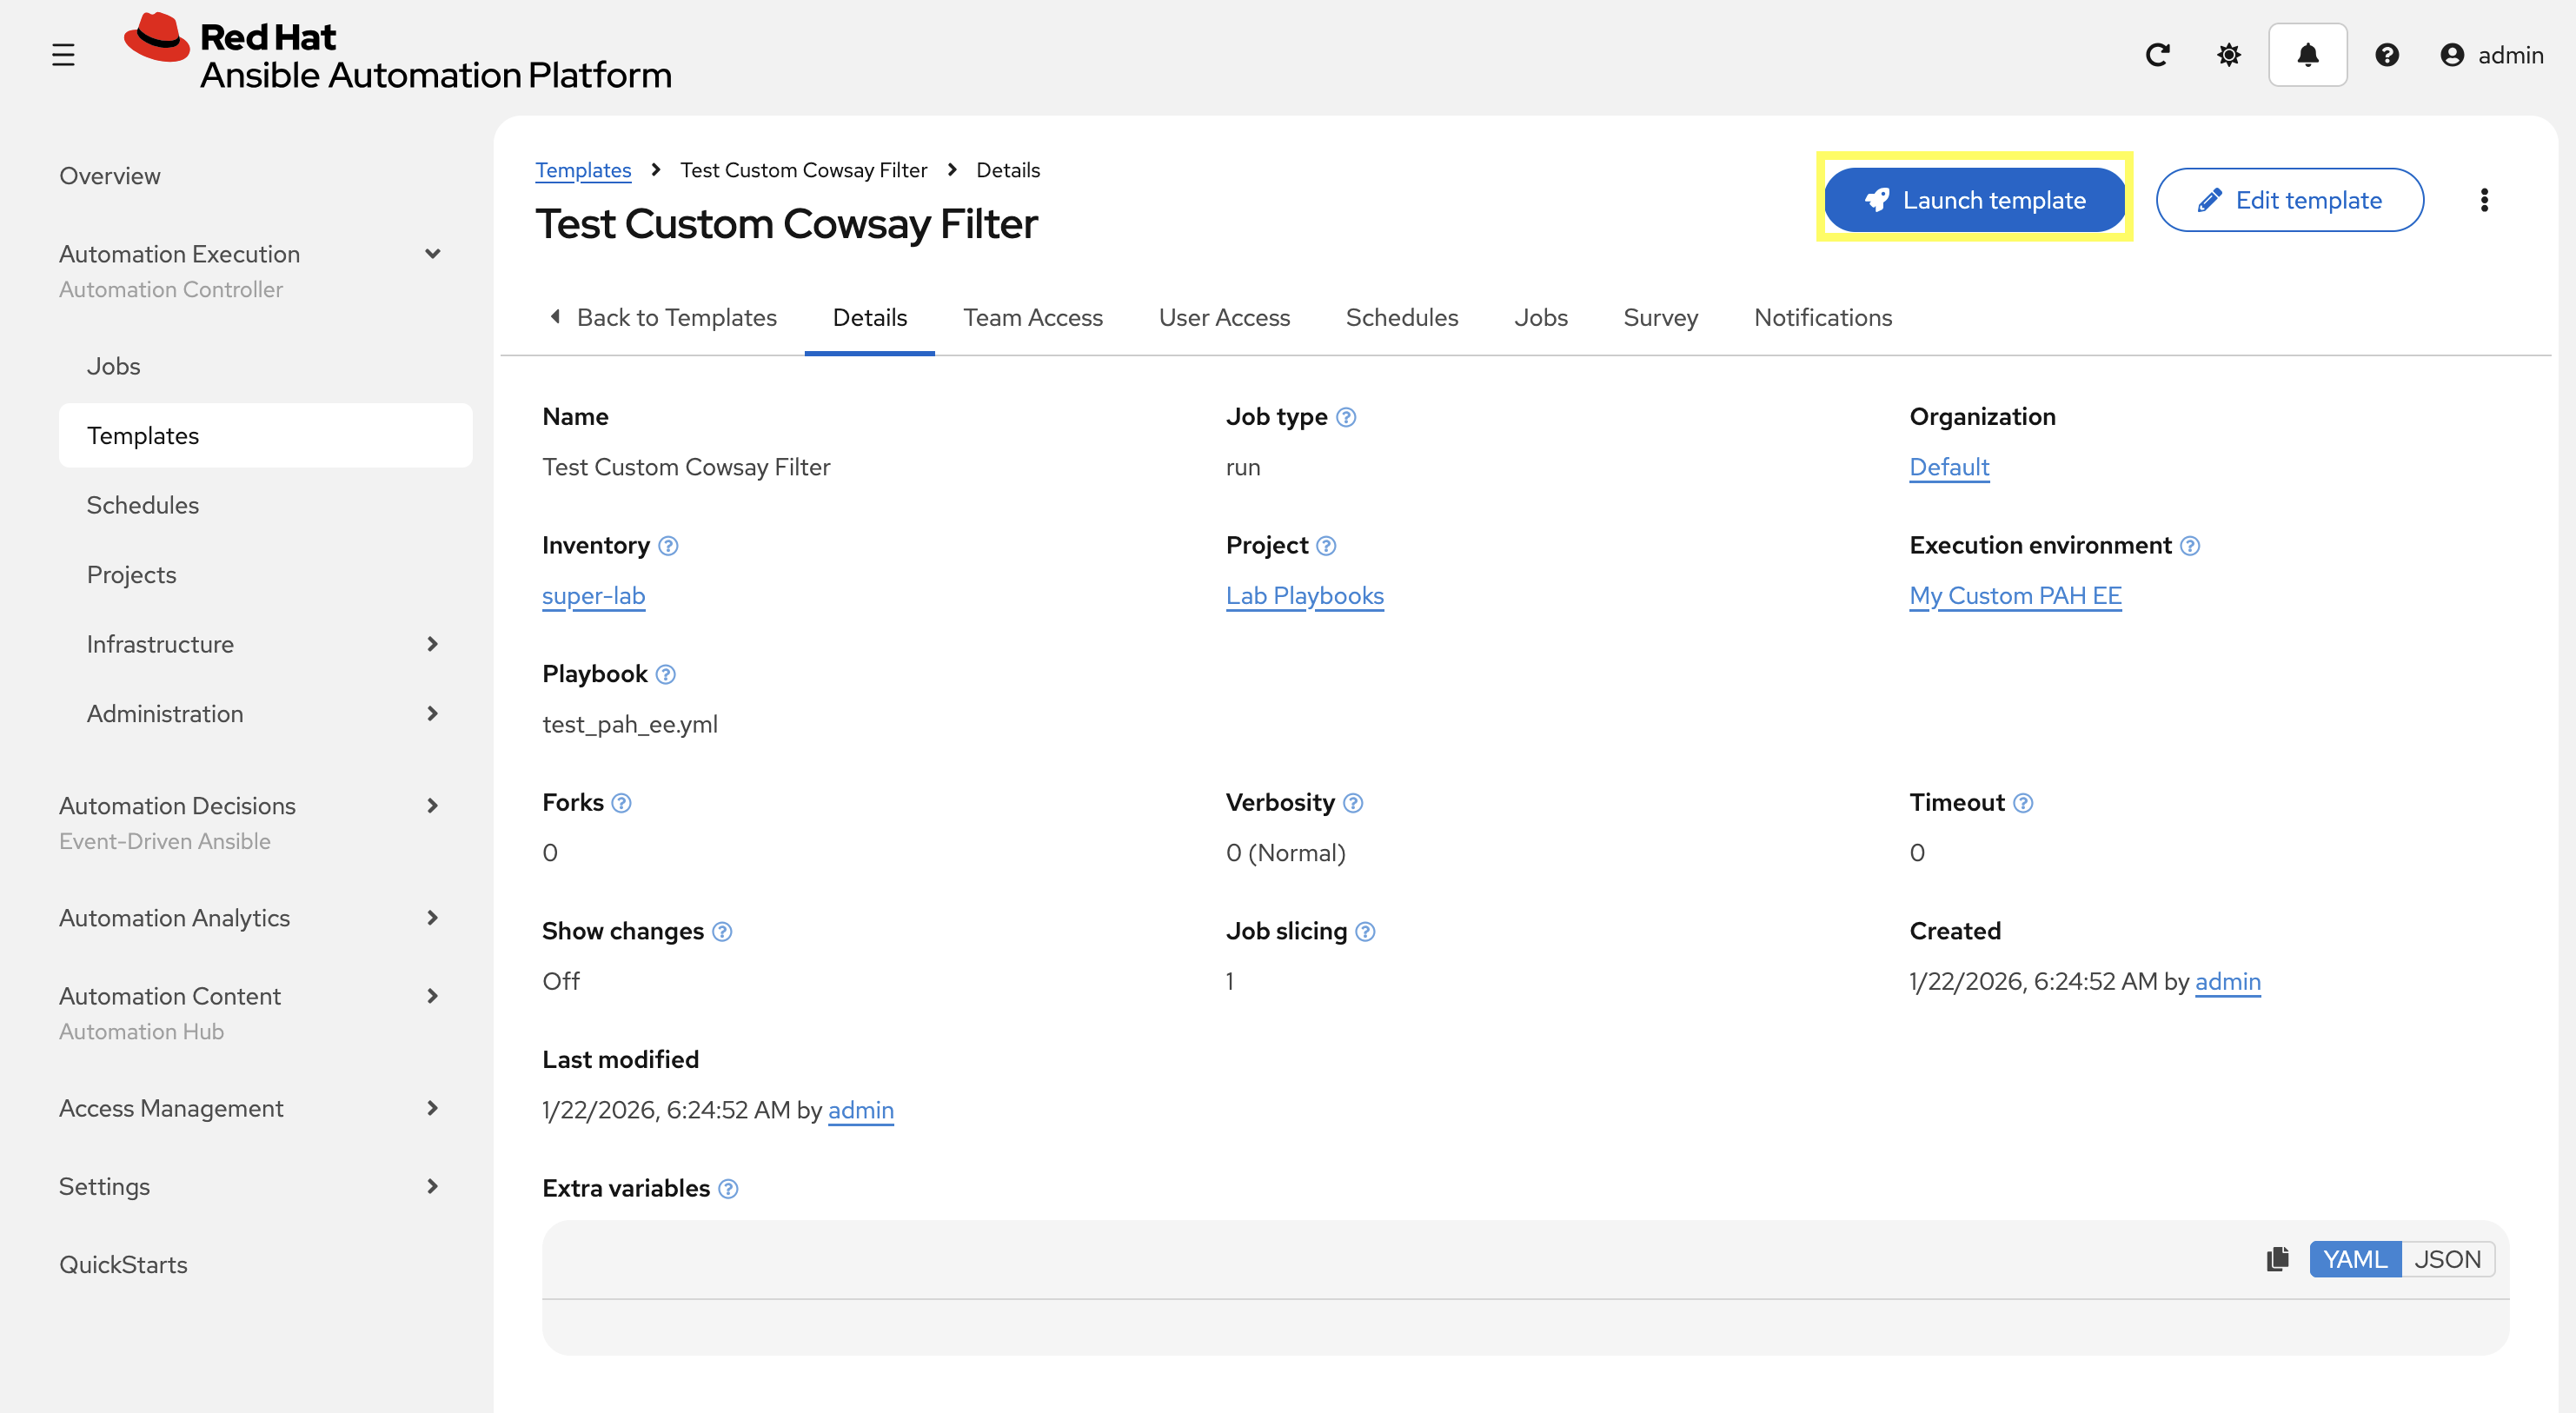
2.7: Launch the Job Template and Verify
Now that the Job Template has been created, launch the Test Custom Cowsay Filter and verify that the custom filter is working as expected.
-
From the Test Custom Cowsay Filter Job Template details page, click the Launch template button on the upper right hand side.
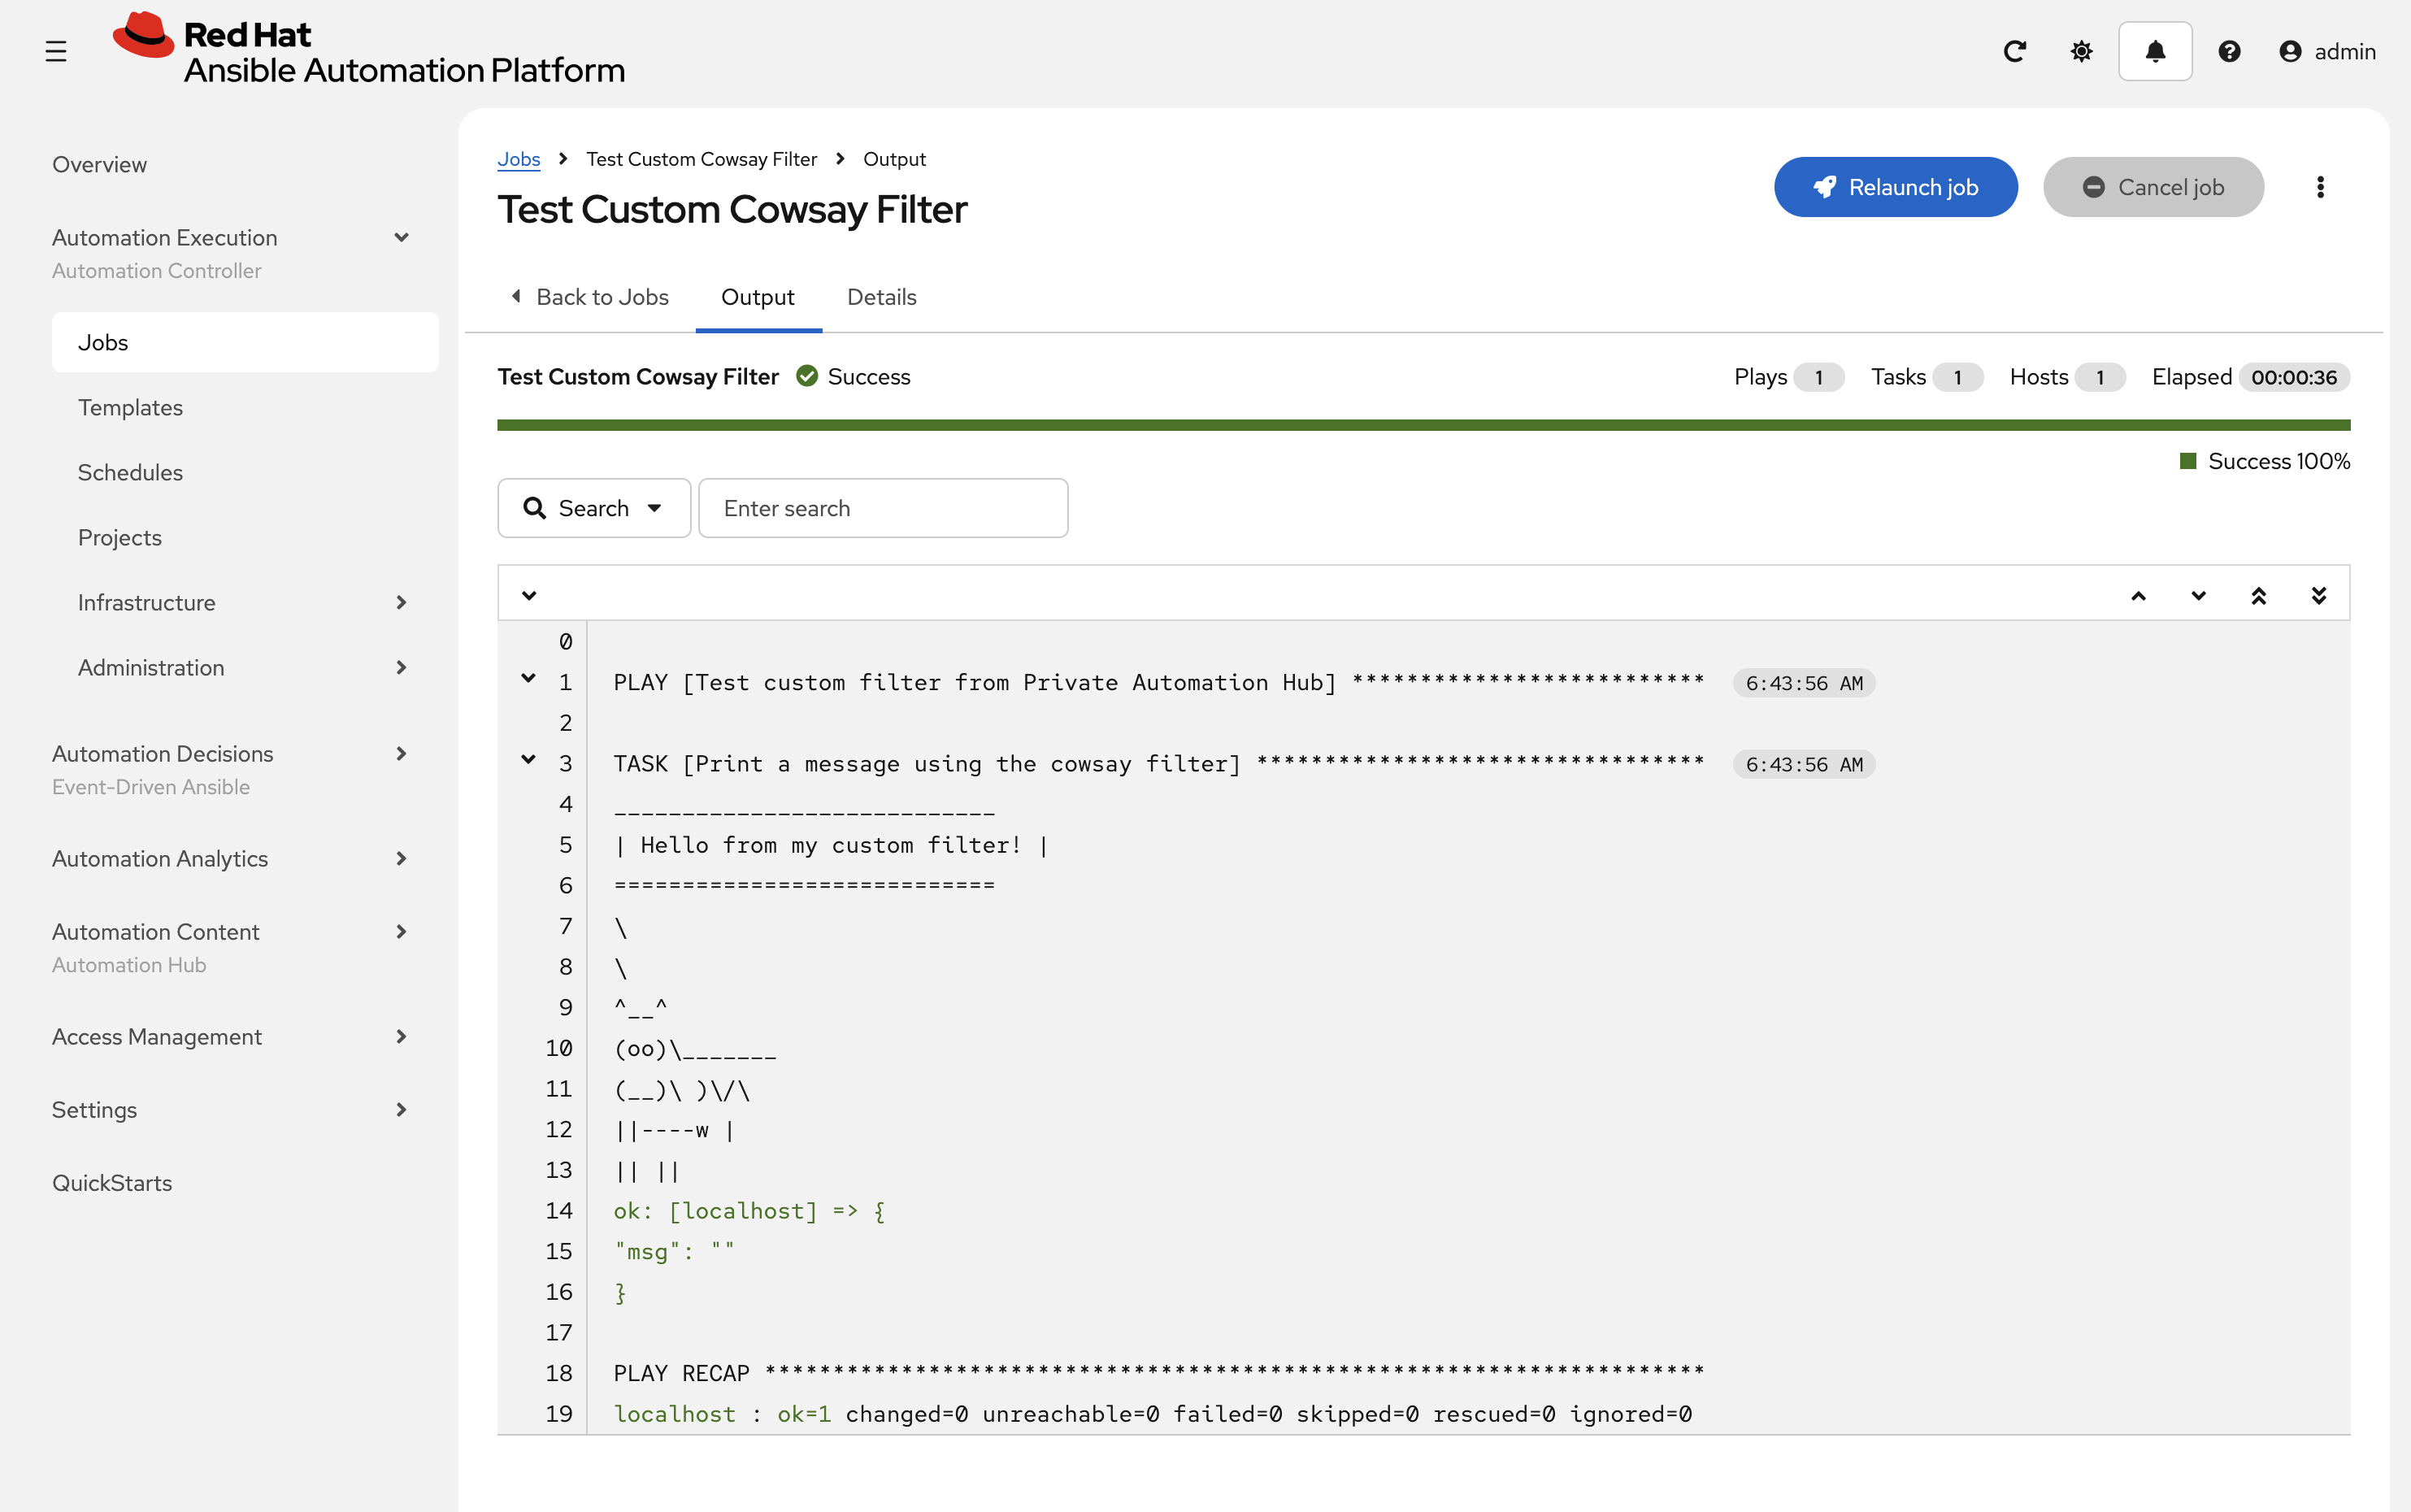
-
Monitor the status of the job until it completes successfully displaying the output of the cowsay filter similar to the following:
2.8: Add Job Template for Windows Node
Repeat these steps to add a Job Template to execute the playbook we created in Module 2 Lab 1 page.
-
From the navigation menu on the left, go to Automation Execution → Templates → Create template → Create job template.
-
Enter the following details on the Create job template page:
-
Name:
Provision Web Node -
Inventory:
super-lab -
Project:
Lab Playbooks -
Playbook:
site.yml -
Credential:
Windows -
Execution Environment:
My Custom PAH EE
-
-
Click Create job template to create the new Job Template.
-
Click the Launch template button on the upper right hand side.
-
Monitor the status of the job until it completes successfully
If you have any issues with the Windows server, you may need to return to Dev Spaces and reboot the server: ansible --module-name ansible.builtin.win_reboot windows --extra-vars @/projects/env/secrets.yml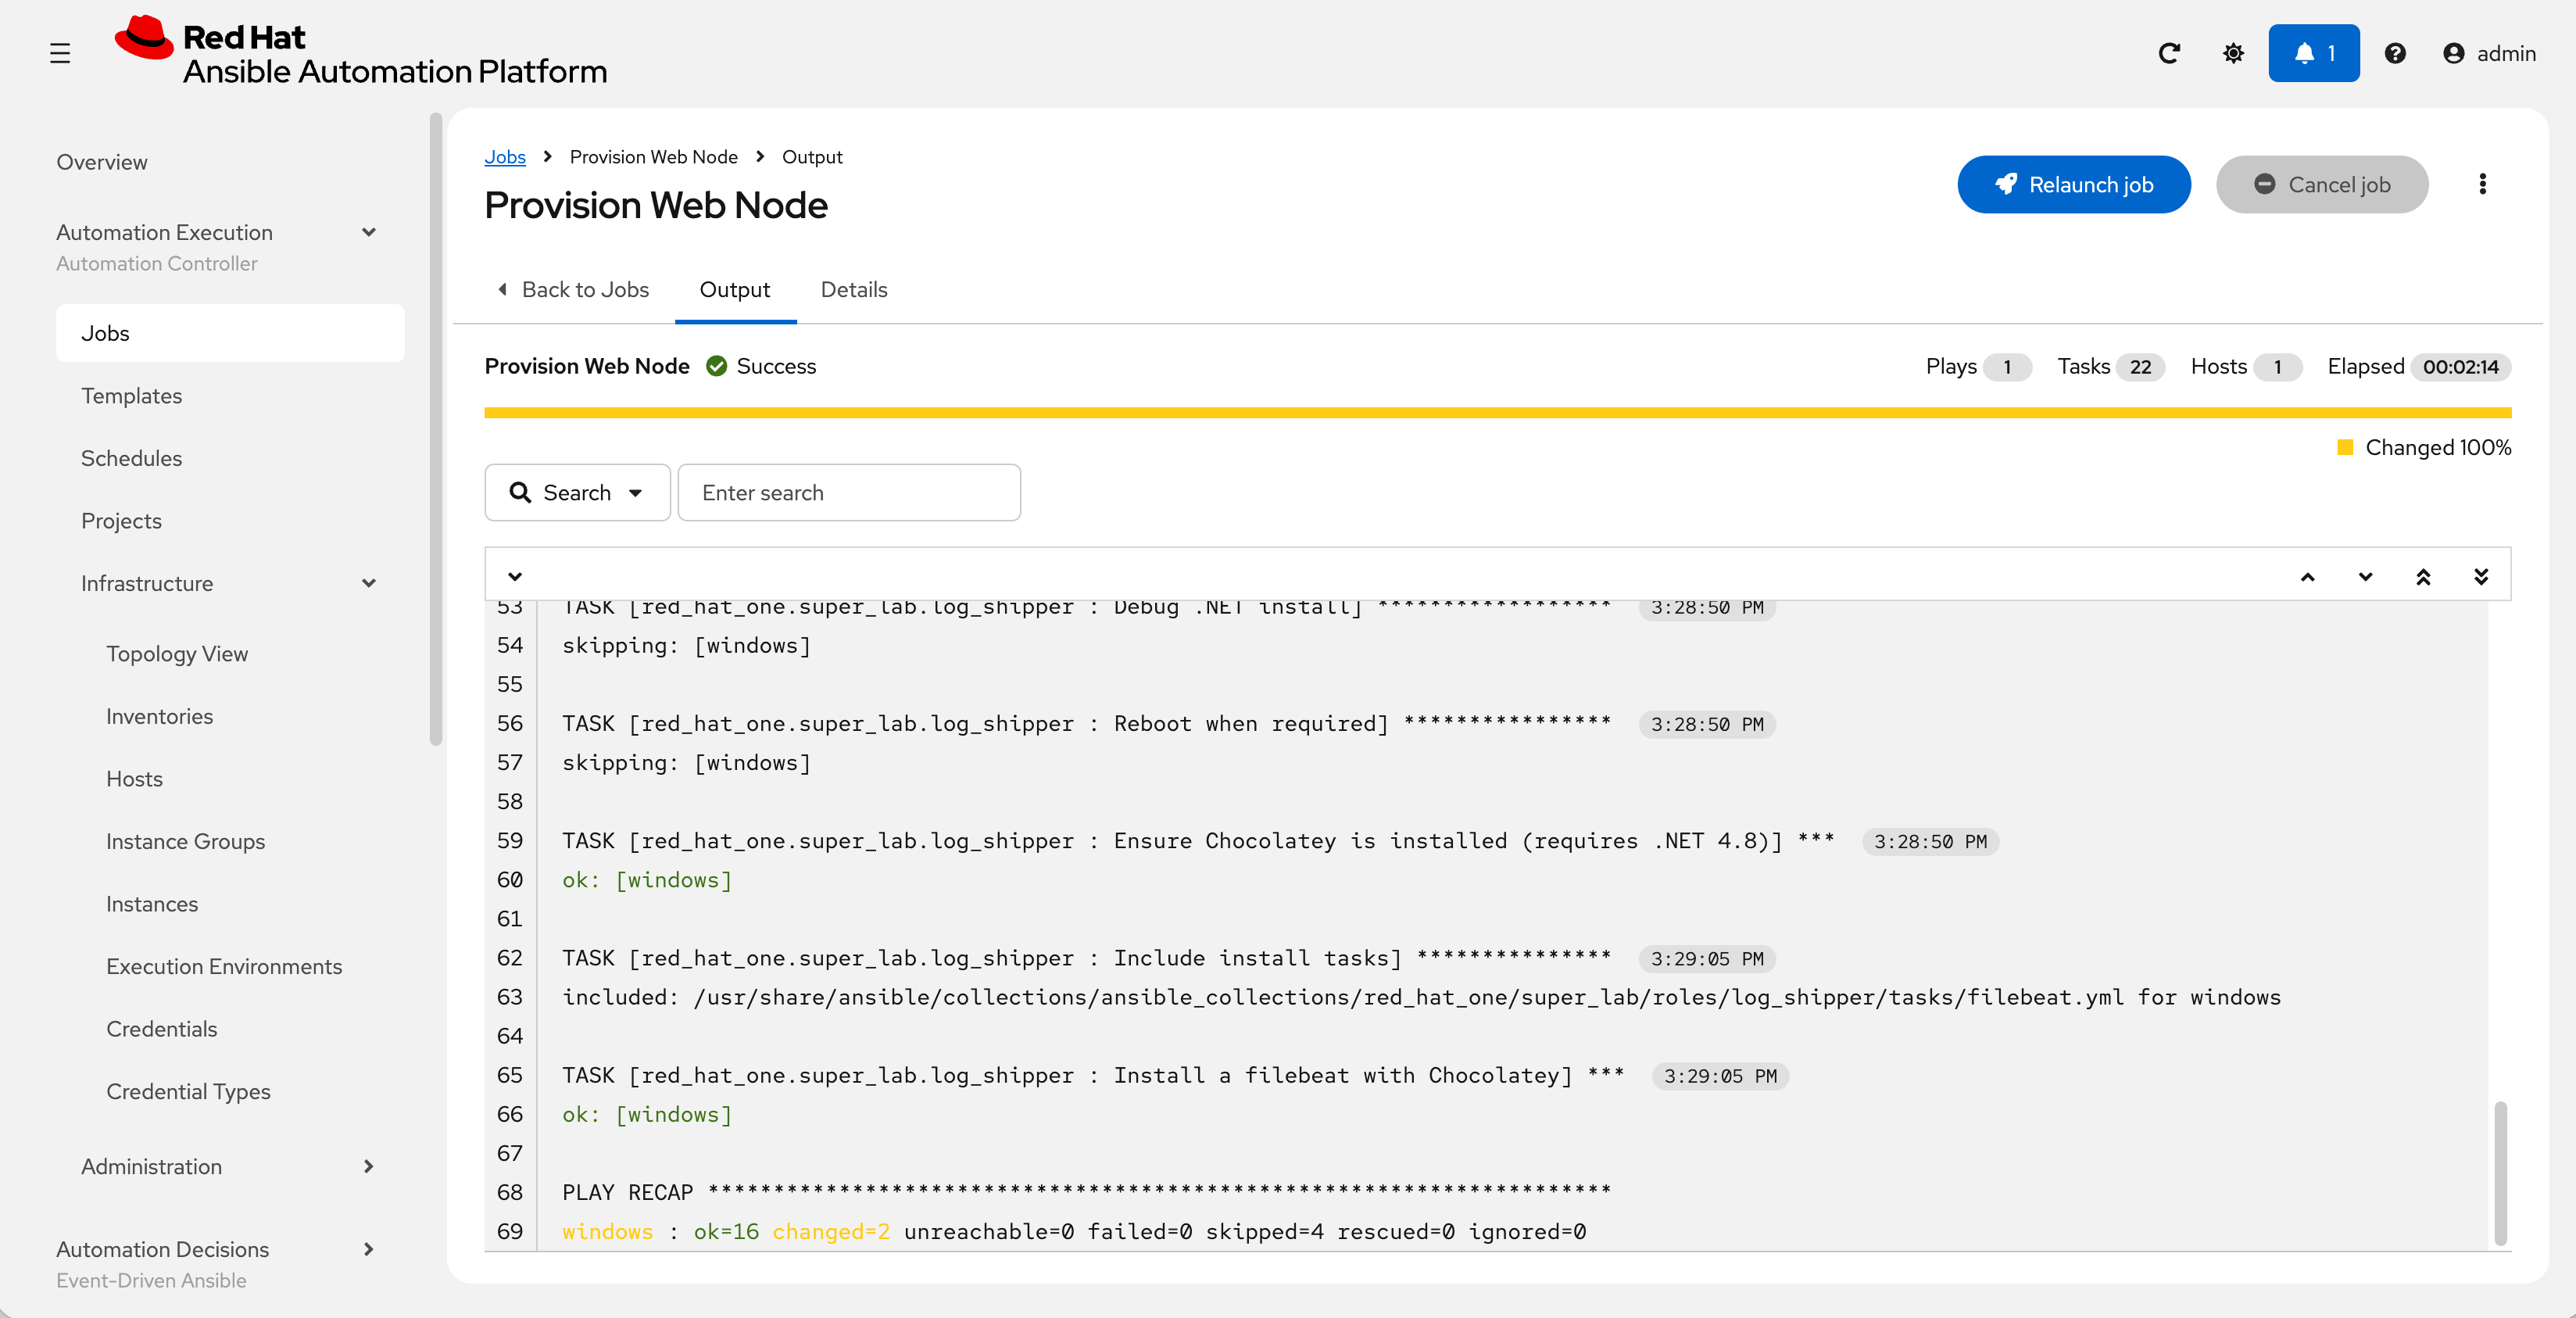
3: Collections Management
The final exercise in this lab is to customize the content sources from Remote Automation Hub / Ansible Galaxy instances into Private Automation Hub. To support lab exercises later in this bootcamp, we will specify additional collections to be synchronized.
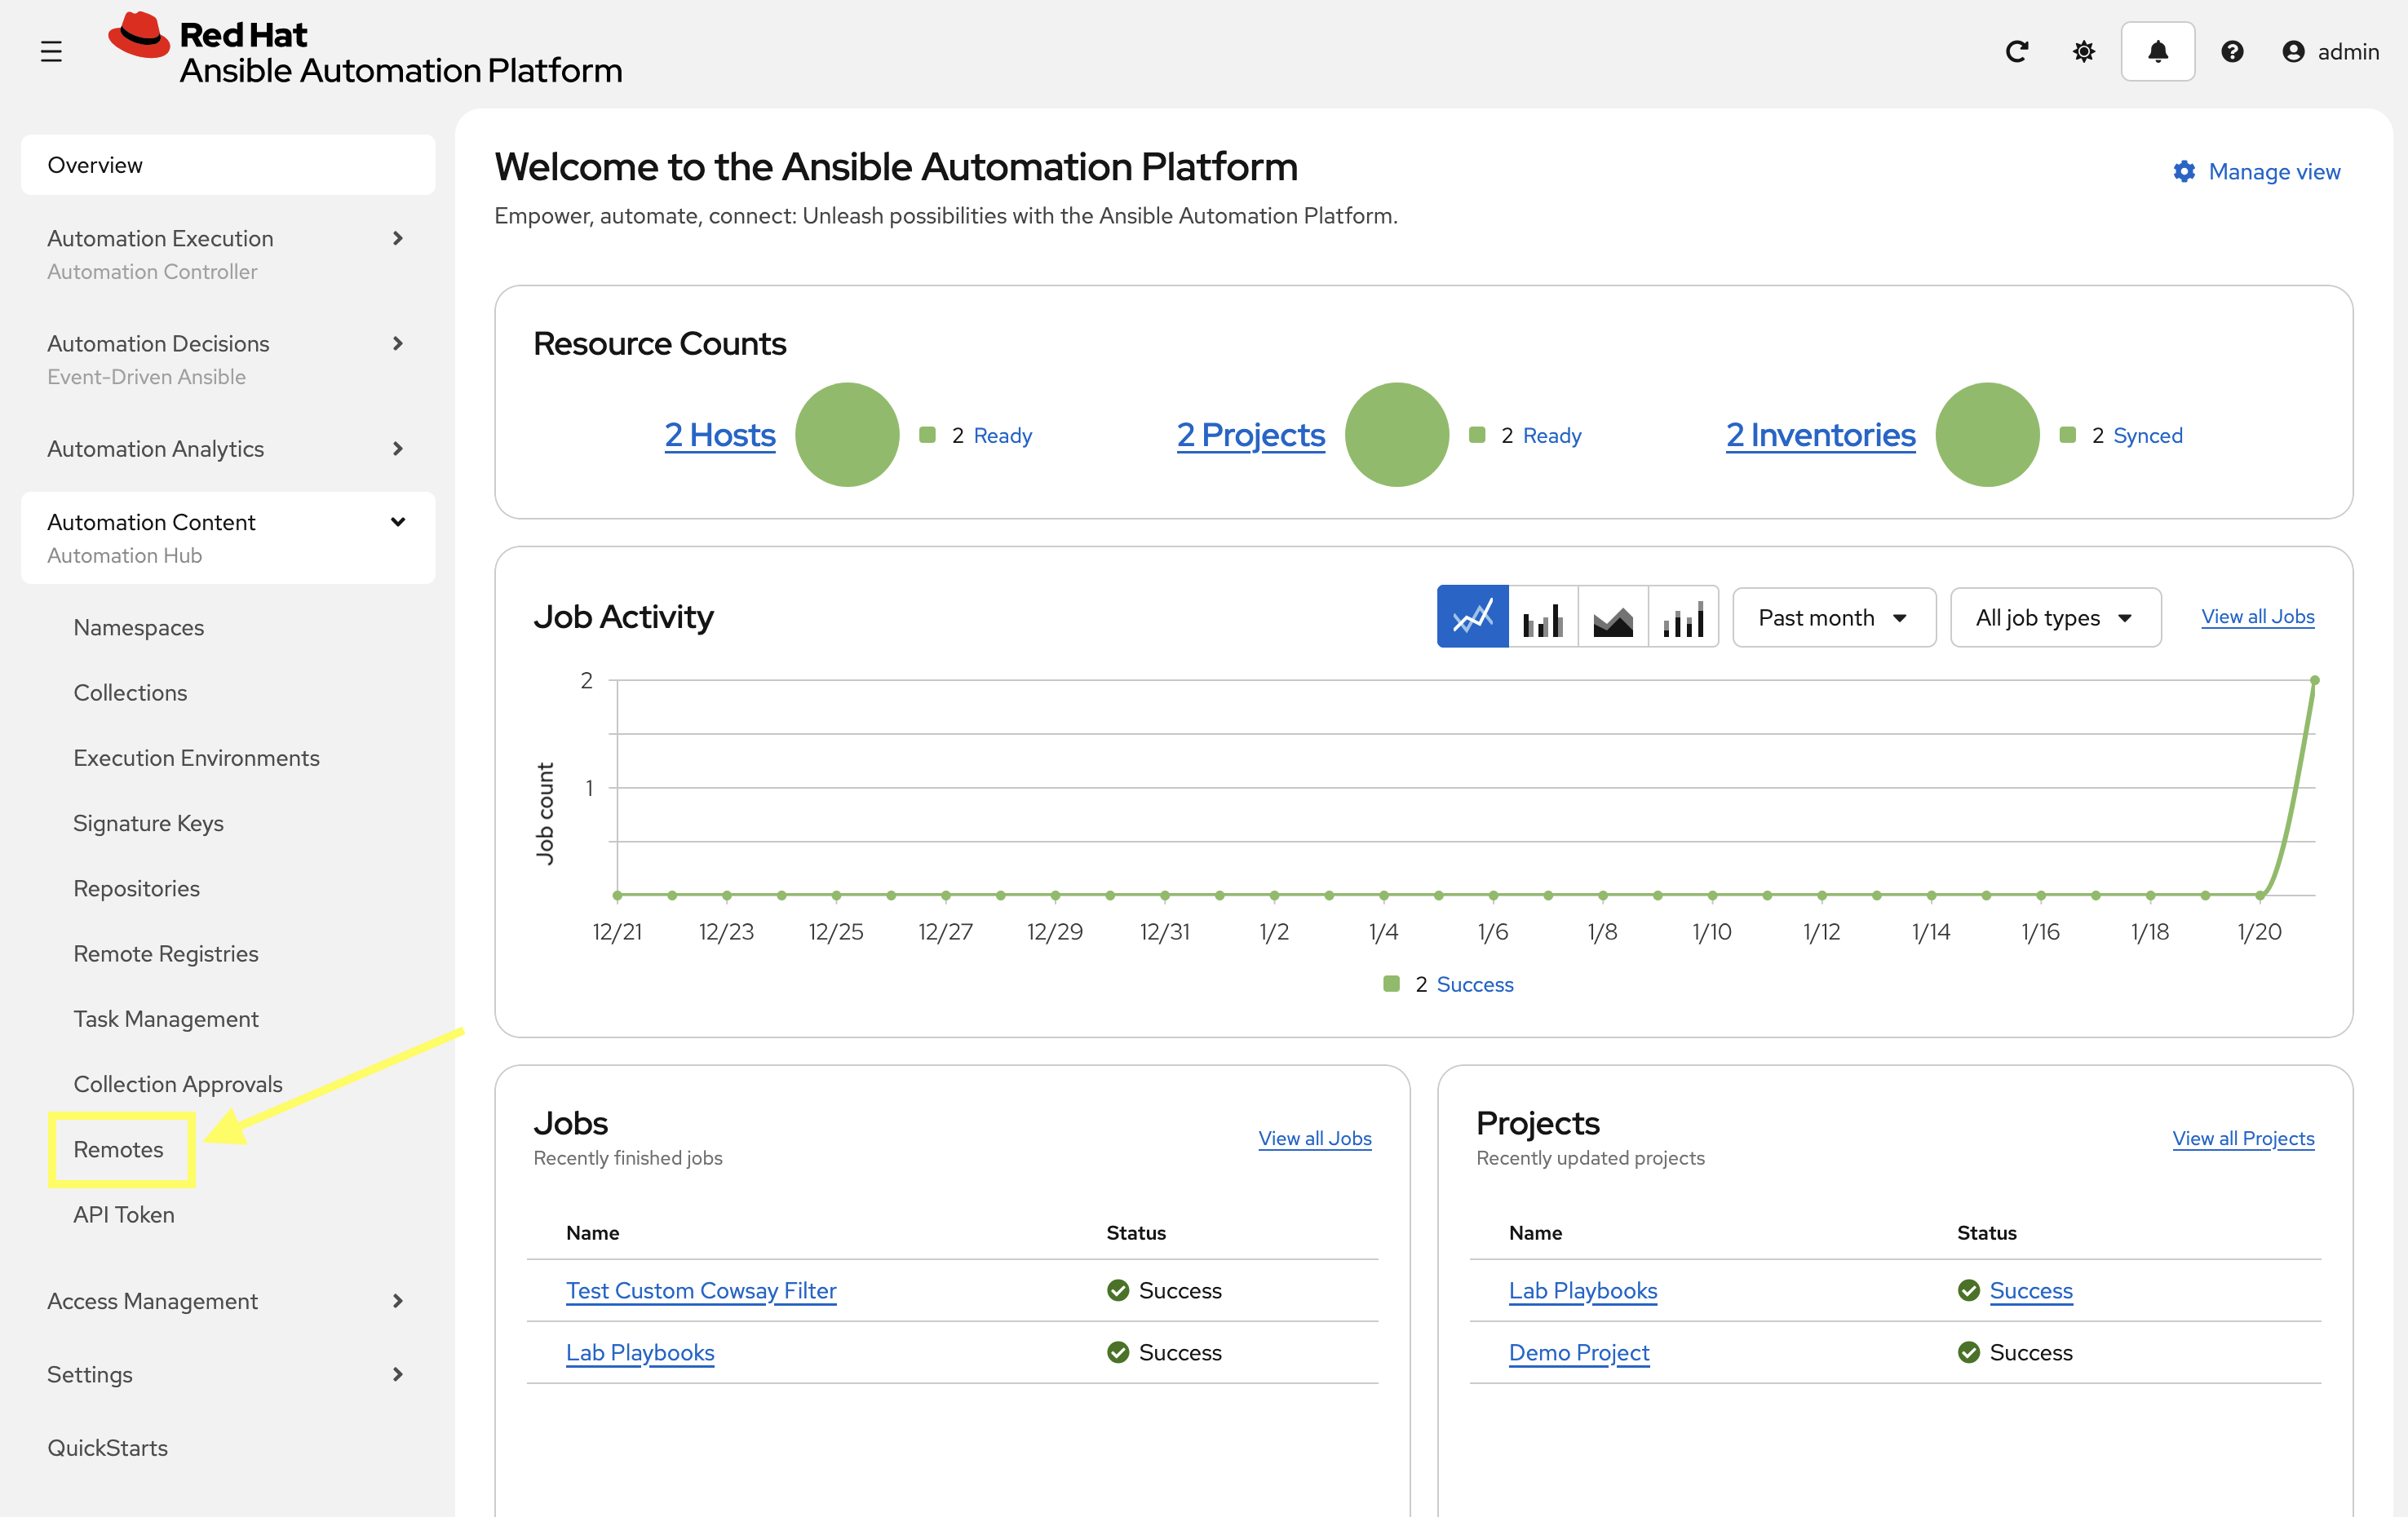
3.1: Update Community Remote
-
From the navigation menu on the left, expand Automation Content and click on Remotes.
-
Click the pencil icon to edit the
communityremote.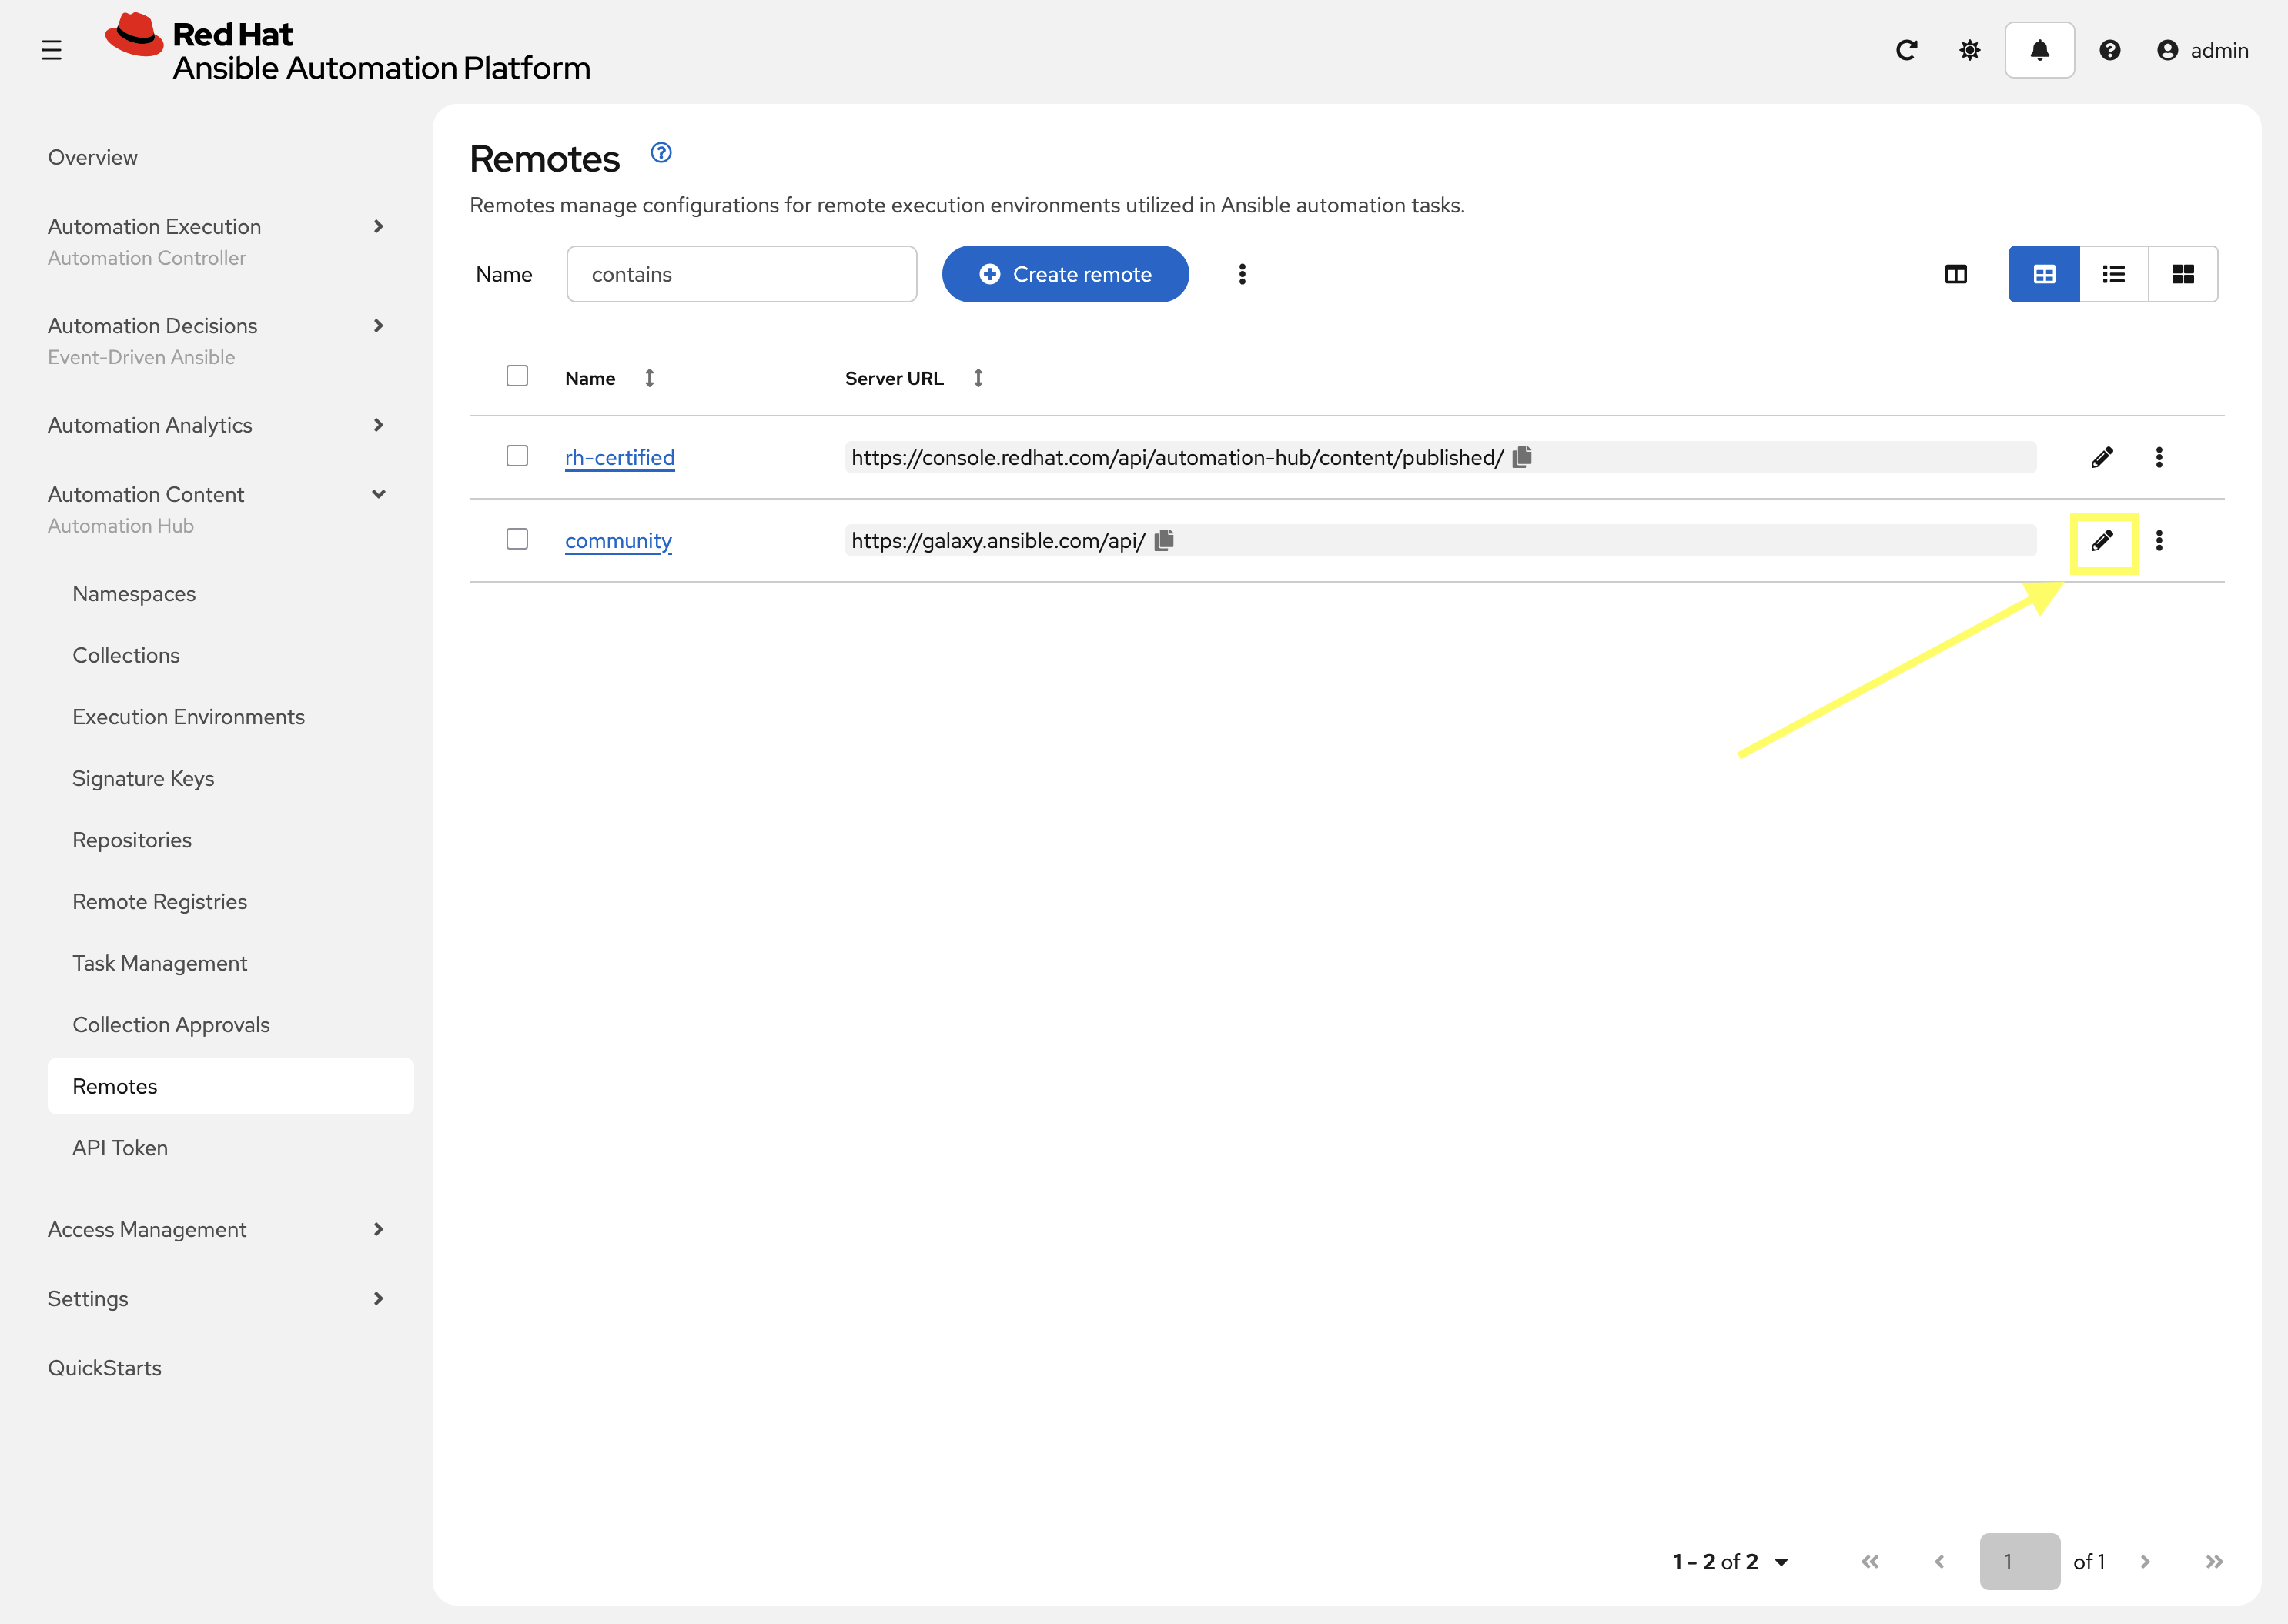
-
Paste the following into the Requirements file field to specify additional collections to be synced:
collections: - name: containers.podman - name: community.postgresql -
Click Save remote to apply the changes.
3.1: Add Validated Remote
Create a new remote for the validated collections repository. The API token for upstream Red Hat Automation Hub is required to access this repository. The token retrieved in a prior lab can be used here (this is the longer 769 character token saved as UPSTREAM_CONSOLE_HUB>TOKEN)
-
From the Remotes page in Private Automation Hub, click Create remote.
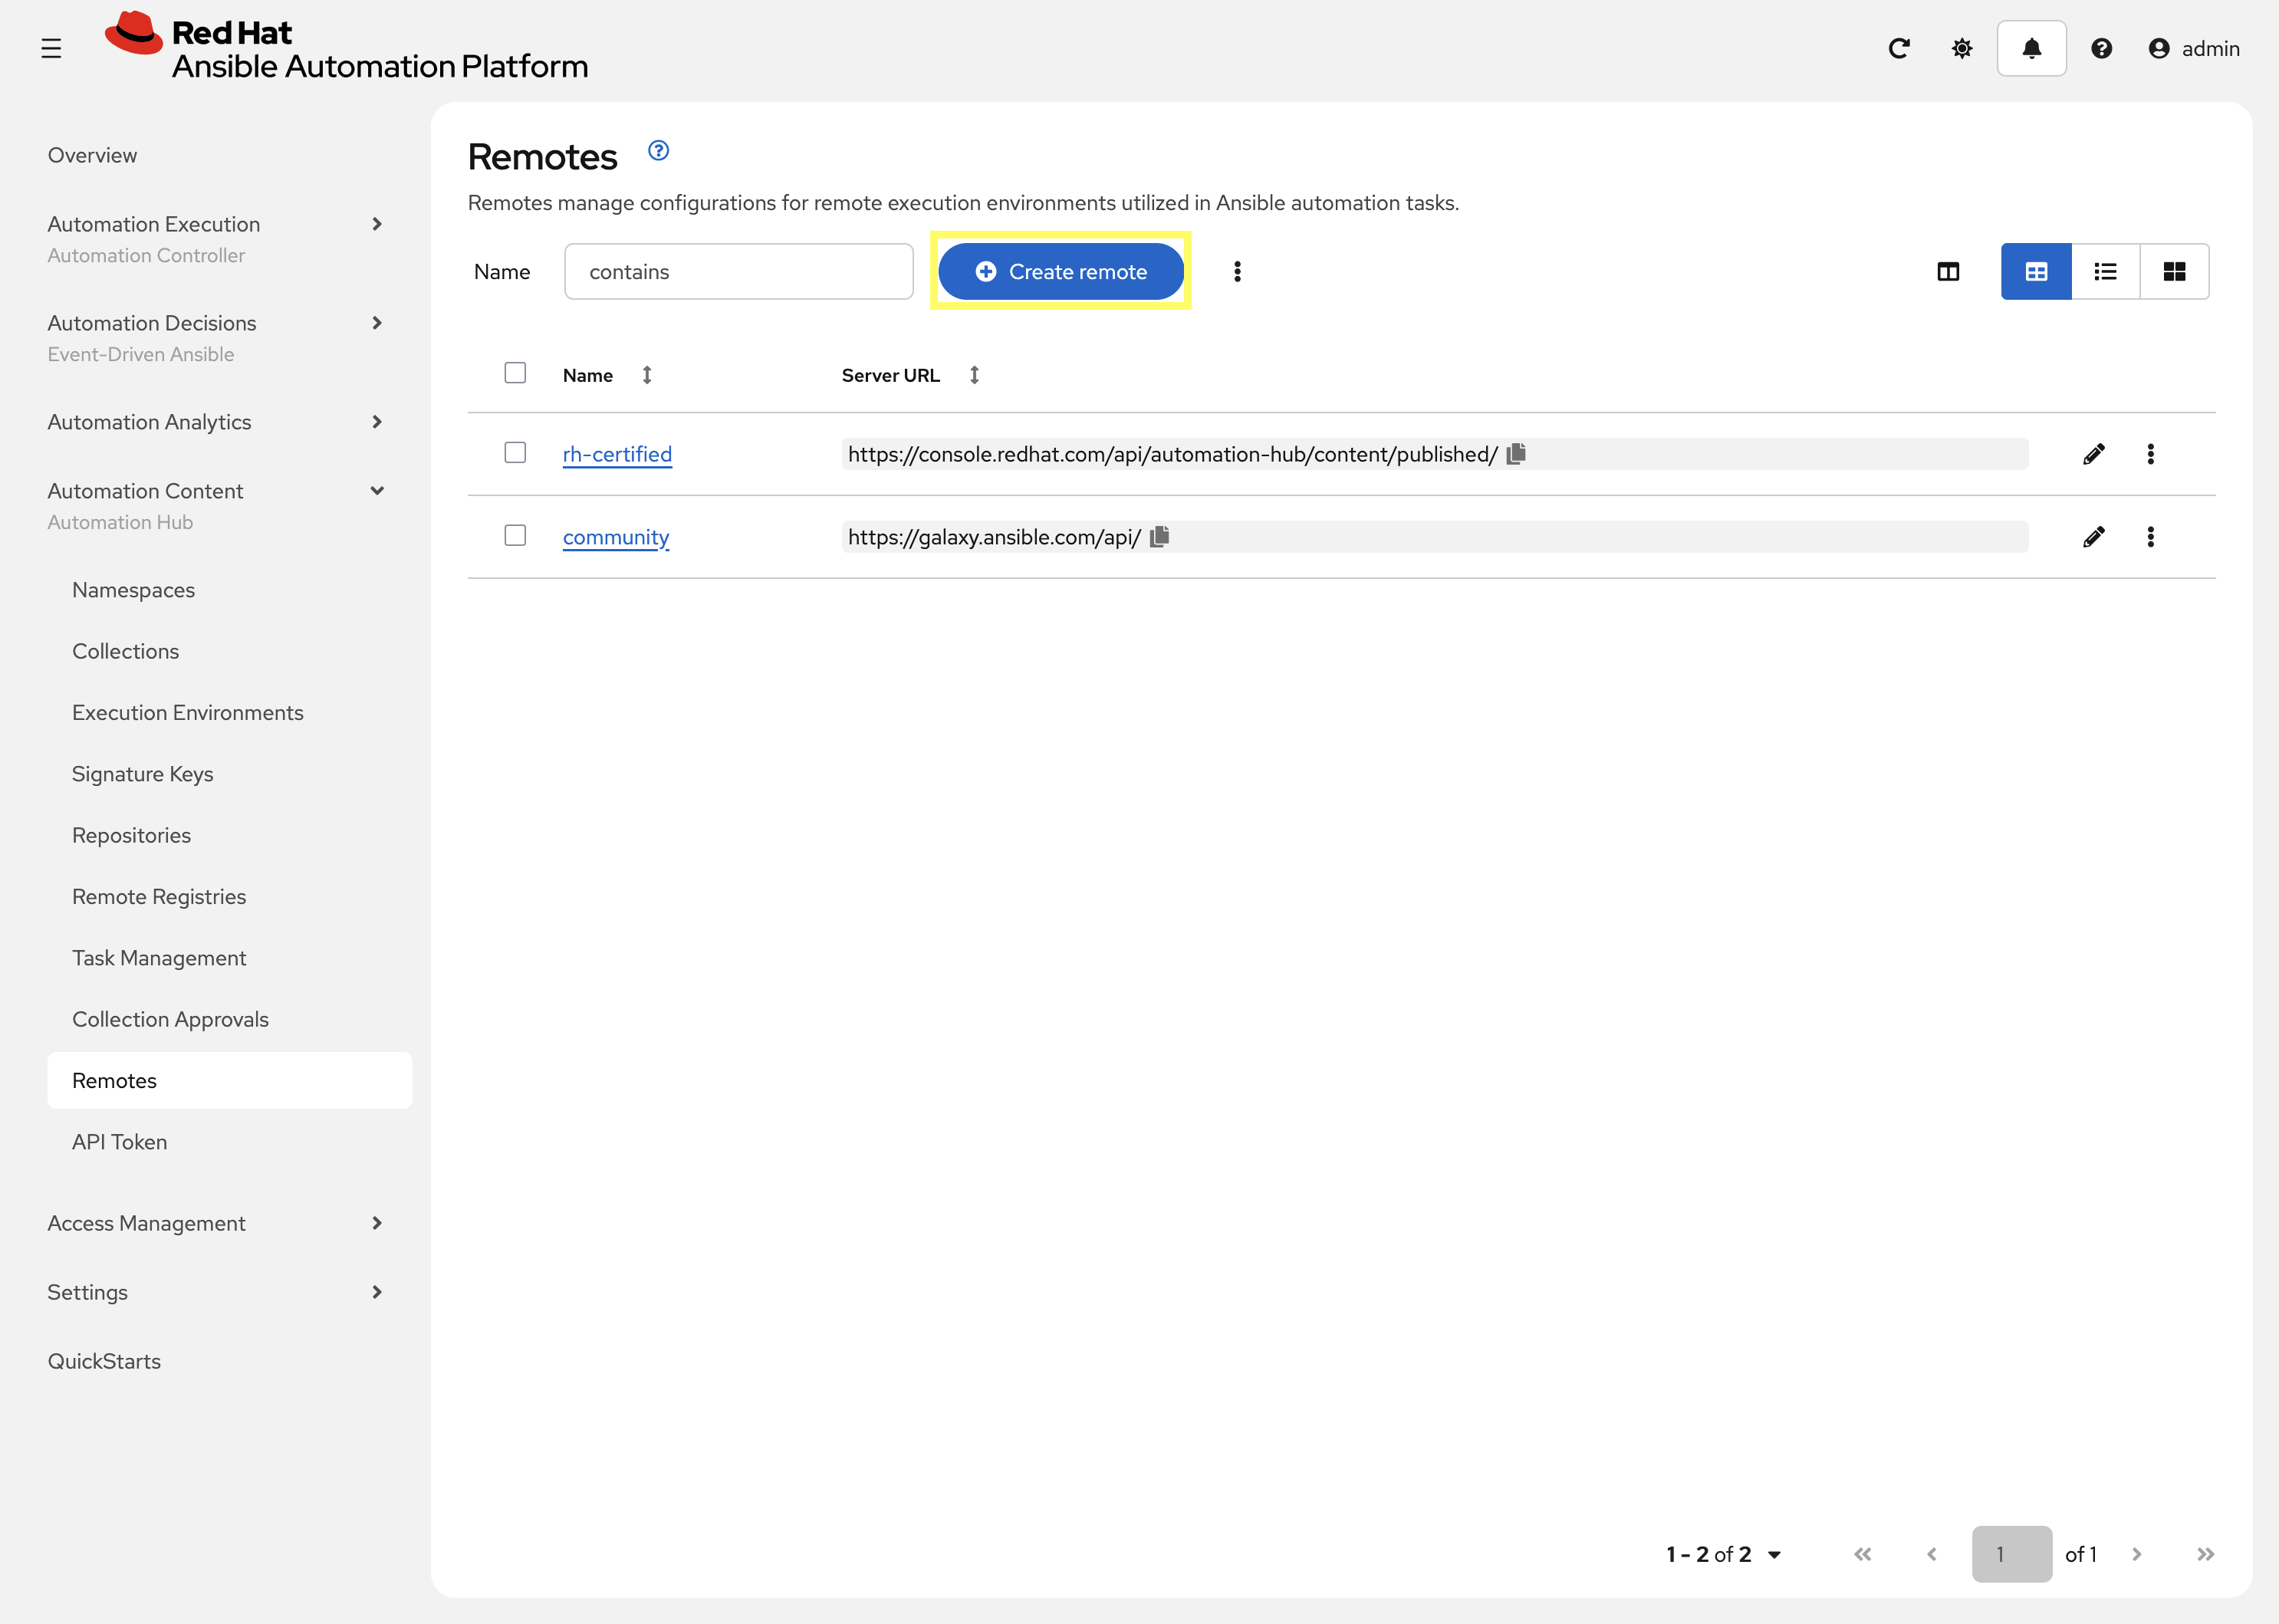
-
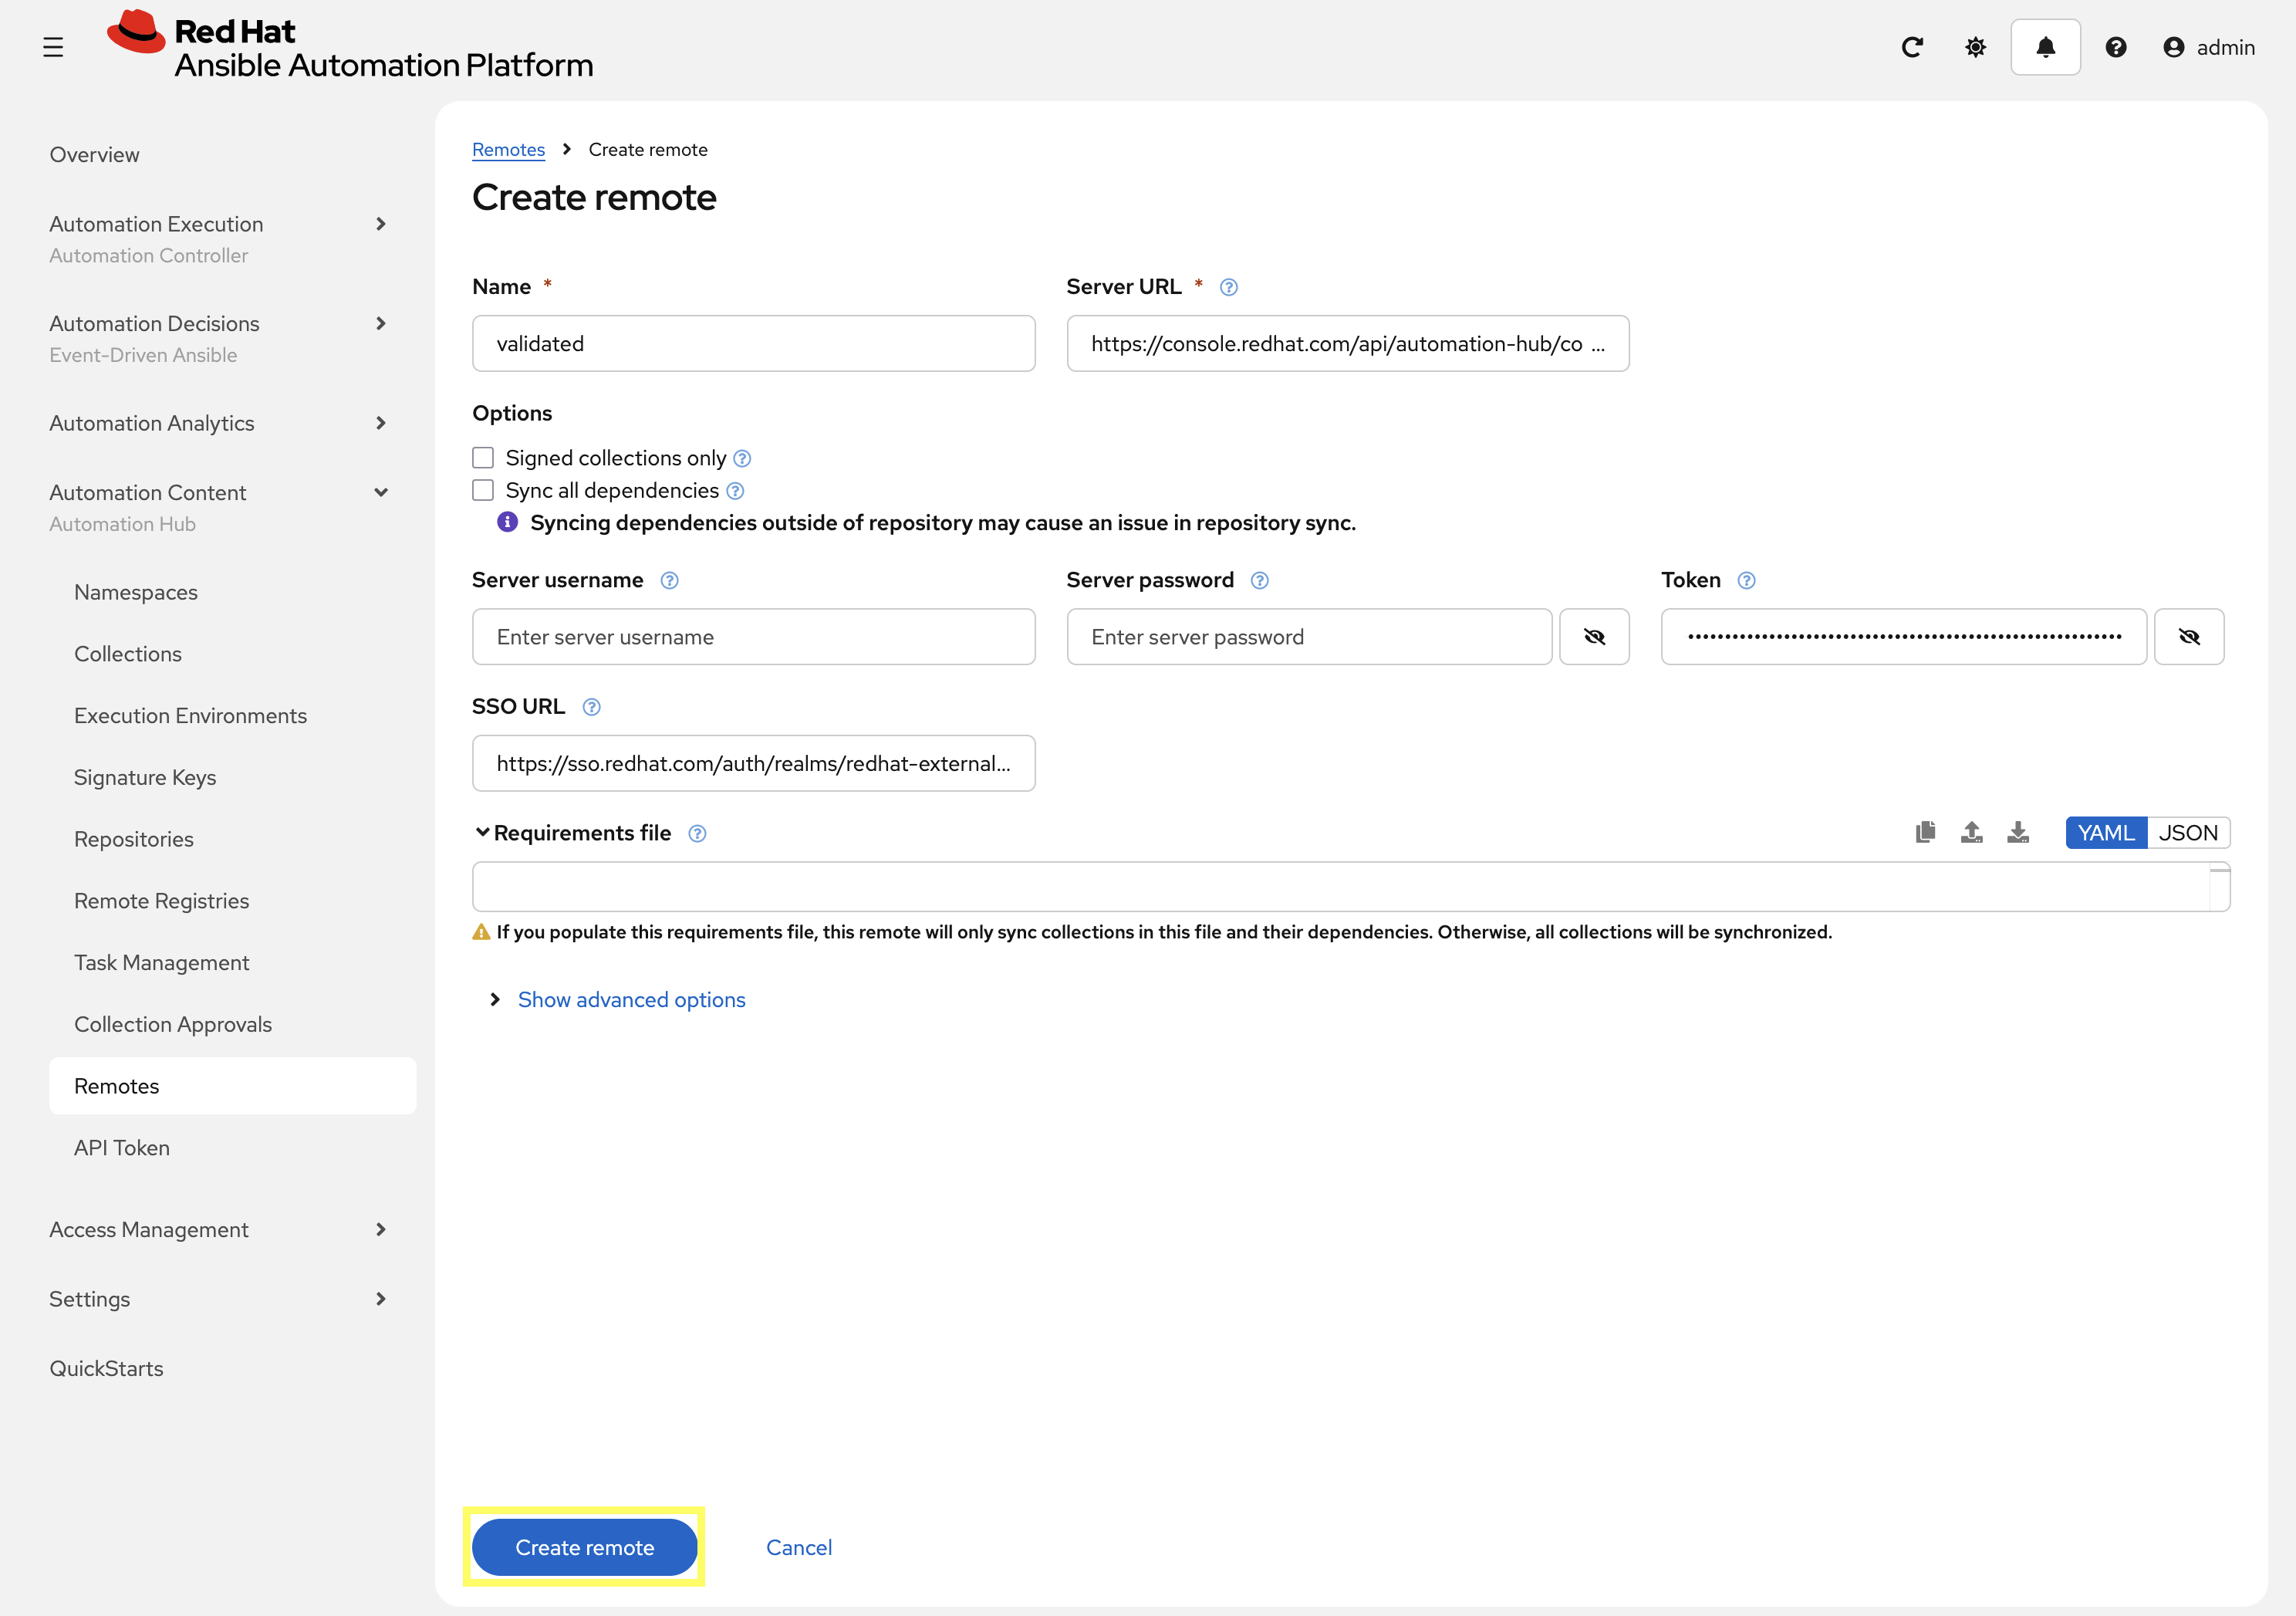
Enter the following details on the Create remote page:
-
Name:
validated -
Server URL:
https://console.redhat.com/api/automation-hub/content/validated/ -
SSO URL:
https://sso.redhat.com/auth/realms/redhat-external/protocol/openid-connect/token -
Token:
UPSTREAM_CONSOLE_HUB_TOKEN
-
-
Click Create remote to create the new Remote.
Now that the validated remote has been created, update the validated repository to reference the newly created remote.
-
From the navigation menu on the left, expand Automation Content and click on Repositories.
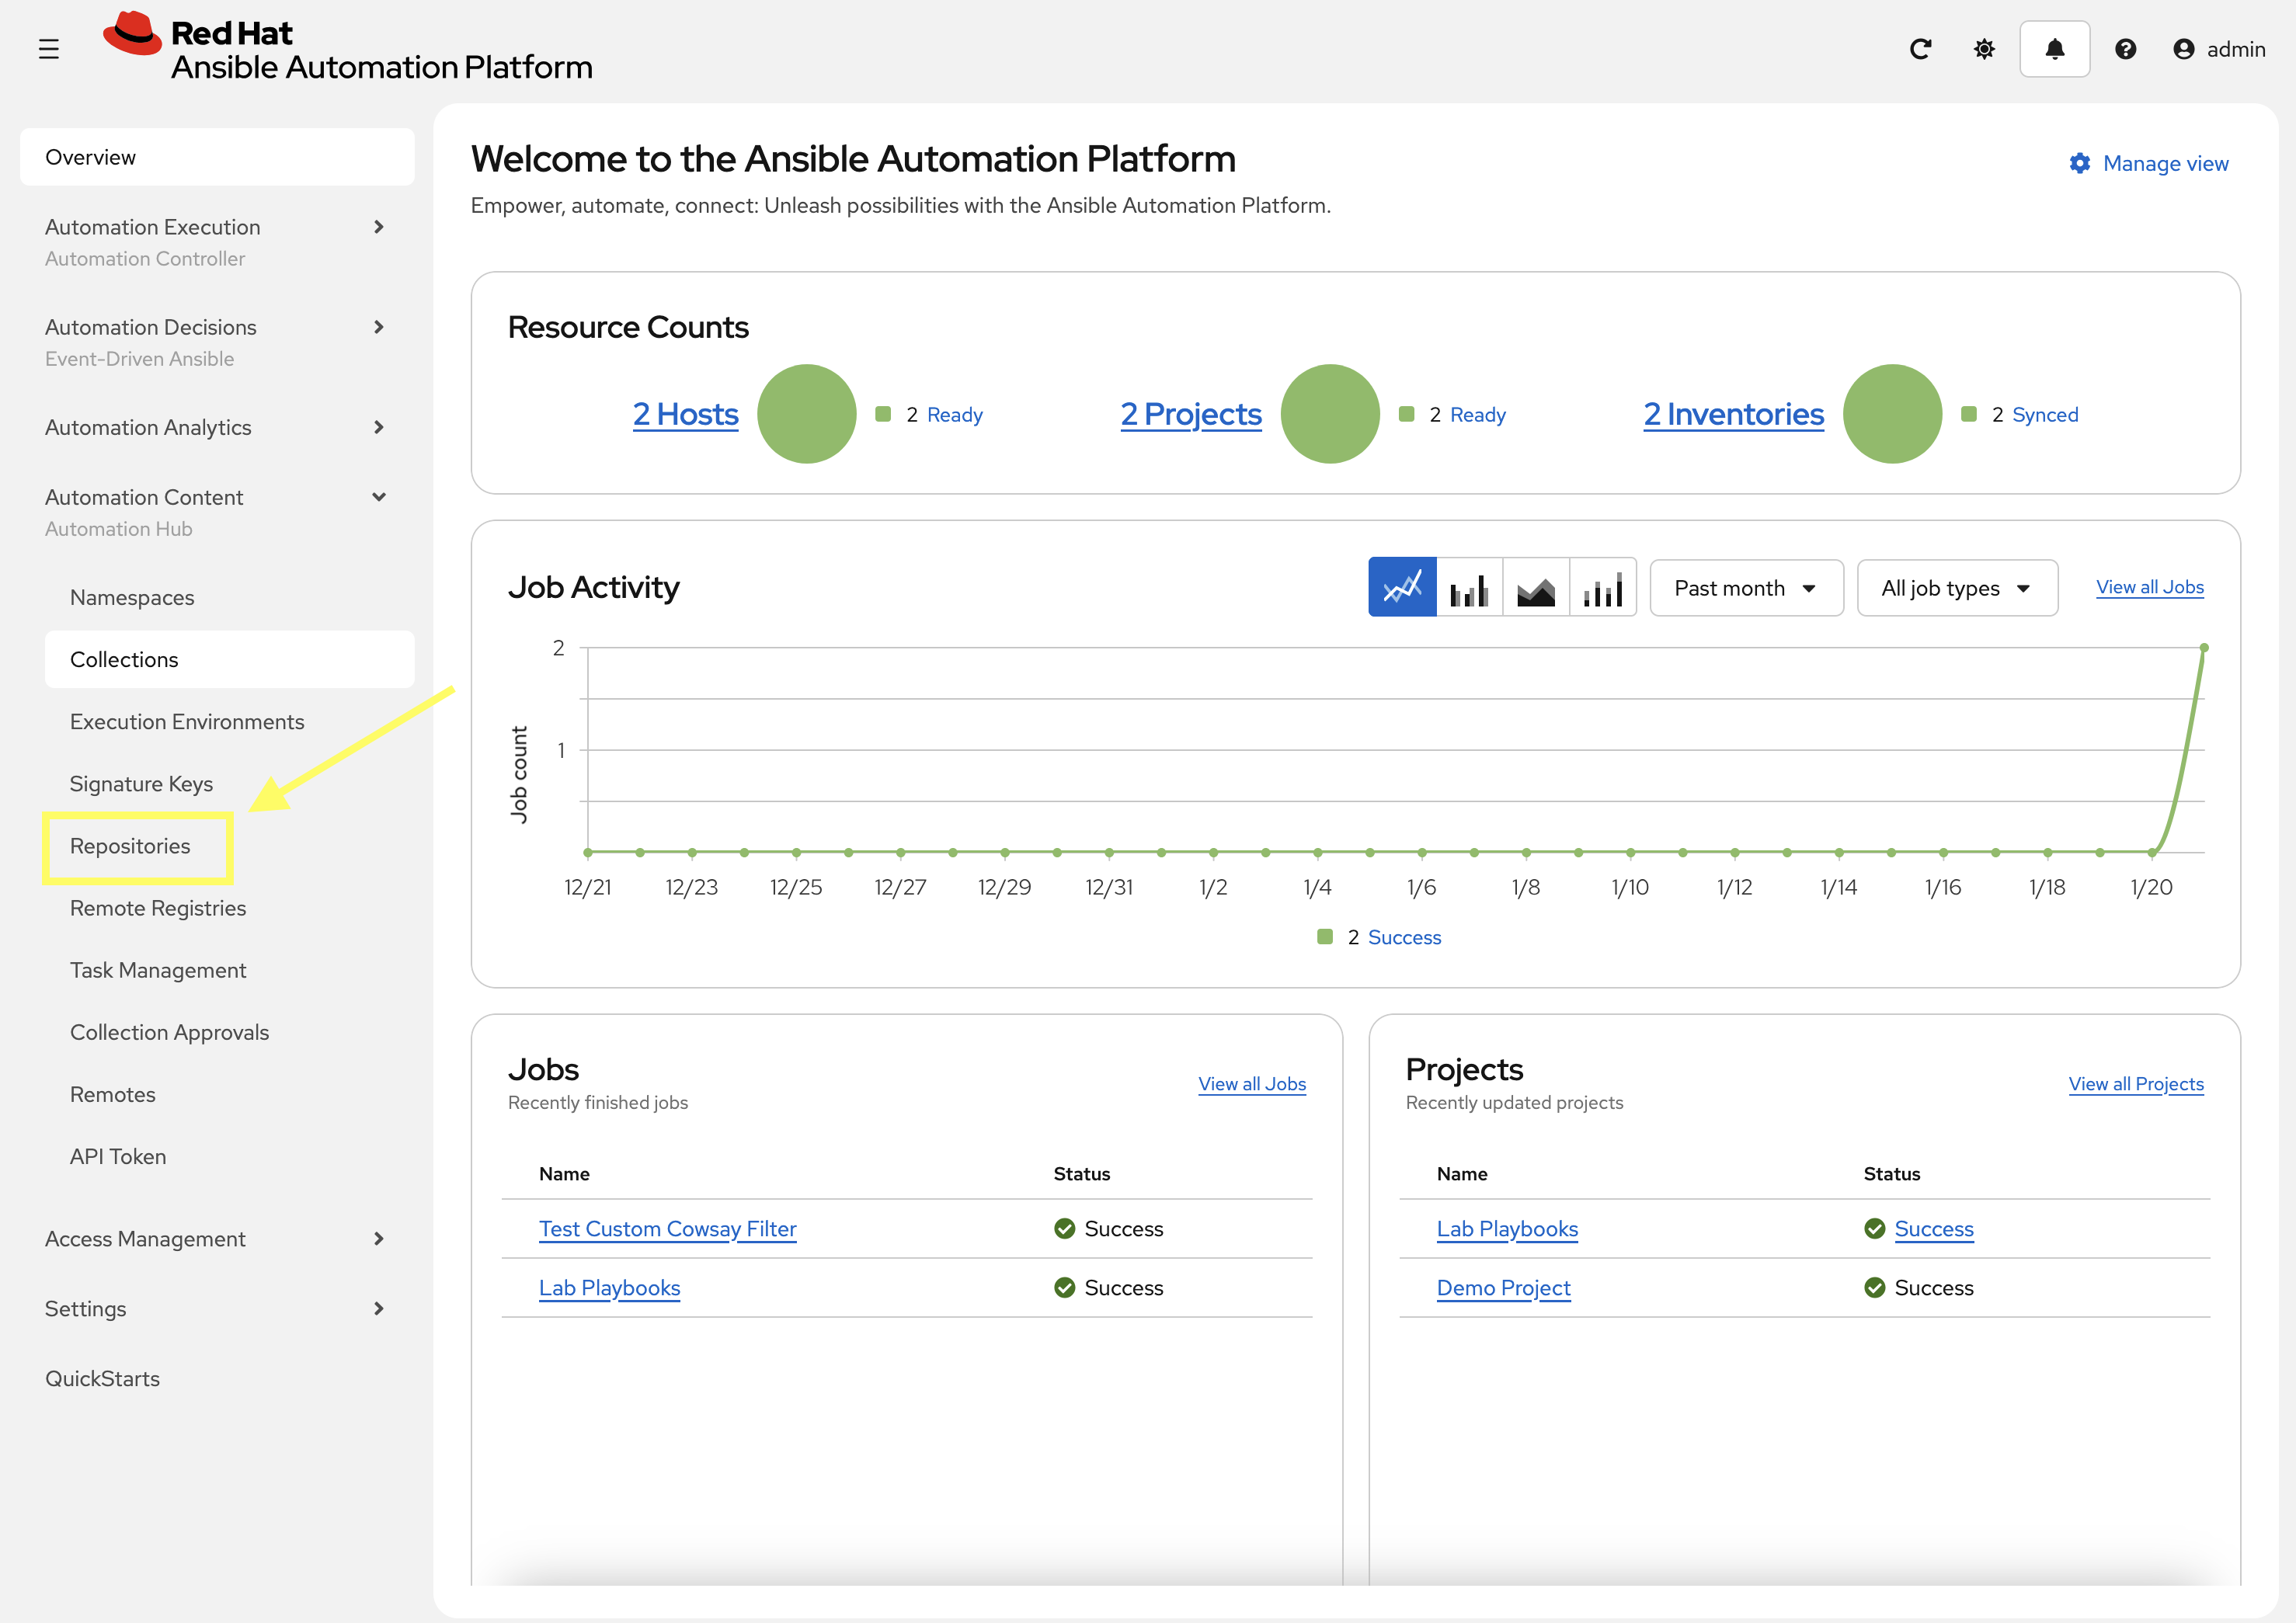
-
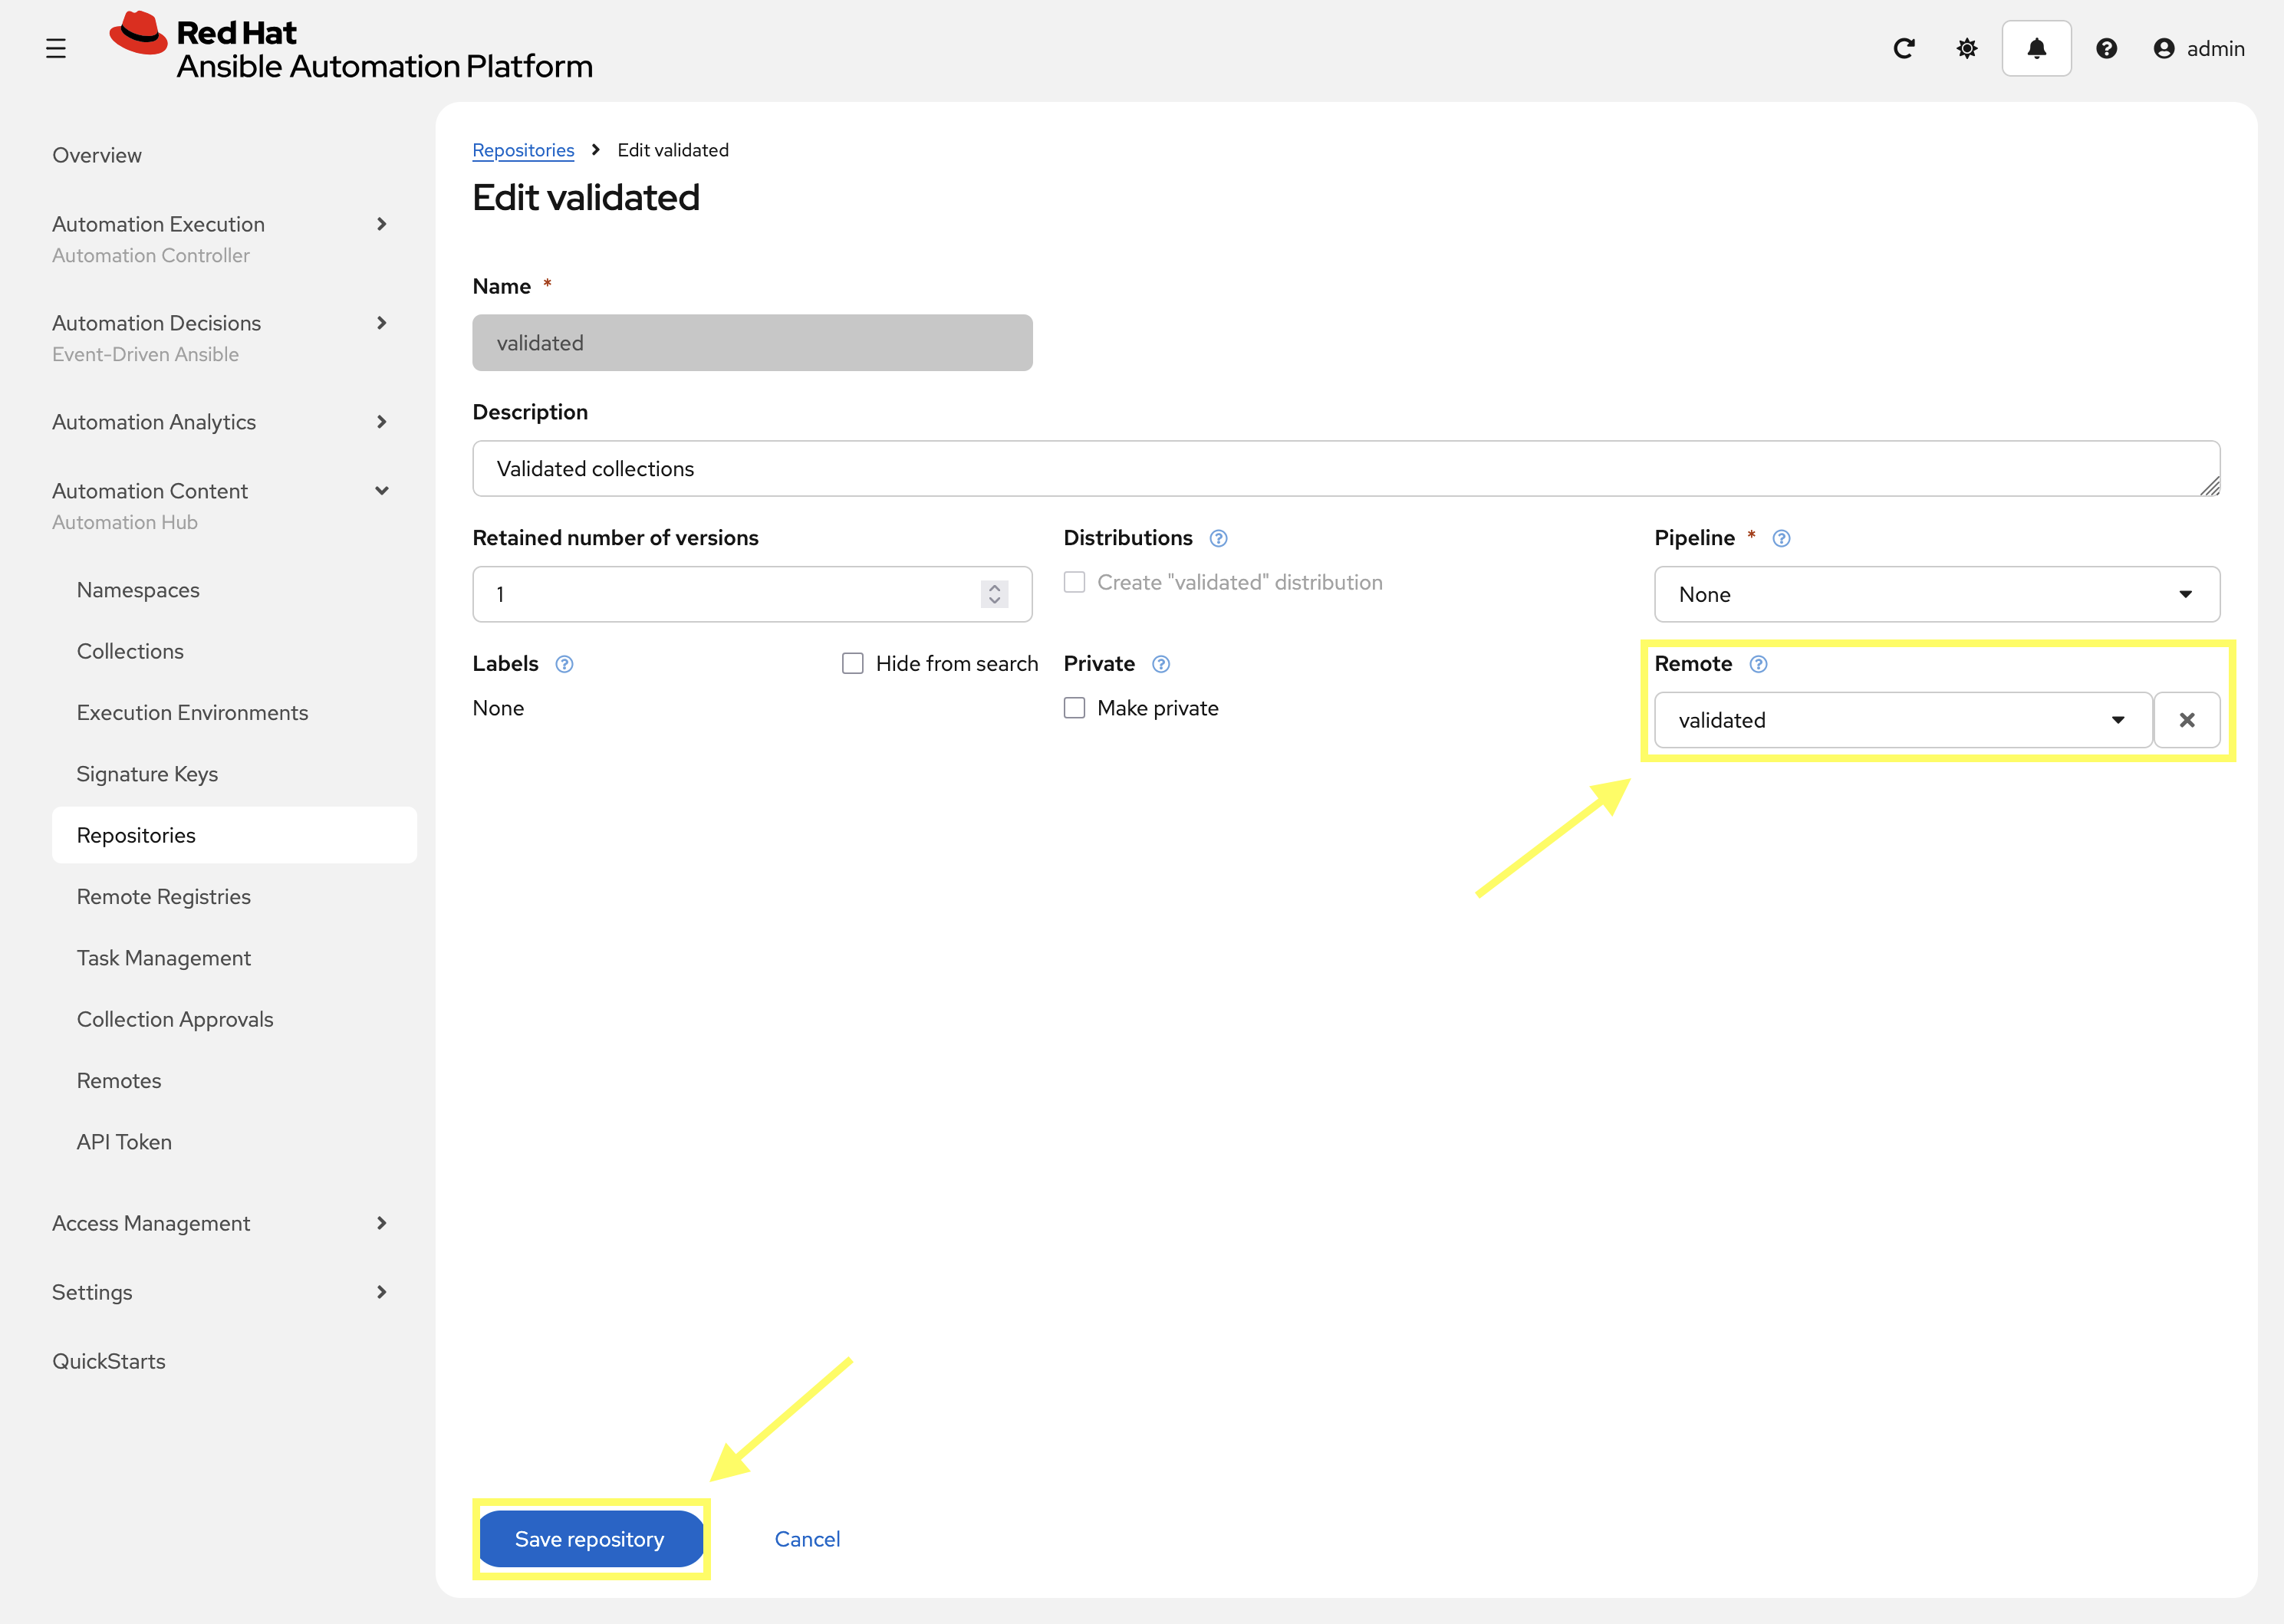
Edit the validated repository by selecting the pencil icon
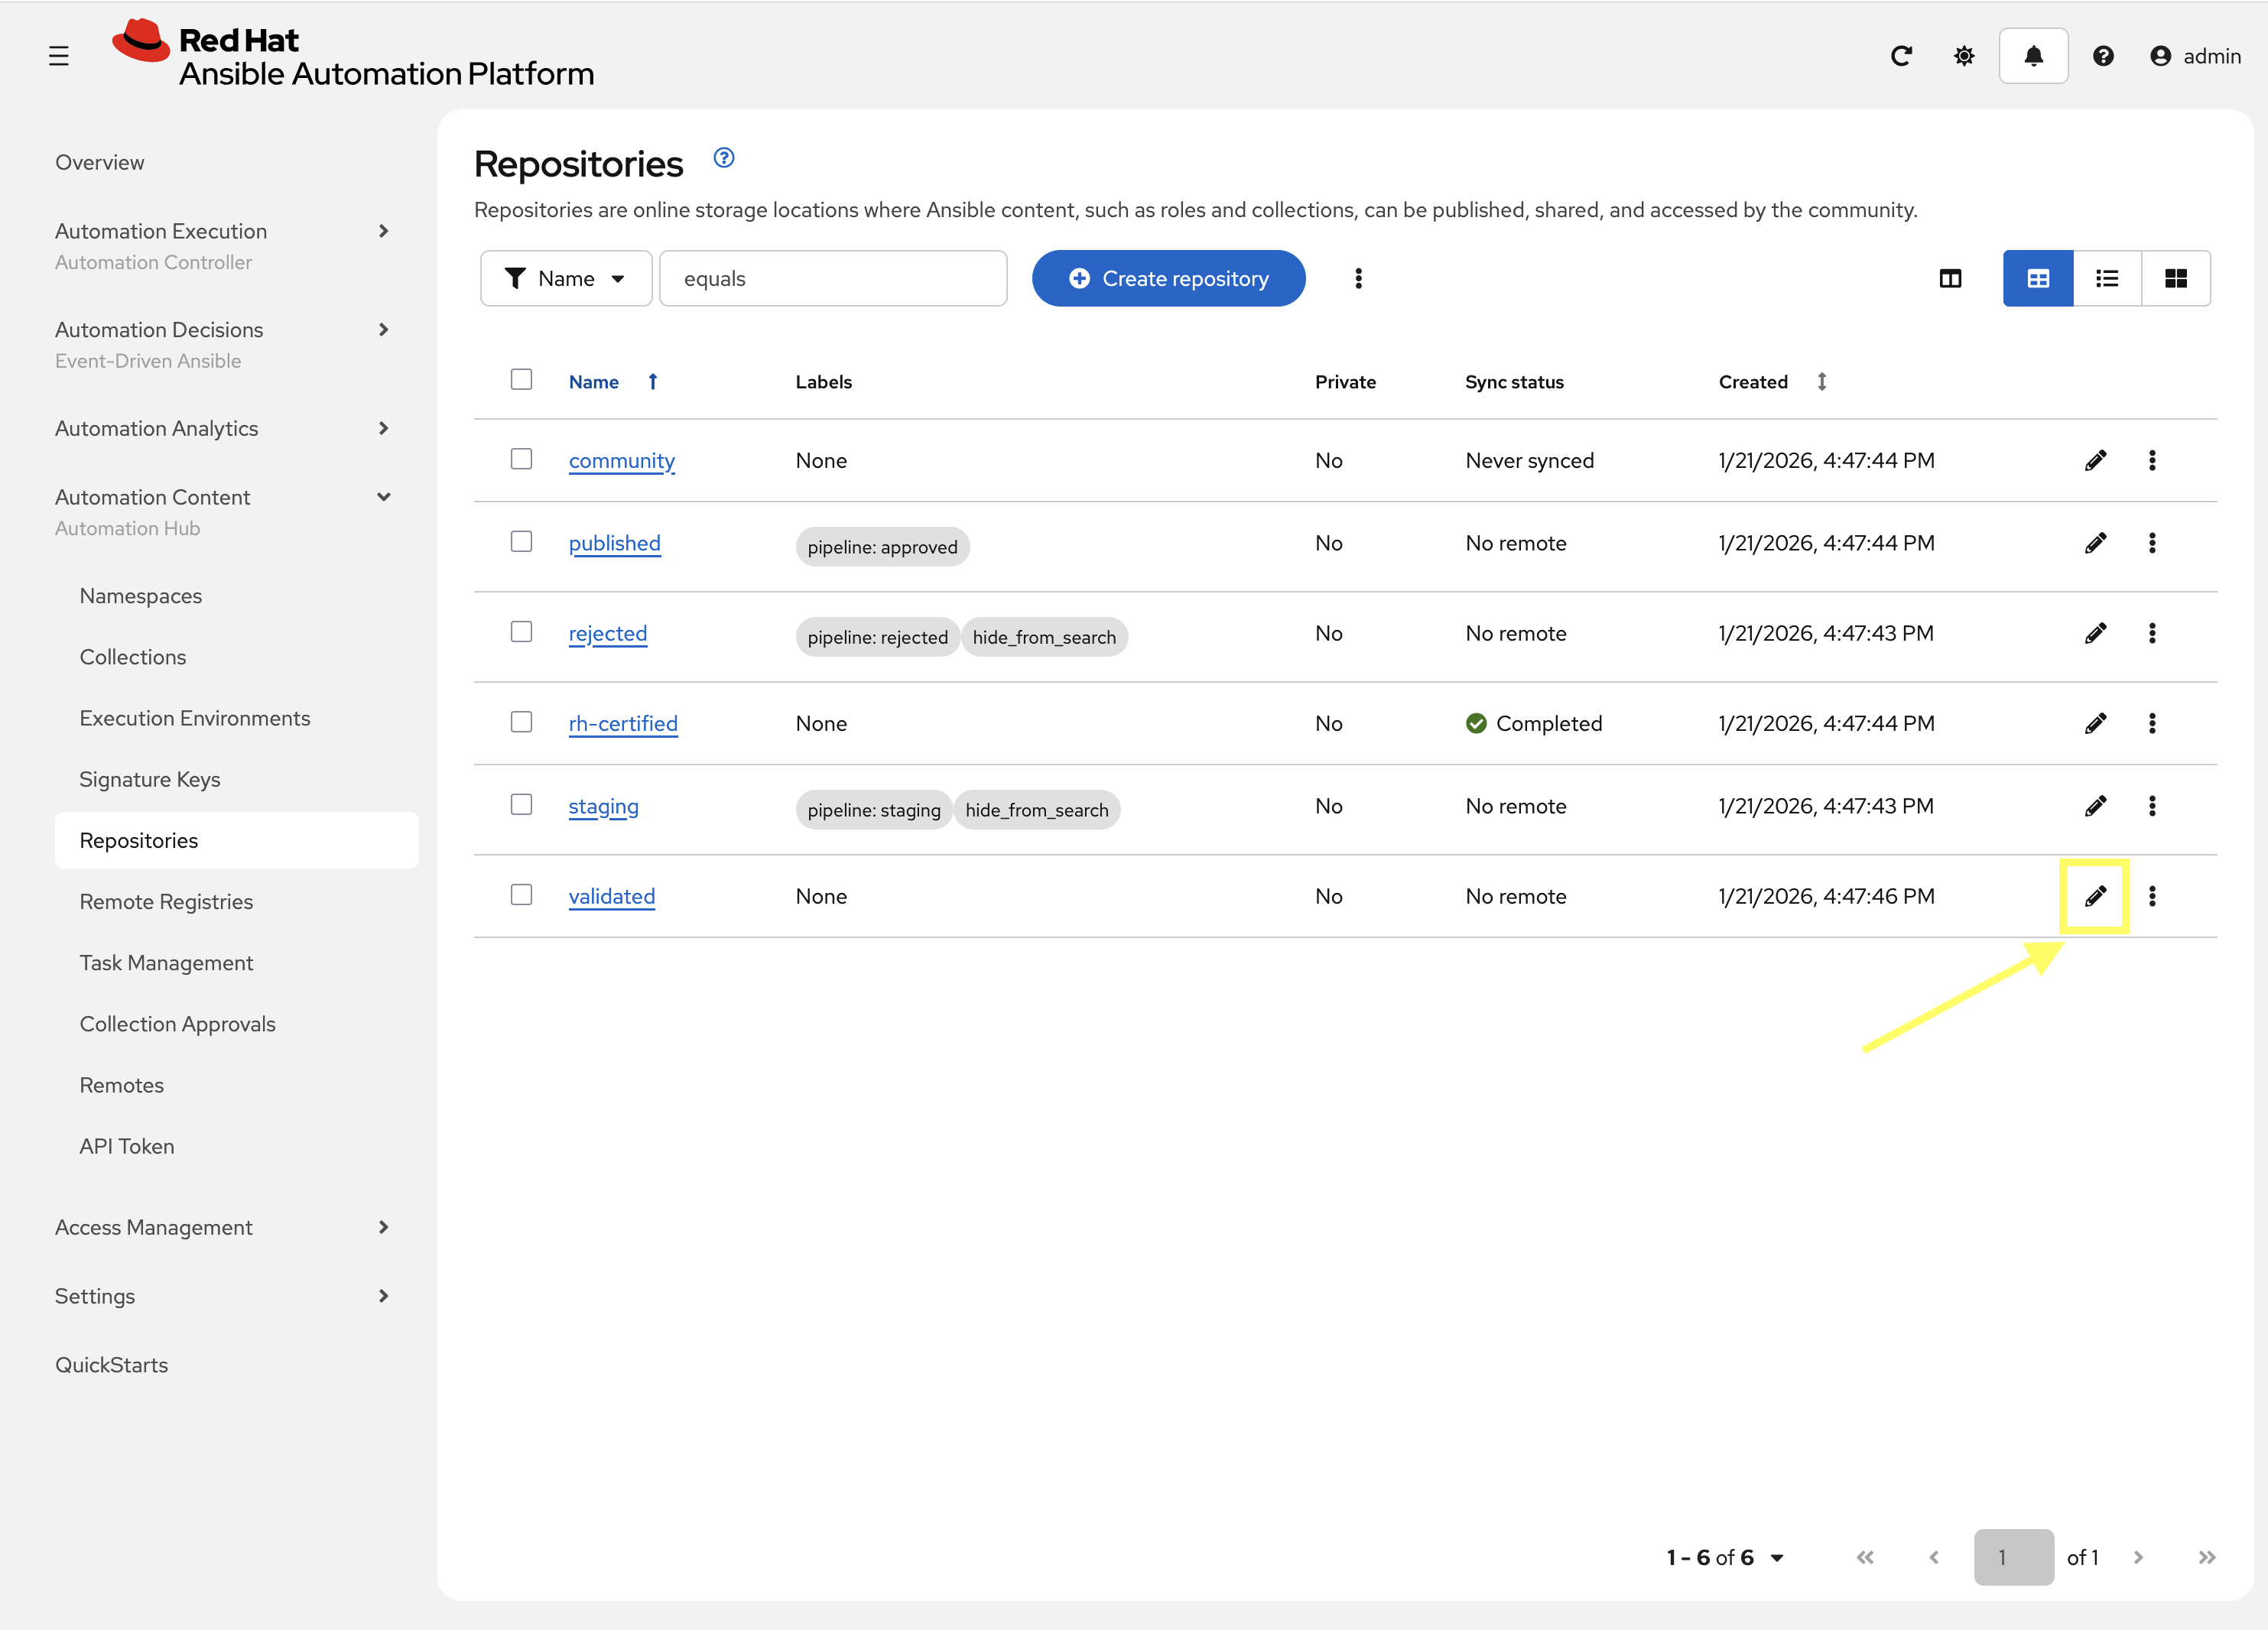
-
Update the
Remotefield by selectingvalidatedfrom the drop down. -
Click Save repository to update the repository.
3.2: Sync Repositories
Finally, synchronize the validated and community repositories to pull in the new collections within the Repositories page.
-
From the navigation menu on the left, expand Automation Content and click on Repositories.
-
Next to the
validatedrepository, click the kebab menu (three vertical dots) on the right hand side of the entry and select Sync repository.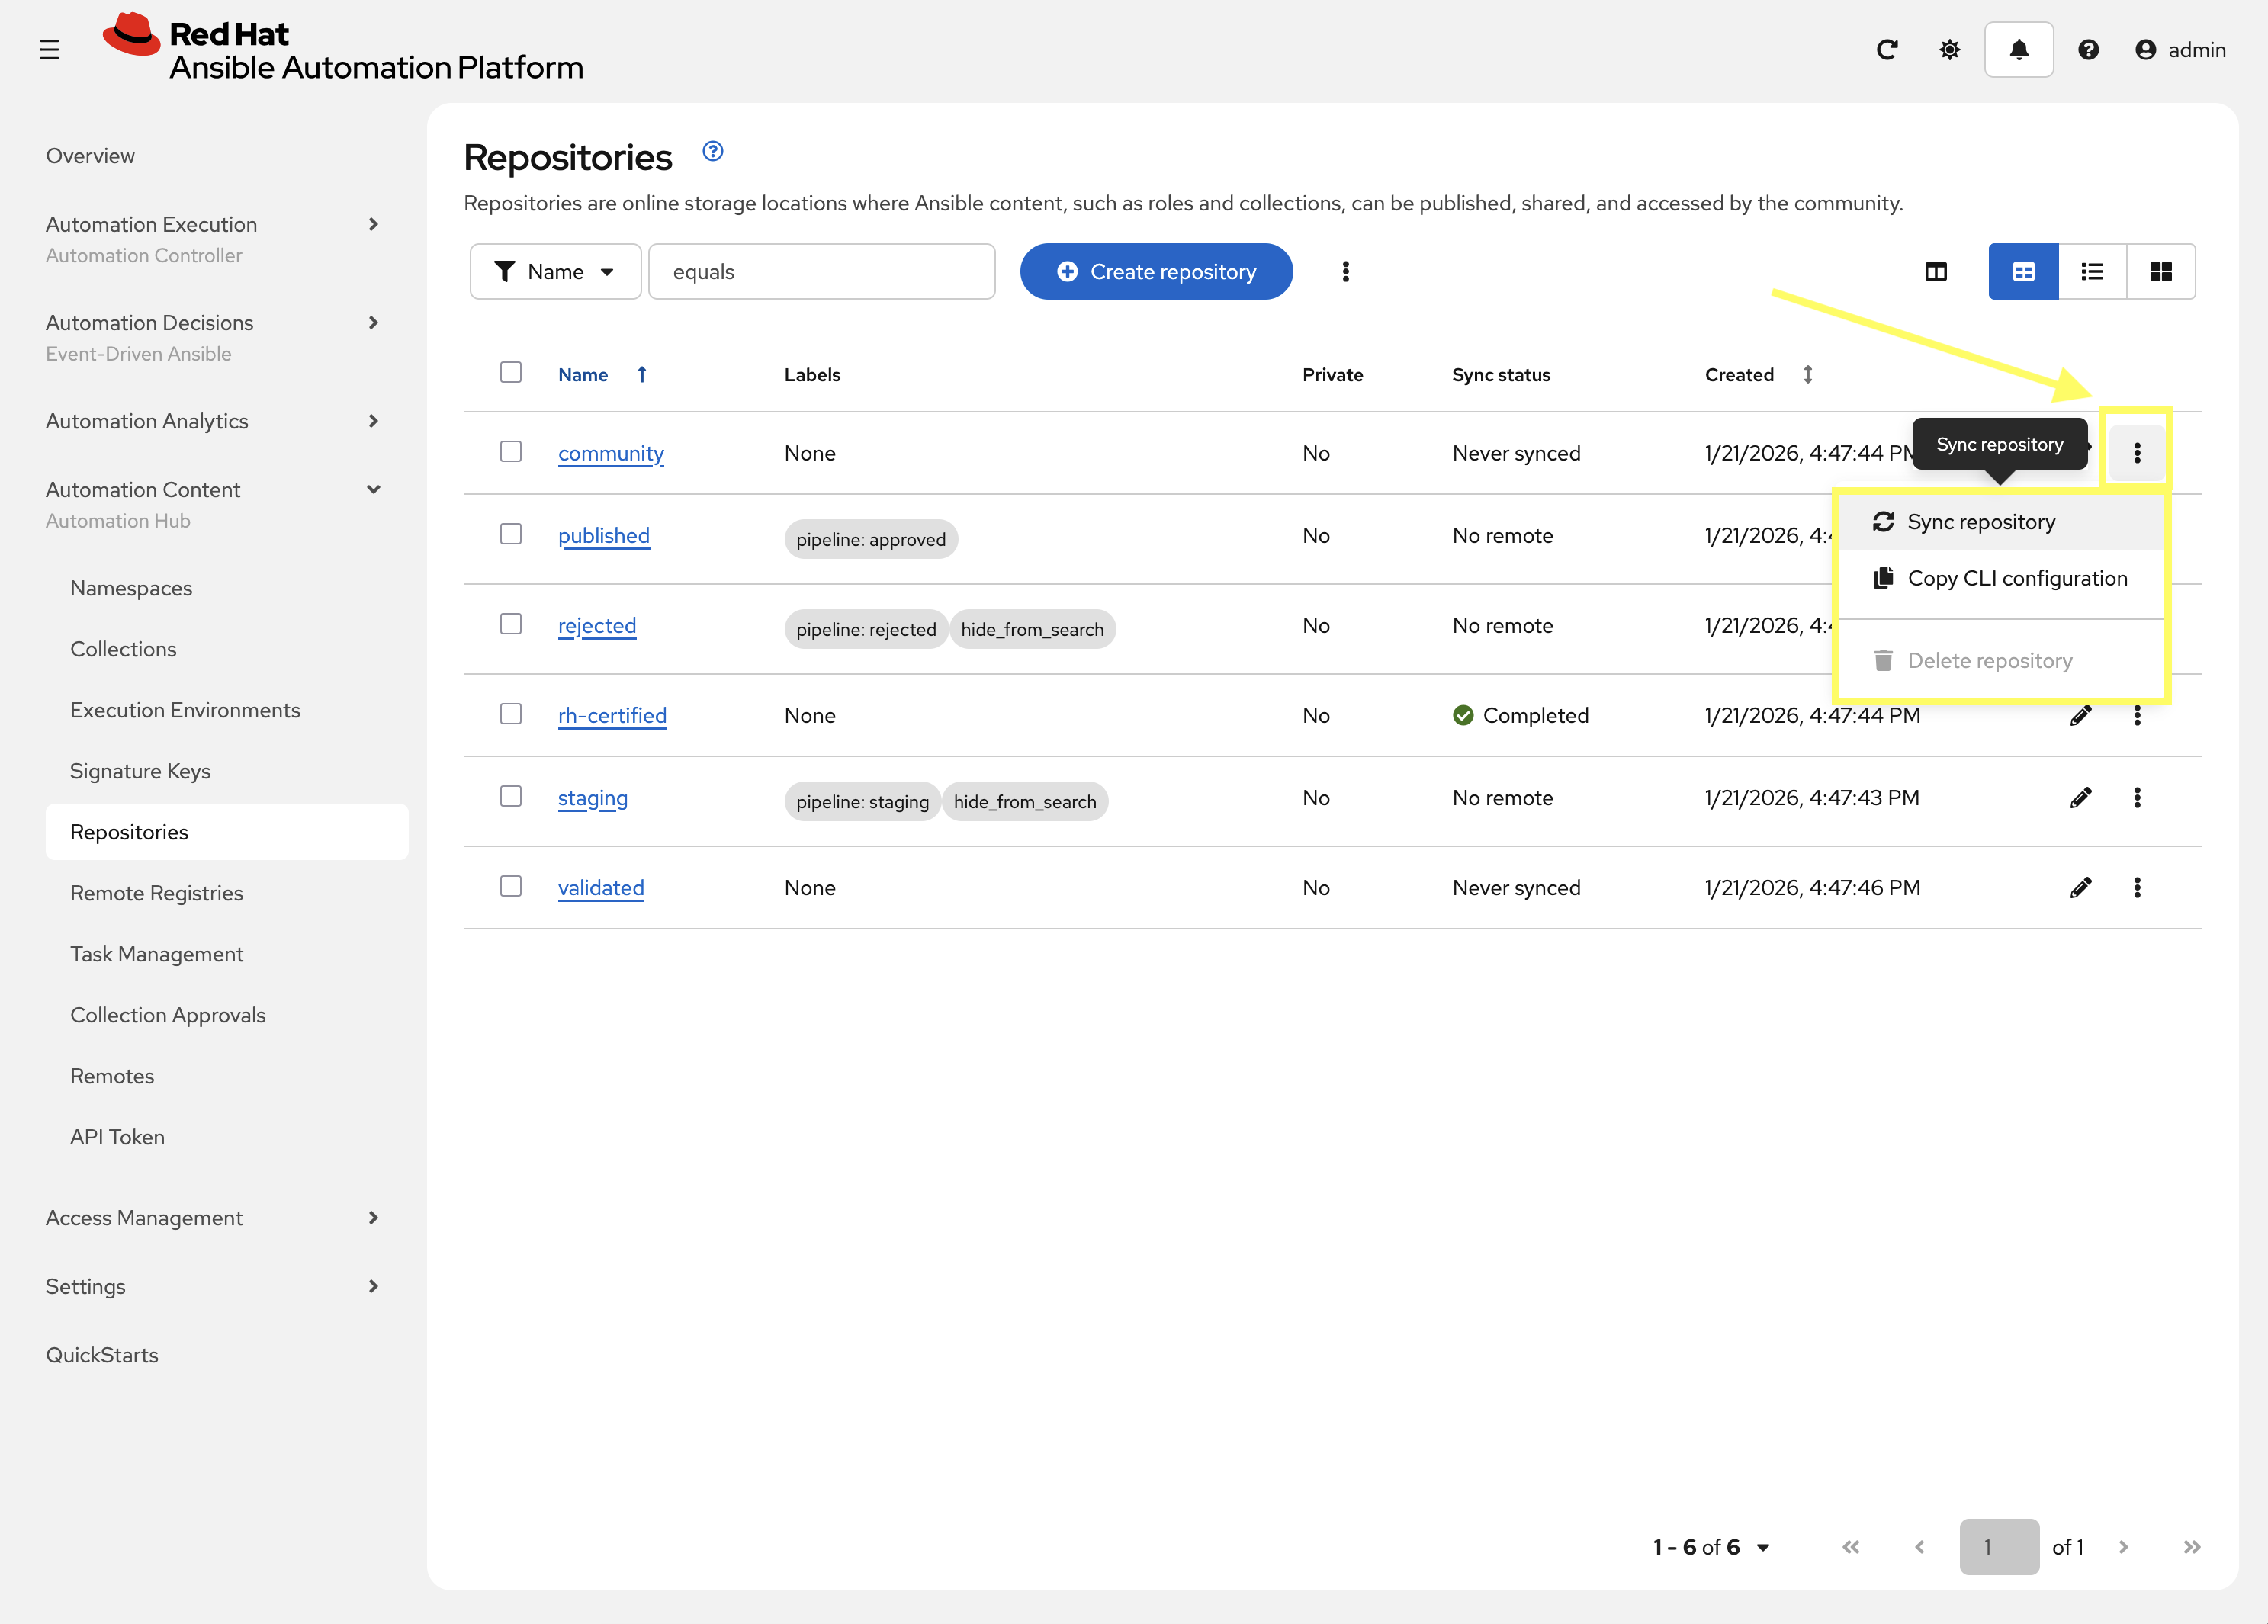
-
In the Sync Repository dialog, click Sync to start the synchronization.
-
Repeat the above steps to sync the
communityrepositories as well.Syncing the collections can take some time. You can monitor the progress, but it will not impact the next set of labs.
Conclusion
Congratulations! You have successfully mastered the complete lifecycle of managing Ansible content in enterprise environments:
-
Playbook Creation and Testing: Created a playbook to test custom filter locally
-
Git repository management: Committed files to repository to make it available to Automation Controller
-
Controller Integration: Connected Automation Controller with custom content and environments
-
End-to-End Validation: Verified the complete automation workflow from development to execution
This foundation enables you to create, manage, and distribute automation content at enterprise scale while maintaining security, compliance, and governance standards. The skills learned here are essential for managing automation in large organizations where content needs to be curated, controlled, and distributed efficiently.
Appendix
Commands used in this lab.
Playbook files upload
These are the git commands used to push the /projects/lab_playbooks/ files:
cd /projects/lab_playbooks/
git init
git checkout -b main
git add site.yml test_pah_ee.yml collections/requirements.yml
git remote add origin {gitea_console_url}/{gitea_user}/lab_playbooks.git
git commit --message "Initial commit of playbook files"
git push origin main