Trusted Software Supply Chain
Module Goals
The goal of this lab is to learn about the features from the Trusted Software Supply Chain suite of products from Red Hat.
Trusted Artifact Signer
Red Hat Trusted Artifact Signer (TAS) enhances software supply chain security by simplifying cryptographic signing and verification of software artifacts, such as container images, binaries, and documents.
Trusted Artifact Signer provides a production-ready deployment of the Sigstore project as a core component of the Red Hat Trusted Software Supply Chain product family.
Signing and verification, e.g., using GPG, has been around a long time—why would someone found a new open source project to address signing and verification, you might ask?
Why Sigstore / Trusted Artifact Signer?
-
Supply Chain Security: Modern software development requires robust mechanisms to secure dependencies and artifacts, which GPG struggles to address effectively.
-
Usability: Developers need simpler, more intuitive signing solutions without the burden of manual key management.
-
Transparency: A centralized, tamper-evident log system ensures accountability and traceability of signatures, enhancing trust.
-
Modern Identity Integration: Sigstore aligns with contemporary authentication mechanisms (e.g., OAuth, OpenID Connect), making it easier to tie signatures to identities.
-
Automation: Sigstore fits seamlessly into automated CI/CD workflows, which are critical in modern software development pipelines.
These are bold statements, so let’s quickly compare the two to better understand the advantages that Trusted Artifact Signer brings to the table:
1. Key Management
-
GPG:
-
Users must generate and manage long-term public/private key pairs themselves.
-
Keys are often stored locally, and their security is tied to the user’s system.
-
If a private key is lost or compromised, recovery or revocation can be complex.
-
-
Sigstore / Trusted Artifact Signer:
-
Utilizes short-lived (ephemeral) keys generated on-demand for signing.
-
No need for long-term private key management; keys are automatically discarded after use.
-
Simplifies key management for developers, reducing the risk of key compromise.
-
2. Trust Model
-
GPG:
-
Relies on a Web of Trust where individuals sign each other’s keys to establish authenticity.
-
Trust depends on manual verification and key-signing parties, which can be cumbersome and error-prone.
-
Requires a high degree of trust in individual users and their ability to manage their keys properly.
-
-
Sigstore / Trusted Artifact Signer:
-
Leverages OpenID Connect (OIDC) for authentication, binding artifacts to an identity (e.g., an SSO system such as Keycloak, a GitHub or GitLab account, email, etc.).
-
Trust is rooted in central transparency logs (e.g., Rekor), ensuring all signatures are centrally (or publicly, if desired) auditable.
-
Encourages a more automated and modern trust model, simplifying verification.
-
3. Transparency and Verifiability
-
GPG:
-
Signed artifacts and their signatures must be manually shared and verified.
-
No central or automatic system for transparency or revocation tracking.
-
Difficult to audit or trace all signatures and the associated public keys at scale.
-
-
Sigstore / Trusted Artifact Signer:
-
Every signing action is logged in a central, optionally public, tamper-evident transparency log (Rekor).
-
Anyone can independently verify the signing event and its associated identity.
-
Provides a centralized and automated system for transparency and auditability.
-
4. Ease of Use
-
GPG:
-
Comparatively complex for users, requiring manual key generation, management, and sharing.
-
CLI tools have a steep learning curve and are not always user-friendly.
-
Widespread adoption hindered by usability challenges.
-
-
Sigstore / Trusted Artifact Signer:
-
Streamlined experience designed for developers and modern workflows.
-
No need to manually manage keys or trust chains; authentication is identity-based.
-
Easily integrates into CI/CD pipelines and modern development practices.
-
5. Security
-
GPG:
-
Vulnerable to long-term key compromise if private keys are not properly secured.
-
Trust in signatures is tightly coupled to key security and revocation is challenging.
-
-
Sigstore / Trusted Artifact Signer:
-
Ephemeral keys reduce the risk of long-term compromise.
-
Transparency logs provide tamper-evident evidence of signing, reducing the risk of undetected forgery.
-
Designed with supply chain security in mind, reducing risks from malicious dependencies or compromised keys.
-
Advantages of Sigstore / Trusted Artifact Signer over GPG
In summary, Sigstore is designed to address the pain points and limitations of GPG in the context of modern software development, focusing on ease of use, transparency, and security for signing and verifying software artifacts.
-
Eliminates manual key management.
-
Provides automated, identity-based signing.
-
Ensures transparency with central (optionally public) logs.
-
Simplifies adoption with developer-friendly tools.
-
Reduces risks from long-term private key compromises.
-
Aligns with modern software practices and supply chain security requirements.
Setup
| Run the following command to ensure the environment is up to date: |
curl -fsSL https://raw.githubusercontent.com/redhat-tssc-tmm/security-roadshow/main/cosign_gitsign_installer.sh | bashFor this exercise, we’ll be using the container image in Quay that we created during our lab setup (Build a container image).
| Make sure you still have the variables set. If not, please go through the Build a container image section again to set up your environment and make sure you have pushed the image to Quay. |
Procedure
-
Run the following command in the terminal:
echo $QUAY_USER
echo $QUAY_URL
quayadmin
quay-88k5s.apps.cluster-88k5s.88k5s.sandbox139.opentlc.comFor signing and verification of container images, we’ll be using the cosign CLI binary, which has already been installed on your bastion host (and can also be downloaded from the OpenShift Console).
cosign can easily be used in any CI/CD toolchain as we use it here and handles all the communication with the Sigstore / Trusted Artifact Signer services that request certificates, handle the OIDC authentication, store info in the transparency log (Rekor), etc.
-
Run the following command in the terminal:
cosign version[lab-user@bastion ~]$ cosign version
______ ______ _______. __ _______ .__ __.
/ | / __ \ / || | / _____|| \ | |
| ,----'| | | | | (----`| | | | __ | \| |
| | | | | | \ \ | | | | |_ | | . ` |
| `----.| `--' | .----) | | | | |__| | | |\ |
\______| \______/ |_______/ |__| \______| |__| \__|
cosign: A tool for Container Signing, Verification and Storage in an OCI registry.
GitVersion: 366aae20
GitCommit: 366aae20a8edc21f7402f0d65d36cf8765bcfa42
GitTreeState: clean
BuildDate: 2025-02-24T11:24:47Z
GoVersion: go1.22.9 (Red Hat 1.22.9-2.el9_5)
Compiler: gc
Platform: linux/amd64
cosignneeds to be initialized with all the required endpoints that it communicates with. Additionally, during initialization, it will download the public trust root certificate in a local cache.
This initialization can be done via command-line parameters or by setting environment variables that are read when no command-line parameters are present.
Cosign itself doesn’t need access to OpenShift, but since we have Trusted Artifact Signer installed on OpenShift (a RHEL installation is another deployment option), we will be using some oc commands to get the required endpoints.
|
-
Run the following command in the terminal:
export TUF_URL=$(oc get tuf -o jsonpath='{.items[0].status.url}' -n trusted-artifact-signer)
export OIDC_ISSUER_URL=https://$(oc get route keycloak -n rhsso | tail -n 1 | awk '{print $2}')/auth/realms/openshift
export COSIGN_FULCIO_URL=$(oc get fulcio -o jsonpath='{.items[0].status.url}' -n trusted-artifact-signer)
export COSIGN_REKOR_URL=$(oc get rekor -o jsonpath='{.items[0].status.url}' -n trusted-artifact-signer)
export COSIGN_MIRROR=$TUF_URL
export COSIGN_ROOT=$TUF_URL/root.json
export COSIGN_OIDC_CLIENT_ID="trusted-artifact-signer"
export COSIGN_OIDC_ISSUER=$OIDC_ISSUER_URL
export COSIGN_CERTIFICATE_OIDC_ISSUER=$OIDC_ISSUER_URL
export COSIGN_YES="true"
export SIGSTORE_FULCIO_URL=$COSIGN_FULCIO_URL
export SIGSTORE_OIDC_ISSUER=$COSIGN_OIDC_ISSUER
export SIGSTORE_REKOR_URL=$COSIGN_REKOR_URL
export REKOR_REKOR_SERVER=$COSIGN_REKOR_URL
# to verify URL endpoints have been set
env | grep URL
# to verify URL endpoints have been set
env | grep URL
TUF_URL=https://tuf-trusted-artifact-signer.apps.cluster-88k5s.88k5s.sandbox139.opentlc.com
OIDC_ISSUER_URL=https://keycloak-rhsso.apps.cluster-88k5s.88k5s.sandbox139.opentlc.com/auth/realms/openshift
QUAY_URL=quay-88k5s.apps.cluster-88k5s.88k5s.sandbox139.opentlc.com
COSIGN_FULCIO_URL=https://fulcio-server-trusted-artifact-signer.apps.cluster-88k5s.88k5s.sandbox139.opentlc.com
SIGSTORE_REKOR_URL=https://rekor-server-trusted-artifact-signer.apps.cluster-88k5s.88k5s.sandbox139.opentlc.com
SIGSTORE_FULCIO_URL=https://fulcio-server-trusted-artifact-signer.apps.cluster-88k5s.88k5s.sandbox139.opentlc.com
COSIGN_REKOR_URL=https://rekor-server-trusted-artifact-signer.apps.cluster-88k5s.88k5s.sandbox139.opentlc.com
[lab-user@bastion ~]$| The reason we define multiple variables with the same values is due to the long history of the upstream Sigstore project. Some tools (like cosign and gitsign) use different environment variables for the same purpose. For various reasons, including open source principles and compatibility, we are not creating a specialized Red Hat version with simplified environment parameters. These variables will be maintained in both the upstream project and the Red Hat enterprise-ready version. |
As the last step, initialize
cosignso it knows who to talk to.
-
Run the following command in the terminal:
cosign initialize[lab-user@bastion ~]$ cosign initialize
Root status:
{
"local": "/home/lab-user/.sigstore/root",
"remote": "https://tuf-trusted-artifact-signer.apps.cluster-l2ktc.l2ktc.sandbox75.opentlc.com",
"metadata": {
"root.json": {
"version": 1,
"len": 2178,
"expiration": "13 Jun 25 16:39 UTC",
"error": ""
},
"snapshot.json": {
"version": 1,
"len": 618,
"expiration": "13 Jun 25 16:39 UTC",
"error": ""
},
"targets.json": {
"version": 1,
"len": 1372,
"expiration": "13 Jun 25 16:39 UTC",
"error": ""
},
"timestamp.json": {
"version": 1,
"len": 619,
"expiration": "13 Jun 25 16:39 UTC",
"error": ""
}
},
"targets": [
"ctfe.pub",
"fulcio_v1.crt.pem",
"rekor.pub"
]
}Signing and Verifying a Container Image
cosign will be interacting with the image in our private registry, therefore we need to log in to Quay.
Procedure
-
Run the following command in the terminal:
cosign login $QUAY_URL -u $QUAY_USER -p sample_LSncwGJkXcayY1tUMmr8[lab-user@bastion ~]$ cosign login $QUAY_URL -u $QUAY_USER -p MzI2OTI0
auth.go:203: logged in via /home/lab-user/.docker/config.json
To verify that the image we created here is still available and cosign can access the image, we can use the cosign tree command that checks for signatures, SBOMs (Software Bills of Materials), and attestations (e.g., build provenance attestation):
|
-
Run the following command in the terminal:
cosign tree $QUAY_URL/$QUAY_USER/frontend:0.1[lab-user@bastion ~]$ cosign tree $QUAY_URL/$QUAY_USER/frontend:0.1
📦 Supply Chain Security Related artifacts for an image: quay-l2ktc.apps.cluster-l2ktc.l2ktc.sandbox75.opentlc.com/quayadmin/frontend:0.1
No Supply Chain Security Related Artifacts artifacts found for image quay-l2ktc.apps.cluster-l2ktc.l2ktc.sandbox75.opentlc.com/quayadmin/frontend:0.1
, start creating one with simply running$ COSIGN_EXPERIMENTAL=1 cosign sign <img>As
cosignsuggests, signing this image is as simple as the following:
-
Run the following command in the terminal:
cosign sign $QUAY_URL/$QUAY_USER/frontend:0.1[lab-user@bastion ~]$ cosign sign $QUAY_URL/$QUAY_USER/frontend:0.1
Generating ephemeral keys...
Retrieving signed certificate...
Note that there may be personally identifiable information associated with this signed artifact.
This may include the email address associated with the account with which you authenticate.
This information will be used for signing this artifact and will be stored in public transparency logs and cannot be removed later.
By typing 'y', you attest that you grant (or have permission to grant) and agree to have this information stored permanently in transparency logs.
error opening browser: exec: "xdg-open": executable file not found in $PATH
Go to the following link in a browser:
https://keycloak-rhsso.apps.cluster-l2ktc.l2ktc.sandbox75.opentlc.com/auth/realms/openshift/protocol/openid-connect/auth?access_type=online&client_id=trusted-artifact-signer&code_challenge=JHFlN4cLdRCGJWjkGf1S1nKYO9Nc-bnC6bhwkZXoS3M&code_challenge_method=S256&nonce=2qDckQCVBACjnviJ8bdxIWwPh1r&redirect_uri=urn%3Aietf%3Awg%3Aoauth%3A2.0%3Aoob&response_type=code&scope=openid+email&state=2qDckRnXkzmspwUHxF3f6K3NX67
Enter verification code:| As mentioned above, the signing process ties an identity (an OIDC identity, to be specific) to the signature. The signing certificate is issued on demand, but only issued if an OIDC identity proof can be established. |
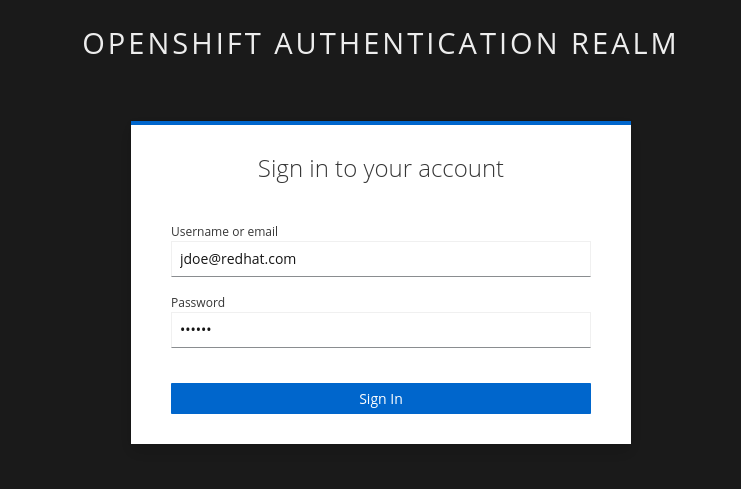
In this example, the "OAuth2 browser-based flow" is used. In other words, you will authenticate to the OIDC system by user and password via a browser login. We are running cosign in an ssh session with no connection to your system, therefore the check for a browser to open the login page fails: error opening browser: exec: "xdg-open": executable file not found in $PATH.
-
Copy the URL and paste it in a new browser window or tab and log in—use the following credentials:
Username: |
jdoe@redhat.com |
Password: |
secure |
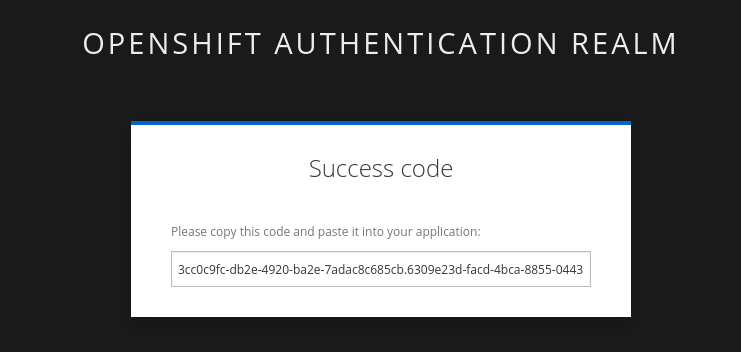
| Make sure to copy the whole code, as it is longer than the text box. |
You may have to run rm -rf ~/.sigstore if you get a cache error.
|
-
Enter verification code:
Enter verification code: 3cc0c9fc-db2e-4920-ba2e-7adac8c685cb.6309e23d-facd-4bca-8855-0443a3c4ddf5.d8370879-39c7-41ec-99ab-669101e99f91

Successfully verified SCT...
WARNING: Image reference quay-l2ktc.apps.cluster-l2ktc.l2ktc.sandbox75.opentlc.com/quayadmin/frontend:0.1 uses a tag, not a digest, to identify the image to sign.
    This can lead you to sign a different image than the intended one. Please use a
    digest (example.com/ubuntu@sha256:abc123...) rather than tag
    (example.com/ubuntu:latest) for the input to cosign. The ability to refer to
    images by tag will be removed in a future release.

tlog entry created with index: 1
Pushing signature to: quay-l2ktc.apps.cluster-l2ktc.l2ktc.sandbox75.opentlc.com/quayadmin/ctf-web-to-system
SUCCESS!
With one command, you have signed the container image and pushed the container image to the registry. Furthermore, the signing event and its metadata have been recorded in the Rekor transparency log: tlog entry created with index: 1.
To check, we can again use
cosign tree.
-
Run the following command in the terminal:
cosign tree $QUAY_URL/$QUAY_USER/frontend:0.1[lab-user@bastion ~]$ cosign tree $QUAY_URL/$QUAY_USER/frontend:0.1
📦 Supply Chain Security Related artifacts for an image: quay-l2ktc.apps.cluster-l2ktc.l2ktc.sandbox75.opentlc.com/quayadmin/frontend:0.1
└── 🔐 Signatures for an image tag: quay-l2ktc.apps.cluster-l2ktc.l2ktc.sandbox75.opentlc.com/quayadmin/ctf-web-to-system:sha256-4530d5e1556631804ce21d37271b0d3f173c350956f2312421db0840fd103c82.sig
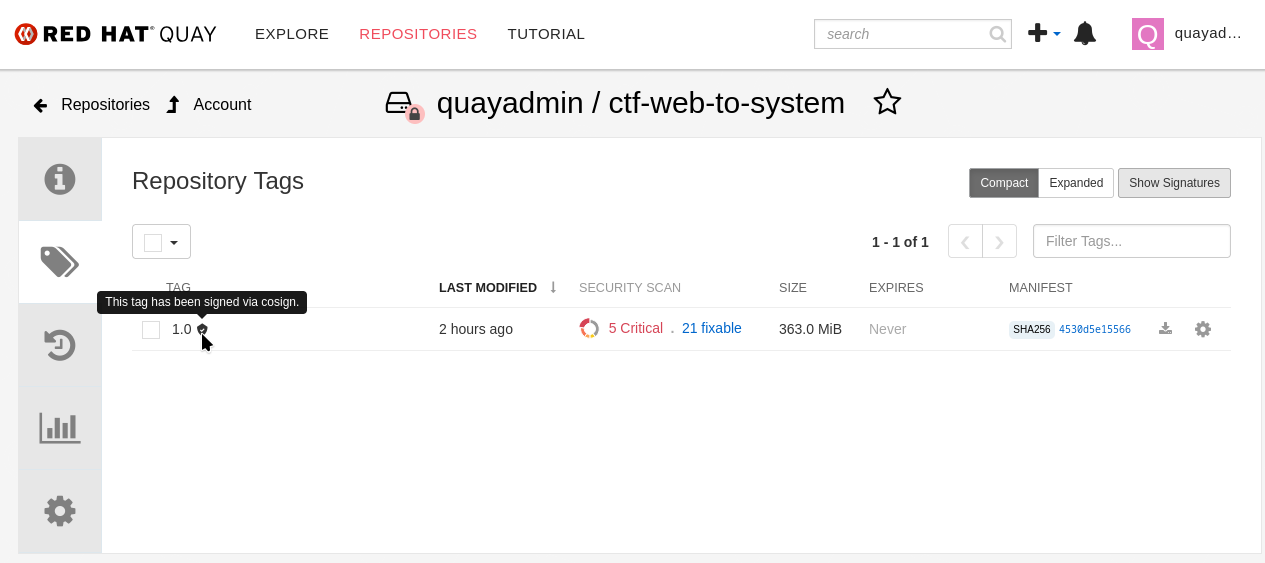
└── 🍒 sha256:f638a989546b998409719e3eb78c0843d880e0bbb5237afa831da685fee48880We can also log in to Quay at https://quay-sample.apps.cluster-sample.sample.sandboxsample.opentlc.com using the Quay credentials:
Quay Console Username: |
sample_quayadmin |
Quay Console Password: |
sample_LSncwGJkXcayY1tUMmr8 |
Quay recognizes the cosign image signature, too!
You might be wondering how a pipeline task authenticates itself, since it can’t open a browser to log in. Trusted Artifact Signer / Sigstore (including the cosign tool) doesn’t authenticate the user directly. Instead, it relies on the OIDC system to authenticate the request before issuing a signing certificate. This allows the full flexibility of OIDC systems for authentication.
For example, GitHub Actions and GitLab CI/CD can pass the OIDC identity of the pipeline runner via OIDC tokens into the pipeline.
In general, continuous integration (CI) systems focus on providing the identity of the build or deployment environment rather than the personal identity of the user who triggered it. This helps maintain least privilege and ensures reproducibility.
However, depending on your CI setup and requirements, you can leverage the flexibility of OIDC to meet your specific needs.
EXAMPLE
In our workshop environment, we are using Keycloak as SSO / OIDC system. We can request a short-lived OIDC token from Keycloak and use this for authentication (and therefore, signing of the image).
1) First, we need to get the OIDC token issuer endpoint from Keycloak:
export OIDC_TOKEN_SERVICE=$(curl -s $OIDC_ISSUER_URL | jq -r '.["token-service"]')/token
echo $OIDC_TOKEN_SERVICE
[lab-user@bastion ~]$ export OIDC_TOKEN_SERVICE=$(curl -s $OIDC_ISSUER_URL | jq -r '.["token-service"]')/token
echo $OIDC_TOKEN_SERVICE
https://keycloak-rhsso.apps.cluster-l2ktc.l2ktc.sandbox75.opentlc.com/auth/realms/openshift/protocol/openid-connect/token2) Now, we are requesting a token from that endpoint for our signing user.
export OIDC_TOKEN=$(curl -s --request POST --url $OIDC_TOKEN_SERVICE --header 'content-type: application/x-www-form-urlencoded' --data 'grant_type=password' --data 'client_id=trusted-artifact-signer' --data 'username=jdoe@redhat.com'  --data 'password=secure' --data 'scope=openid' | jq -r '.["access_token"]')
echo $OIDC_TOKEN
[lab-user@bastion ~]$ export OIDC_TOKEN=$(curl -s --request POST --url $OIDC_TOKEN_SERVICE --header 'content-type: application/x-www-form-urlencoded' --data 'grant_type=password' --data 'client_id=trusted-artifact-signer' --data 'username=jdoe@redhat.com' --data 'password=secure' --data 'scope=openid' | jq -r '.["access_token"]')
echo $OIDC_TOKEN
eyJhbGciOiJSUzI1NiIsInR5cC...
...IgOiAiSldUIiwia2lkIiA6ICJl| This is just an example—naturally, in your own CI system, you would not use the username and password of the signing user in clear text. Rather, you would store them in a Kubernetes Secret or in a Vault. Or, depending on your setup, you already have the pipeline user’s OIDC token as an environment variable during your pipeline run. Additionally, you wouldn’t echo the token so it doesn’t show in logs—even though it might only be short-lived, this is not a good practice. |
3) Now that we have the token, we can pass that to cosign for authentication:
cosign sign -y --identity-token=$OIDC_TOKEN $QUAY_URL/$QUAY_USER/frontend:0.1[lab-user@bastion ~]$ cosign sign -y --identity-token=$OIDC_TOKEN $QUAY_URL/$QUAY_USER/frontend:0.1
Generating ephemeral keys...
Retrieving signed certificate...
Successfully verified SCT...
WARNING: Image reference quay-l2ktc.apps.cluster-l2ktc.l2ktc.sandbox75.opentlc.com/quayadmin/frontend:0.1 uses a tag, not a digest, to identify the image to sign.
This can lead you to sign a different image than the intended one. Please use a
digest (example.com/ubuntu@sha256:abc123...) rather than tag
(example.com/ubuntu:latest) for the input to cosign. The ability to refer to
images by tag will be removed in a future release.
Note that there may be personally identifiable information associated with this signed artifact.
This may include the email address associated with the account with which you authenticate.
This information will be used for signing this artifact and will be stored in public transparency logs and cannot be removed later.
By typing 'y', you attest that you grant (or have permission to grant) and agree to have this information stored permanently in transparency logs.
tlog entry created with index: 2
Pushing signature to: quay-l2ktc.apps.cluster-l2ktc.l2ktc.sandbox75.opentlc.com/quayadmin/ctf-web-to-system
You might have seen the cosign warning about using a tag rather than a sha256 digest. Yes, tags can be reassigned and can be considered inappropriate for signing (and verification) purposes. We have left this out for the sake of simplicity, but if you’d like, you can obtain the image’s sha256 digest via the Quay console or by using podman inspect, for example.
|
[lab-user@bastion ~]$ cosign sign --identity-token=$OIDC_TOKEN $QUAY_URL/$QUAY_USER/ctf-web-to-system@sha256:4530d5e1556631804ce21d37271b0d3f173c350956f2312421db0840fd103c82
Generating ephemeral keys...
Retrieving signed certificate...
Successfully verified SCT...

        Note that there may be personally identifiable information associated with this signed artifact.
        This may include the email address associated with the account with which you authenticate.
        This information will be used for signing this artifact and will be stored in public transparency logs and cannot be removed later.

By typing 'y', you attest that you grant (or have permission to grant) and agree to have this information stored permanently in transparency logs.
tlog entry created with index: 4
Pushing signature to: quay-l2ktc.apps.cluster-l2ktc.l2ktc.sandbox75.opentlc.com/quayadmin/ctf-web-to-system
Verifying Signatures
Verifying an image signature is even easier than signing:
Procedure
-
Run the following command:
cosign verify --certificate-identity jdoe@redhat.com $QUAY_URL/$QUAY_USER/frontend:0.1 | jq[lab-user@bastion ~]$ cosign verify --certificate-identity jdoe@redhat.com $QUAY_URL/$QUAY_USER/frontend:0.1 | jq
Verification for quay-lpv5s.apps.cluster-lpv5s.lpv5s.sandbox1300.opentlc.com/quayadmin/frontend:0.1 --
The following checks were performed on each of these signatures:
- The cosign claims were validated
- Existence of the claims in the transparency log was verified offline
- The code-signing certificate was verified using trusted certificate authority certificates
[
{
"critical": {
"identity": {
"docker-reference": "quay-lpv5s.apps.cluster-lpv5s.lpv5s.sandbox1300.opentlc.com/quayadmin/frontend"
},
"image": {
"docker-manifest-digest": "sha256:9323448ee75bfb5380004038bd04e2d7be5a45707f3895b620e6937aac6ebba7"
},
"type": "cosign container image signature"
},
"optional": {
"1.3.6.1.4.1.57264.1.1": "https://keycloak-rhsso.apps.cluster-lpv5s.lpv5s.sandbox1300.opentlc.com/auth/realms/openshift",
...In this case, we are asking cosign (and therefore Trusted Artifact Signer) to verify if jdoe@redhat.com has signed this image. We can also use regular expressions to check if anyone from Red Hat has signed this image, using --certificate-identity-regexp:
-
Run the following command:
cosign verify --certificate-identity-regexp ^[a-zA-Z0-9._%+-]+@redhat\.com$ $QUAY_URL/$QUAY_USER/frontend:0.1 | jq[lab-user@bastion ~]$ cosign verify --certificate-identity-regexp ^[a-zA-Z0-9._%-]@redhat\.com$ $QUAY_URL/$QUAY_USER/frontend:0.1 | jq
Verification for quay-lpv5s.apps.cluster-lpv5s.lpv5s.sandbox1300.opentlc.com/quayadmin/frontend:0.1 --
The following checks were performed on each of these signatures:
- The cosign claims were validated
- Existence of the claims in the transparency log was verified offline
- The code-signing certificate was verified using trusted certificate authority certificates
[
{
"critical": {
"identity": {
"docker-reference": "quay-lpv5s.apps.cluster-lpv5s.lpv5s.sandbox1300.opentlc.com/quayadmin/frontend"
},
"image": {
"docker-manifest-digest": "sha256:9323448ee75bfb5380004038bd04e2d7be5a45707f3895b620e6937aac6ebba7"
},
"type": "cosign container image signature"
},
"optional": {
"1.3.6.1.4.1.57264.1.1": "https://keycloak-rhsso.apps.cluster-lpv5s.lpv5s.sandbox1300.opentlc.com/auth/realms/openshift",We can also verify that the person (to be correct, the OIDC identity) who signed the image was authenticated against a specific OIDC Issuer (using the --certificate-oidc-issuer flag) or against an OIDC Issuer somewhere in our domain:
-
Run the following command:
cosign verify --certificate-identity jdoe@redhat.com --certificate-oidc-issuer-regexp \.opentlc\.com $QUAY_URL/$QUAY_USER/frontend:0.1 | jq
We are using jq for readability in these examples; it is not required.
|
[lab-user@bastion ~]$ cosign verify --certificate-identity jdoe@redhat.com --certificate-oidc-issuer-regexp \.opentlc\.com $QUAY_URL/$QUAY_USER/frontend:0.1 | jq

Verification for quay-l2ktc.apps.cluster-l2ktc.l2ktc.sandbox75.opentlc.com/quayadmin/frontend:0.1 --
The following checks were performed on each of these signatures:
  - The cosign claims were validated
  - Existence of the claims in the transparency log was verified offline
  - The code-signing certificate was verified using trusted certificate authority certificates
Signing and Verifying Git Commits
| Using traditional commit signing and verification methods required management and distribution of private/public key pairs to developers - a task that can become quite cumbersome for a large number of developers in your organization. With Red Hat Trusted Artifact Signer, there is no need to issue/distribute/re-issue keys due to lost passwords/maintain a key revocation list etc. |
| If you haven’t already done so, please execute the following steps from previous exercises: |
-
We need a git repository for git signing, therefore please make sure you have cloned the workshop apps repository as shown here: Deploy the Workshop Applications
-
We won’t go through setting up the environment for signing and verification (the Trusted Artifact Signer endpoints) again. If you have followed this chapter from the beginning, you have everything configured already. If not, please set the environment variables as shown here, followed by a
cosign initialize
Setting up gitsign
While you could use the gitsign CLI binary directly for signing your commits, it is much easier to configure your local (or global, if you want) git configuration, so that commits will be signed every time you issue a git commit or git tag, for example. This also applies to using your git installation from e.g. VSCode or other IDEs leveraging the local git installation.
Go to the demo-apps local repository you created earlier:
cd /home/lab-user/demo-apps
git status
git remote -v
[lab-user@bastion demo-apps]$ cd /home/lab-user/demo-apps
git status
git remote -v
On branch main
Your branch is up to date with 'origin/main'.
nothing to commit, working tree clean
origin https://github.com/mfosterrox/demo-apps.git (fetch)
origin https://github.com/mfosterrox/demo-apps.git (push)Since we don’t want to push our commits to the original source, we will use a GitLab instance on this cluster:
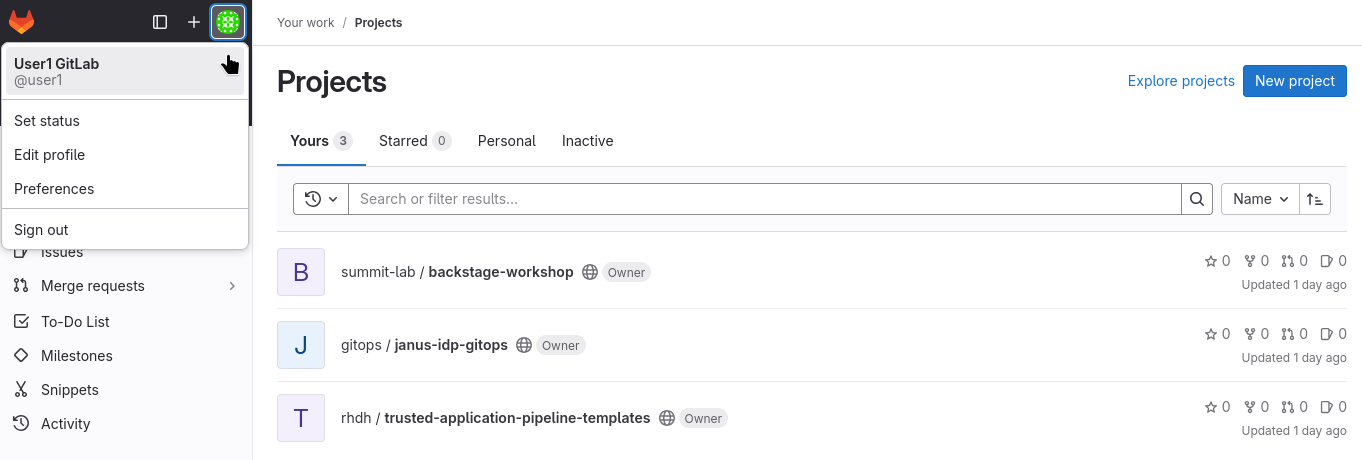
You can access the ⇒ GitLab instance UI on the cluster using
GitLab Username: |
sample_user1 |
GitLab Password: |
sample_KQt21WpVVWzo |
| You can also create an empty repository in GitLab with just a README and clone this to your console - but since we already have a repo, we’ll use that. However, for our signing and verification exercise, the actual content isn’t really important, so an arbitrary repo will do. |
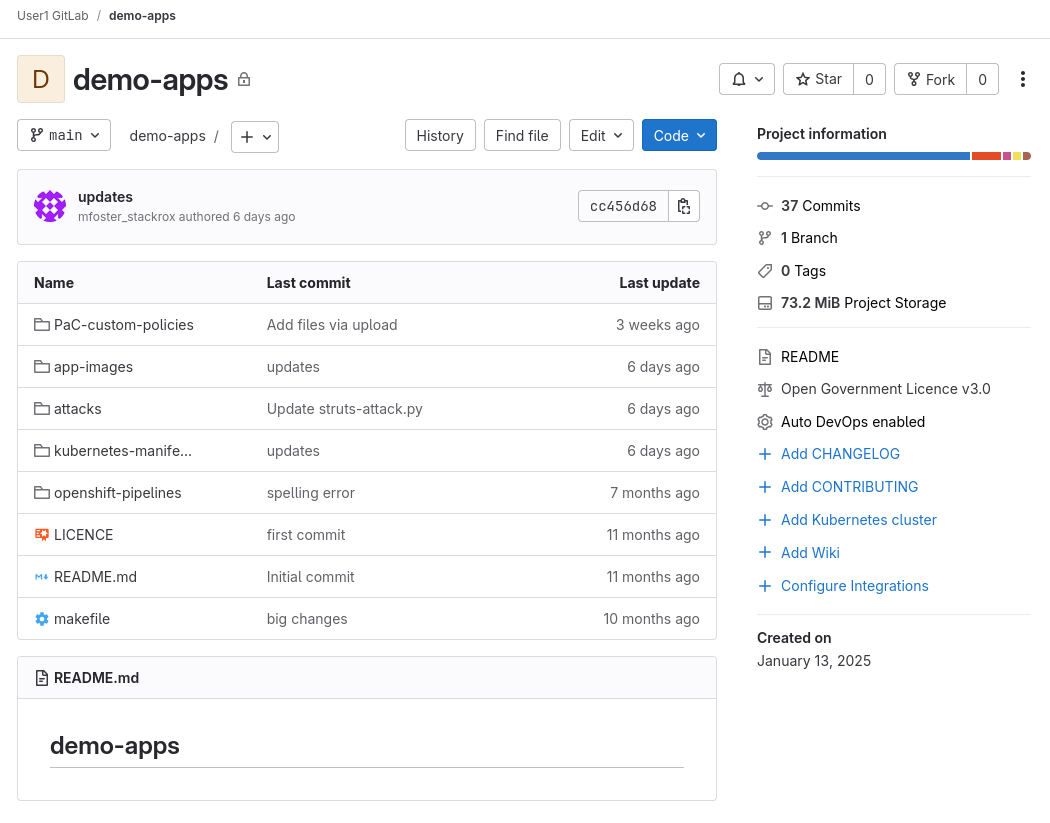
Your GitLab instance, logged in as user1:
So, before we proceed, let’s quickly push our local git repo to GitLab:
-
In our local repository, let’s replace the origin with the a new one on GitLab:
export GITLAB_REPO_URL=https://$(oc get route gitlab -n gitlab | tail -n 1 | awk '{print $2}')/user1/demo-apps.git
git remote remove origin
git remote add origin $GITLAB_REPO_URL
git remote -v
[lab-user@bastion demo-apps]$ export GITLAB_REPO_URL=https://$(oc get route gitlab -n gitlab | tail -n 1 | awk '{print $2}')/user1/demo-apps.git
[lab-user@bastion demo-apps]$ git remote remove origin
[lab-user@bastion demo-apps]$ git remote add origin $GITLAB_REPO_URL
[lab-user@bastion demo-apps]$ git remote -v
origin https://gitlab-gitlab.apps.cluster-47fg6.47fg6.sandbox2892.opentlc.com/user1/demo-apps.git (fetch)
origin https://gitlab-gitlab.apps.cluster-47fg6.47fg6.sandbox2892.opentlc.com/user1/demo-apps.git (push)-
Now let’s push it to GitLab
git push --set-upstream origin mainUse the GitLab username and password from above ( sample_user1 / sample_KQt21WpVVWzo )
[lab-user@bastion demo-apps]$ git push --set-upstream origin main
Username for 'https://gitlab-gitlab.apps.cluster-47fg6.47fg6.sandbox2892.opentlc.com': user1
Password for 'https://user1@gitlab-gitlab.apps.cluster-47fg6.47fg6.sandbox2892.opentlc.com':
Enumerating objects: 2907, done.
Counting objects: 100% (2907/2907), done.
Delta compression using up to 32 threads
Compressing objects: 100% (2240/2240), done.
Writing objects: 100% (2907/2907), 73.15 MiB | 137.19 MiB/s, done.
Total 2907 (delta 499), reused 2907 (delta 499), pack-reused 0
remote: Resolving deltas: 100% (499/499), done.
remote:
remote:
remote: The private project user1/demo-apps was successfully created.
remote:
remote: To configure the remote, run:
remote:   git remote add origin https://gitlab-gitlab.apps.cluster-47fg6.47fg6.sandbox2892.opentlc.com/user1/demo-apps.git
remote:
remote: To view the project, visit:
remote:   https://gitlab-gitlab.apps.cluster-47fg6.47fg6.sandbox2892.opentlc.com/user1/demo-apps
remote:
remote:
remote:
To https://gitlab-gitlab.apps.cluster-47fg6.47fg6.sandbox2892.opentlc.com/user1/demo-apps.git
 * [new branch]      main -> main
branch 'main' set up to track 'origin/main'.-
(optional) If you’d like to double check on GitLab, go to the app repo
-
Configure
git
As stated above, we could use the gitsign command directly - but it is much easier to configure your git environment to use gitsign:
git config --local commit.gpgsign true
git config --local tag.gpgsign true
git config --local gpg.x509.program gitsign
git config --local gpg.format x509
git config --local gitsign.fulcio $SIGSTORE_FULCIO_URL
git config --local gitsign.rekor $SIGSTORE_REKOR_URL
git config --local gitsign.issuer $SIGSTORE_OIDC_ISSUER
git config --local gitsign.clientID trusted-artifact-signer
git config --local --list
[lab-user@bastion demo-apps]$ git config --local commit.gpgsign true
git config --local tag.gpgsign true
git config --local gpg.x509.program gitsign
git config --local gpg.format x509
git config --local gitsign.fulcio $SIGSTORE_FULCIO_URL
git config --local gitsign.rekor $SIGSTORE_REKOR_URL
git config --local gitsign.issuer $SIGSTORE_OIDC_ISSUER
git config --local gitsign.clientID trusted-artifact-signer
git config --local --list
core.repositoryformatversion=0
core.filemode=true
core.bare=false
core.logallrefupdates=true
remote.origin.url=https://gitlab-gitlab.apps.cluster-47fg6.47fg6.sandbox2892.opentlc.com/user1/demo-apps.git
remote.origin.fetch=+refs/heads/*:refs/remotes/origin/*
branch.main.remote=origin
branch.main.merge=refs/heads/main
commit.gpgsign=true
tag.gpgsign=true
gpg.x509.program=gitsign
gpg.format=x509
gitsign.fulcio=https://fulcio-server-trusted-artifact-signer.apps.cluster-47fg6.47fg6.sandbox2892.opentlc.com
gitsign.rekor=https://rekor-server-trusted-artifact-signer.apps.cluster-47fg6.47fg6.sandbox2892.opentlc.com
gitsign.issuer=https://keycloak-rhsso.apps.cluster-47fg6.47fg6.sandbox2892.opentlc.com/auth/realms/openshift
gitsign.clientid=trusted-artifact-signerSigning a commit
Now, let’s quickly modify our repo and commit the changes (you can of course make any modification you like, we’ll simply add an empty file)
touch make-a-commit.txt
git add .
git status
[lab-user@bastion demo-apps]$ touch make-a-commit.txt
git add .
git status
On branch main
Your branch is up to date with 'origin/main'.
Changes to be committed:
(use "git restore --staged <file>..." to unstage)
new file: make-a-commit.txtgit commit -m "added an empty file"| Similarly to signing an image, you will be asked to open your browser to the OIDC System (in our case Keycloak) to authenticate. This is because you are working in an SSH session with no connection to your local computer, so it can’t automatically open your browser. |
Please use the "signing user" jdoe@redhat.com with password secure again.
[lab-user@bastion demo-apps]$ git commit -m "added an empty file"
error opening browser: exec: "xdg-open": executable file not found in $PATH
Go to the following link in a browser:

         https://keycloak-rhsso.apps.cluster-47fg6.47fg6.sandbox2892.opentlc.com/auth/realms/openshift/protocol/openid-connect/auth?access_type=online&client_id=trusted-artifact-signer&code_challenge=QzAAVp3Bo82vhdN0DFX1nUBHA3iSzrvD1-GFxj58xCI&code_challenge_method=S256&nonce=2raUg4ukP7RtOKQCOJiVfYyCQp2&redirect_uri=urn%3Aietf%3Awg%3Aoauth%3A2.0%3Aoob&response_type=code&scope=openid+email&state=2raUg74ynB8w1azNM8rV5va2Ypr
Enter verification code:
tlog entry created with index: 2
[main 390aeb4] added an empty file
 Committer: Red Hat Demo Platform Student <lab-user@bastion.47fg6.internal>
Your name and email address were configured automatically based
on your username and hostname. Please check that they are accurate.
You can suppress this message by setting them explicitly. Run the
following command and follow the instructions in your editor to edit
your configuration file:

    git config --global --edit

After doing this, you may fix the identity used for this commit with:

    git commit --amend --reset-author

 1 file changed, 0 insertions(+), 0 deletions(-)
 create mode 100644 make-a-commit.txt
gitsign doesn’t echo the output of the verification code, so don’t worry if you don’t see it when pasting from your browser.
|
If you look closer at the git console output, you will notice that you have committed your code change as "Red Hat Demo Platform Student". That is because your git environment hasn’t been configured with an explicit user. It is important to understand that we have two user types here - and depending on your requirements, these can be the same or different users: Firstly, the committer. This is what git is storing as the user metadata. However, this is not secure, as it can be changed easily, just by configuring your local git environment. Secondly, the signer - in our case, "jdoe@redhat.com". Since that user just authenticated against the "Company SSO" (Keycloak), this signature is safe - and furthermore, the signing event in the transparency log cannot be altered. This also gives a user the option to work in different git systems with different committer IDs - but all commits would be signed with the same identifiable OIDC identity.
|
Now we can push the signed commit to our remote GitLab repository:
Remember to use the GitLab username and password from above ( sample_user1 / sample_KQt21WpVVWzo )
git push[lab-user@bastion demo-apps]$ git push
Username for 'https://gitlab-gitlab.apps.cluster-47fg6.47fg6.sandbox2892.opentlc.com': user1
Password for 'https://user1@gitlab-gitlab.apps.cluster-47fg6.47fg6.sandbox2892.opentlc.com':
Enumerating objects: 4, done.
Counting objects: 100% (4/4), done.
Delta compression using up to 32 threads
Compressing objects: 100% (2/2), done.
Writing objects: 100% (3/3), 1.41 KiB | 1.41 MiB/s, done.
Total 3 (delta 1), reused 1 (delta 0), pack-reused 0
To https://gitlab-gitlab.apps.cluster-47fg6.47fg6.sandbox2892.opentlc.com/user1/demo-apps.git
cc456d6..390aeb4 main -> main| If you check the GitLab repository after you pushed the commit, you might have noticed the "unverified" badge. It means that GitLab recognizes that the commit has been signed, but currently GitLab cannot verify "keyless" signatures - however, given the demand and ease of use of Sigstore / Trusted Artifact Signer, many vendors (including the GitLab community and company backing it) are working on it: GitLab issue |

Verifying a commit signature
Now that we have signed our latest commit (and pushed it), first let’s take a look at the signature.
With the traditional git show <commit-hash> we’d get a mixture of signature and actual commit information. Depending on your usecase and personal taste, this might be sufficient or not.
git show --show-signature[lab-user@bastion demo-apps]$ git show --show-signature
commit d9f7258dfc05d6d86d197fc3c4ac54e2a4bcfbe6 (HEAD -> main, origin/main)
tlog index: 2
gitsign: Signature made using certificate ID 0x463cfdb3c69173adfeead655e333194e53fb23ad | CN=fulcio.hostname,O=Red Hat
gitsign: Good signature from [jdoe@redhat.com](https://keycloak-rhsso.apps.cluster-lpv5s.lpv5s.sandbox1300.opentlc.com/auth/realms/openshift)
Validated Git signature: true
Validated Rekor entry: true
Validated Certificate claims: false
WARNING: git verify-commit does not verify cert claims. Prefer using `gitsign verify` instead.
Author: Red Hat Demo Platform Student <lab-user@bastion.lpv5s.internal>
Date: Mon Aug 4 16:08:41 2025 0000
added an empty file
diff --git a/app-images/frontend/Dockerfile b/app-images/frontend/Dockerfile
index 8af98676..fb442656 100644
--- a/app-images/frontend/Dockerfile
++ b/app-images/frontend/Dockerfile
@@ -1,4 +1,4 @@
-FROM python:3.12-alpine AS build
+FROM quay-lpv5s.apps.cluster-lpv5s.lpv5s.sandbox1300.opentlc.com/quayadmin/python-alpine-golden:0.1 AS build
# Install Bash and other dependencies
RUN apk add --no-cache bash
@@ -13,7 +13,7 @@ RUN pip install --no-cache-dir Django==1.11.29
RUN pip install --no-cache-dir requests==2.19.0
RUN pip install --no-cache-dir PyYAML==3.12
-FROM python:3.12-alpine AS run
+FROM quay-lpv5s.apps.cluster-lpv5s.lpv5s.sandbox1300.opentlc.com/quayadmin/python-alpine-golden:0.1 AS run
# Install Bash in the runtime container
RUN apk add --no-cache bash
diff --git a/make-a-commit.txt b/make-a-commit.txt
new file mode 100644
index 00000000..e69de29bgitsign gives us a similar command that allows us to inspect the signature and its metadata in more detail: gitsign show <commit-hash>
gitsign show[lab-user@bastion demo-apps]$ gitsign show
{
"_type": "https://in-toto.io/Statement/v0.1",
"predicateType": "https://gitsign.sigstore.dev/predicate/git/v0.1",
"subject": [
{
"name": "https://gitlab-gitlab.apps.cluster-lpv5s.lpv5s.sandbox1300.opentlc.com/user1/demo-apps.git",
"digest": {
"sha1": "d9f7258dfc05d6d86d197fc3c4ac54e2a4bcfbe6"
}
}
],
"predicate": {
"source": {
"tree": "45c938637cb151eb384e43a730d1dcd4e812c20c",
"parents": [
"91b7f65b245b1e0b925747c20fee4c83a683cc16"
],
"author": {
"name": "Red Hat Demo Platform Student",
"email": "lab-user@bastion.lpv5s.internal",
"date": "2025-08-04T16:08:41Z"
},
"committer": {
"name": "Red Hat Demo Platform Student",
"email": "lab-user@bastion.lpv5s.internal",
"date": "2025-08-04T16:08:41Z"
},
"message": "added an empty file\n"
},
"signature": "-----BEGIN SIGNED MESSAGE-----\nMIIEmAYJKoZIhvcNAQcCoIIEiTCC
...
upWtFh86YBa5P7do2vALyfoDxb3GMcVZCawg==\n-----END SIGNED MESSAGE-----\n",
"signer_info": [
{
"attributes": "MWkwGAYJKoZIhvcNAQkDMQsGCSqGSIb3DQEHATAcBgkqhkiG9w0BCQUxDxcNMjUwODA0MTYwOTA2WjAvBgkqhkiG9w0BCQQxIgQgAgWjvWIIh+ltKuFl0+t9ov73qpaDNyWgiz+D2Vh6iIo=",
"certificate": "-----BEGIN CERTIFICATE-----\nMIIDQDCCAsegAwIBAgIUZsHGCFYOhYsRXkb
...
2wVuy1ruf0yUPvDc2wZIy4=\n-----END CERTIFICATE-----\n"
}
]
}
}
It is important to note that this just shows the signature information - this could in theory be forged and does not count as verification (see the warning in the git show command output above: WARNING: git verify-commit does not verify cert claims. Prefer using `gitsign verify instead.)!
|
Ok, now that we have seen what signing information is stored in our git repo, let’s verify this information against the Rekor transparency database and the trust root:
Similar to the image signature verification examples above, we can explicitly check if the commit was really signed by our colleague Jon Doe and he authenticated against the Keycloak instance:
gitsign verify --certificate-identity=jdoe@redhat.com --certificate-oidc-issuer $OIDC_ISSUER_URL[lab-user@bastion demo-apps]$ gitsign verify --certificate-identity=jdoe@redhat.com --certificate-oidc-issuer $OIDC_ISSUER_URL
tlog index: 2
gitsign: Signature made using certificate ID 0x463cfdb3c69173adfeead655e333194e53fb23ad | CN=fulcio.hostname,O=Red Hat
gitsign: Good signature from [jdoe@redhat.com](https://keycloak-rhsso.apps.cluster-lpv5s.lpv5s.sandbox1300.opentlc.com/auth/realms/openshift)
Validated Git signature: true
Validated Rekor entry: true
Validated Certificate claims: trueSince coding is a team effort, we don’t want to be too restrictive here, so let’s verify that someone from Red Hat signed this commit and authenticated against any OIDC system in the opentlc.com domain:
gitsign verify --certificate-identity-regexp ^[a-zA-Z0-9._%+-]+@redhat\.com$ --certificate-oidc-issuer-regexp \.opentlc\.com[lab-user@bastion demo-apps]$ gitsign verify --certificate-identity-regexp ^[a-zA-Z0-9._%-]@redhat\.com$ --certificate-oidc-issuer-regexp \.opentlc\.com
tlog index: 2
gitsign: Signature made using certificate ID 0x463cfdb3c69173adfeead655e333194e53fb23ad | CN=fulcio.hostname,O=Red Hat
gitsign: Good signature from [jdoe@redhat.com](https://keycloak-rhsso.apps.cluster-lpv5s.lpv5s.sandbox1300.opentlc.com/auth/realms/openshift)
Validated Git signature: true
Validated Rekor entry: true
Validated Certificate claims: trueSummary
With keyless signing and verification, both for container images (or any blob, to be exact) and git commits, we have established artifact and commit integrity, security AND traceability - without the need to create, distribute and manage public/private key pairs.
The artifact is now:
-
Signed: By using a Sigstore client (cosign/gitsign).
-
Associated: With an identity through the certificate authority (Fulcio).
-
Witnessed: By recording the signing information in a permanent transparency log (Rekor).
Trusted Profile Analyzer
The Trusted Profile Analyzer adds management capabilities for Software Bills of Materials (SBOMs) to OpenShift.
What is an SBOM?
CISA.gov defines an SBOM as "a nested inventory, a list of ingredients that make up software components." ¹
Using SBOMs, you can have a clear vision of everything that goes into your application or what you may have received from vendors, such as Red Hat. This enables platform engineers to more easily enforce operational controls and compliance across hybrid multi-cloud environments.
In addition, several regulatory requirements and frameworks either mandate or recommend the use of Software Bills of Materials (SBOMs) to enhance software supply chain transparency and security. Here are some key examples, but the list is continually growing:
1. U.S. Executive Order 14028 (Improving the Nation’s Cybersecurity)
-
Mandate: In May 2021, this Executive Order directed the U.S. government to take actions to secure the software supply chain.
-
SBOM Requirement:
-
The National Telecommunications and Information Administration (NTIA) was tasked with defining minimum elements for SBOMs.
-
Vendors providing software to federal agencies must provide SBOMs as part of their cybersecurity practices.
-
Goal: Increase transparency about software components to mitigate risks from vulnerabilities.
-
2. EU Cyber Resilience Act
-
Proposed Mandate: Expected to become law in the near future, this act will apply to products with digital elements in the EU.
-
SBOM Requirement: It encourages or requires organizations to maintain transparency about their software dependencies, including SBOMs, for compliance with security standards.
3. U.S. Food and Drug Administration (FDA) Guidance
-
Recommendation: The FDA issued guidance for medical device manufacturers to include SBOMs.
-
Context: As part of the Pre-market Cybersecurity Guidance for medical devices, manufacturers are encouraged to provide SBOMs to identify vulnerabilities in device software and support risk management.
-
Goal: Protect healthcare systems and patient safety.
4. OWASP Software Component Verification Standard (SCVS)
-
Recommendation: OWASP promotes SBOMs as part of software composition analysis (SCA) to track components and identify vulnerabilities.
-
Context: Although not a regulatory requirement, it is widely recognized in cybersecurity best practices.
5. CISA Binding Operational Directive (BOD) 23-01
-
Mandate: U.S. government agencies are required to track and mitigate known vulnerabilities in software they use.
-
SBOM Role: Although the directive doesn’t explicitly mandate SBOMs, managing them is critical to identifying and addressing vulnerabilities efficiently.
Why SBOMs are Becoming Standard in Regulations
-
Transparency: Knowing what’s in your software reduces the risk of vulnerabilities.
-
Risk Management: SBOMs help identify, track, and remediate issues in the software supply chain.
-
Compliance: They demonstrate adherence to evolving cybersecurity and data privacy laws.
As cybersecurity frameworks continue to evolve, the use of SBOMs is increasingly seen as foundational for compliance and risk mitigation.
Using the Trusted Profile Analyzer UI
A Red Hat Trusted Profile Analyzer has been created for you to use. The proctor will make the URL available to you once you’ve completed the previous section.
When you are given the URL, log into the RHTPA UI using the username and password provided.
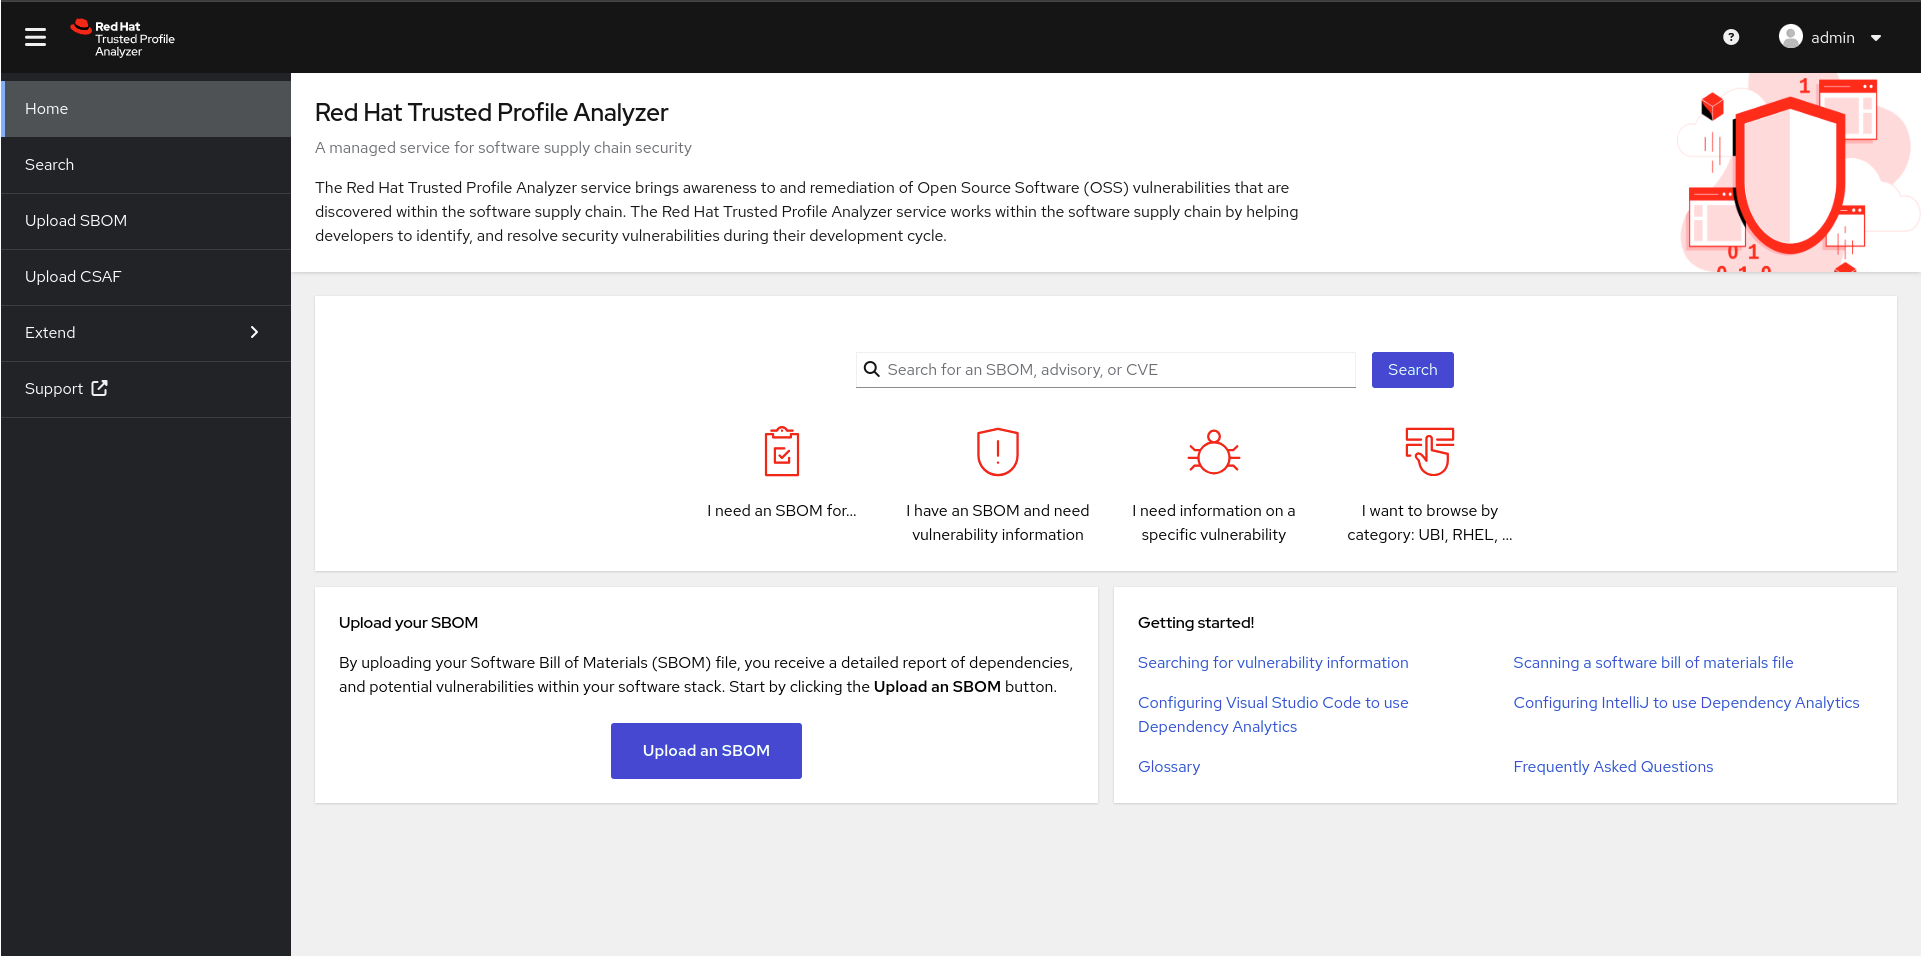
You can search for an SBOM, advisory, or CVE directly from the home page, or you can click on Search in the left menu for further options.
From the Search page, you can choose to browse SBOMs, Packages, CVEs, and Advisories from the Tabs, and further filter using the filter menu on the left.
Let’s take a look at some packages.
Click the Packages tab, then check the Red Hat box under supplier.
The list now shows packages that are supplied by Red Hat.
You may click on a package to get information like related vulnerabilities, if any exist, and related products.
Uploading an SBOM
An SBOM has been made available for you to download here.
Upload the SBOM.
It will take a few minutes for the SBOM to be processed by TPA, so click in the Search bar and type "home". Once you see home-banking, click on it.
This will open the page for the home-banking SBOM you’ve uploaded.
The Info tab will give you standard information about the SBOM itself, including the version, the CycloneDX version, and the serial number.
Click on the Packages tab.
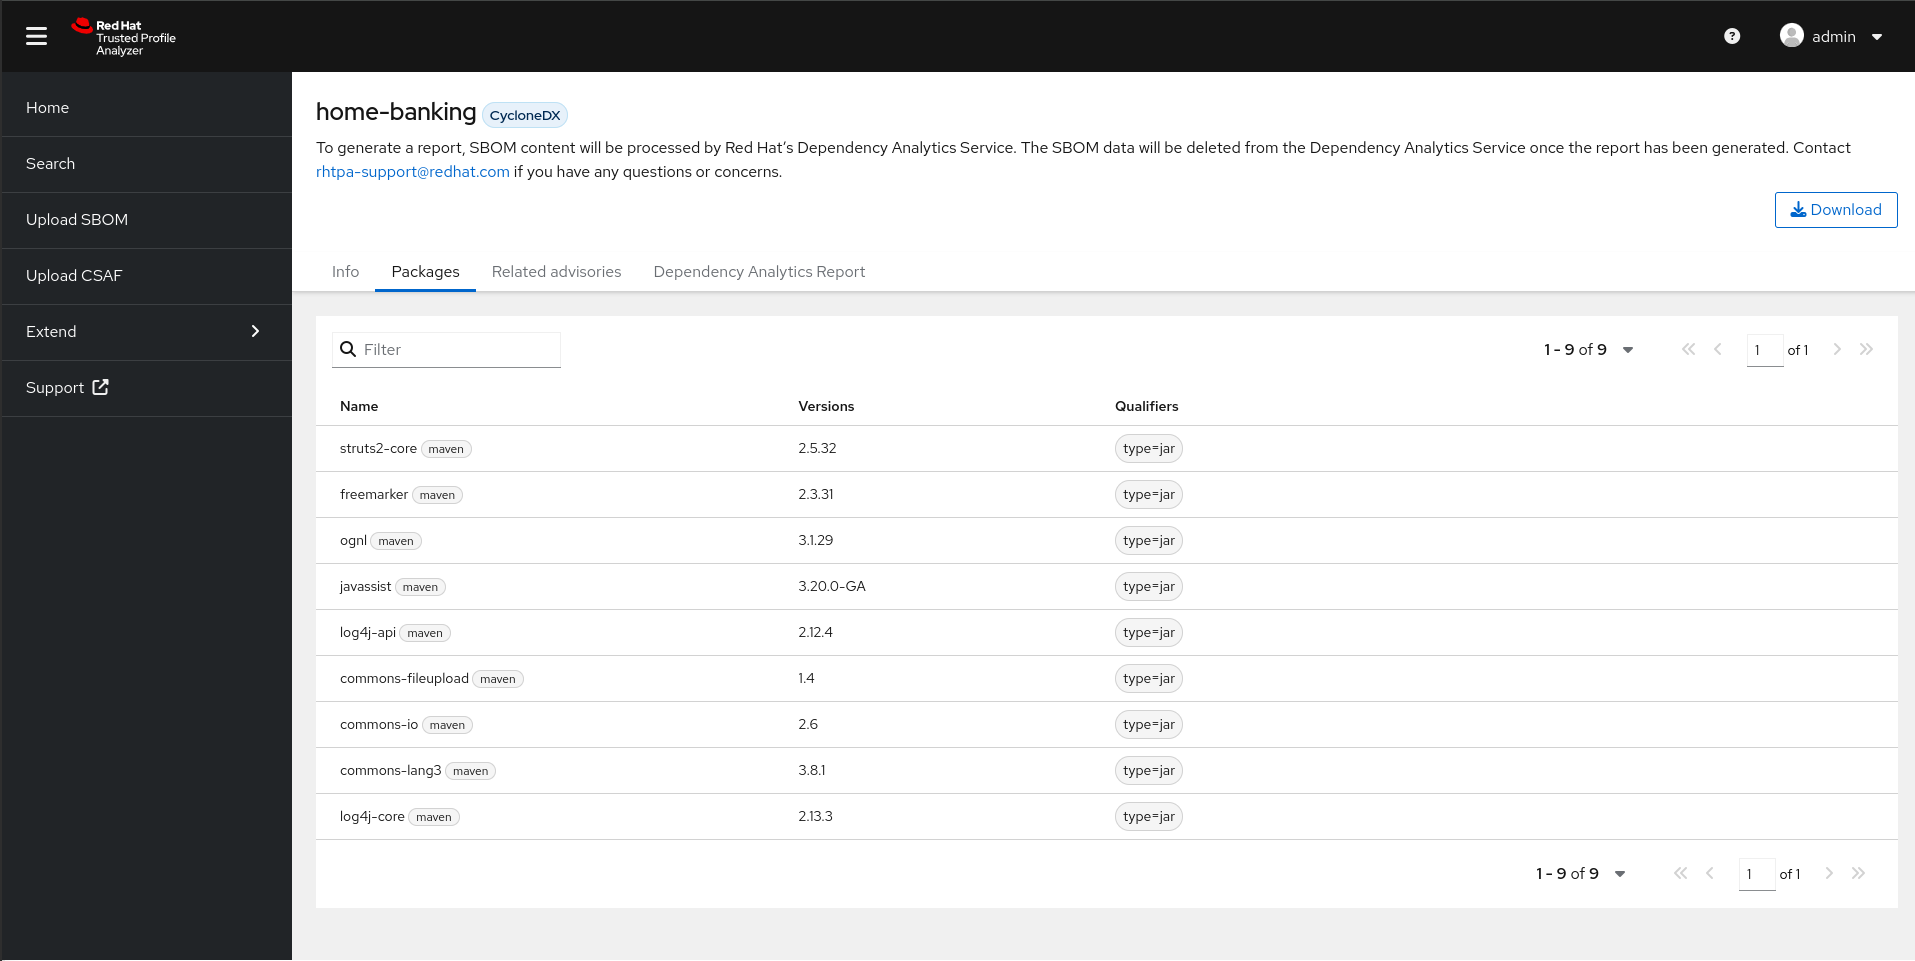
The Packages tab will list all the packages found in this SBOM.
Click on Dependency Analytics Report.
The Dependency Analytics Report tab will list the security issues found in this SBOM. As you can see, there are a number of violations found. 3 of them are Critical, 3 High, and 2 Medium.
Scroll down the page to find the osv tab.
Here you will find further information about the detected vulnerabilities. Clicking on the Direct Vulnerabilities to the right of the log4j entry will expand the entry to show more information about the vulnerabilities, including Remediation.
The same can be done with the Transitive Vulnerabilities next to the struts2-core entry.
Module Cleanup
Once you’re done with this module, kindly execute the following command to reset the content, variables, repositories, etc. for the next user:
curl -fsSL https://raw.githubusercontent.com/redhat-tssc-tmm/security-roadshow/main/cleanup_tssc-module.sh | bash -s sample_quayadmin sample_LSncwGJkXcayY1tUMmr8