Parksmap App
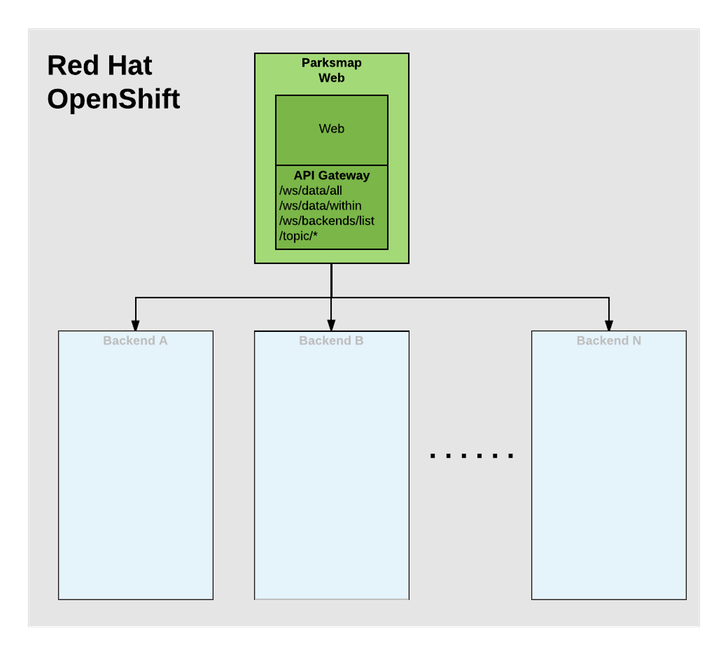
In this section, you’ll deploy the web component of the ParksMap application, also known as parksmap. This component uses OpenShift’s service discovery mechanism to discover backend services and display their data on the map.
Exercise: Deploying Your First Container Image
Let’s start by doing the simplest thing possible - get a plain old Docker - formatted image to run on OpenShift. This is incredibly simple to do. With OpenShift it can be done directly from the web console.
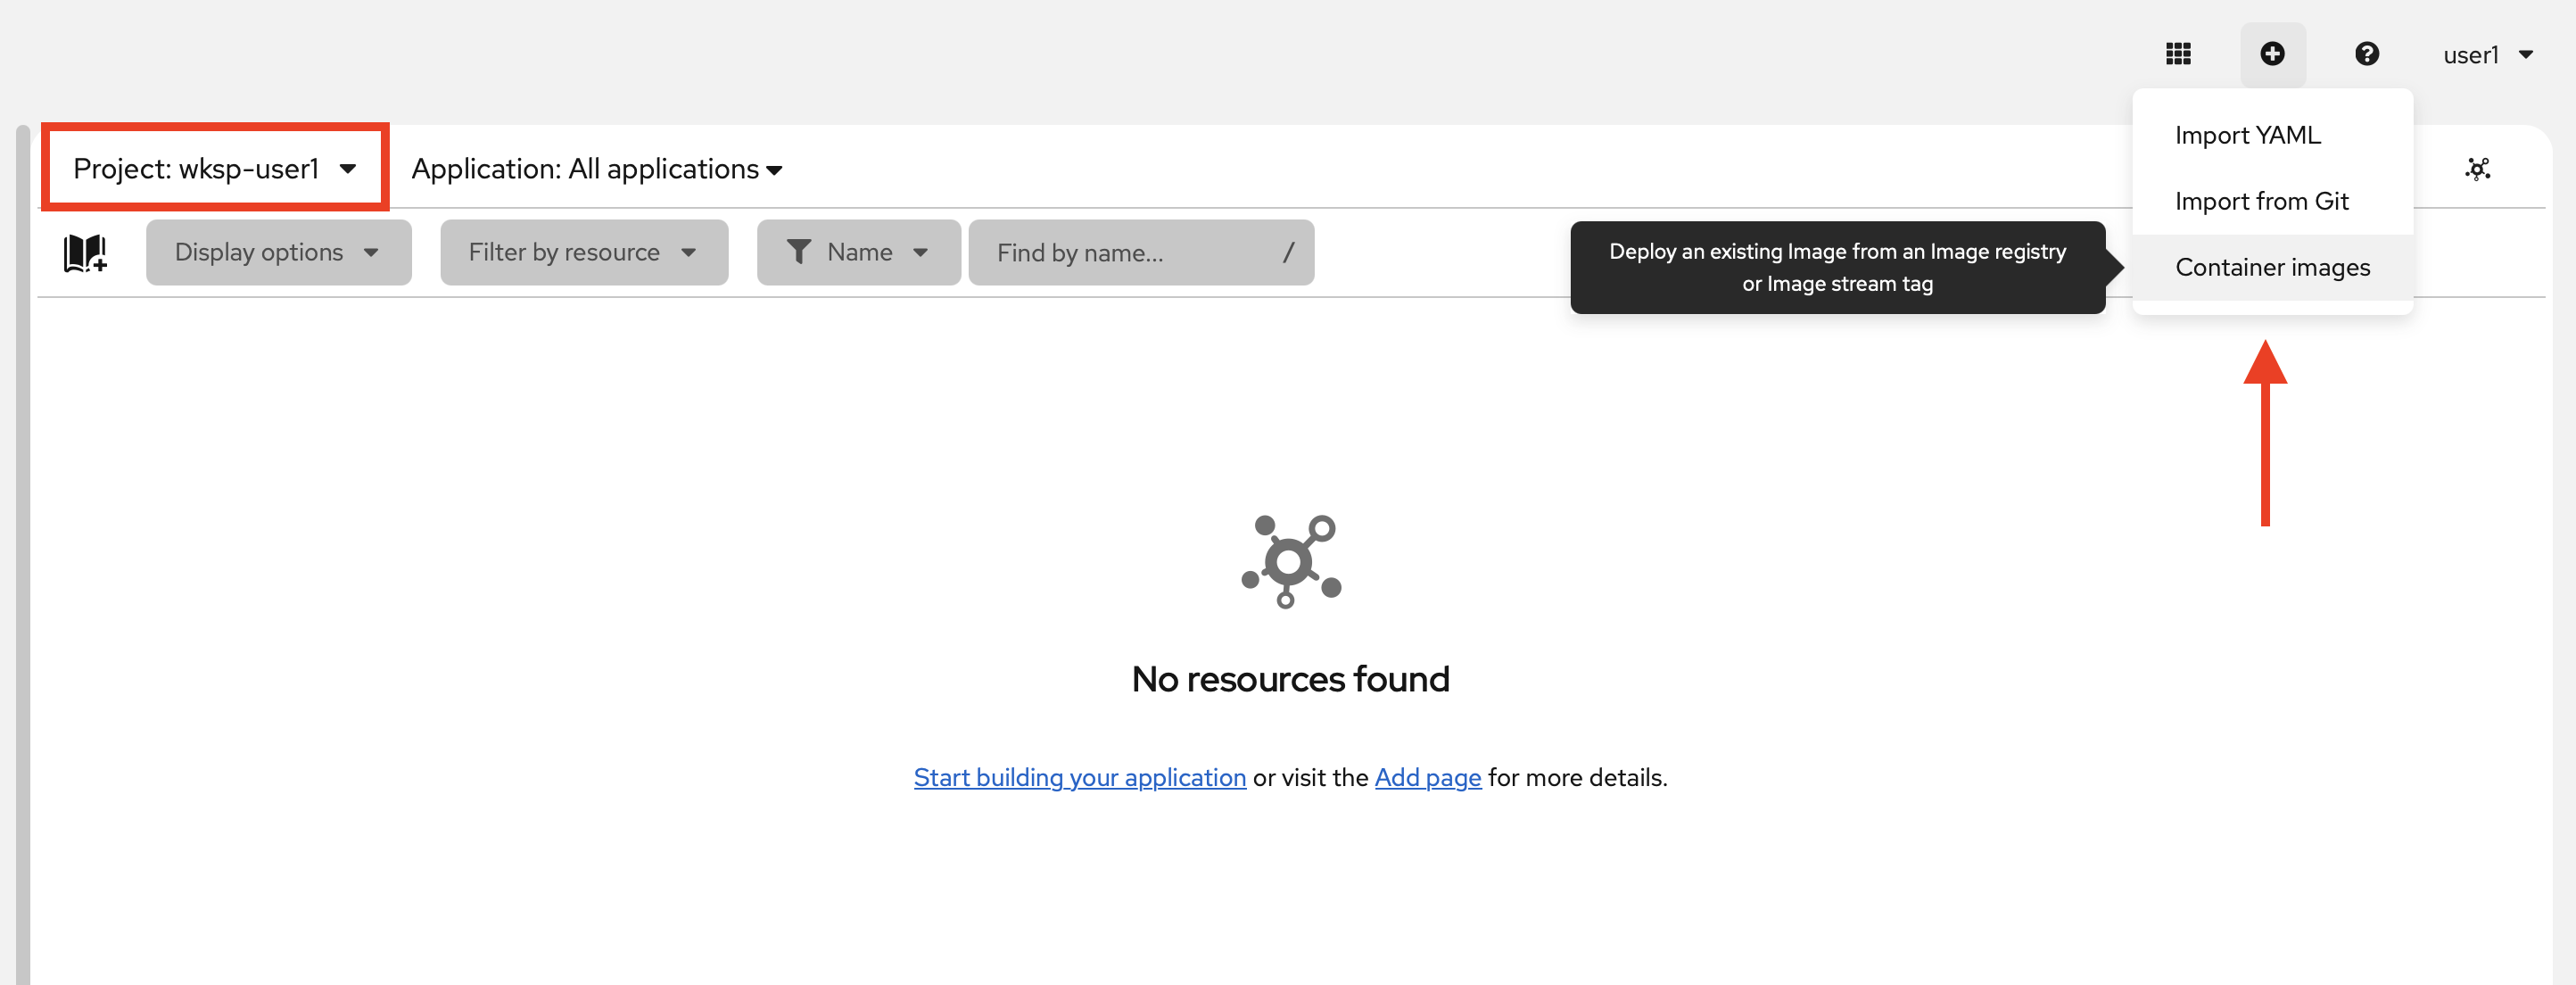
Return to the topology view in the wksp-userX project.
At the top left, click the + icon. You will see a menu where you have multiple options to deploy application to OpenShift. Click Container images to open a dialog that will allow you to specify the information for the image you want to deploy.
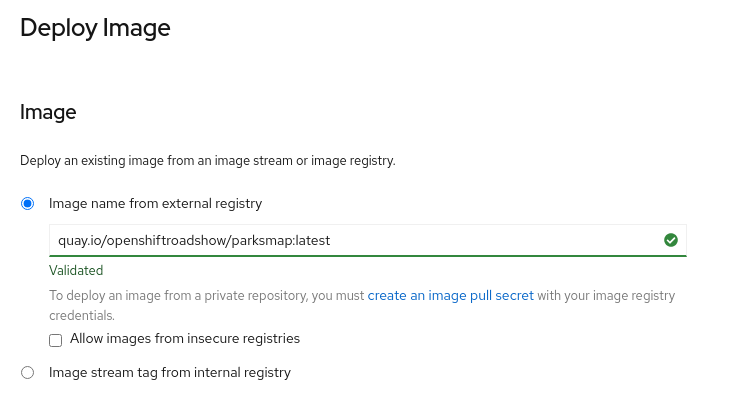
In the Image Name field, copy/paste the following:
quay.io/openshiftroadshow/parksmap:latestOpenShift will then access the specified container registry and retrieve the image details.
Your screen will end up looking something like this:
In Runtime Icon, select the icon for the OpenShift Topology View. Since this frontend is made with Spring Boot, choose spring-boot.
Ensure the following values are set:
Application Name :
workshopName :
parksmap
The Application Name is the name of the overall application, while the Name field represents the name given to an individual component. In this case the parksmap component is the container you’ll deploy.
|
Ensure Deployment is selected from the Resource type section.
| The Resource type will be discussed in detail in later chapters. |
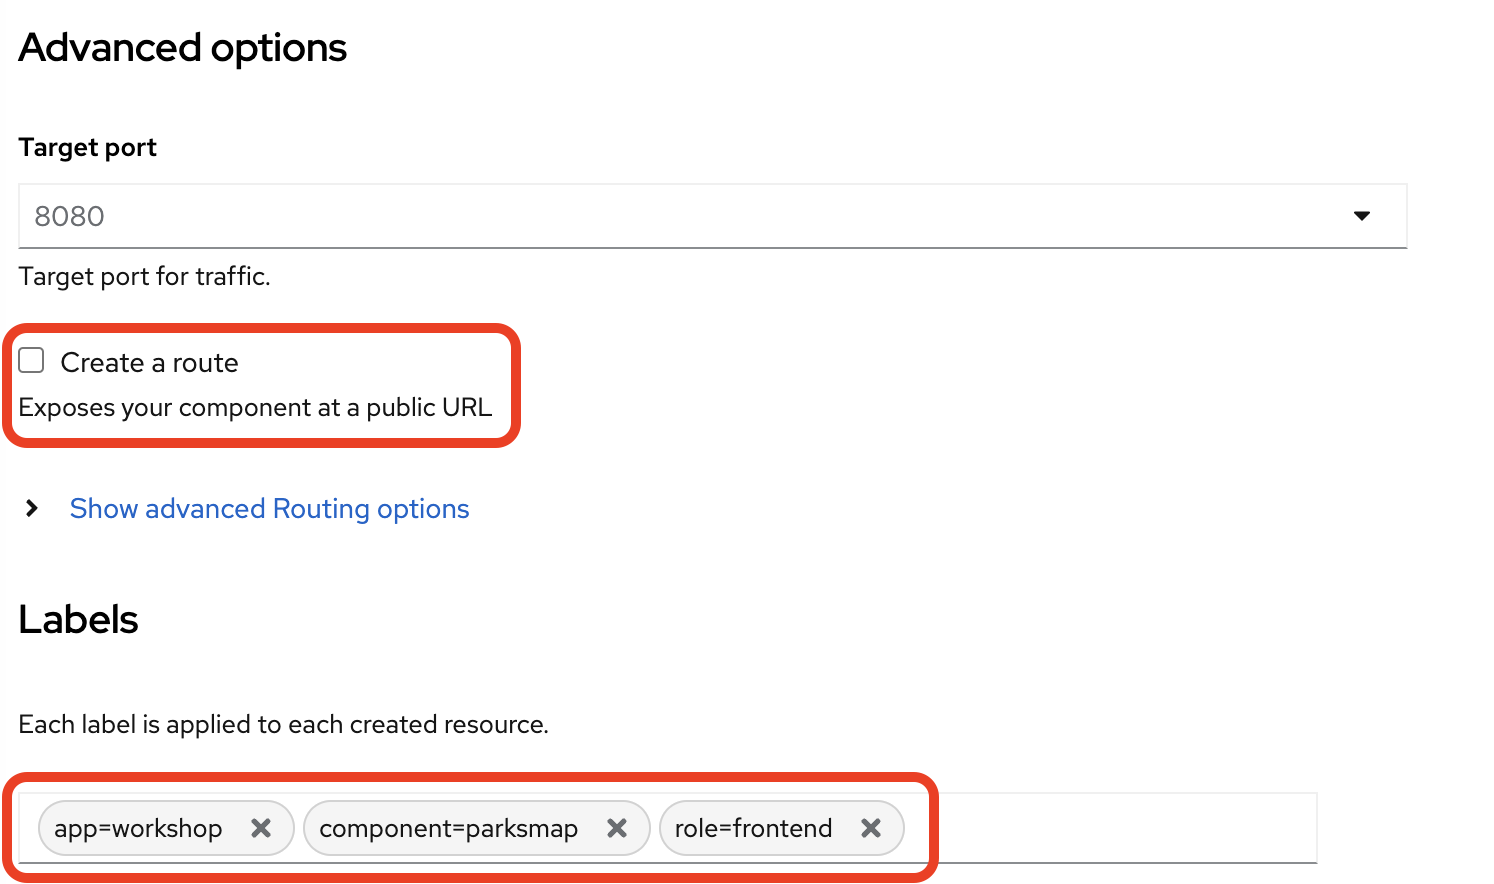
Un-check the checkbox next to Create a route under "Advanced options". You’ll create a Route for the application later in the workshop for learning purposes.
At the bottom of the page, click Labels in the Advanced Options section and add labels that can be used to identify this deployment later. Labels help you identify and filter components in the web console and command line.
Add 3 labels. After entering the name=value pair for each label, press Return (or Enter depending on your keyboard) before typing the next. The first label is the name for the application.
app=workshopNext, the name of this deployment.
component=parksmapAnd finally, the role this component plays in the overall application.
role=frontend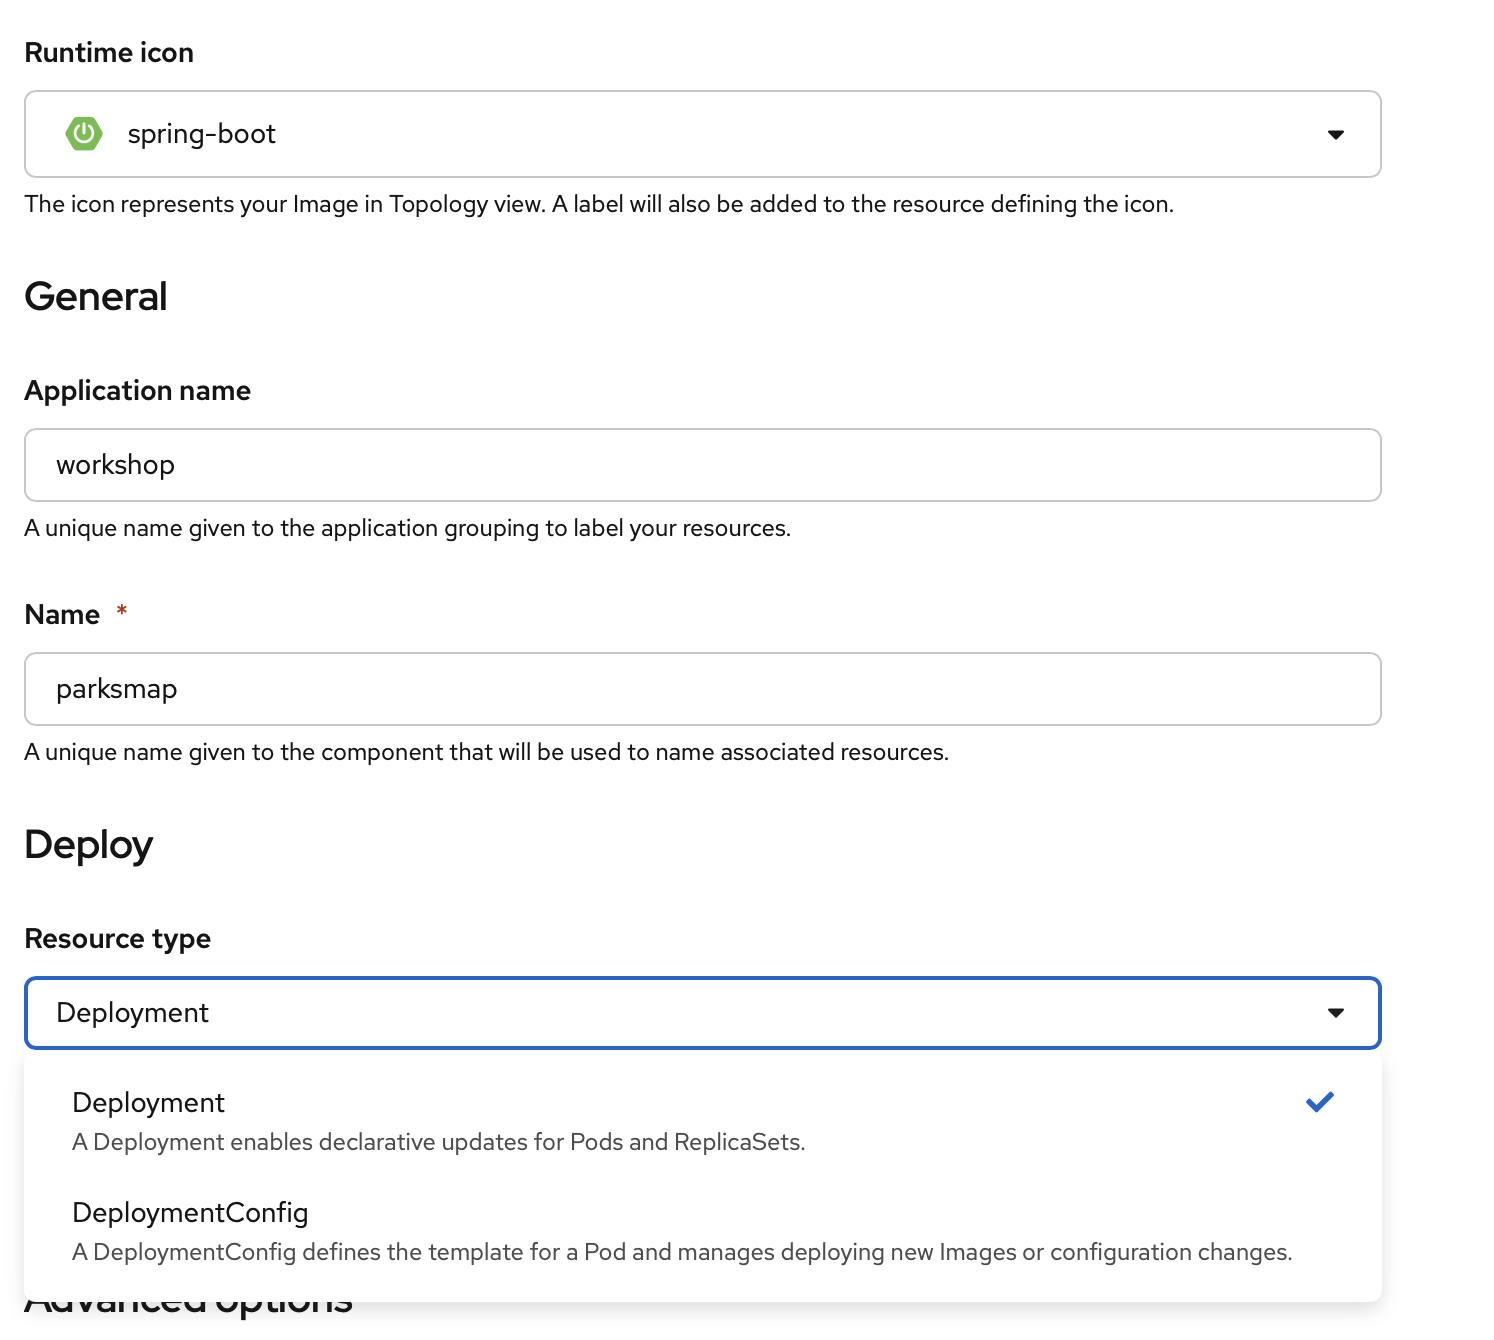
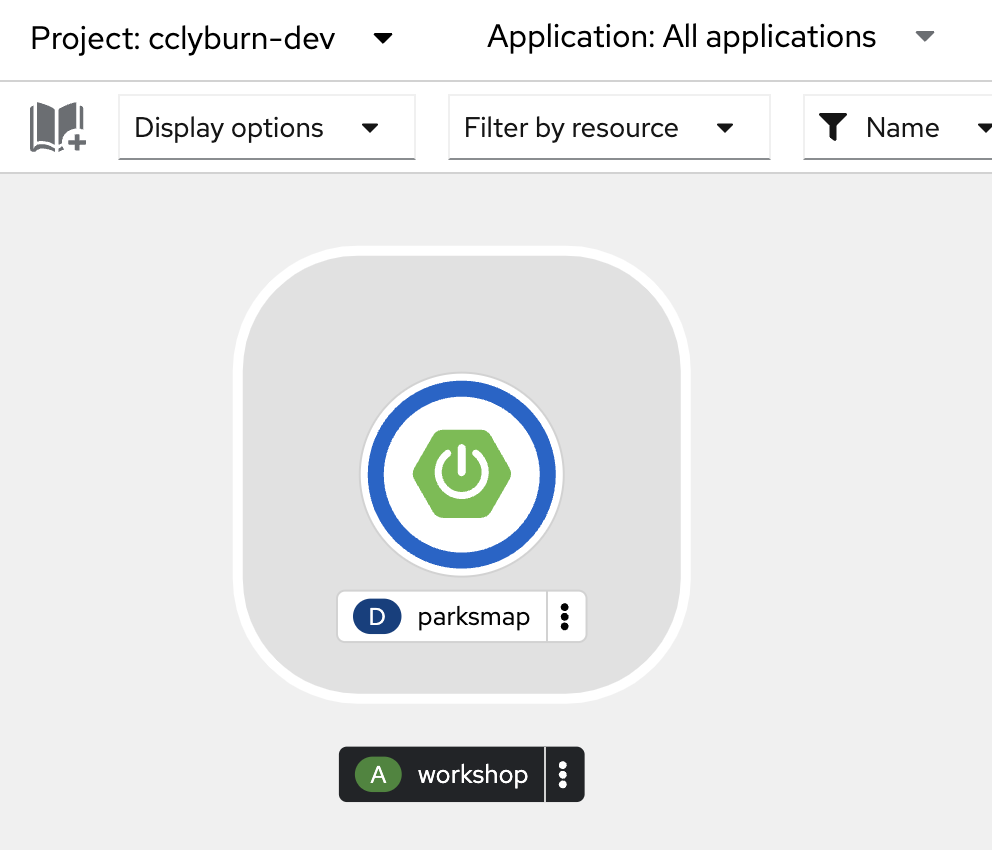
Next, click the blue Create button. You will be directed to the Topology page, where you should see the visualization for the parksmap deployment config in the workshop application.
These steps are all you need to deploy a container image on OpenShift. This will work with any container image that follows best practices, such as defining an EXPOSE port, not needing to run as the root user or other user name, and a single non-exiting CMD to execute on start. You can see these in the application’s Dockerfile.
| Providing appropriate labels is important when deploying applications at scale. OpenShift uses a label app to define and group components together in the Overview page. OpenShift will create this label with a default value if you don’t provide it explicitly. |
Background: Containers and Pods
Before diving in, it’s important to understand how containers and Pods are related. This workshop won’t cover the background on these technologies, but if you have questions, please inform the instructor. Instead, you’ll dive right in and start using them.
In OpenShift (and Kubernetes), the smallest deployable unit is a Pod. A Pod is a group of one or more OCI containers deployed together and guaranteed to be on the same host. From the official OpenShift documentation:
Each Pod has its own IP address, therefore owning its entire port space, and containers within pods can share storage. Pods can be "tagged" with one or more labels, which are then used to select and manage groups of Pods in a single operation.
Pods can contain multiple OCI containers. The general idea is for a Pod to contain a "main process" and any auxiliary services you want to run along with that process. Examples of containers you might put in a Pod are, an Apache HTTPD server, a log analyzer, and a file service to help manage uploaded files.
Exercise: Examining the Pod
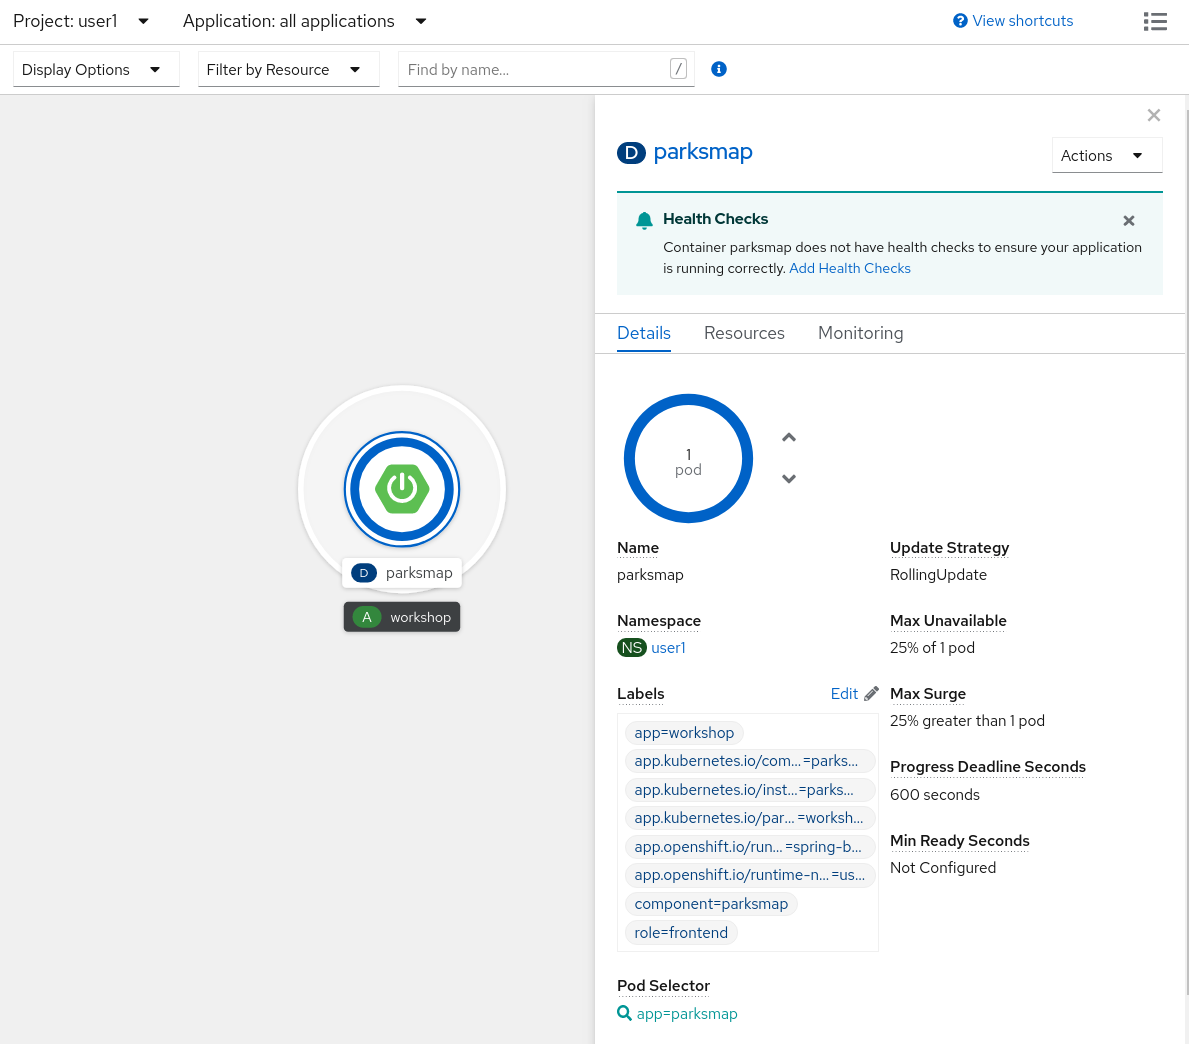
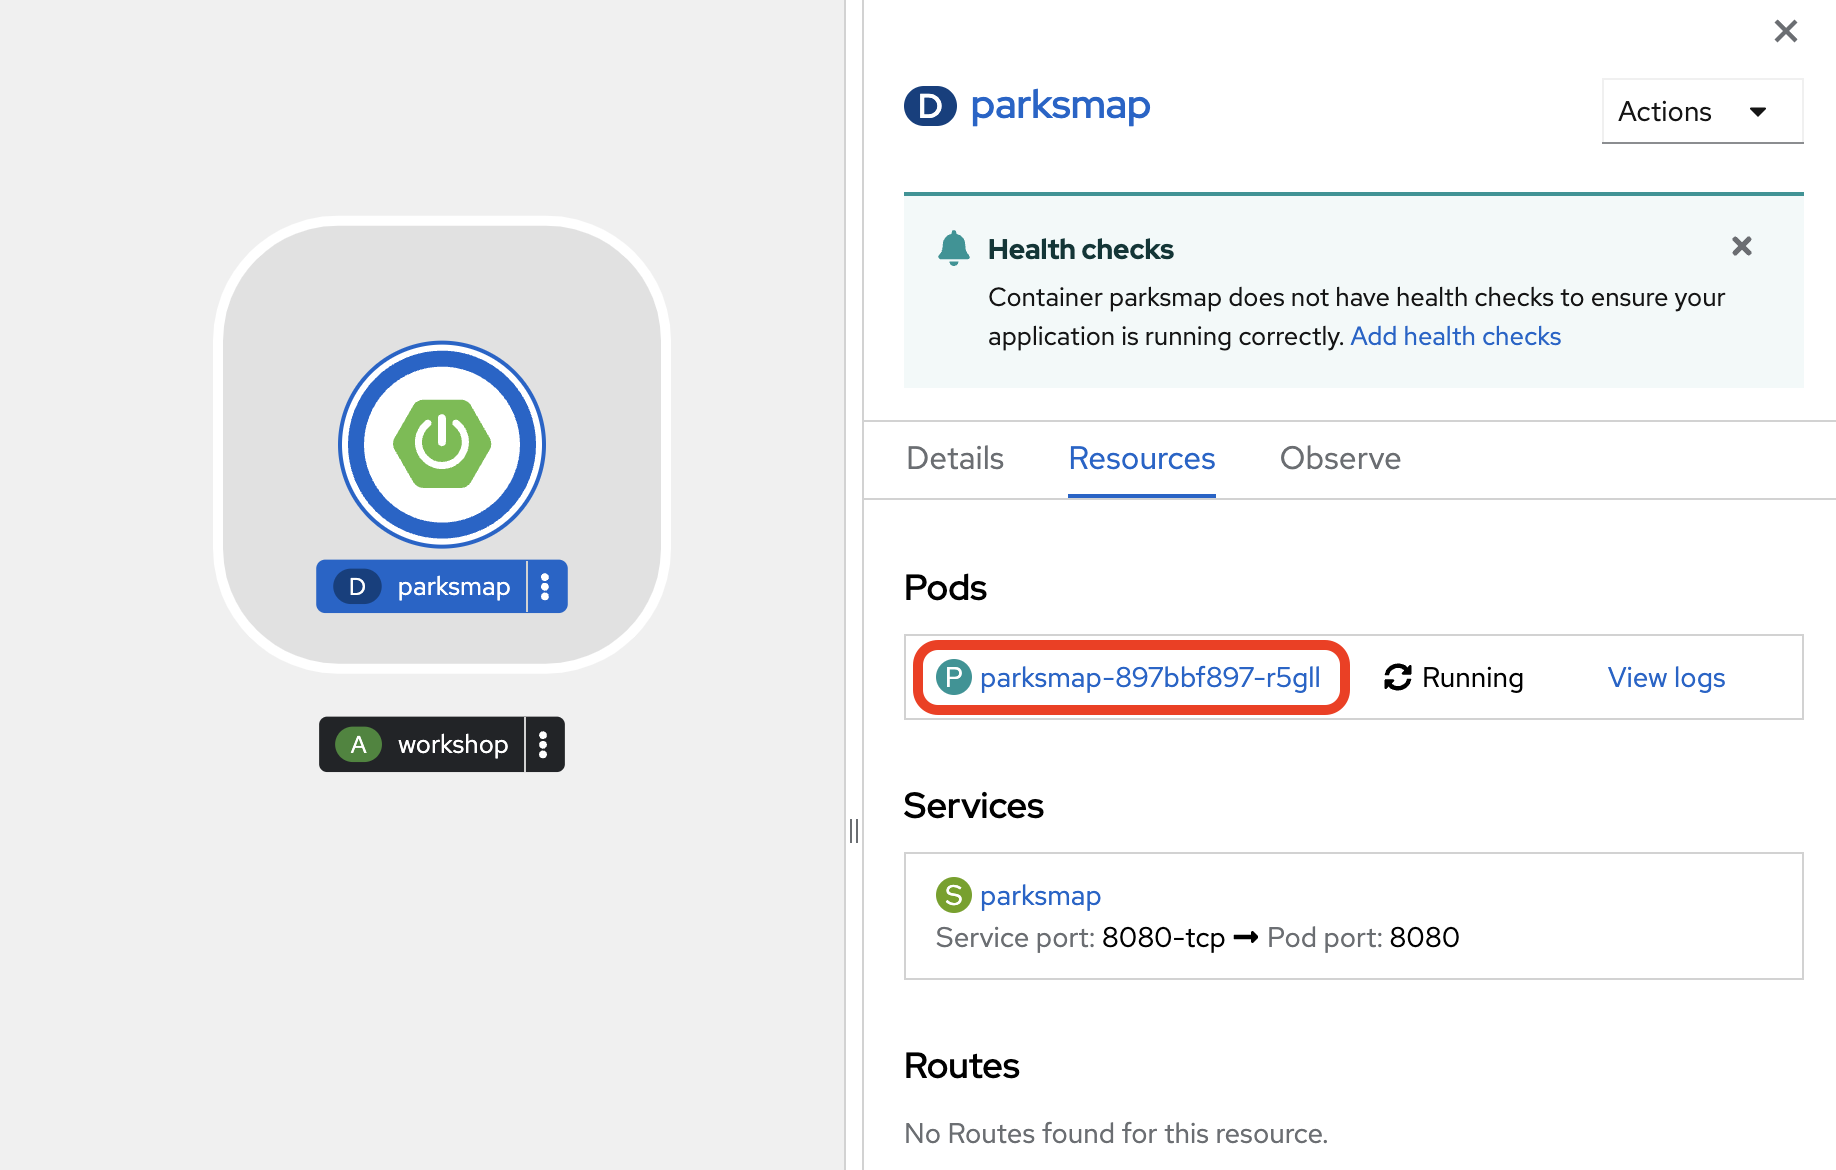
If you click on the parksmap entry in the Topology view, you’ll see information about the deployment. The Resources tab may be displayed by default. If so, click on the Details tab.
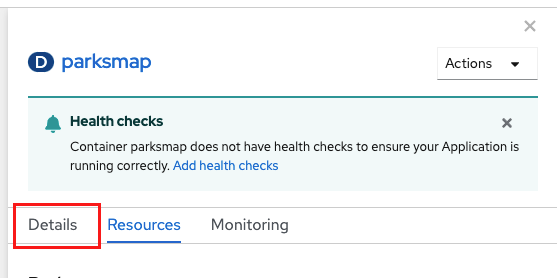
On that panel, you will see that there is a single Pod that was created by your actions.
| You’ll notice in this view an info box suggesting to add Health checks for your app. You’ll take care of this later, so for now, you can just close this info box by clicking on the top-right X icon. |
You can also get a list of all the Pods created within your Project, by navigating to Workloads → Pods in the web console.
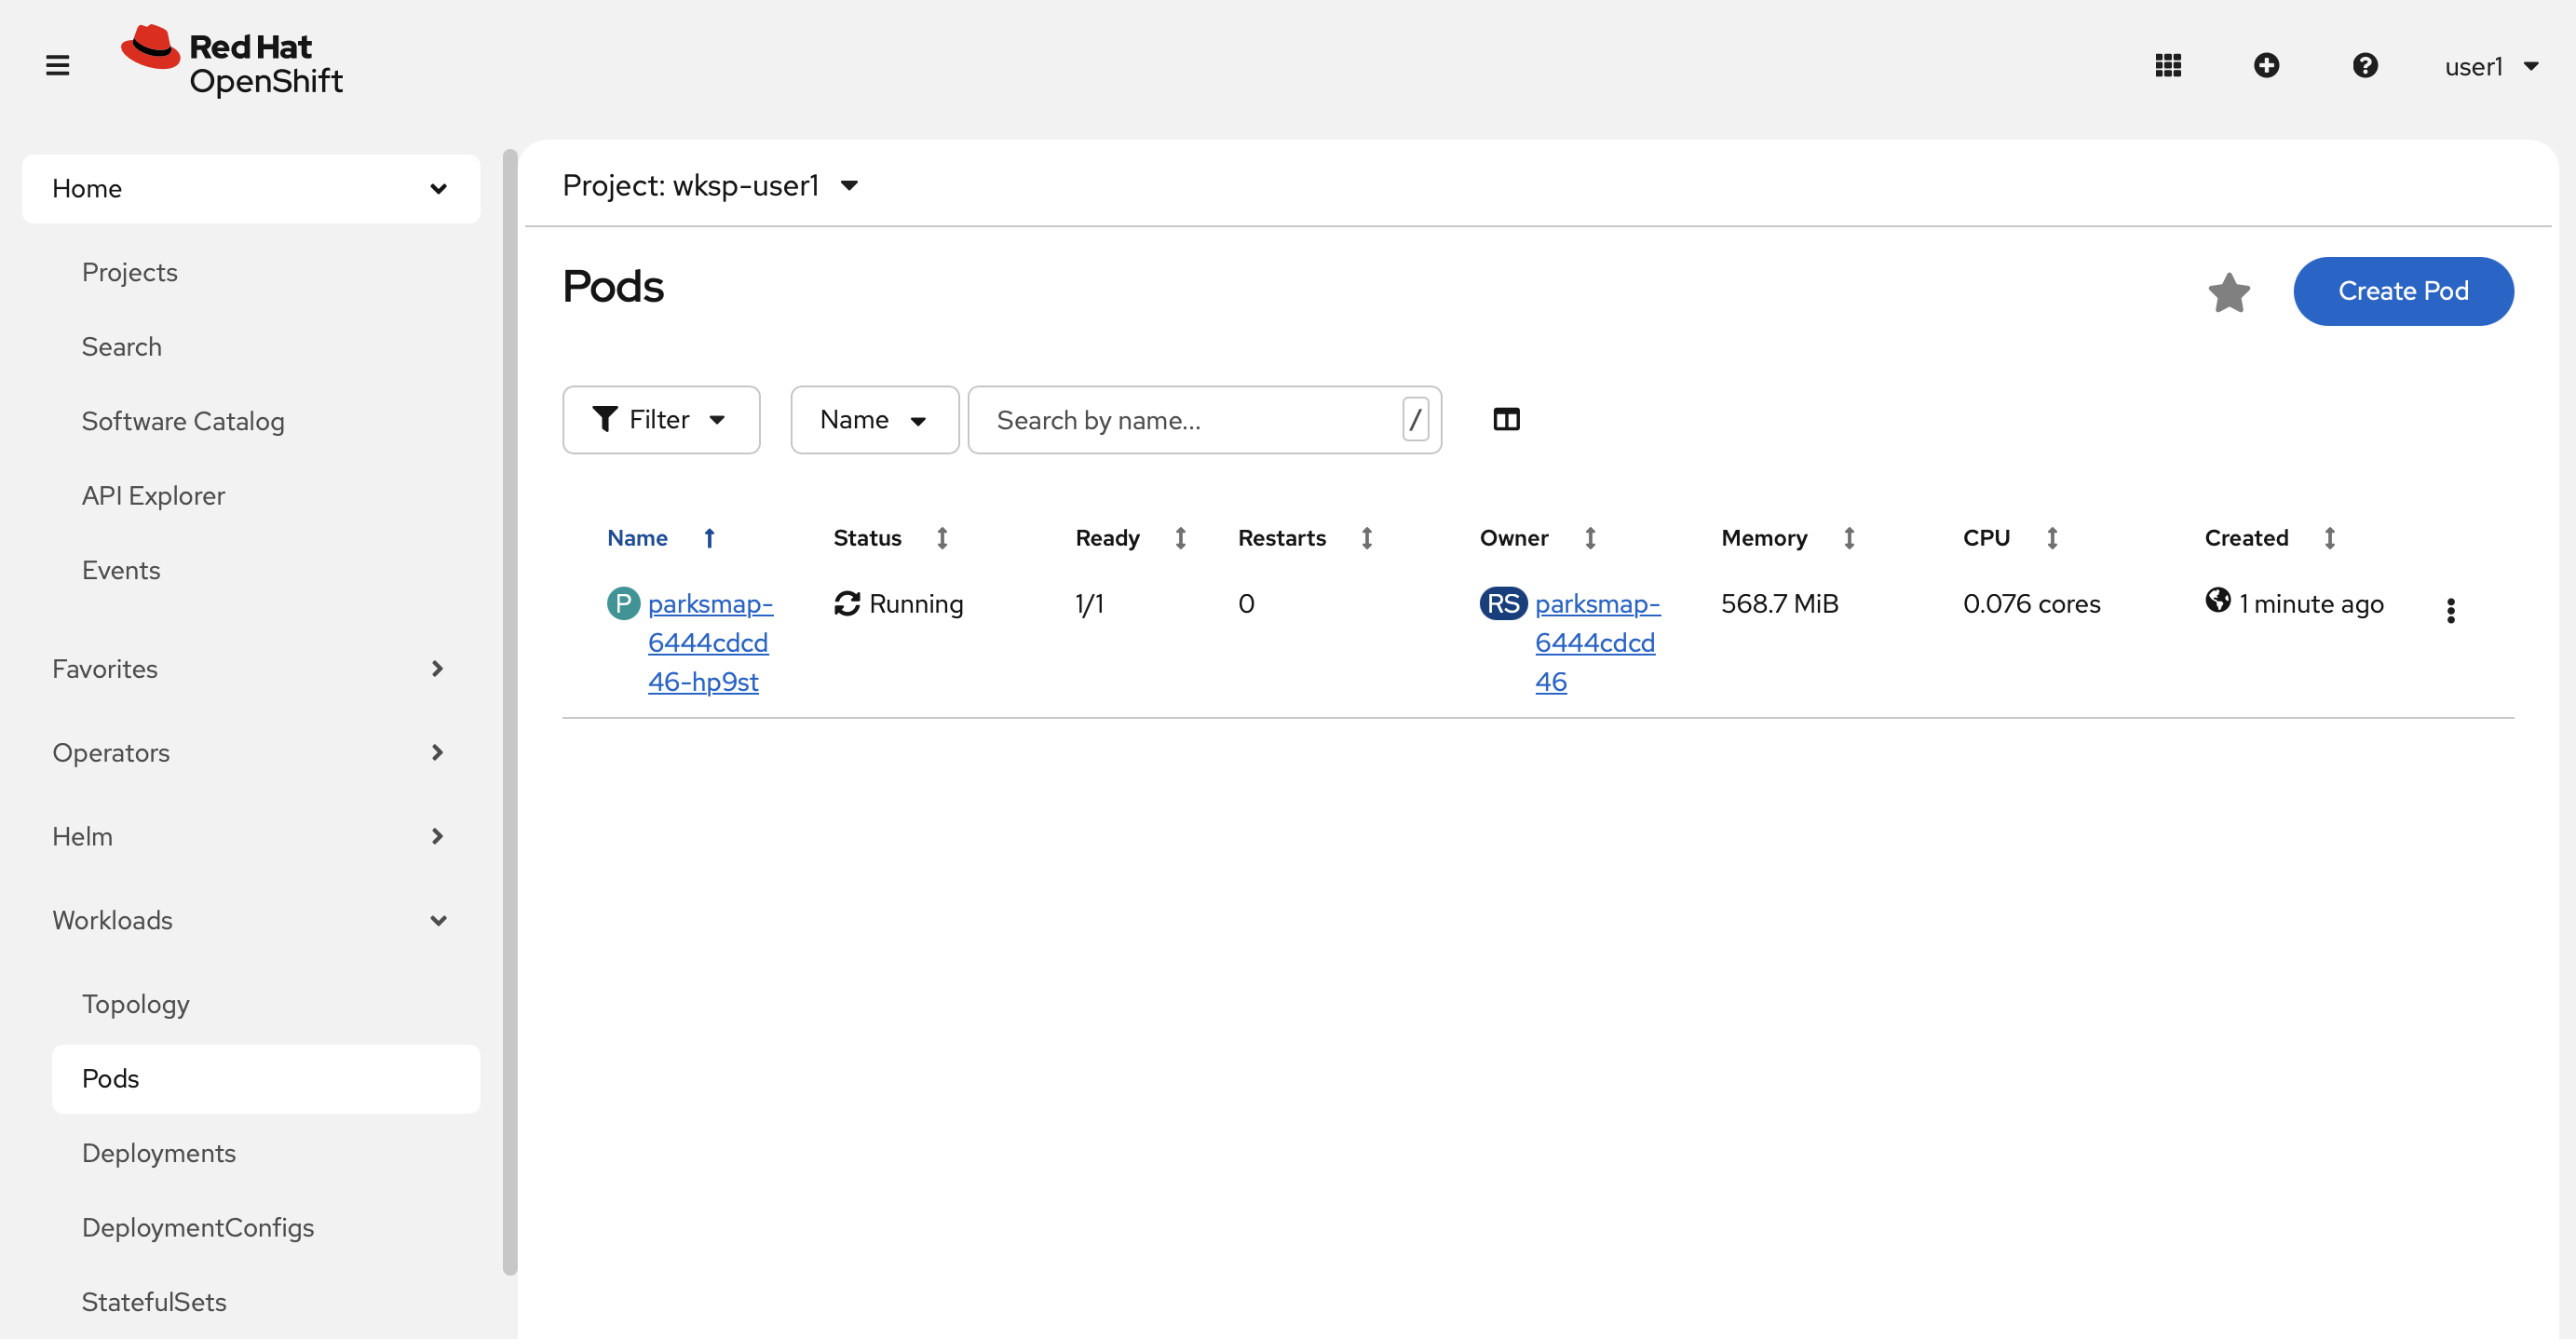
This Pod contains a single container, which
happens to be the parksmap application - a simple Spring Boot/Java application.
You can also examine Pods from the command line:
oc get podsYou should see output that looks similar to:
NAME                        READY   STATUS    RESTARTS   AGE
parksmap-6444cdcd46-hp9st   1/1     Running   0          50s
The above output lists all of the Pods in the current Project, including the Pod name, state, restarts, and uptime.
Once you have a Pod's name, you can
get more information about the Pod using the oc get command.
Change the output format to YAML using the
following syntax:
| Make sure you use the correct Pod name from your output. |
oc get pod parksmap-1-gxbgq -o yamlYou should see something like the following output (which has been truncated due to space considerations of this workshop):
apiVersion: v1
kind: Pod
metadata:
annotations:
k8s.v1.cni.cncf.io/network-status: |-
[{
"name": "",
"interface": "eth0",
"ips": [
"10.131.0.93"
],
"default": true,
"dns": {}
}]
k8s.v1.cni.cncf.io/networks-status: |-
[{
"name": "",
"interface": "eth0",
"ips": [
"10.131.0.93"
],
"default": true,
"dns": {}
}]
openshift.io/generated-by: OpenShiftWebConsole
openshift.io/scc: restricted
creationTimestamp: "2021-01-05T17:00:32Z"
generateName: parksmap-65c4f8b676-
labels:
app: parksmap
component: parksmap
deployment: parksmap
pod-template-hash: 65c4f8b676
role: frontend
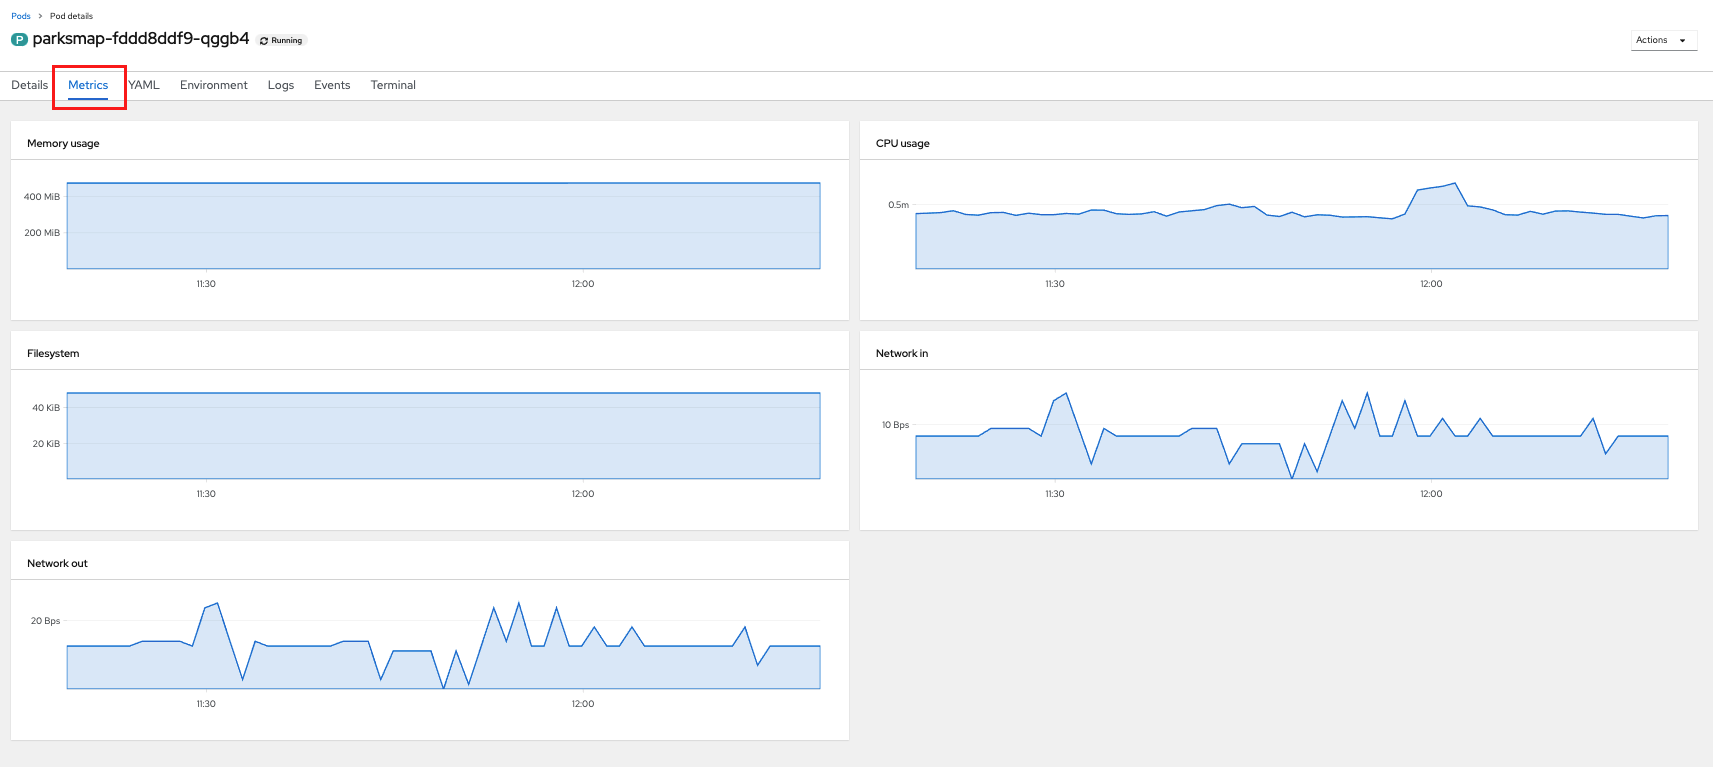
...............The web interface shows a lot of the same information on the Pod details
page. If you click on the name of the Pod, you’ll
find the details page. You can also get there by clicking on the parksmap Deployment on the Topology page, selecting Resources, and then clicking the Pod name.
From here you can see configuration, metrics, environment variables, logs, events and get a Terminal shell on the running pod.

Getting the parksmap image running may take a little while to complete. Each
OpenShift node that is asked to run the image has to pull (download) it, if the
node does not already have it cached locally. You can check on the status of the
image download and deployment in the Pod details page, or from the command
line with the oc get pods command that you used before.
Background: Customizing the Image Lifecycle Behavior
Whenever OpenShift asks the node’s CRI (Container Runtime Interface) runtime (Docker daemon or CRI-O) to run an image, the runtime will check to make sure it has the right version of the image to run. If it doesn’t, it will pull it from the specified registry.
There are a number of ways to customize this behavior. They are outlined in the OpenShift Documentation.
Background: Services
Services provide a convenient abstraction layer inside OpenShift to route traffic to
Pods. They also act as a load balancer for traffic being sent to
those Pods. For example, if you needed more parksmap instances to
handle increased traffic, you could spin up more Pods. OpenShift automatically maps
those Pods as endpoints to the Service, and the incoming requests would not notice
anything different except that parksmap was now doing a better job handling
requests.
When you asked OpenShift to run the image, it automatically created a Service for you. Remember that services are an internal construct. They are not available to the "outside world", or anything that is outside the OpenShift environment. That’s okay, as you will learn how to use Routes to adddress this later.
A Service maps to a set of Pods using a Selector. The Selector uses Labels to determine which Pods should receive traffic.
There is a lot more information about Services, including the YAML format to make one by hand, in the official OpenShift documentation.
Now that you understand the basics of what a Service is, take a look at the Service that was created for the image you just deployed. To view the Services defined in your Project, enter the following command:
oc get servicesYou should see output similar to the following:
NAME       TYPE        CLUSTER-IP       EXTERNAL-IP   PORT(S)    AGE
parksmap   ClusterIP   172.31.106.159   <none>        8080/TCP   15m
In the above output, you can see that there is a Service named parksmap with an
IP/Port combination of 172.30.22.209/8080TCP. Your IP address may be different, as
each Service receives a unique IP address upon creation. Service IPs are
fixed and never change for the life of the Service.
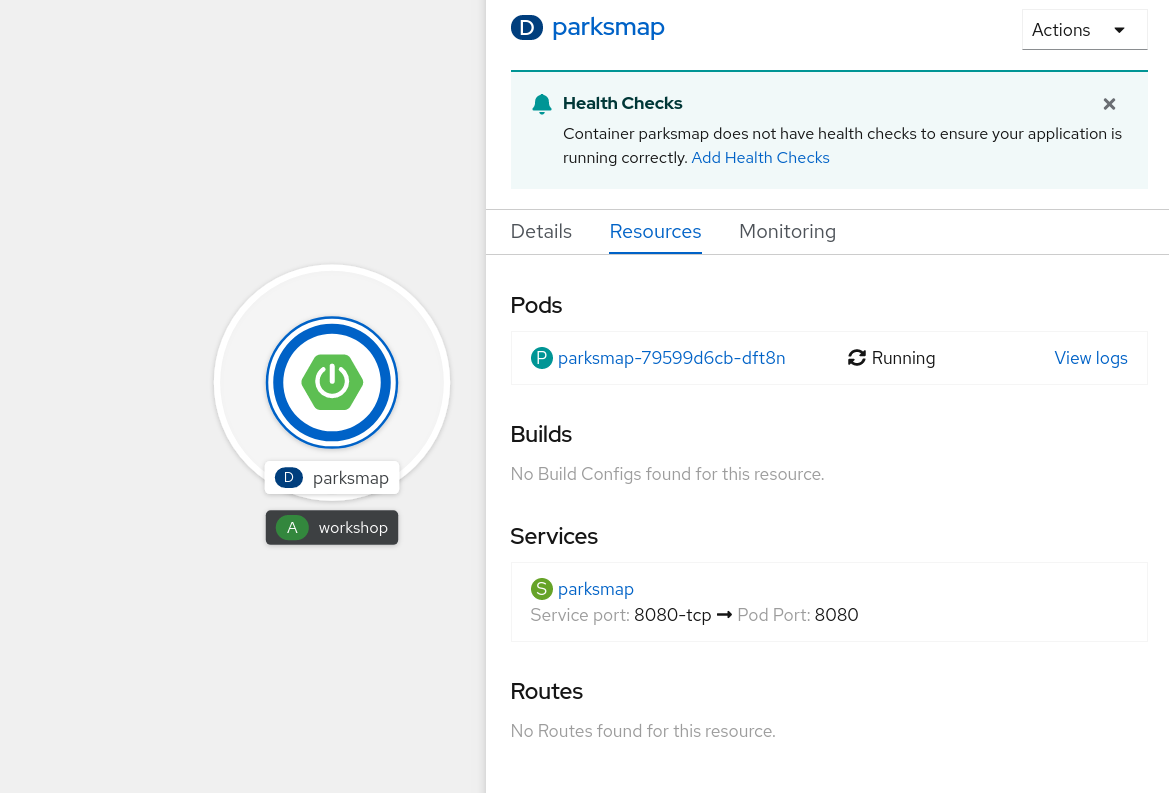
In the Topology view, Service information is available by clicking the parksmap Deployment, then Resources.
You can also get more detailed information about a Service by using the following command to display the data in YAML:
oc get service parksmap -o yamlYou should see output similar to the following:
apiVersion: v1
kind: Service
metadata:
  annotations:
    openshift.io/generated-by: OpenShiftWebConsole
  creationTimestamp: "2020-09-30T14:10:12Z"
  labels:
    app: workshop
    app.kubernetes.io/component: parksmap
    app.kubernetes.io/instance: parksmap
    app.kubernetes.io/part-of: workshop
    component: parksmap
    role: frontend
  name: parksmap
  namespace: workshop
  resourceVersion: "1062269"
  selfLink: /api/v1/namespaces/workshop/services/parksmap
  uid: e1ff69c8-cb2f-11e9-82a1-0267eec7e1a0
spec:
  clusterIP: 172.30.22.209
  ports:
  - name: 8080-tcp
    port: 8080
    protocol: TCP
    targetPort: 8080
  selector:
    app: parksmap
    deployment: parksmap
  sessionAffinity: None
  type: ClusterIP
status:
  loadBalancer: {}
Take note of the selector field. Remember it.
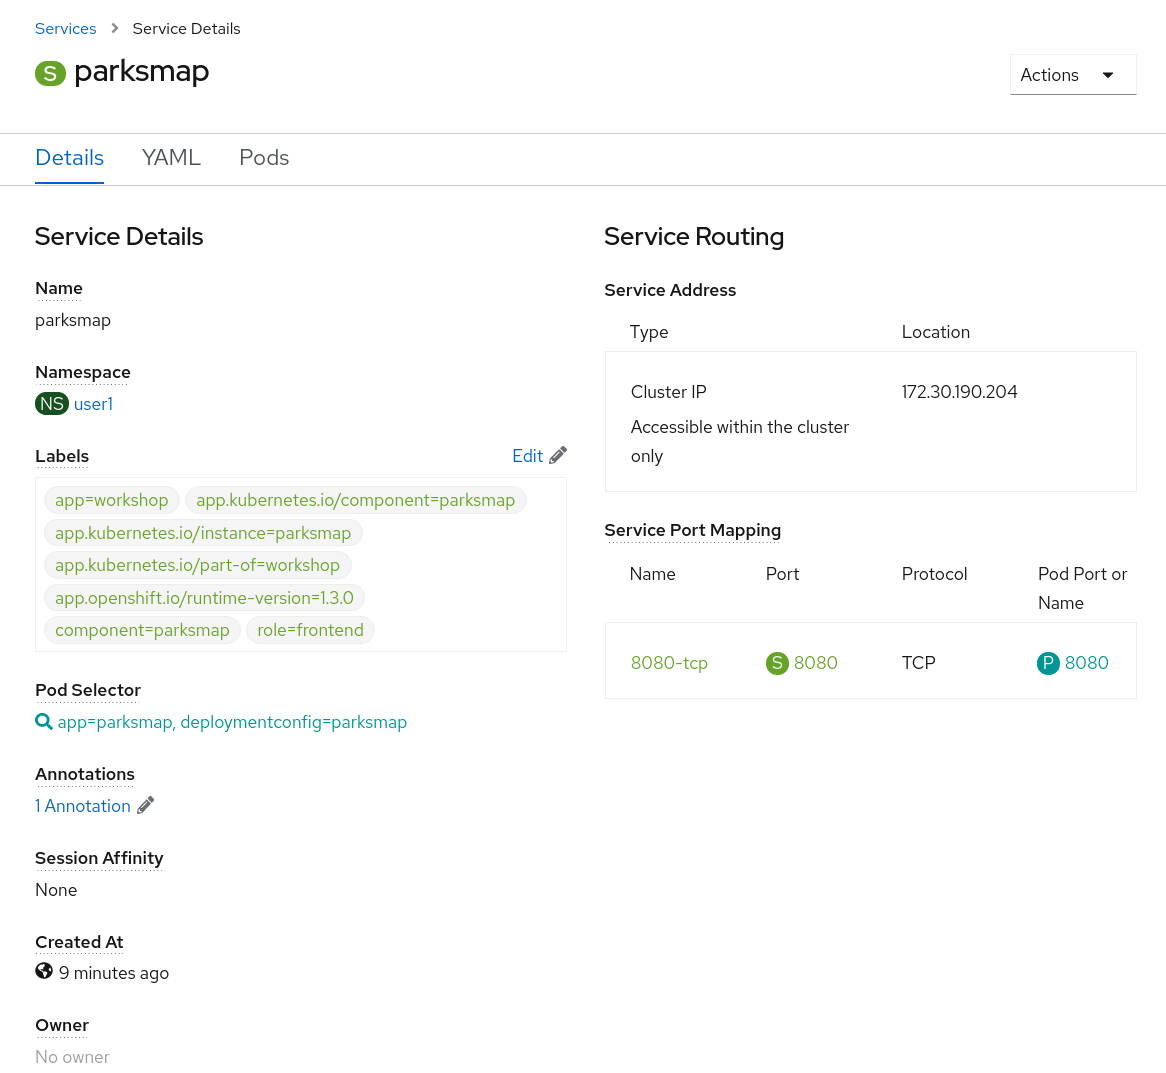
Alternatively, you can use the web console to view information about the Service by clicking on it from the previous screen.
Check the YAML of your parksmap Pod to understand how the Service
uses the Selector. Run the following command view Pod information:
oc describe podsUnder the Labels section you should see the following:
app=parksmap
deployment=parksmap
These Pod labels match the labels targeted by the Selector in the Service.
| Labels are just key-value pairs. Any Pod in the same Project (also known as a Namespace) that has labels that match the Selector will be associated with the Service. To see this in action, issue the following command: |
oc describe service parksmapYou should see something like the following output:
Name:              parksmap
Namespace:         workshop
Labels:            app=workshop
                   app.kubernetes.io/component=parksmap
                   app.kubernetes.io/instance=parksmap
                   app.kubernetes.io/part-of=workshop
                   component=parksmap
                   role=frontend
Annotations:       openshift.io/generated-by: OpenShiftWebConsole
Selector:          app=parksmap,deployment=parksmap
Type:              ClusterIP
IP:                172.30.22.209
Port:              8080-tcp  8080/TCP
TargetPort:        8080/TCP
Endpoints:         10.128.2.90:8080
Session Affinity:  None
Events:            <none>
You may be wondering why only one endpoint is listed. That is because there is only one Pod currently running. In the next lab, we will learn how to scale an application, at which point you will be able to see multiple endpoints associated with the Service.