Writing Your First Playbook
In this exercise, you’ll use Ansible to conduct basic system setup tasks on a Red Hat Enterprise Linux server. You will become familiar with fundamental Ansible modules like package and user, and learn how to create and run playbooks. Playbooks in Ansible are essentially scripts written in YAML format, used to define the tasks and configurations that Ansible will apply to your servers.
Getting Started with VS Code
All command-line exercises in this workshop are performed in the VS Code tab. Click the VS Code tab on the right to open the editor.
To open a terminal in VS Code:
-
Click on the Terminal menu at the top
-
Select New Terminal
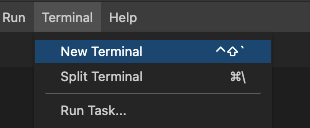
You will use this terminal to run all commands in the exercises that follow.
|
If you have trouble copying and pasting into the VS Code terminal, you can open VS Code in a separate browser tab: Open VS Code in external tab |
Inventory Basics
An inventory tells Ansible what hosts to target and how to group them. In this lab, your working directory ~/lab_inventory contains the inventory used in prior exercises.
Open the inventory to review hosts and groups:
cd ~/lab_inventory
cat hosts
An example INI-style inventory might look like:
[web]
node01
node02

[db]
node03
In a playbook, the hosts key selects which inventory hosts/groups to target. Before moving on, verify connectivity with an ad-hoc ping using the provided inventory:
ansible -i hosts all -m pingYou can substitute all with a specific group (e.g., web) or host (e.g., node01). This helps confirm the inventory is correct before running playbooks.
Playbook Basics
First, create a text file in YAML format for your playbook. Remember:
-
Start with three dashes (
---). -
Use spaces, not tabs, for indentation.
Key Concepts:
-
hosts: Specifies the target servers or devices for your playbook to run against. -
tasks: The actions Ansible will perform. -
become: Allows privilege escalation (running tasks with elevated privileges).
|
An Ansible playbook is designed to be idempotent, meaning if you run it multiple times on the same hosts, it ensures the desired state without making redundant changes. |
Creating Your Playbook
Before creating your first playbook, ensure you are in the correct directory by changing to ~/lab_inventory:
cd ~/lab_inventoryNow create a playbook named system_setup.yml to perform basic system setup:
-
Update a couple of core packages to the latest version.
-
Create a new user named 'myuser'.
The basic structure looks as follows:
---
- name: Basic System Setup
  hosts: node01
  become: true
  tasks:
    - name: Install required packages
      ansible.builtin.package:
        name:
          - git
          - vim
        state: present

    - name: Create a new user
      ansible.builtin.user:
        name: myuser
        state: present
create_home: true-
About the
packagemodule: This module manages packages on a target without specifying a package manager module -
About the
usermodule: This module is used to manage user accounts.
Running the Playbook
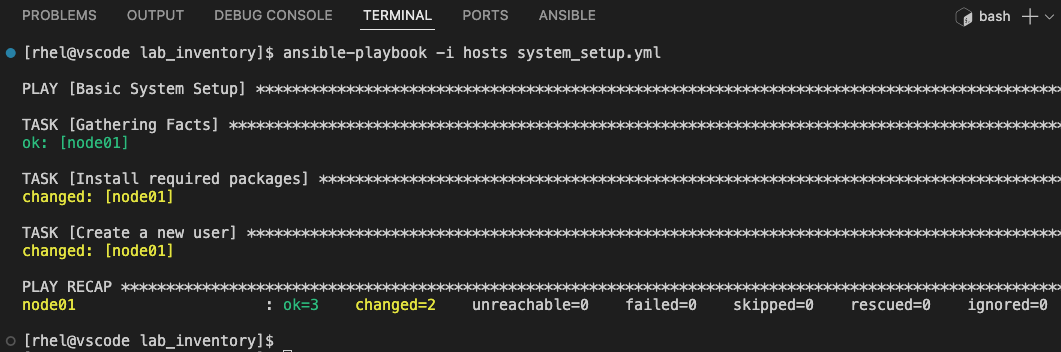
Execute your playbook using the ansible-playbook command:
ansible-playbook -i hosts system_setup.ymlReview the output to ensure each task is completed successfully.
Checking the Playbook
Now, let’s create a second playbook for post-configuration checks, named system_checks.yml:
---
- name: System Configuration Checks
  hosts: node01
  become: true
  tasks:
    - name: Check user existence
      ansible.builtin.command:
        cmd: id myuser
      register: user_check
      changed_when: false

    - name: Report user status
      ansible.builtin.debug:
        msg: "User 'myuser' exists."
when: user_check.rc == 0|
|
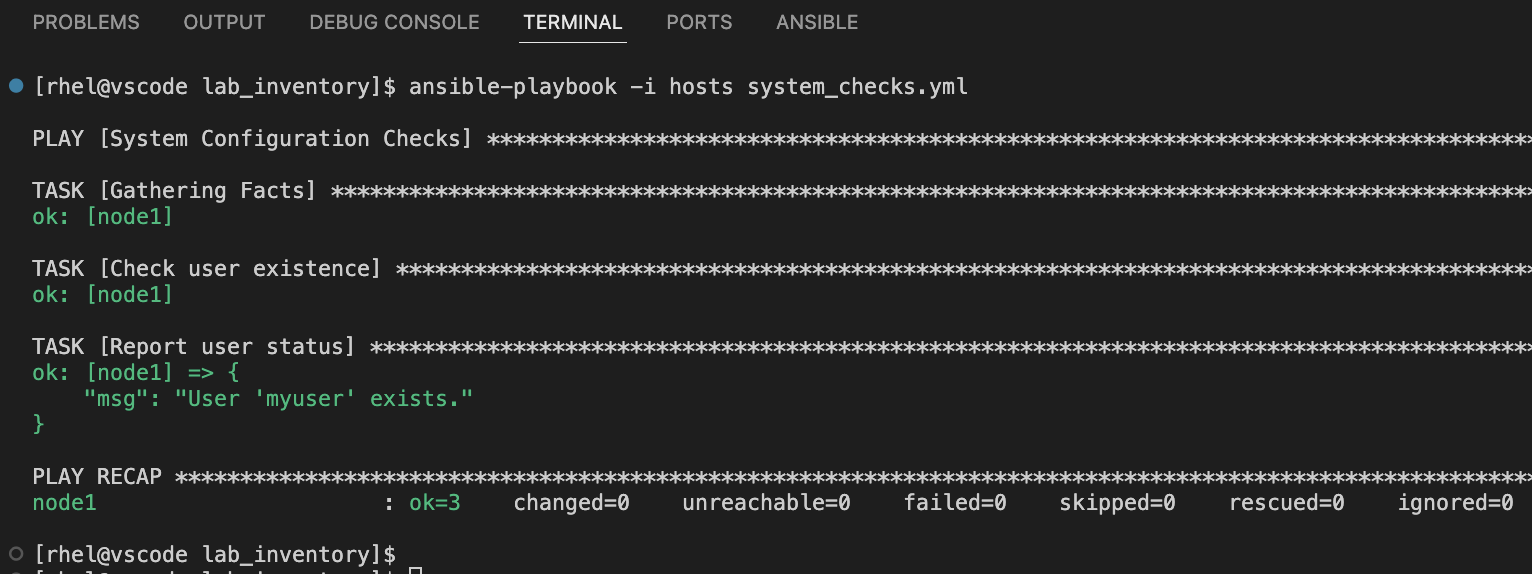
Run the checks playbook:
ansible-playbook -i hosts system_checks.ymlReview the output to ensure the user creation was successful.
Summary
You’ve successfully completed the first playbook exercises! You now have:
-
Reviewed inventory basics and verified host connectivity
-
Learned the key concepts of Ansible playbooks
-
Created and ran a
system_setup.ymlplaybook to install packages and create a user -
Built a
system_checks.ymlplaybook to verify the configuration