Deploy a Model on CPU
Exercise 2: Deploy a Model on CPU
We are going to deploy Qwen3 0.6B using vLLM as the runtime. vLLM is a high-performance inference engine for LLMs that is optimized for low latency and high throughput. It supports both CPU and GPU inference, and it can be used to deploy models in a distributed manner. In our case we’ll use vLLM for CPU inference now.
-
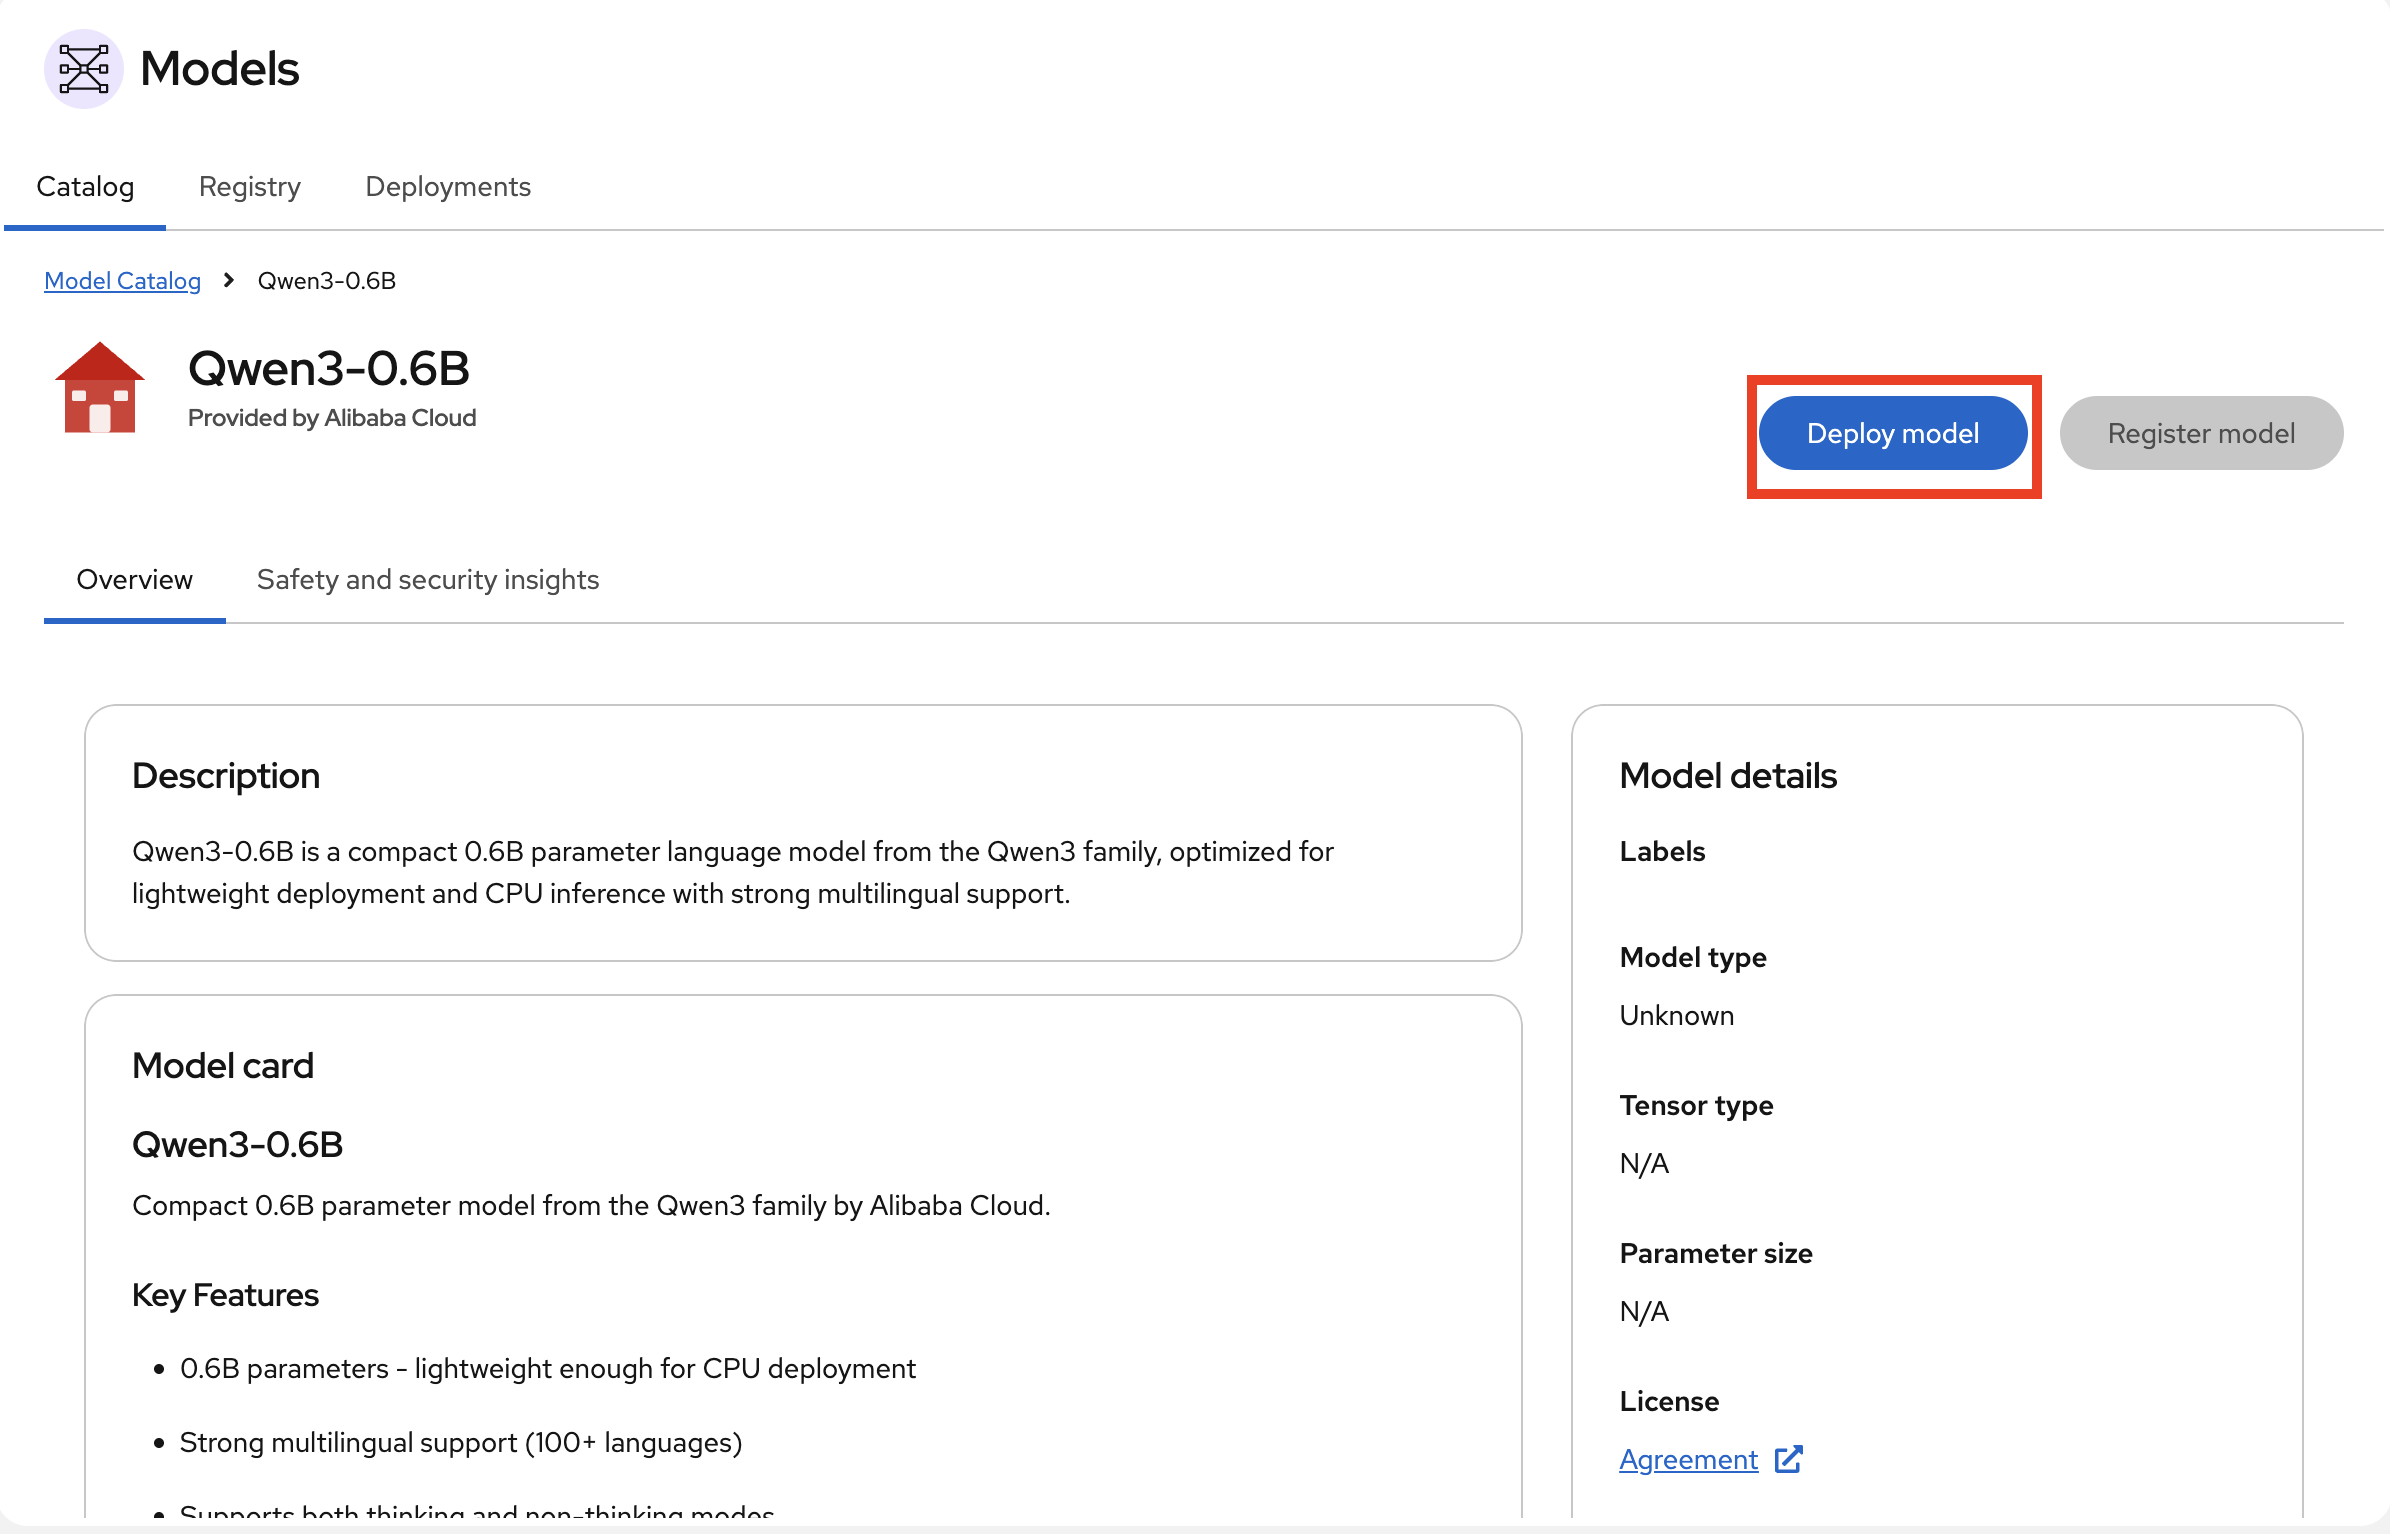
In the Model Catalog, select Other Models and click on Qwen3 0.6B. Click the Deploy button in the top right corner:
-
Select your project
Workspace user1and click Next. -
You will be prompted for where the model lives and what’s the model type is. This information is already populated because the catalog has the information. Don’t change anything, just click Next.
-
On the deployment configuration screen, keep the name as-is.
-
Under deployment options, select LLM inference service.
-
Then, with the Hardware profile, as CPU Profile, expand
> Customize resource requests and limitsto set the resource values as shown below: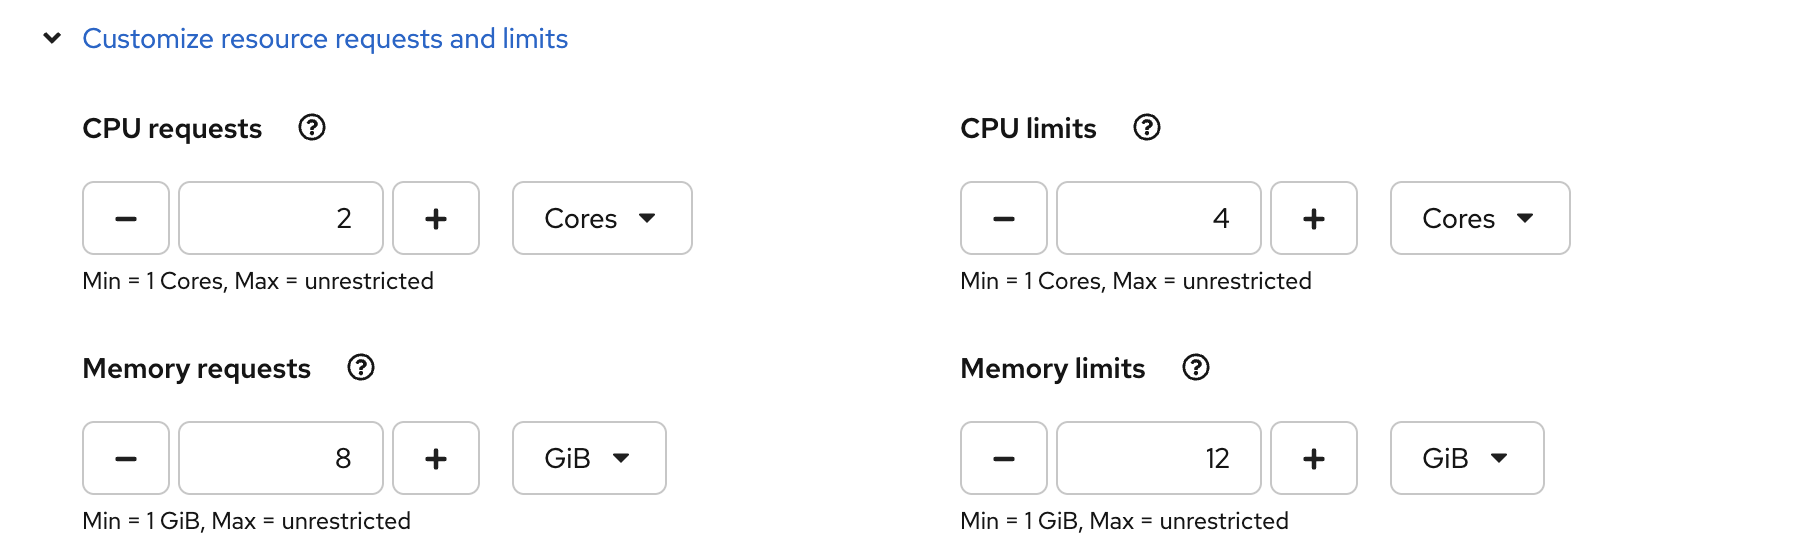
-
For the accelerator configuration, select vLLM CPU (x86). Set the number of replicas to
1and click Next: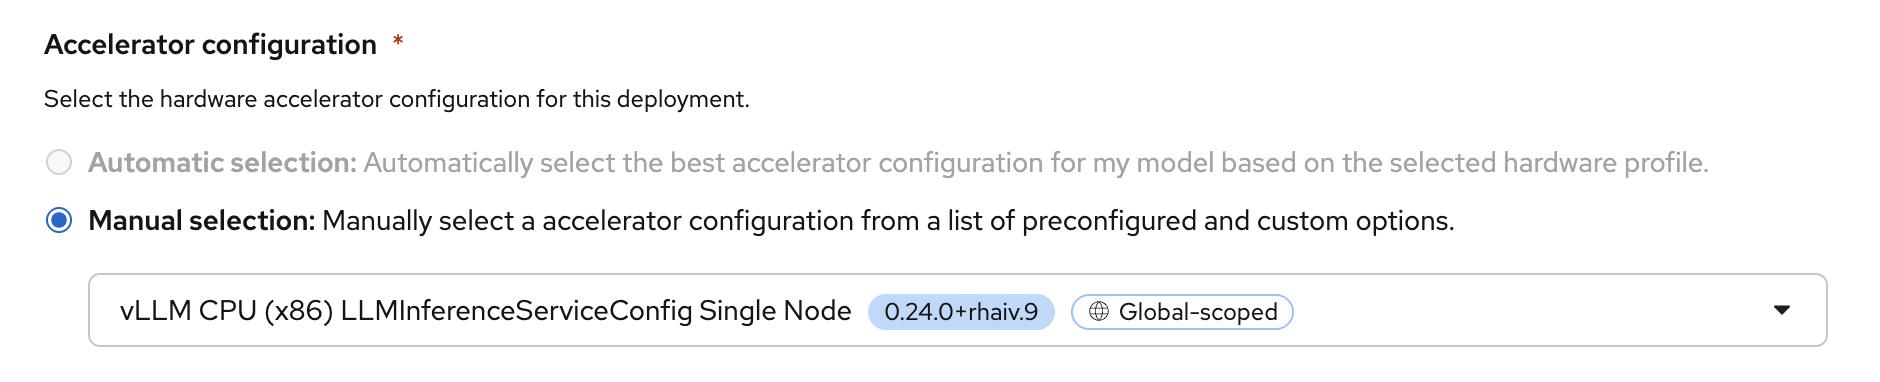
-
On the final screen, select Add as AI asset endpoint and under Use case enter
chat. Don’t worry about the MaaS option yet, we’ll get to that in Exercise 4.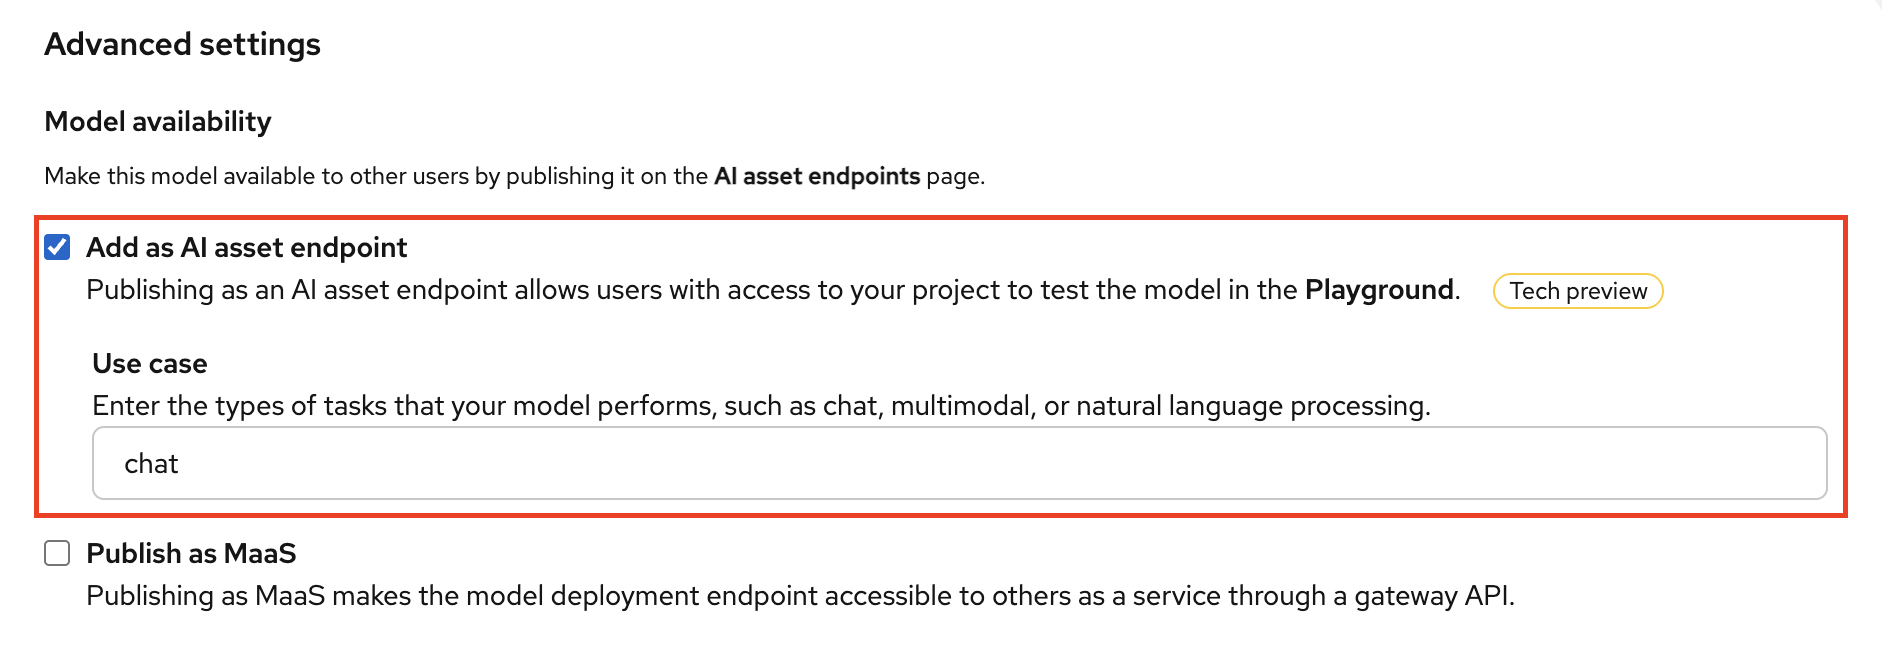
-
For Gateway, select the default
openshift-ai-inference | openshift-ingressgateway.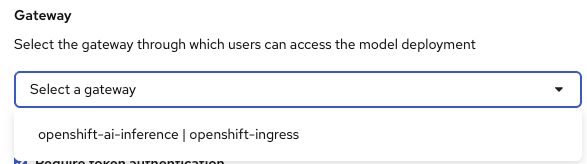
-
Make sure you unchecked the Token authentication option. In Exercise 4, you’ll explore to control access to models.
-
On this screen, we can add
Add custom runtime argumentsif we want to pass any additional arguments to the vLLM runtime.Let’s pass
--max-model-len=2048to limit the maximum length of the model’s context window to 2048 tokens. This controls how many tokens (words and word pieces) the model can process in a single request, including both the input prompt and the generated output. We set it to 2048 (lower than the model’s default) to reduce memory usage, since we are deploying on a CPU with limited resources.--max-model-len=2048 -
We can also add
custom runtime environment variablesif we want to pass any additional environment variables to the vLLM runtime.Click Add variable and enter the key and value below. This allocates 8 GB for the key-value (KV) cache, which gives the model enough cache space to handle requests efficiently.
Key:
VLLM_CPU_KVCACHE_SPACEValue:
8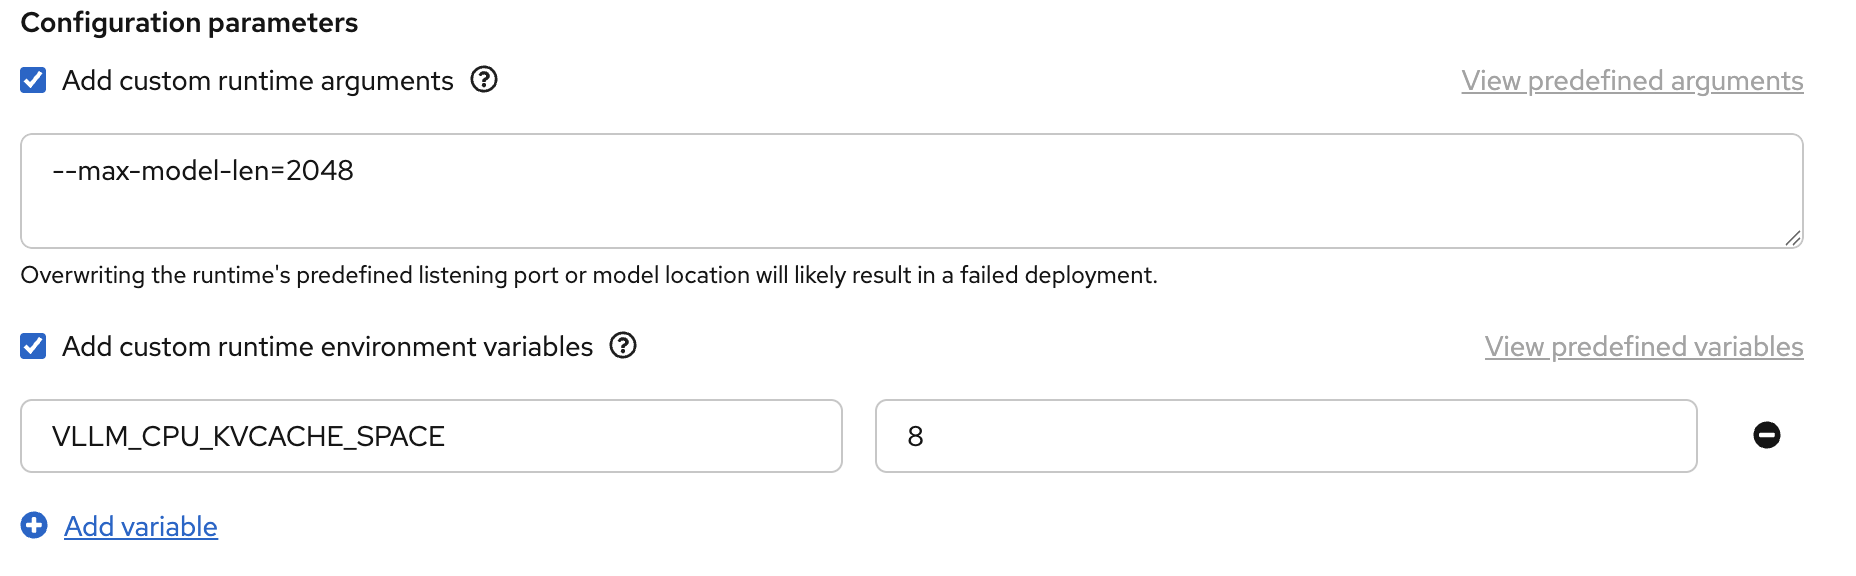
Click Next and then Deploy model.
-
Scroll to the far right and wait for the deployment to show a green Ready status under Status column. It takes a couple of minutes while the model weights are loaded:
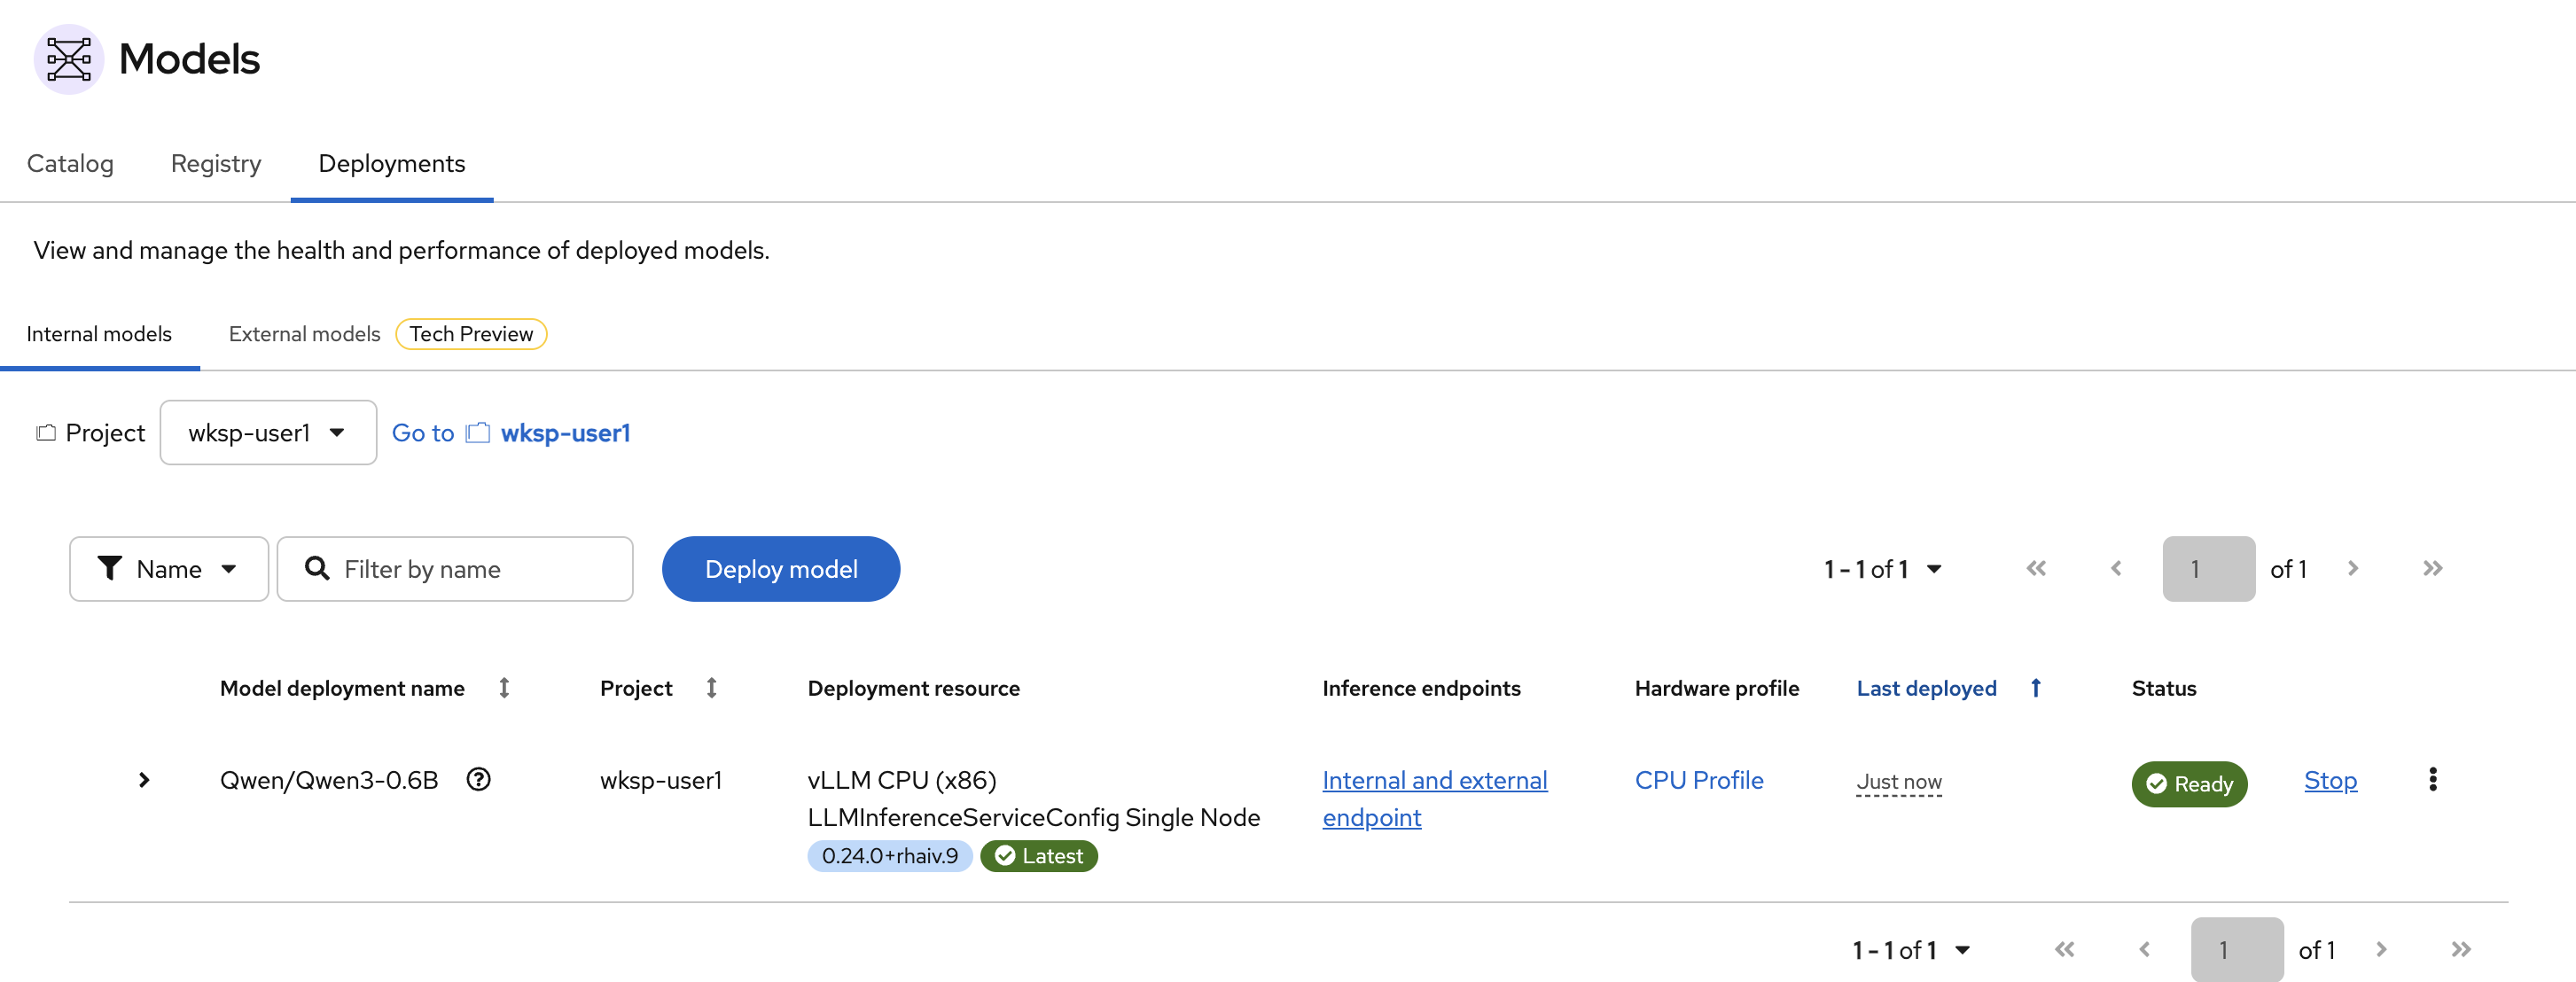
You can get the inference endpoints on this view and start using the model. But let’s go to the GenAI Playground to test it out!
Quick Test: GenAI Playground
GenAI Playground is here to test the model you just deployed, alongside other capabilities such as shaping a model’s behavior with system prompts, and connecting the model to private knowledge and tools. In this exercise, we will use it to confirm that the model is responding to prompts.
-
Go to Gen AI Studio > Playground. When the model is in Running state, click Create Playground.
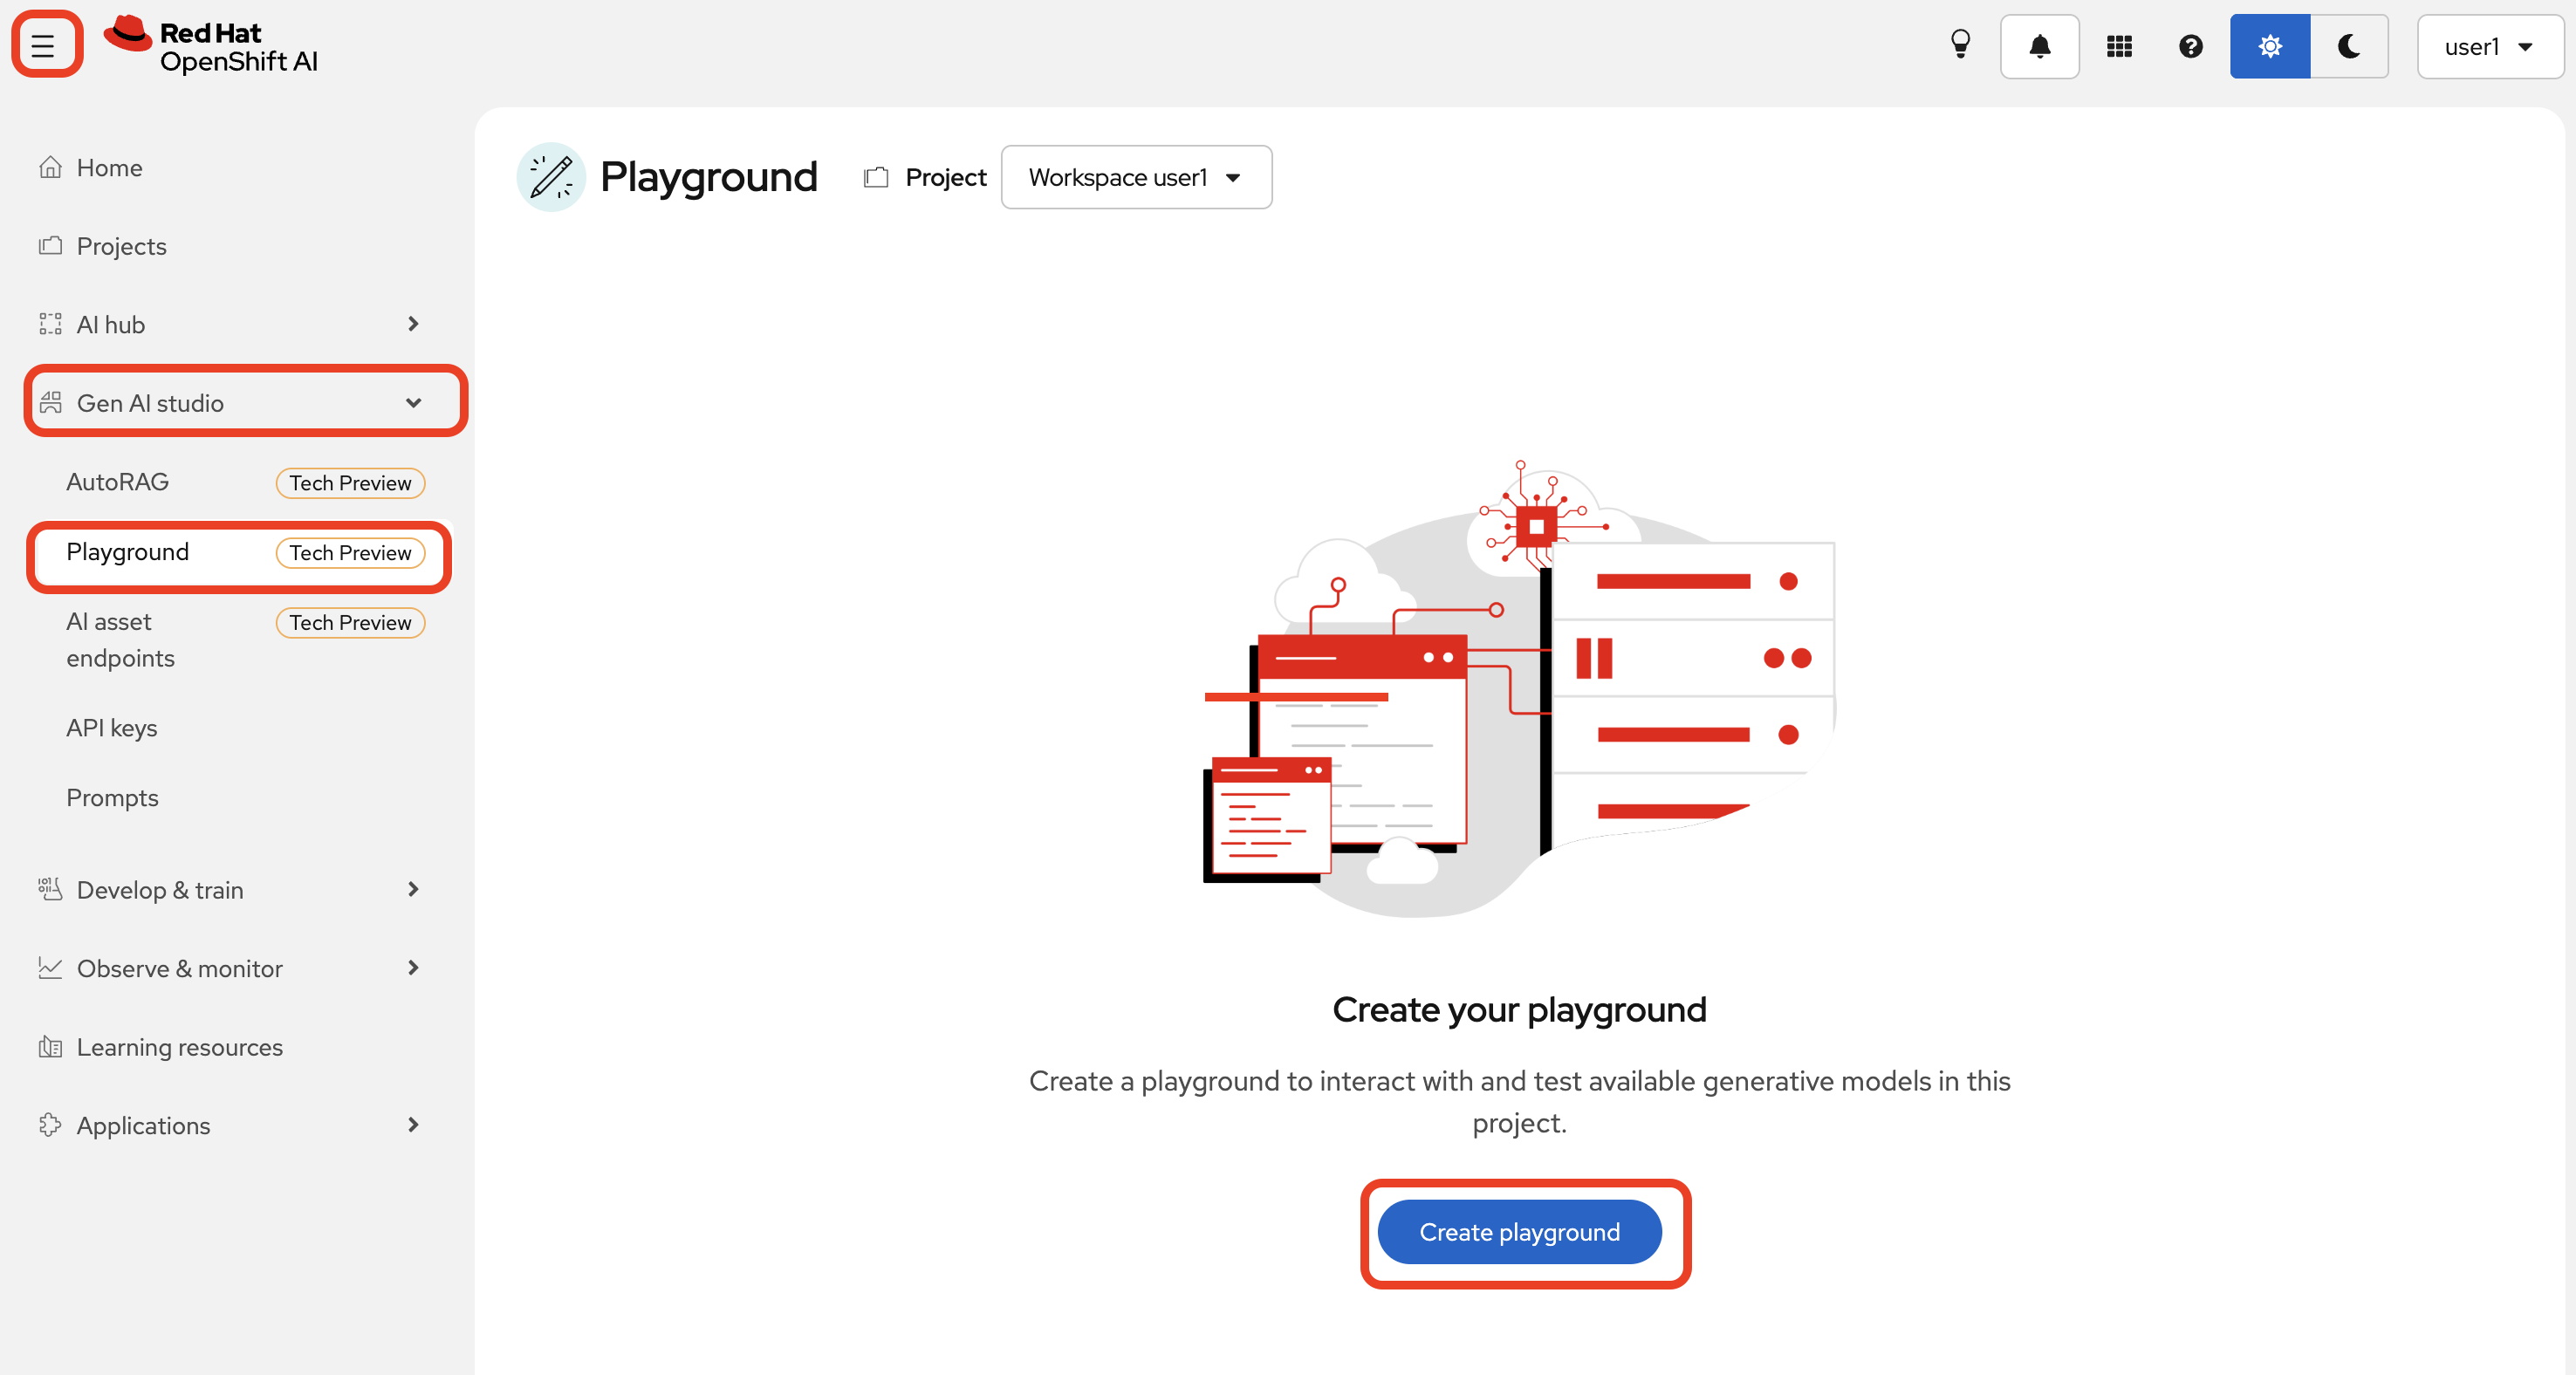
-
And select the model you just deployed. (Please don’t worry about
qwen3-235b-a22byet, keep it unchecked.) Set Max tokens to1024and click Create: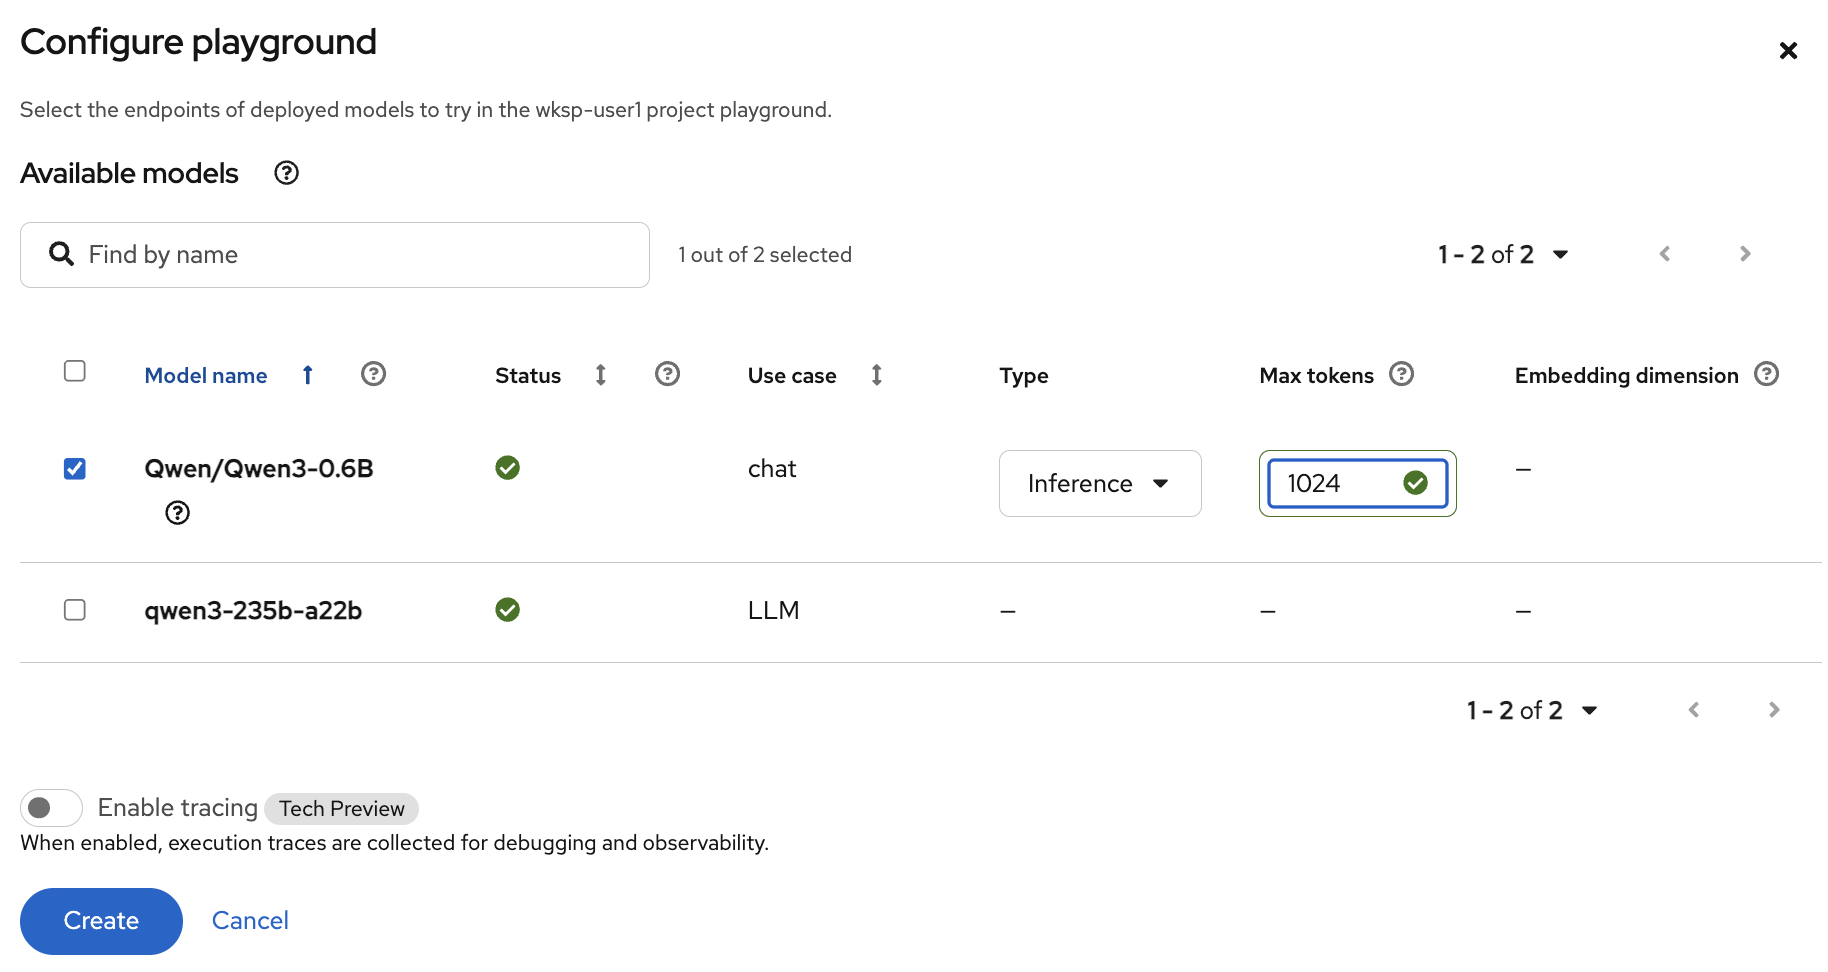
Earlier you set max token length as 2048. This means your prompt and the model’s response together cannot exceed 2048 tokens. In this case, we are limiting the model’s response to 1024 tokens, which gives you enough room for a long prompt and a long response, while staying within the 2048 token limit.
-
When the Playground is ready, send a prompt of your choice. For example:
What is the capital of France?You should see a response from the model, hopefully with the correct answer "Paris" 🤭
-
Now try shaping the model’s behavior with a system prompt. Click on the + New chat on the top right first. Then, again on the right side of the Playground, under the Settings, to the Prompt field, enter:
You are a helpful assistant and you talk like Gen Z.Send the same question again
What is the capital of France?. You should get a noticeably different response: same facts, very different vibe 😎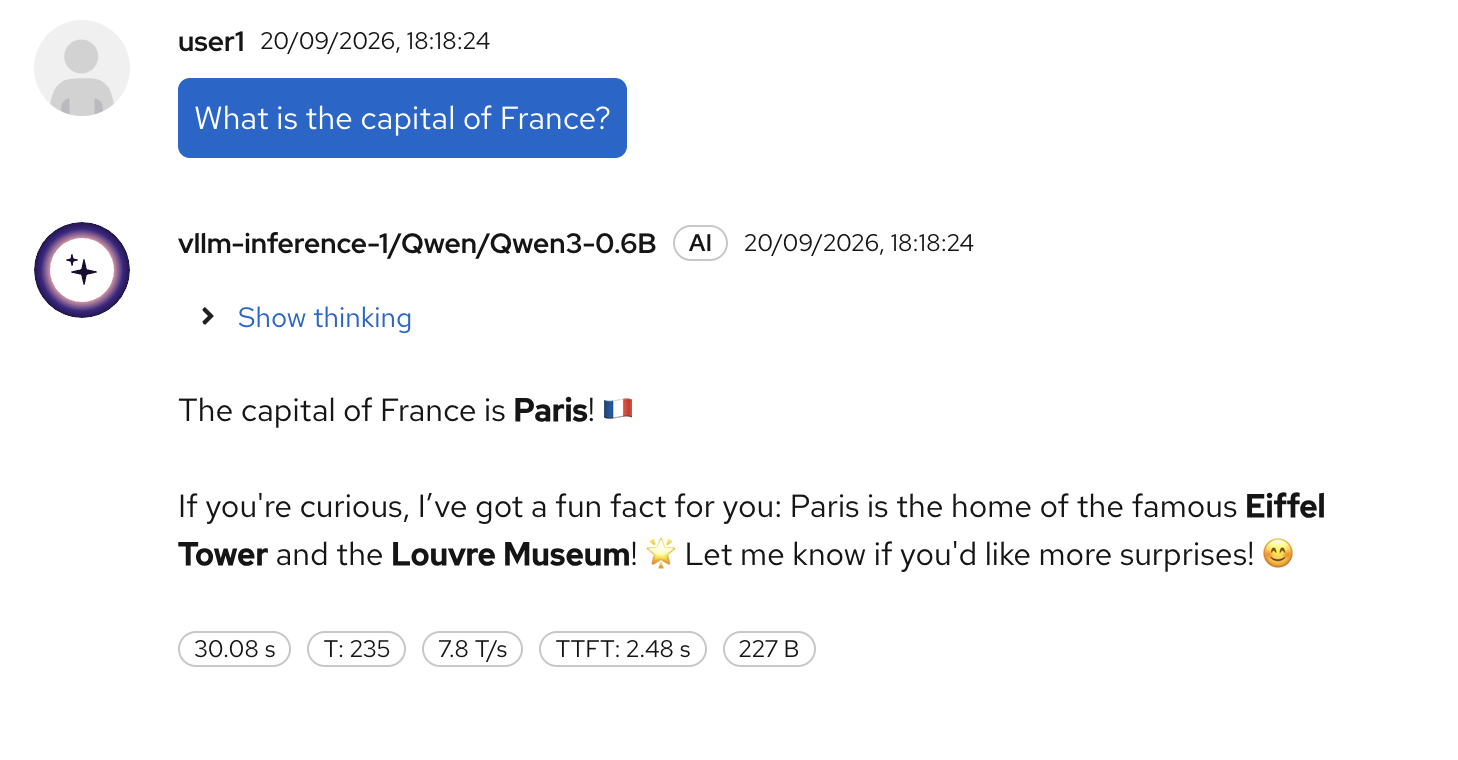
Don’t worry about saving your System Prompt for now. You can explore that later.
| The Instructions field is how you pass a system prompt to the model. These instructions shape its persona, tone, and behavior before the user says anything. This is the simplest form of prompt engineering, and it works on any model regardless of how it was deployed. |
Clean up
Delete this deployment to free up resources before the next exercise, where you’ll deploy the same model with a different serving configuration.
-
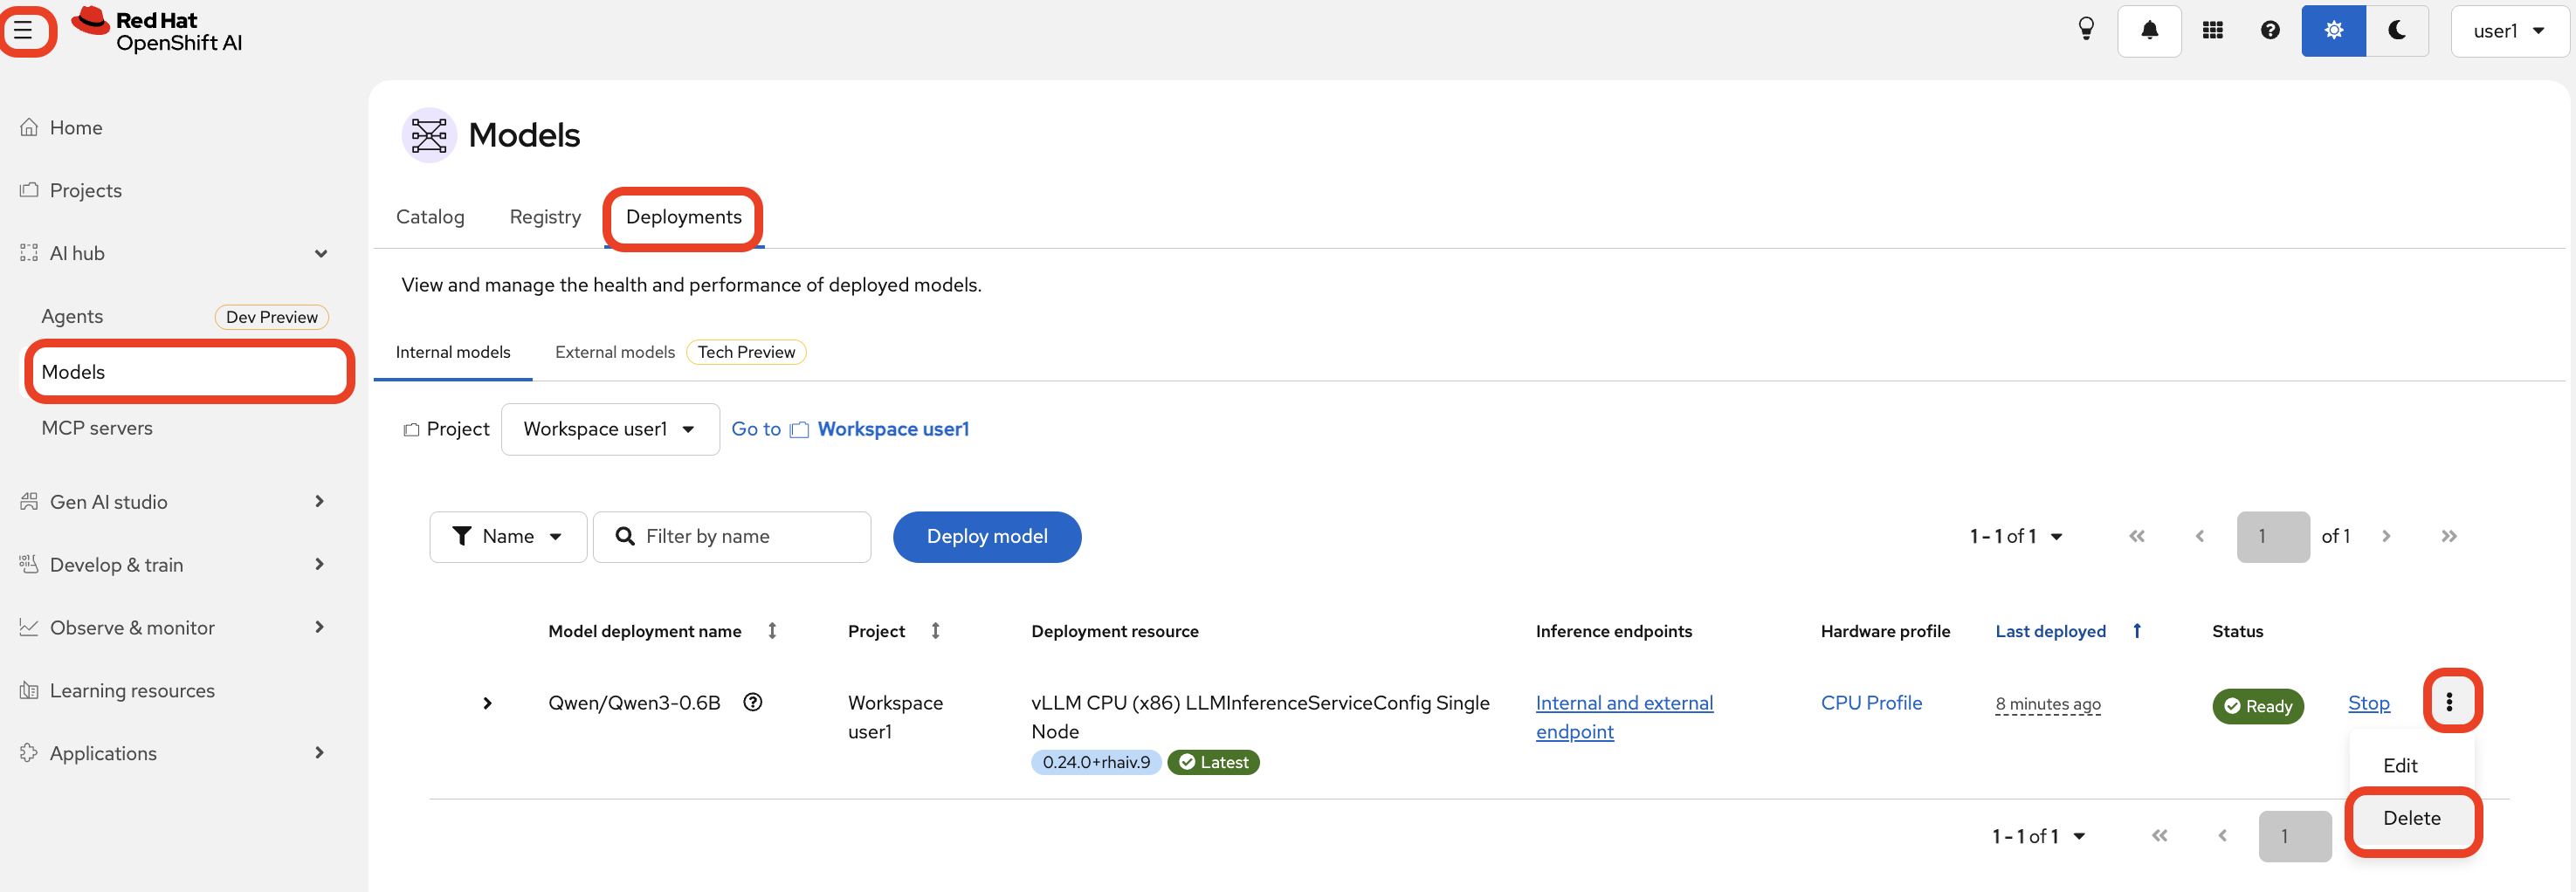
In the OpenShift AI Dashboard, go to AI Hub > Models.
-
Click the three dots next to the Qwen3 0.6B deployment you just created and click Delete.
-
Confirm the deletion.
What’s Next?
You’ve deployed and tested a model running with a single replica. As more users interact with Lenora, that replica may struggle to keep up with simultaneous requests.
Adding replicas provides more capacity, but requests also need to be distributed effectively across them. In the next exercise, you’ll deploy the same model with two replicas using llm-d, which routes requests based on how busy each replica is.
You’ll explore how to configure this deployment on CPU. The exercise focuses on the deployment process rather than measuring performance under load.