Deploy a Model with llm-d
Exercise 3: Deploy with llm-d
In the previous exercise you deployed Qwen3 0.6B on a single node using vLLM. That works for experimentation, but as soon as multiple users send requests at the same time, a single replica becomes a bottleneck. The obvious fix is to add more replicas, but here’s the catch: OpenShift’s default load balancing routes requests round-robin across replicas without knowing anything about what each one is doing. One replica might be halfway through generating a long response while another is completely idle, and new requests still get spread evenly. The result is unpredictable latency and wasted capacity.
llm-d solves this by replacing the default routing with a scheduler that understands LLM workloads. It knows which replicas are busy, how long each request is likely to take, and how to route new requests to minimize wait time across the whole pool.
You get the same vLLM inference engine underneath. llm-d makes the traffic distribution smarter.
| In this exercise, you are deploying to CPU again. The llm-d architecture and deployment steps are identical on GPU. The only difference is the hardware profile you select. |
Deploy the Model
-
In the OpenShift AI Dashboard, go to AI Hub > Models > Catalog and select the Other Models tab. Again, find Qwen3 0.6B and click Deploy.
-
Select your project
Workspace user1and click Next. -
You will be prompted for the model location. Leave the defaults as-is and click Next.
-
On the model deployment configuration screen, keep the name as-is. Under deployment deployment options, select LLM inference service with llm-d.
-
For Topology type keep
Single node. -
For Topology configuration, from the drop down menu, select
Single node on CPU.Do not leave Single node (default)selected. Be sure you pickSingle node on CPUin the dropdown. -
Then expand
> Customize resource requests and limitsand set the resource values as below: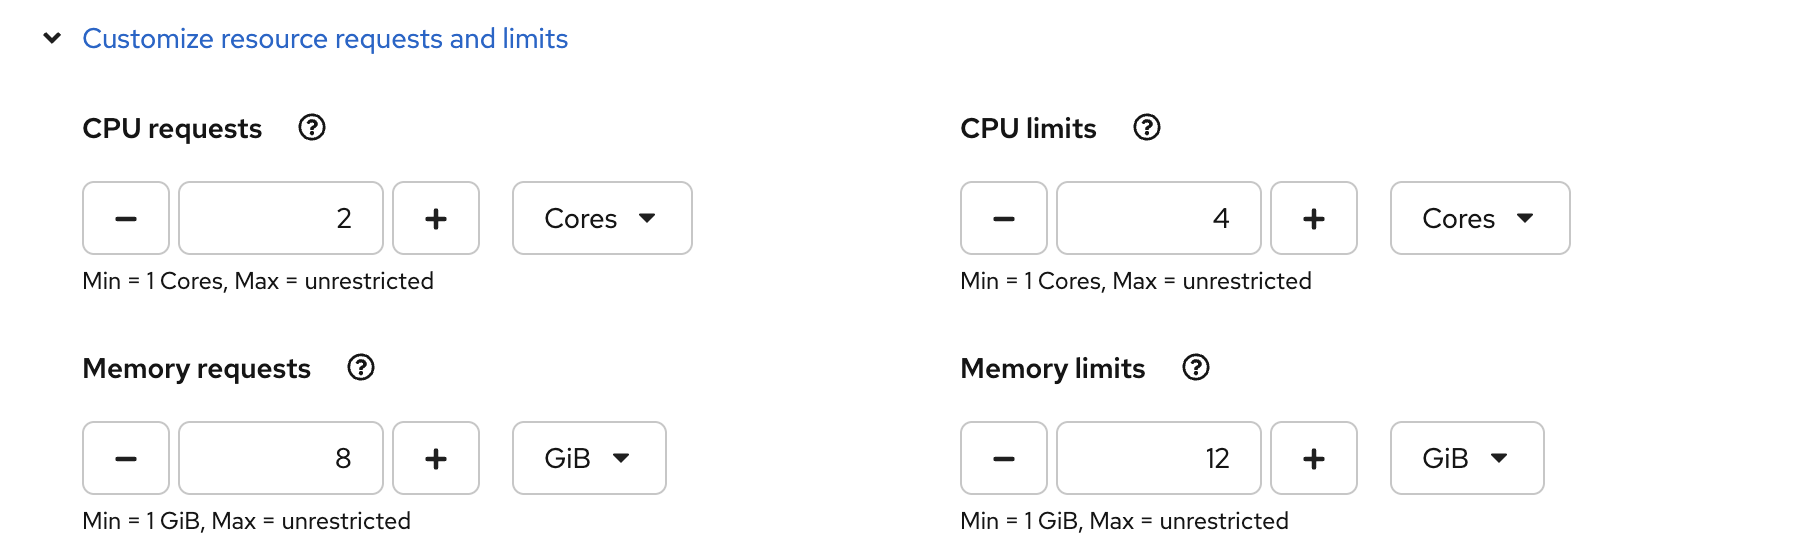
-
For Routing configuration, from the drop down menu, select
CPU LLM-d scheduling-policyrouting config.It is a load aware intelligent routing, which means requests will be routed to the least busy replica. This is a default routing policy for llm-d, but you can also create your own routing policies for different use cases, such as session aware, prefix-cache aware, predicted-latency based, etc.
-
For Replica count set the number of replicas to 2. Click Next:
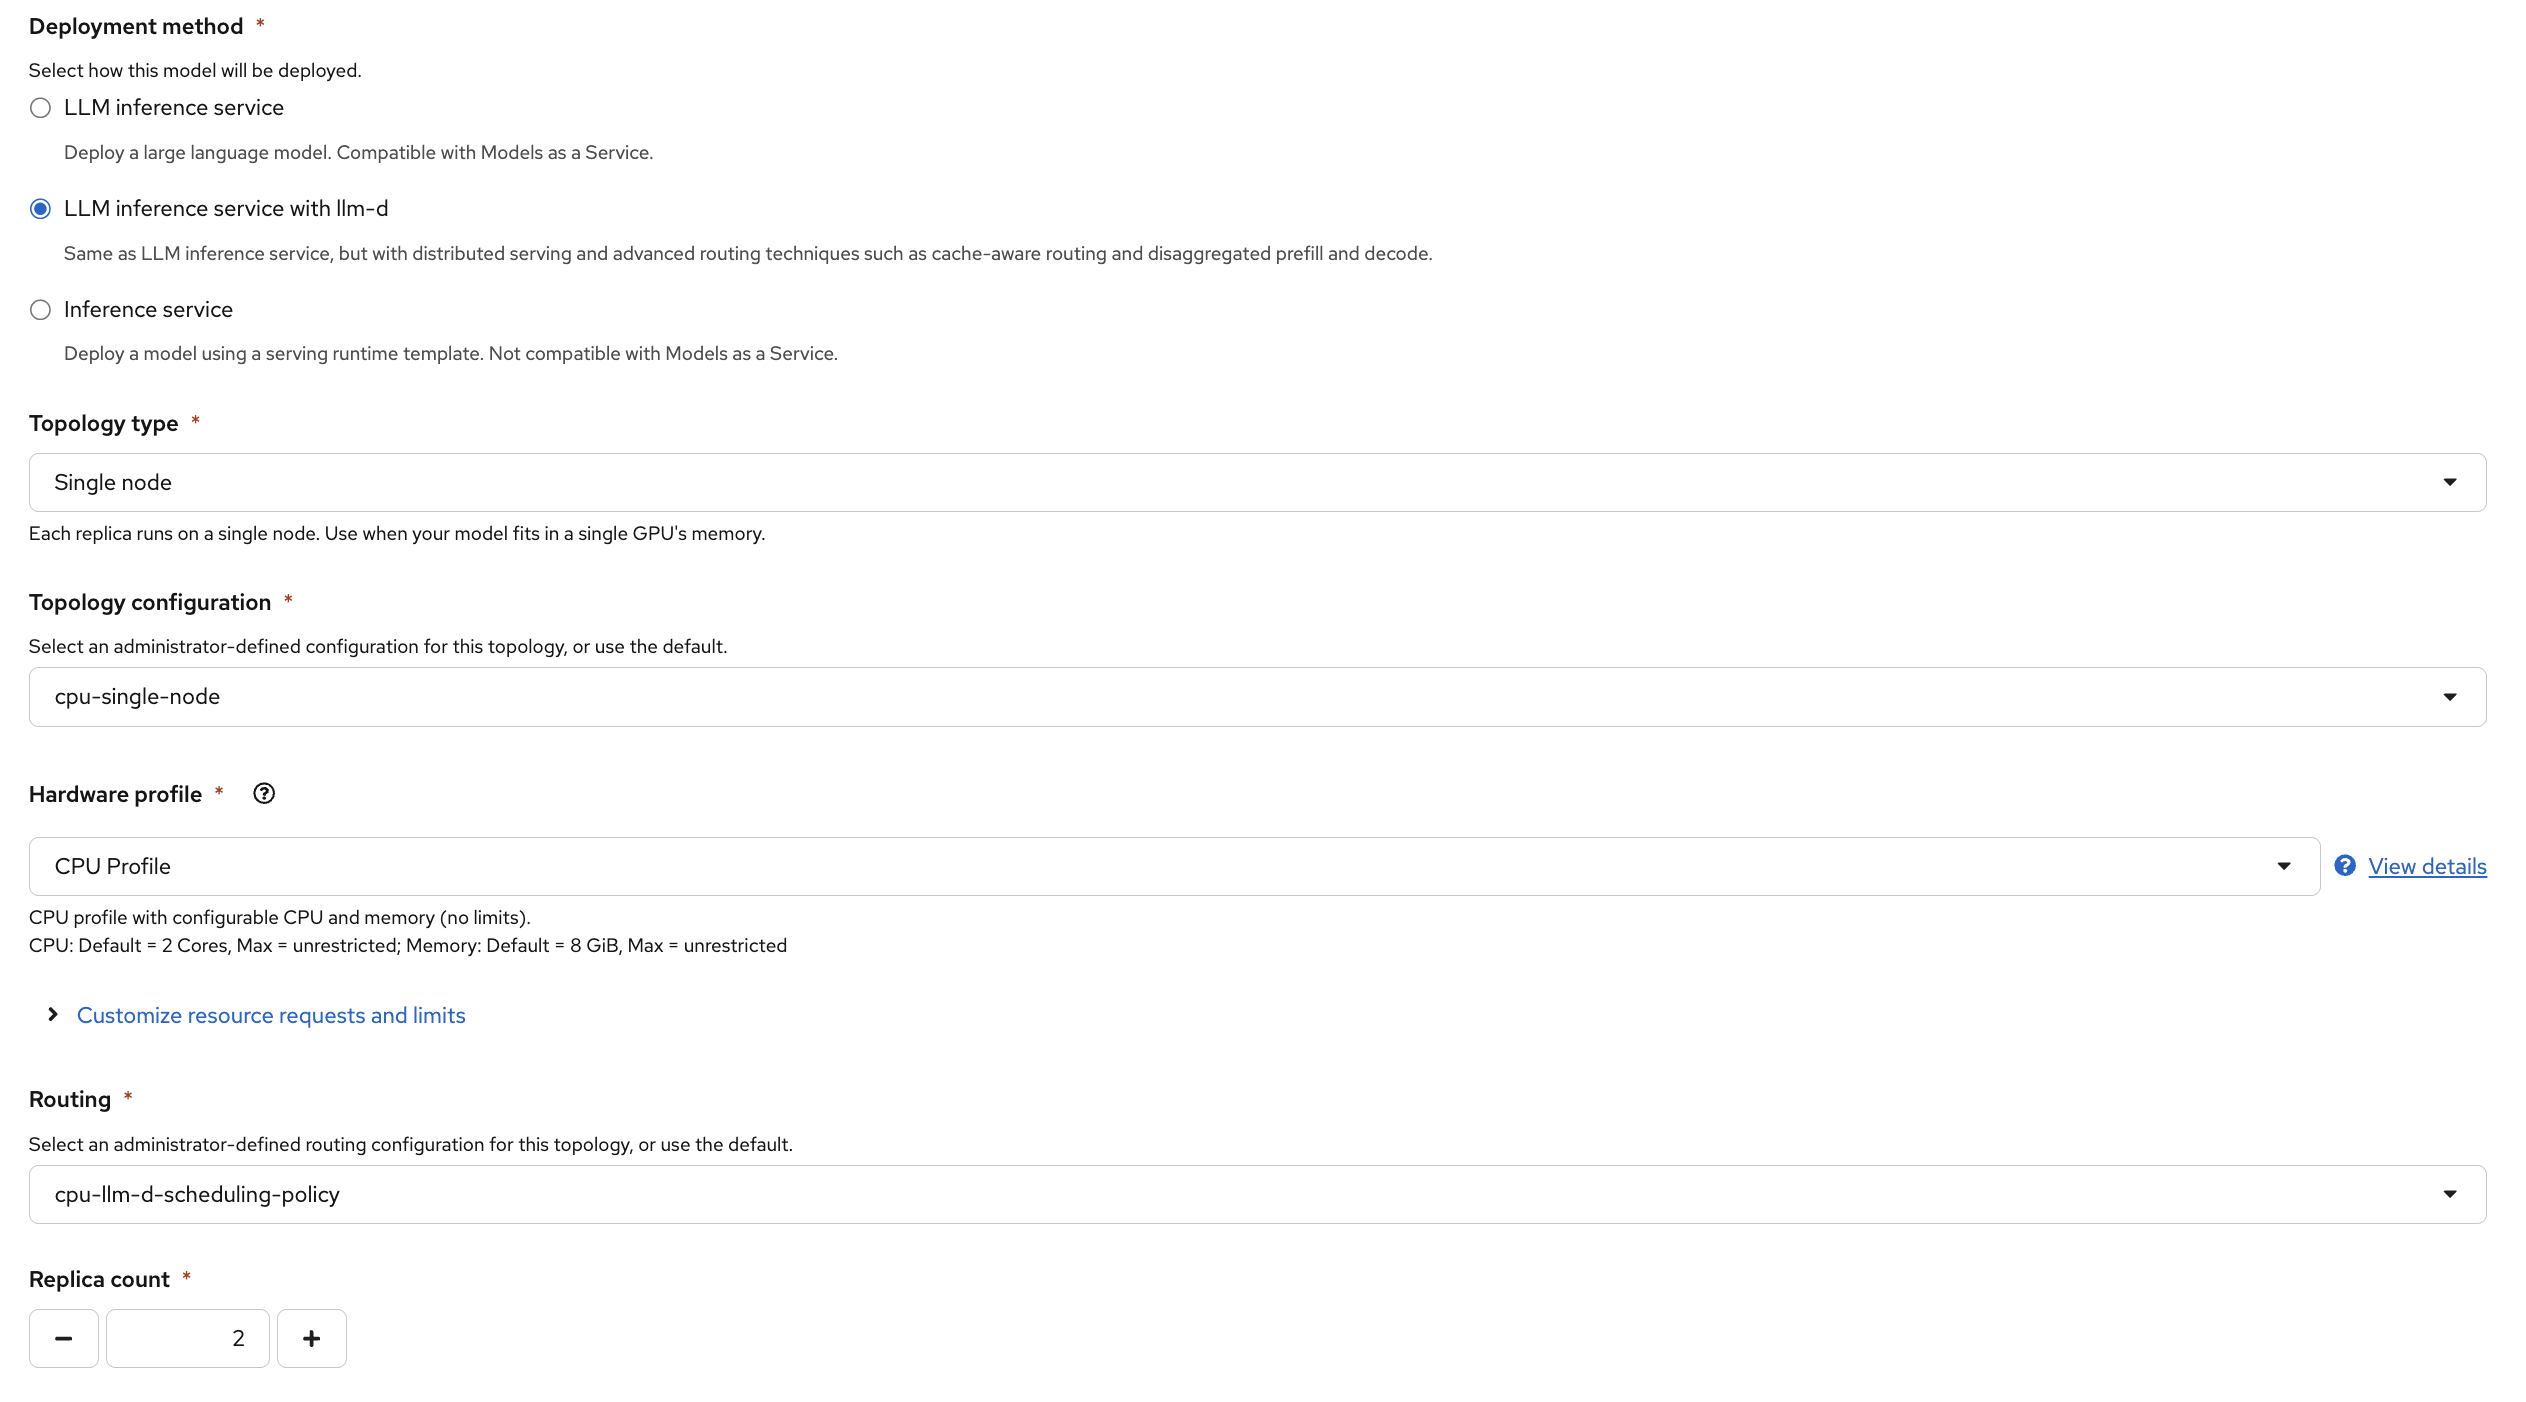
Two replicas means llm-d will distribute incoming requests across two vLLM instances in a smart way. We are not going to simulate a load of multiple users so you won’t see the latency difference in this exercise. We aim to give you the experience of deploying a model with llm-d.
-
On the next screen, select Add as AI asset endpoint. Under Use case, enter
chatagain. Leave the MaaS option unselected.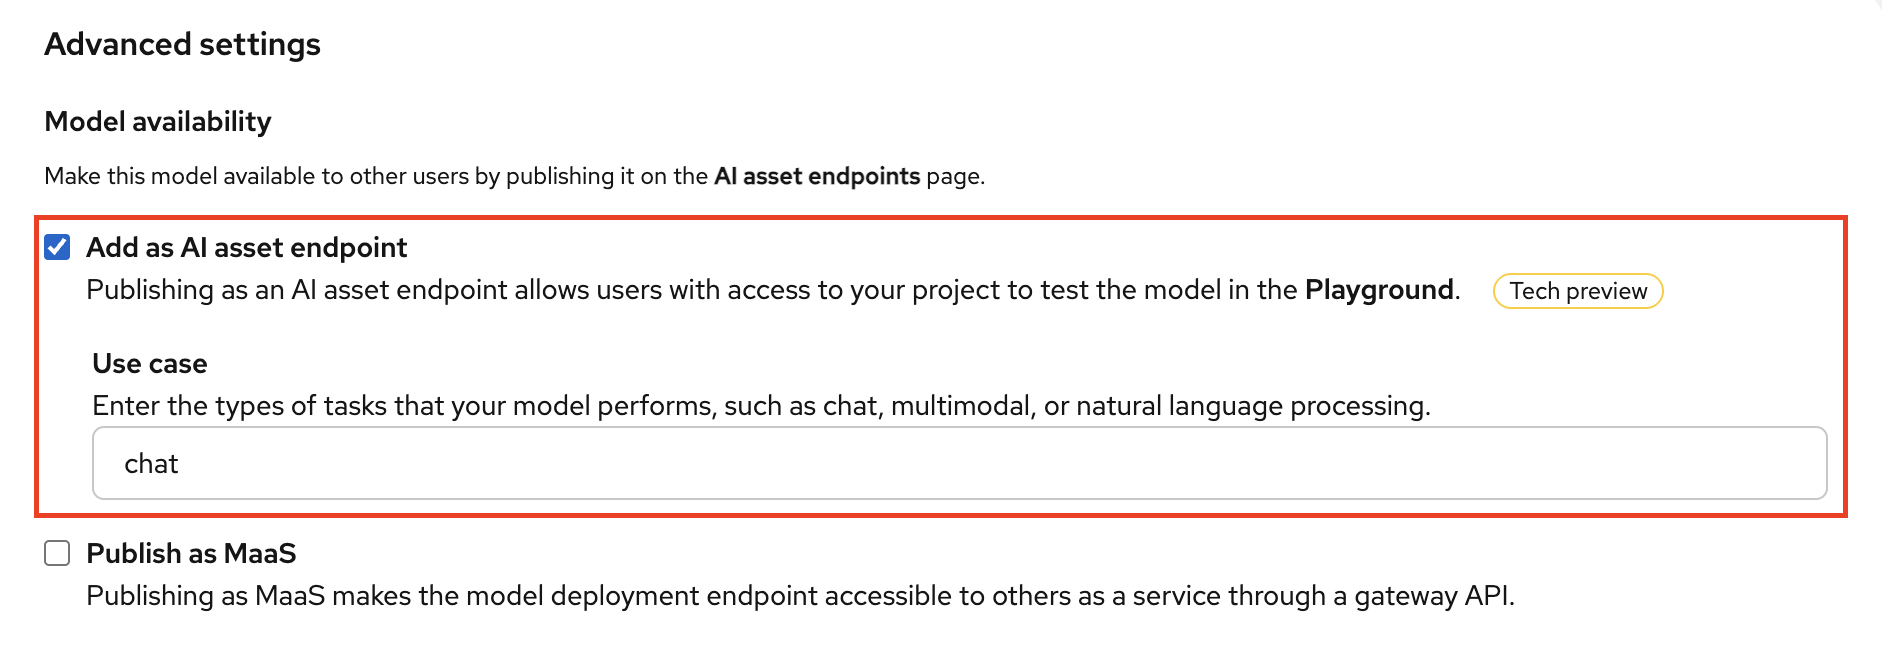
This is important because it allows you to access the model through the GenAI Playground.
-
For Gateway, select the default
openshift-ai-inference | openshift-ingressgateway.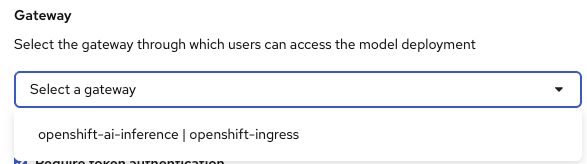
-
Make sure you unchecked the Token authentication option again. We will come back to authentication in Exercise 4 :)
-
Again, let’s add
custom runtime argumentsand pass--max-model-len=2048to limit the maximum length of the model’s context window to 2048 tokens.--max-model-len=2048 -
Under Custom runtime environment variables, click Add variable and enter the key and value below to allocate 8 GB for the key-value (KV) cache.
Key:
VLLM_CPU_KVCACHE_SPACEValue:
8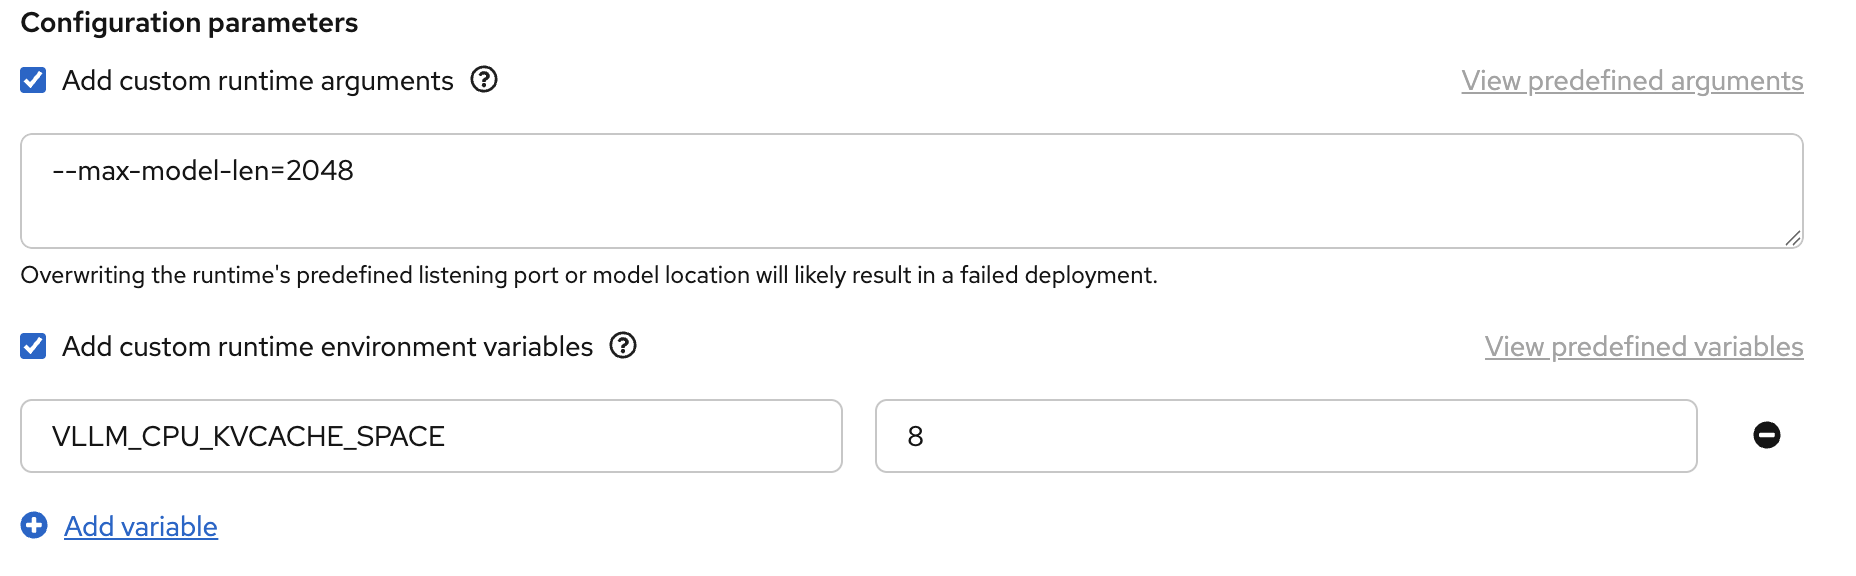
Click Next and then Deploy model.
-
While the model deploys, let’s see what is happening under the hood! Open the Terminal tab and run the following command to watch its pods:
oc get pods -n wksp-user1 -l app.kubernetes.io/part-of=llminferenceservice -wYou should see two model-serving pods (one per replica) and a router pod. With the routing policy selected in this exercise, the router directs incoming requests to the least busy replica.

Once the pods are running, press
Ctrl+Cto stop watching. This does not stop the pods. -
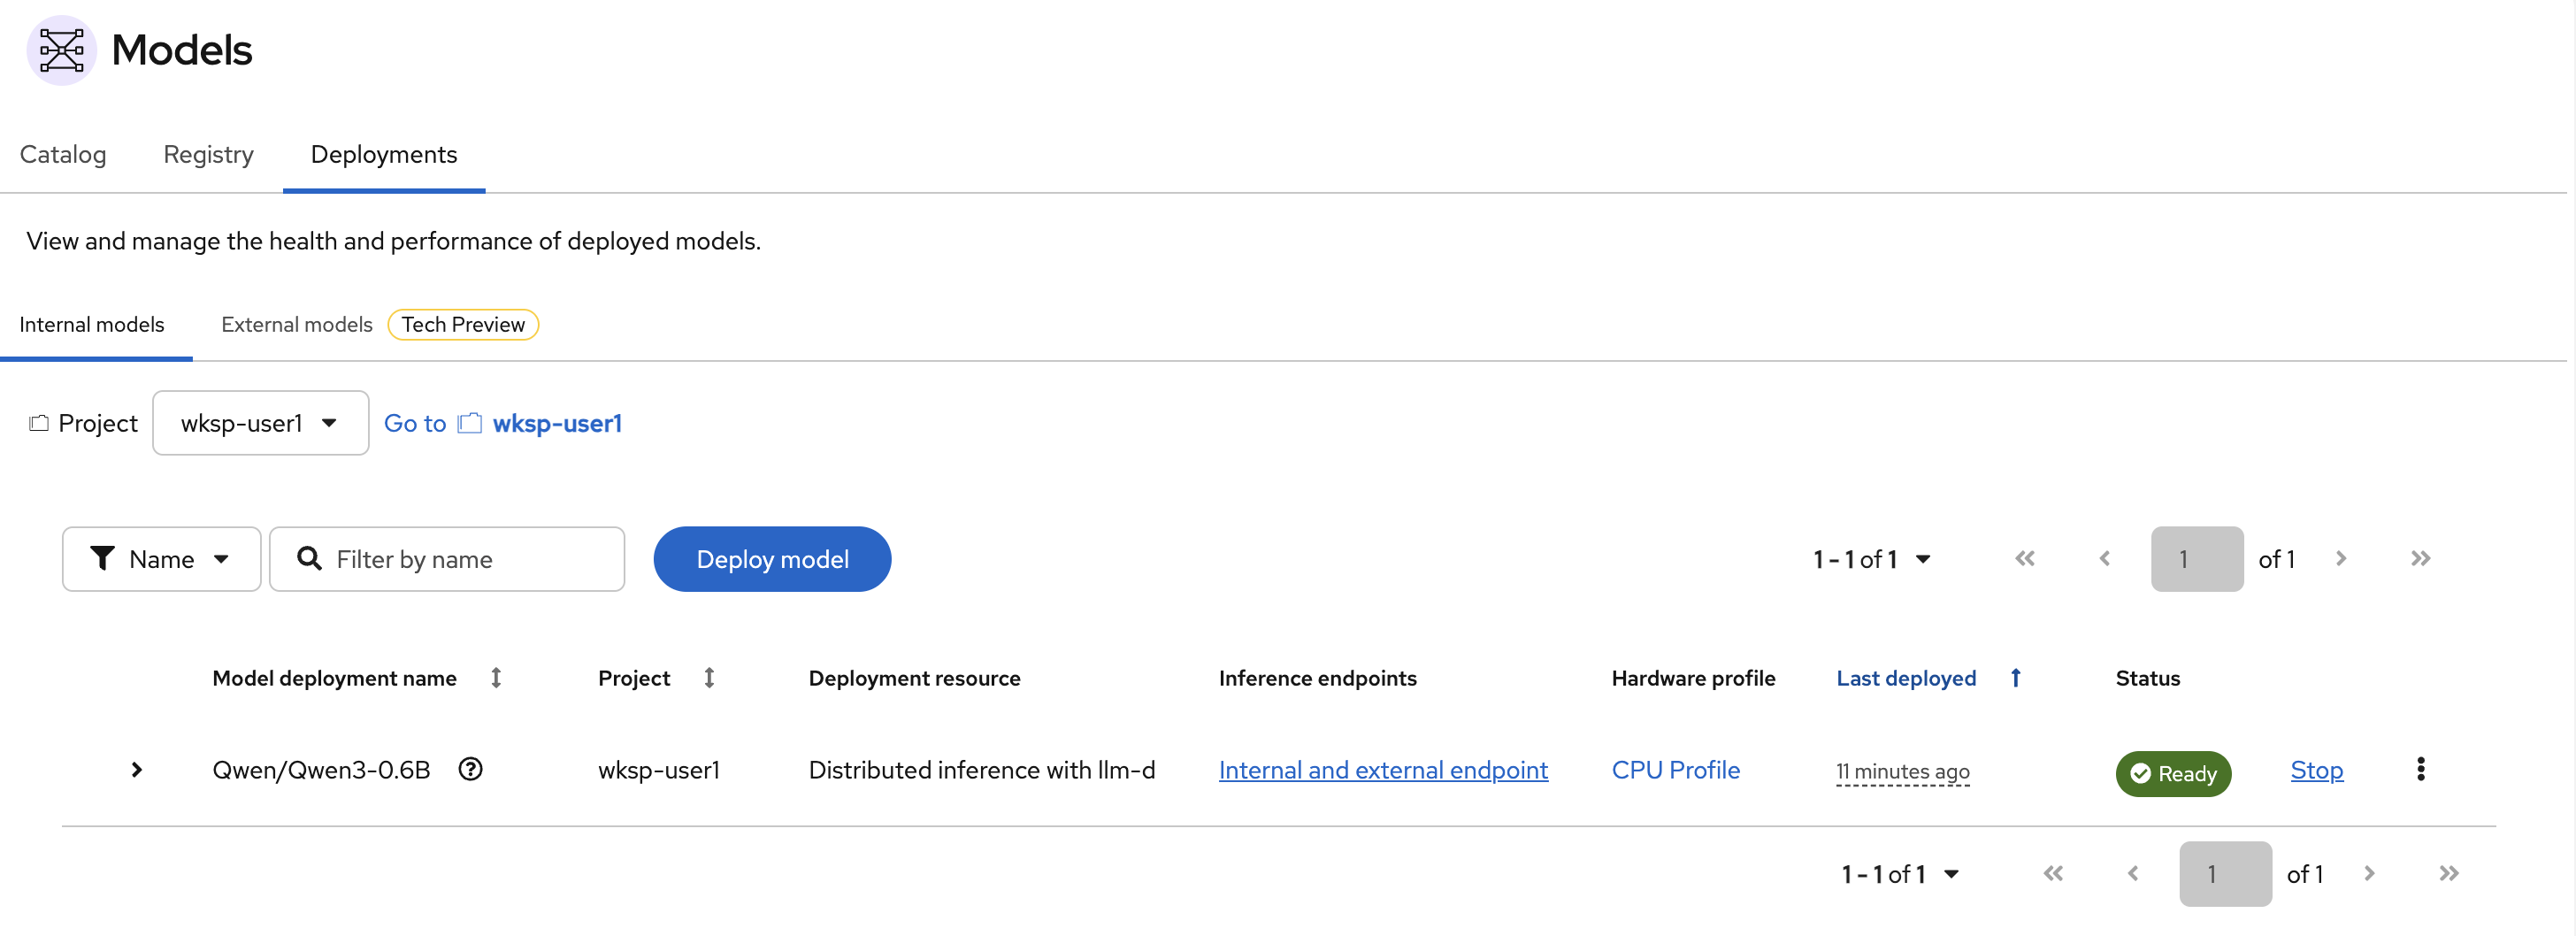
Let’s go back to RHOAI Console and wait for the deployment to show a green status indicator. This takes a minute or two while the model weights are pulled and loaded:
Quick Test: GenAI Playground
Let’s confirm the model is responding before we move on.
-
Go to Gen AI Studio > AI asset endpoints. Click Try in playground for the Qwen3 0.6B model (ignore
qwen3-235b-a22bfor now).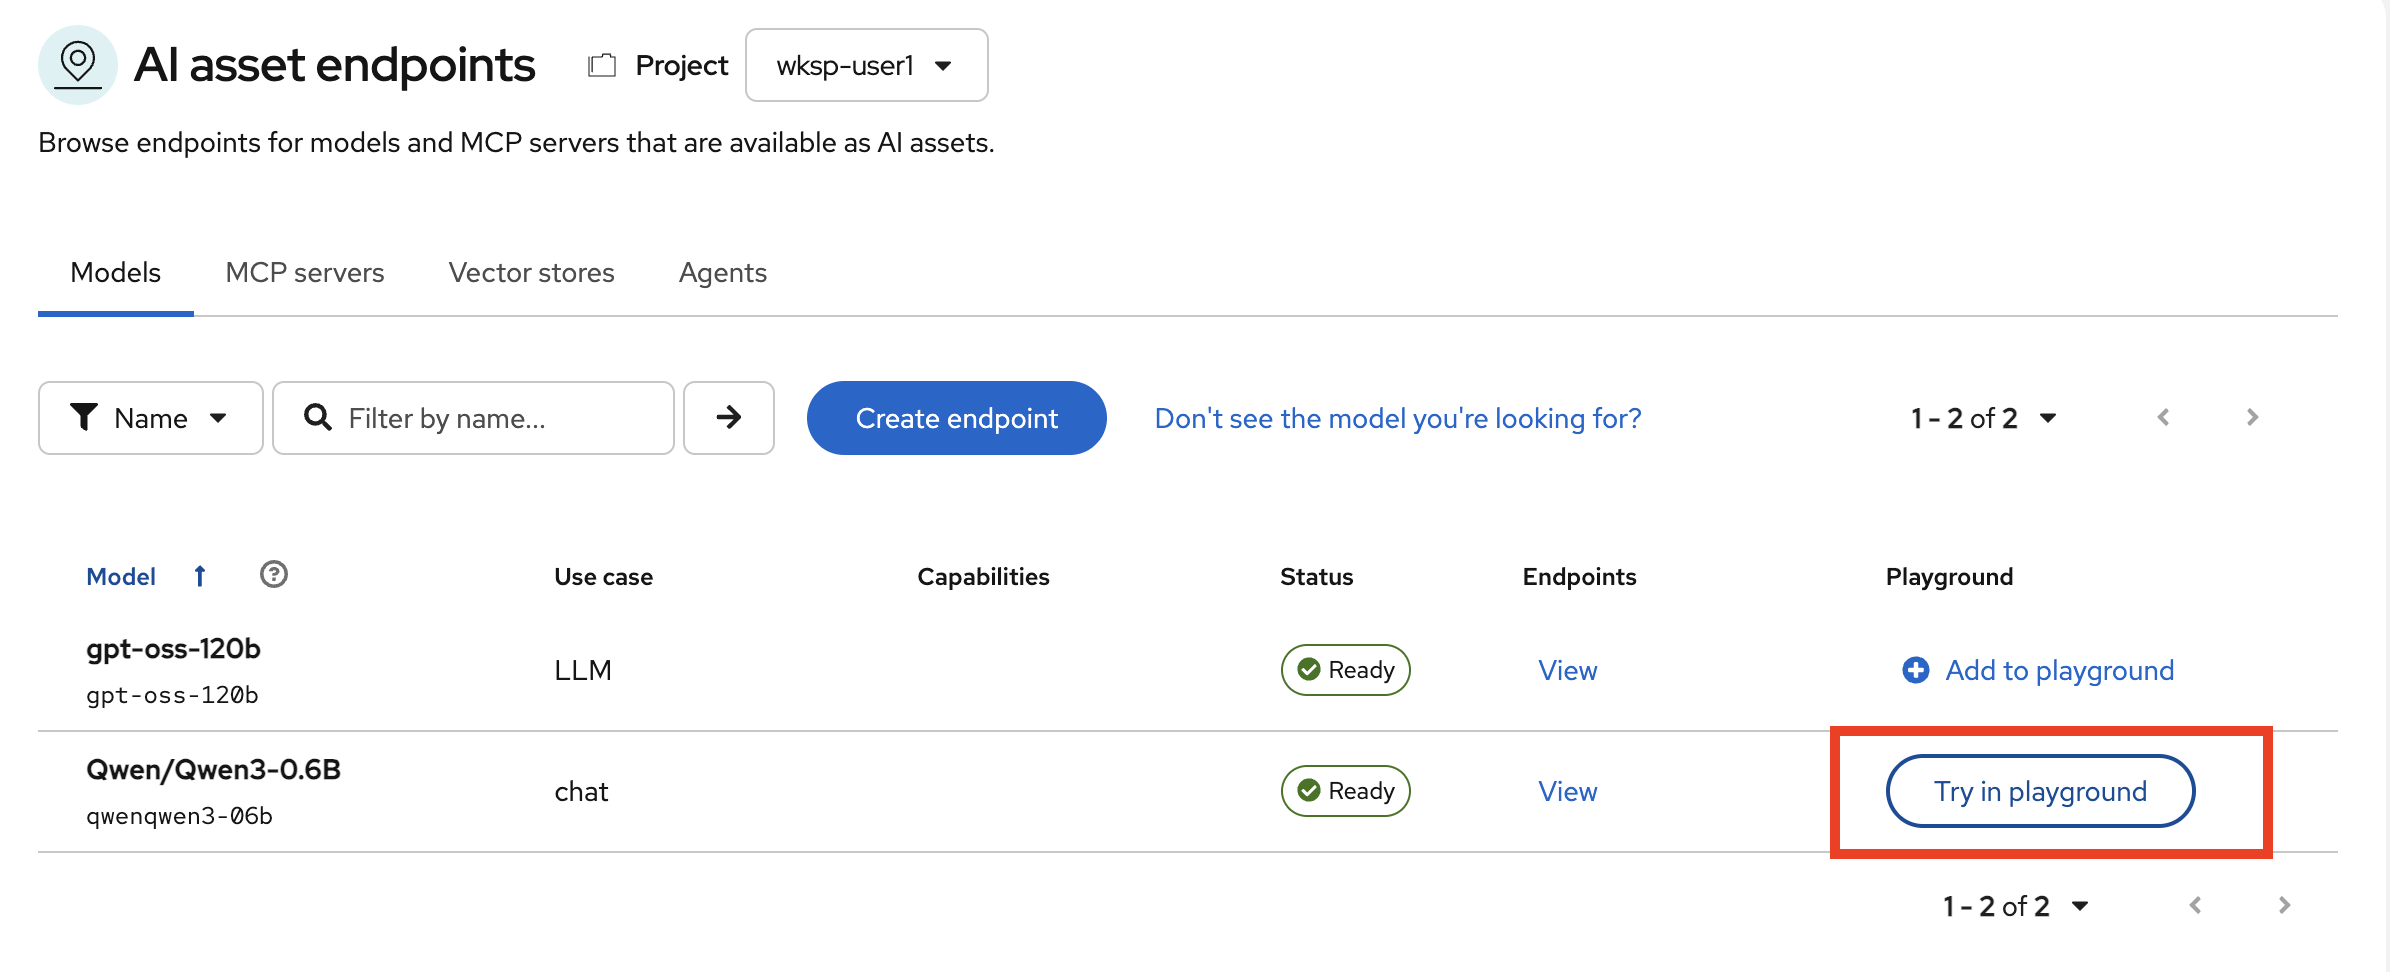
-
Send a prompt of your choice, for example:
Summarize the risks of using a single-node LLM deployment in production.(or try something more interesting🤭). You should get a coherent response from the model. The experience looks identical to what you saw in Exercise 2, and that is the point. llm-d does not change the API or the user experience; it changes what happens underneath, where requests are scheduled and served.
| You can continue chatting but because we are running a low concurrent load (basically only you sending consecutive messages), you won’t observe a latency difference compared to the single-replica deployment. In a real workload with many simultaneous users, the two-replica setup would show meaningfully lower latency and higher throughput. |
See how llm-d works vs plain vLLM
The diagram below contrasts what happens when multiple requests arrive simultaneously: plain vLLM round-robin versus llm-d’s load-aware scheduler. On the left, round-robin distributes blindly: one replica ends up overloaded while the other sits idle. On the right, llm-d tracks each replica’s load and routes new requests to whoever has capacity, so both replicas stay busy and no request waits unnecessarily.
Both replicas run the same Qwen3 0.6B vLLM engine. llm-d only changes how traffic is distributed across them.
Clean up
Again, delete the model deployment to free up resources before moving on.
-
In the OpenShift AI Dashboard, go to AI Hub > Models.
-
Click the three dots next to the Qwen3 0.6B deployment you created and click Delete.
-
Confirm the deletion.
What’s Next?
You’ve deployed a model using single-node vLLM and distributed serving with llm-d. These exercises showed how the platform team deploys models and manages their resources.
But application teams at Fed Aura Capital shouldn’t each need to repeat that work. Lenora, and other applications can share centrally managed models, reducing duplicated deployments and making better use of available resources.
Models as a Service (MaaS) gives these teams API access to shared models, with authentication, rate limits, and usage tracking. The platform team manages the infrastructure, while application teams focus on building their applications.
In Exercise 4, you’ll switch from deploying a model to consuming one: a larger, GPU-hosted model that the platform team has already made available to you.