Signing Your Commits
Every commit tells a story — but how do you know the story is true? Commit authors can be faked with a single git config command. Repository access can be compromised. SSH or GPG keys can be lost, stolen, or shared. Traditional code signing relies on long-lived key pairs that developers must manage, rotate, and protect — and many developers simply do not.
Sigstore keyless signing here, with Red Hat Trusted Artifact Signer (RHTAS), deployed as a cluster infrastructure component, solves this by tying the signature to the developer’s identity rather than a key pair. When you sign a commit, you authenticate with your organization’s identity provider (in our case, Keycloak SSO). A short-lived certificate is issued by Fulcio (RHTAS' Certificate Authority), the signature is recorded in Rekor’s transparency log, and the certificate expires within minutes. There are no keys to manage, lose, or rotate.
In this section, you will commit the vulnerability fix you just made and sign it with your identity.
Section 1: Commit and sign
Exercise 1: Commit your changes
-
In Dev Spaces, open the Source Control panel (the branch icon in the left sidebar, or press
Ctrl+Shift+G). -
You should see the modified
pom.xmlin the changes list. -
Enter a descriptive commit message:
Cleared most of the application vulnerabilities -
Click the Commit button (the checkmark icon).
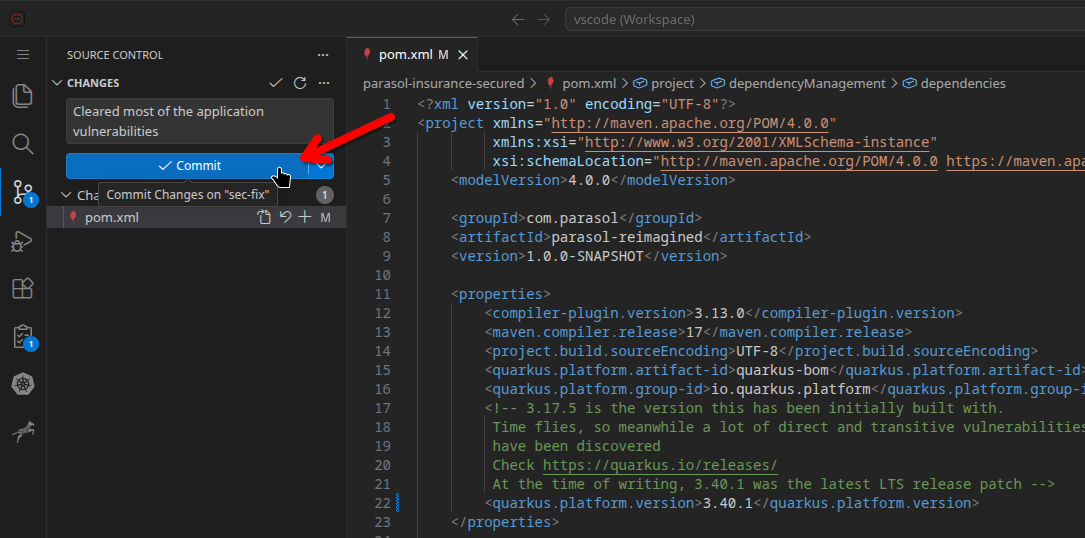
-
We didn’t properly stage our changes, so commit directly by clicking Yes.
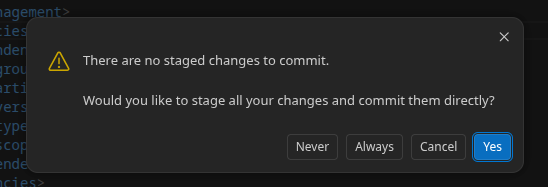
-
VSCode asks to open the Keycloak SSO website. Click Open.

A browser tab or popup will open, showing a success code. This is the Sigstore OIDC login flow.
-
Copy the success code by clicking the copy icon.
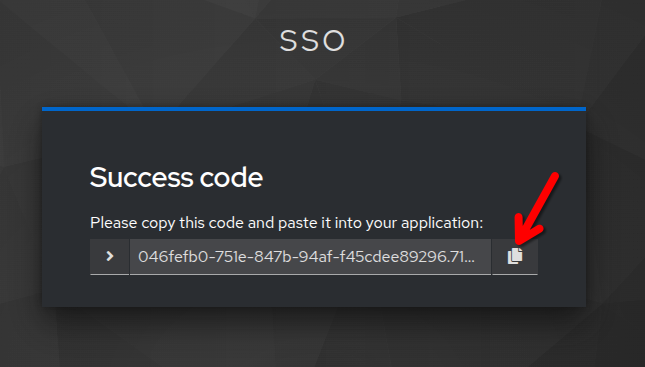
-
Paste it into the gitsign login terminal and hit Return.
This is a Linux terminal, depending on your browser and setup, you will have to paste with Ctrl+Shift+V, not Ctrl+V 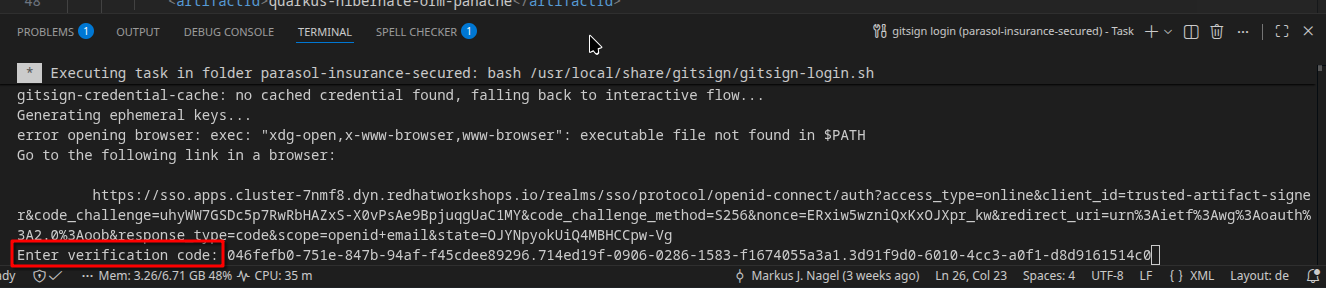
The commit is now signed with your identity.
-
Click Sync Changes (or the push icon) to push the signed commit to GitLab.
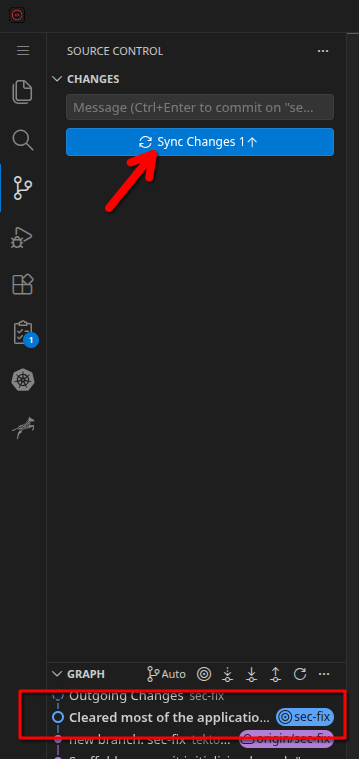
-
Go back to your Sandbox Component in Developer Hub, then click View Source on the component page, (or navigate to https://gitlab-gitlab.{openshift_cluster_ingress_domain}) and find your commit. You should see a signature badge (unverified) next to it.
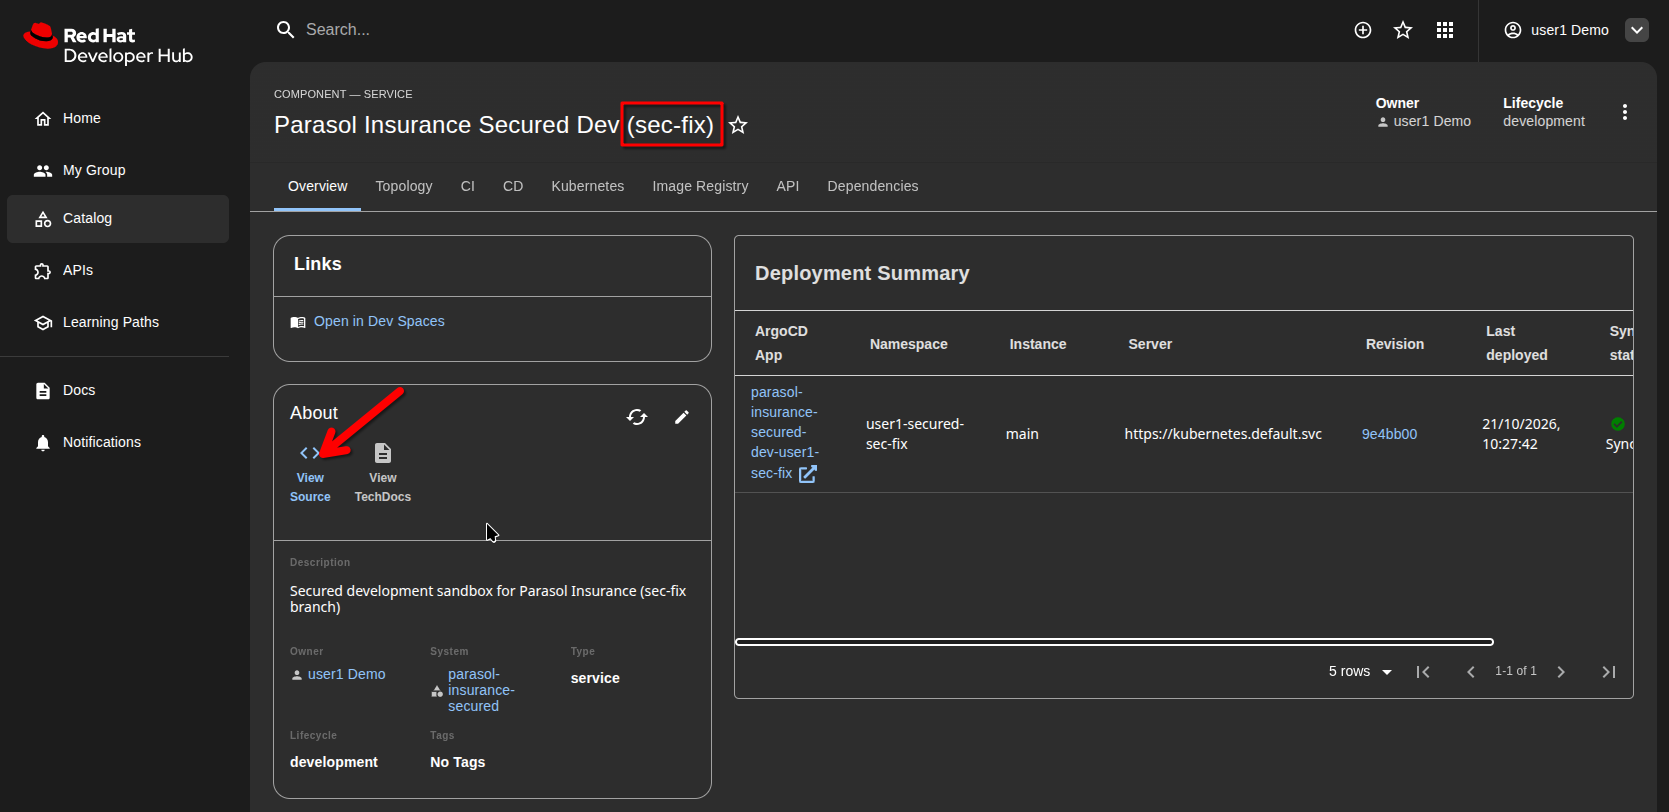
Click on the badge to see the certificate details — notice the Certificate Issuer shows
CN=CISO-office,O=Parasol. Note the Certificate Subject is empty, because GitLab currently doesn’t understand the structure of Sigstore/RHTAS signatures, where the signer identity is stored in a different signature leaf (Subject Alternative Name). GitLab also can’t verify the Sigstore signatures (yet), because the public key is stored in the transparency database and changes with each new ephemeral certificate.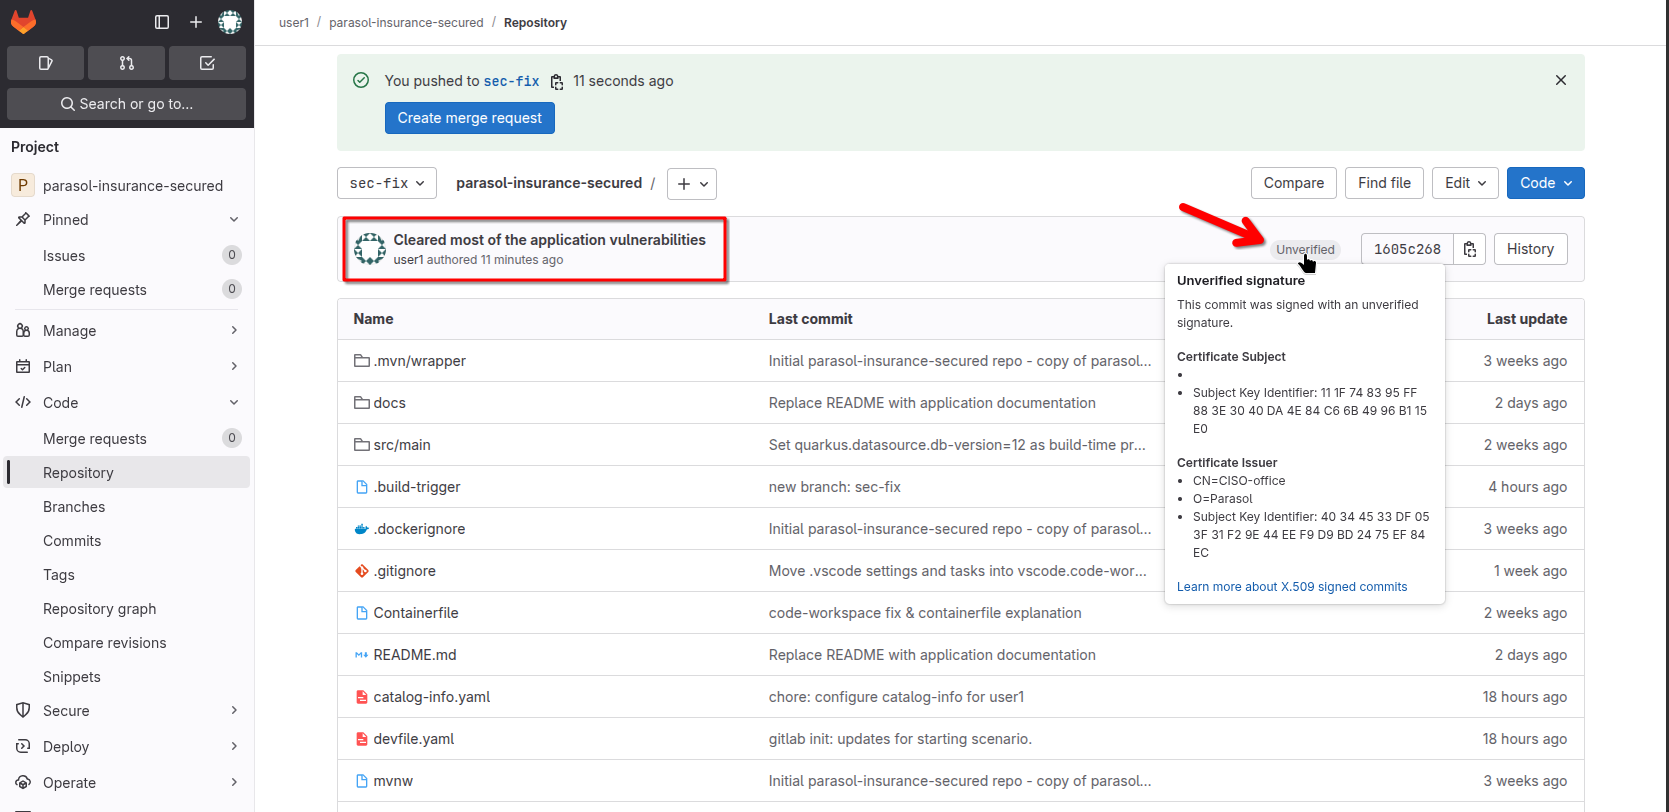
Why is this important?
-
Accountability: Every commit is cryptographically tied to a verified identity — not just a name in a git config
-
Tamper evidence: If anyone modifies a signed commit, the signature breaks
-
No key management: Developers do not need to generate, store, or rotate signing keys
-
Transparency: Every signature is recorded in a public transparency log (Rekor), creating an auditable trail
-
Pipeline enforcement: Later stages of the pipeline will verify that commits were signed before building
How was it done?
To keep the exercise readable, we have added the details below. Expand to read how it was done.
Open to view implementation details
Git has been configured to use gitsign as the signing program. This is set up automatically when the Dev Spaces workspace starts, via the devfile’s postStart command:
git config --global gpg.format x509
git config --global gpg.x509.program gitsign
git config --global commit.gpgsign true
git config --global gitsign.fulcio "https://fulcio-server-trusted-artifact-signer.{subdomain}"
git config --global gitsign.rekor "https://rekor-server-trusted-artifact-signer.{subdomain}"
git config --global gitsign.issuer "https://sso.{subdomain}/realms/sso"
The Sigstore keyless flow works as follows:
-
The developer initiates a commit
-
Gitsign redirects to the OIDC provider (Keycloak) for authentication
-
After authentication, gitsign requests a short-lived certificate from Fulcio (the certificate authority)
-
Fulcio issues a certificate embedding the developer’s email as the Subject Alternative Name
-
Gitsign signs the commit with this certificate
-
The signature is recorded in Rekor (the transparency log) for auditability
-
The certificate expires within minutes — but the Rekor entry proves the signature was valid at the time of signing
Since Dev Spaces runs in a container without a local browser, the gitsign-credential-cache daemon handles the OIDC flow by presenting a verification code that the developer pastes into a terminal. On a local IDE, gitsign would open the browser directly.
Next steps
Continue to Checking the Sandbox Pipeline to see how the pipeline verifies your signature and scans your image.