Moving to the Next Stages
Your sandbox image is clean — vulnerabilities addressed, base image hardened, commit signed. Now it is time to move your changes through the secured pipeline stages: merge request check, post-merge build, and tag-based promotion to production.
Unlike the sandbox, these pipelines enforce security policies. Unsigned commits, policy violations, and missing approvals will block promotion.
Section 1: Merge Request
Exercise 1: Create a Merge Request
-
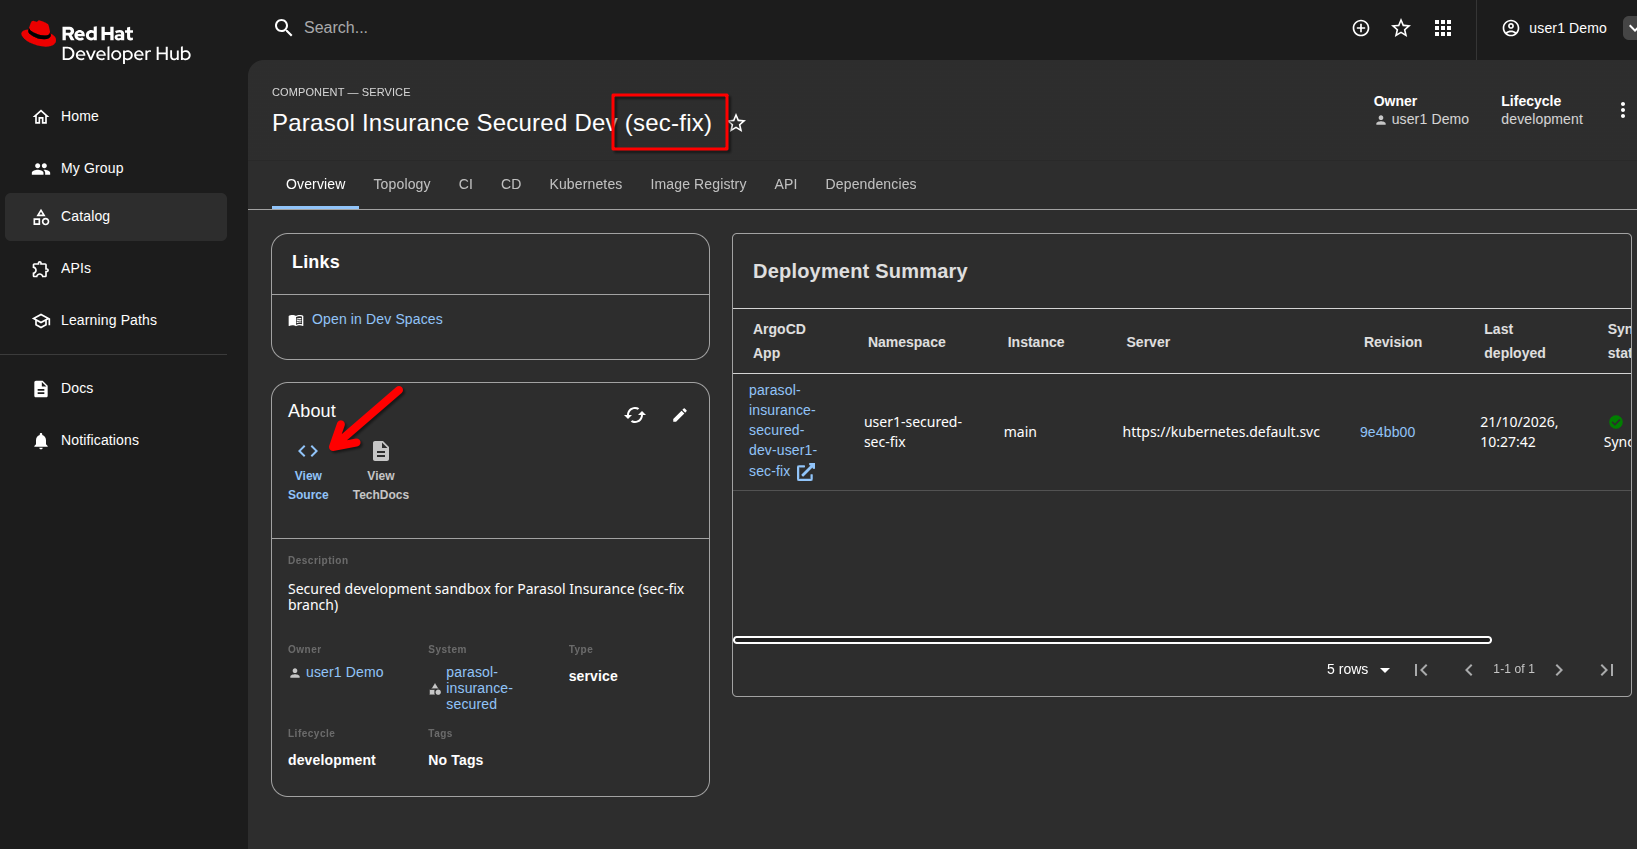
Open GitLab and navigate to your sandbox branch in the
parasol-insurance-securedrepository.You can find it quickly by clicking View Source on your sandbox component in Developer Hub.
-
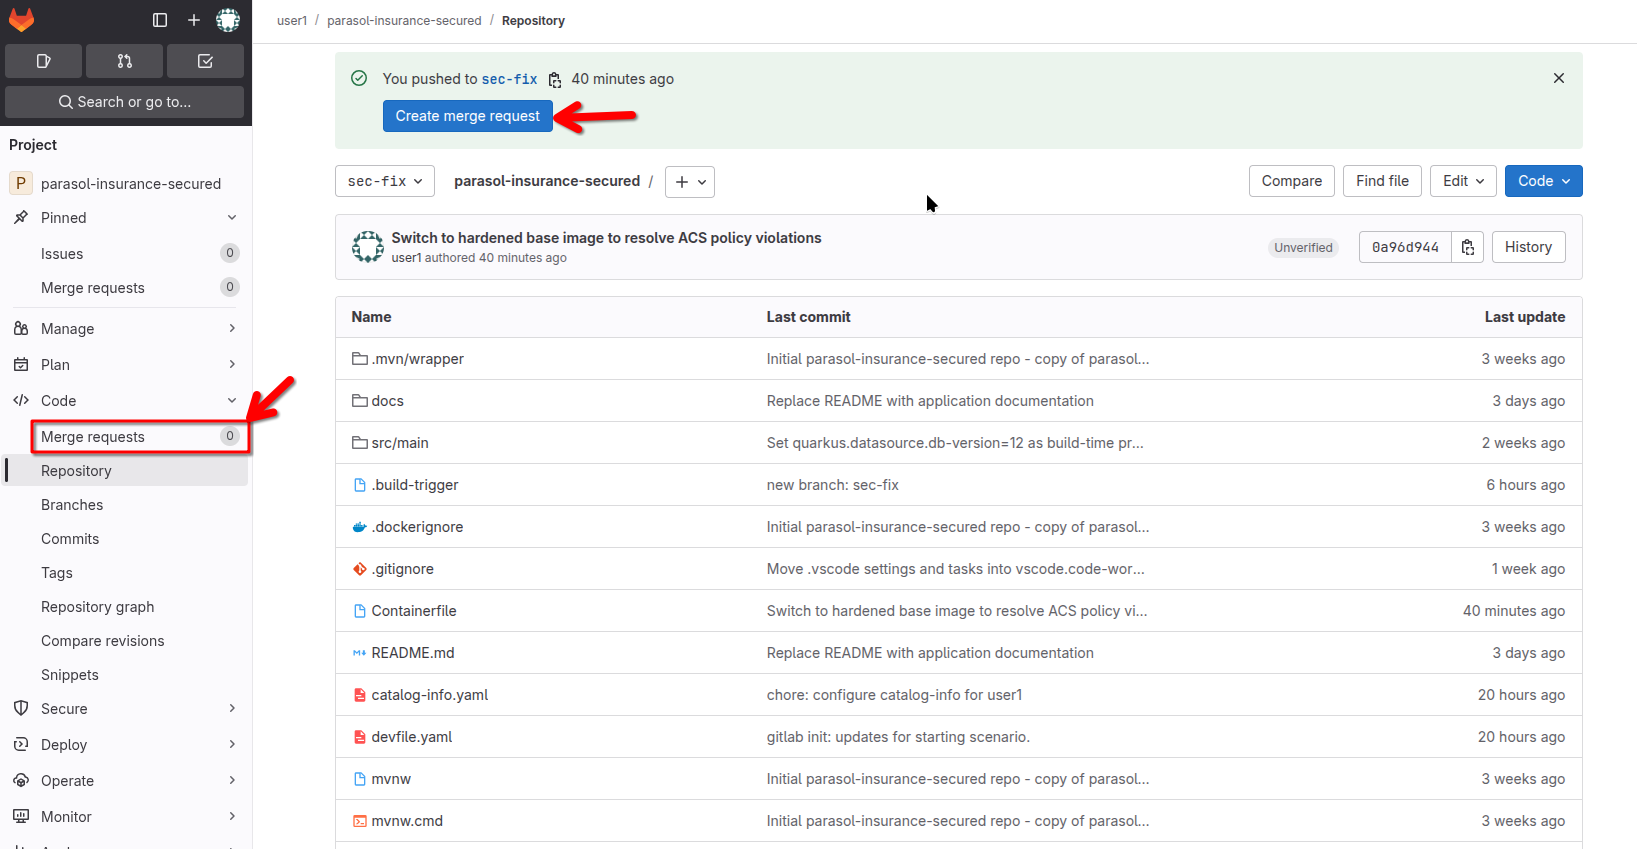
Click Create merge request (or navigate to Merge Requests → New merge request).
-
Set the source branch to your sandbox branch and the target branch to
main.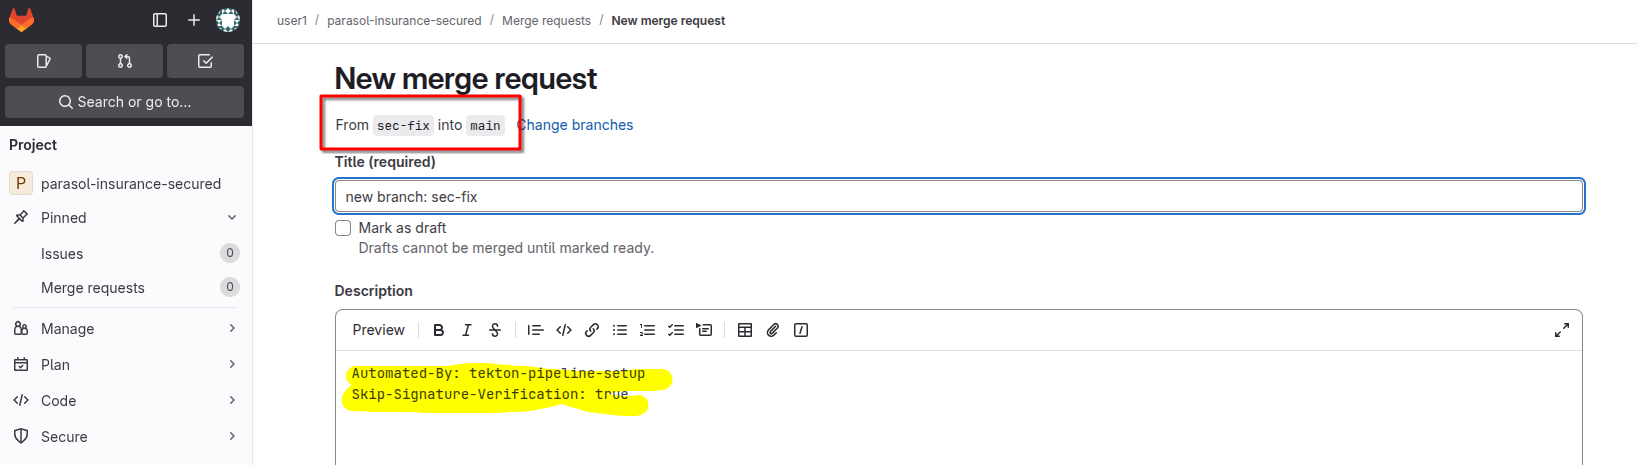
-
Give the merge request a descriptive title:
Sec-fix done, security posture improvedRemove the "Description" and click Create merge request.
Exercise 2: Watch the MR check pipeline
-
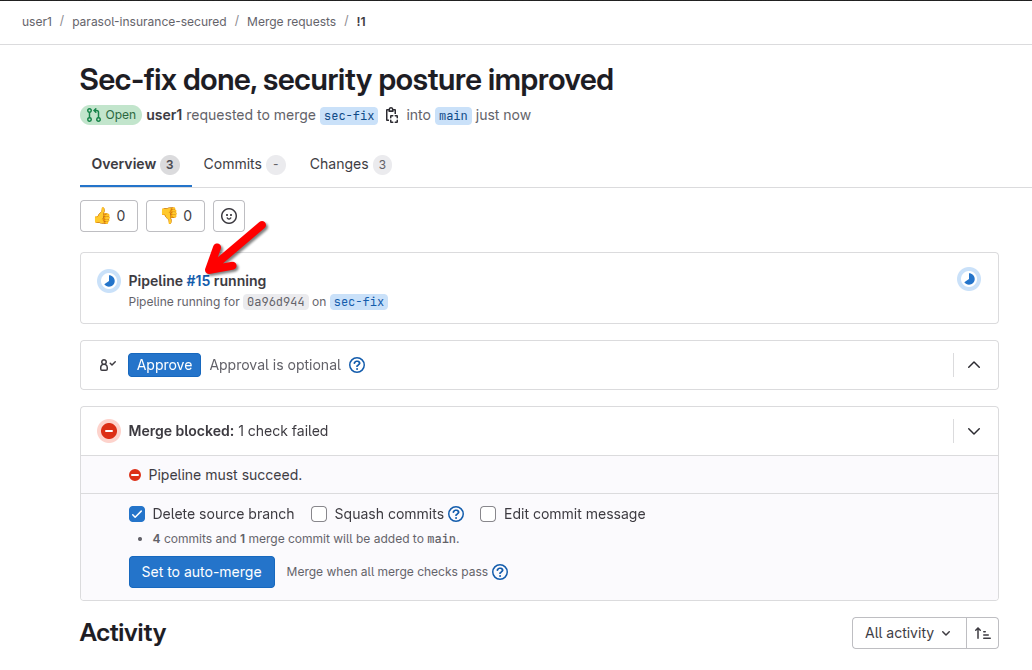
After creating the merge request, a check pipeline is triggered automatically. "can this build in preprod, will it pass, does it adhere to our standards?" If this fails, the branch with the changes cannot be merged. This is the merge request check pipeline — it runs in the Parasol secured build namespace, not in your sandbox.
-
Open the pipeline view in GitLab and click on one of the tasks. It will open the MR Check Pipeline Run in Developer Hub.
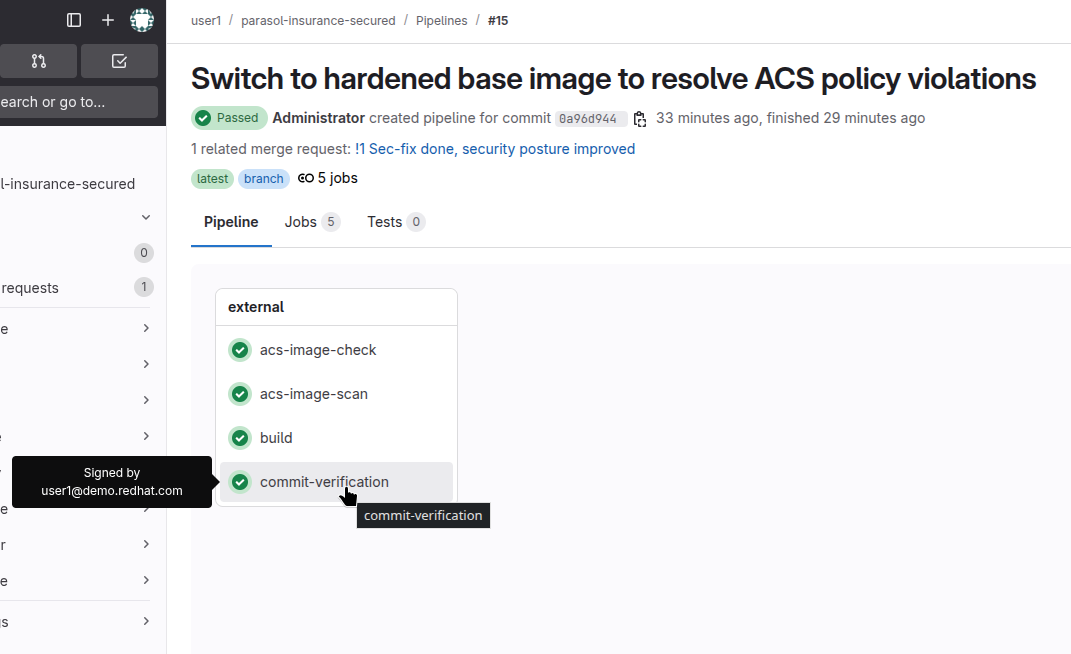
-
Notice the component — this is
Parasol Insurance (Secured), not your sandbox anymore.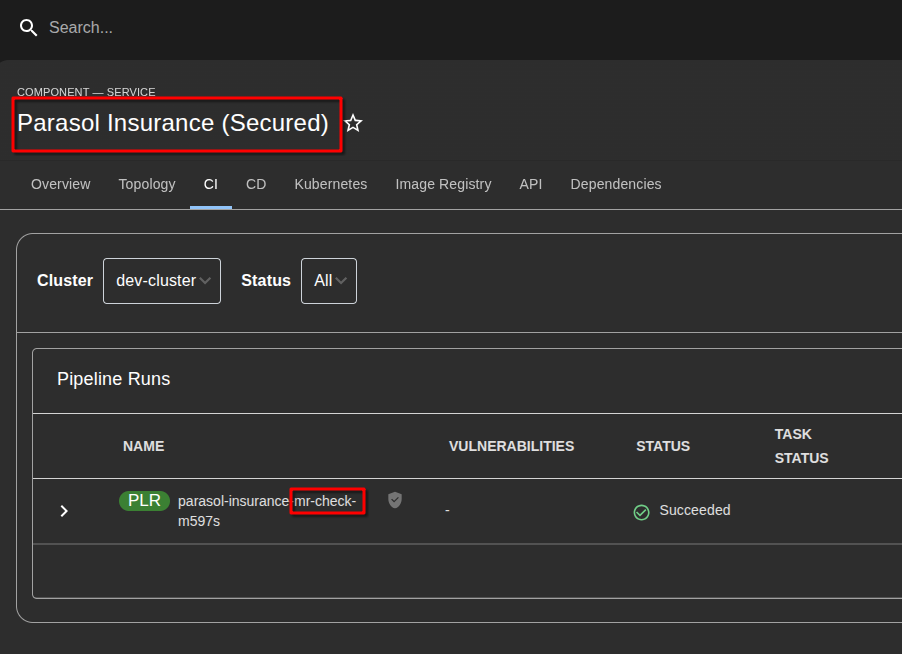
-
The MR check pipeline:
-
Verifies the commit signature — with
ENFORCE=true, unsigned commits will fail the pipeline -
Builds the image from the MR branch
-
Scans and checks the image against ACS policies
-
Reports results back to GitLab as commit statuses and a detailed MR comment
-
-
Wait for the pipeline to complete (this typically takes 3-5 minutes).
-
Go back to the merge request page in GitLab
-
The "Merge" button has been activated, so you can merge - but before you do
-
Scroll down for the latest entry in the Activity where a 🔀 Merge Request Check Results comment is posted with signature status, ACS policy results, and vulnerability counts
-
For a succeeded pre-check, this is not as interesting as checking what went wrong and how to fix it. For you, this is informational (since it succeeded)
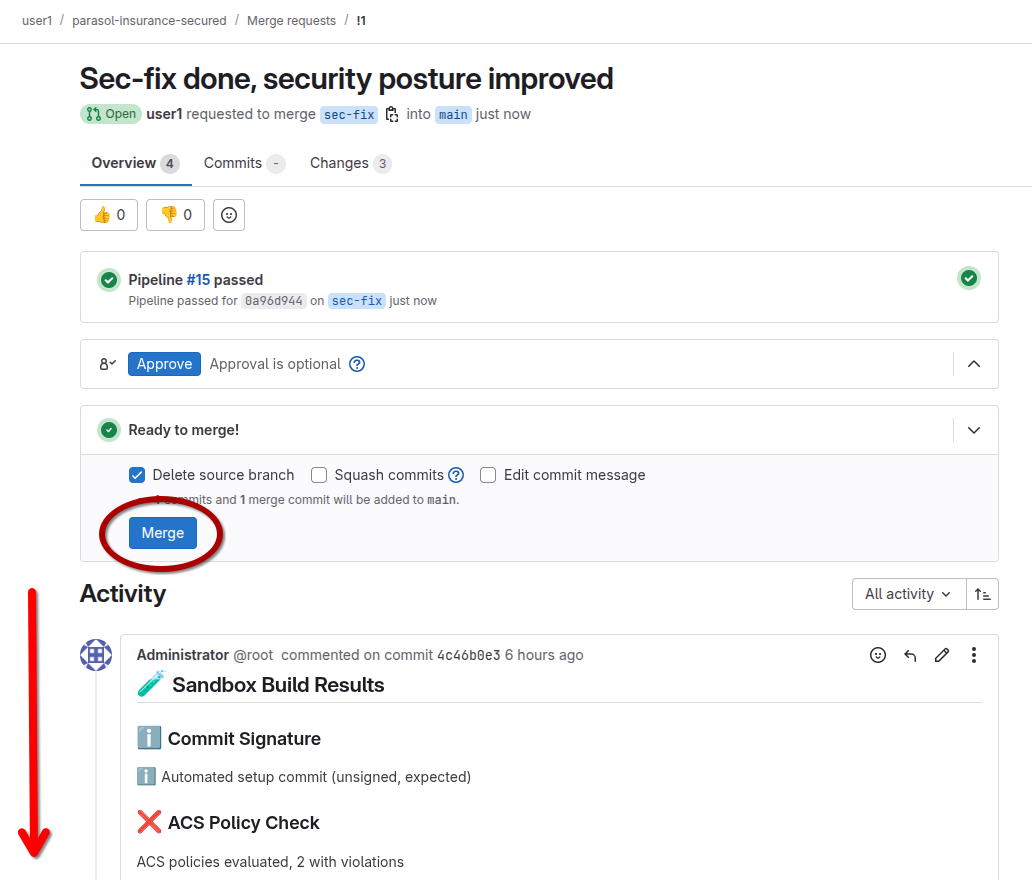
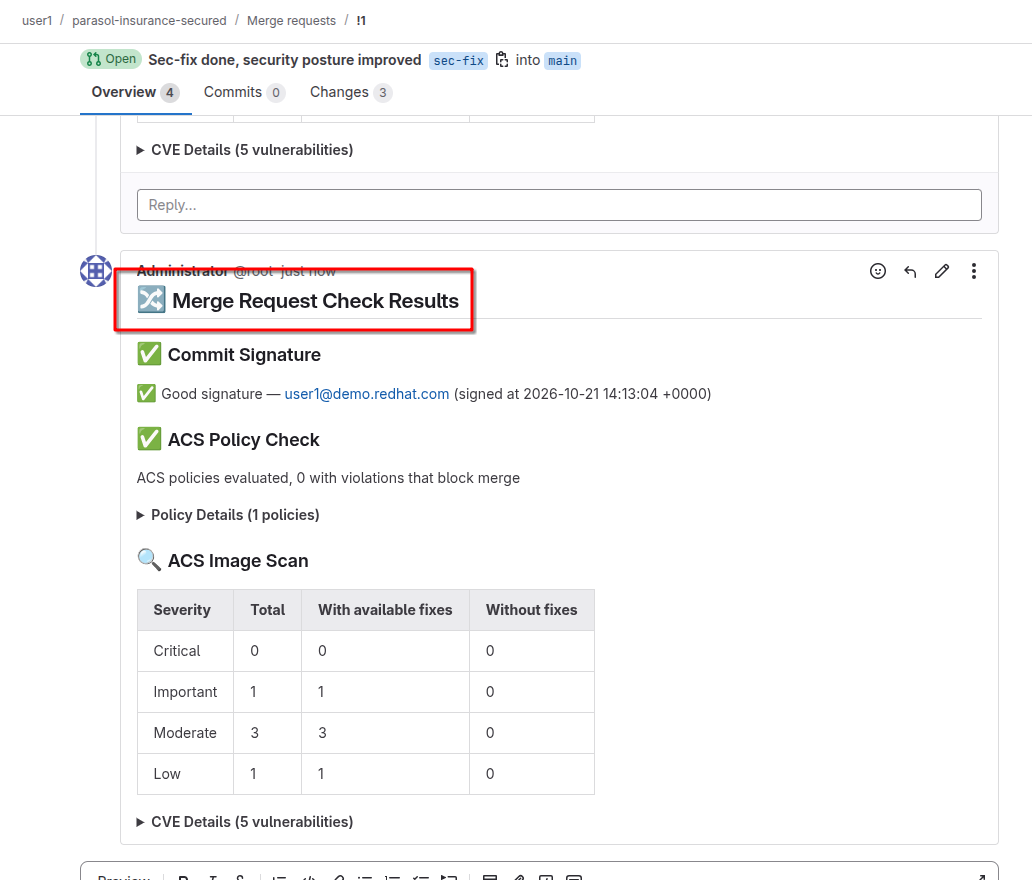
-
Exercise 3: Merge the request
-
If all checks pass, the Merge button becomes available.
If the pipeline failed (e.g., unsigned commit), the merge is blocked. GitLab is configured with onlyMergeWhenPipelineSucceedsto enforce this. -
Click Merge.
This triggers the post-merge build pipeline — the final image is built from
main, signed & attested by Tekton Chains, stored in Quay and deployed to the preprod environment.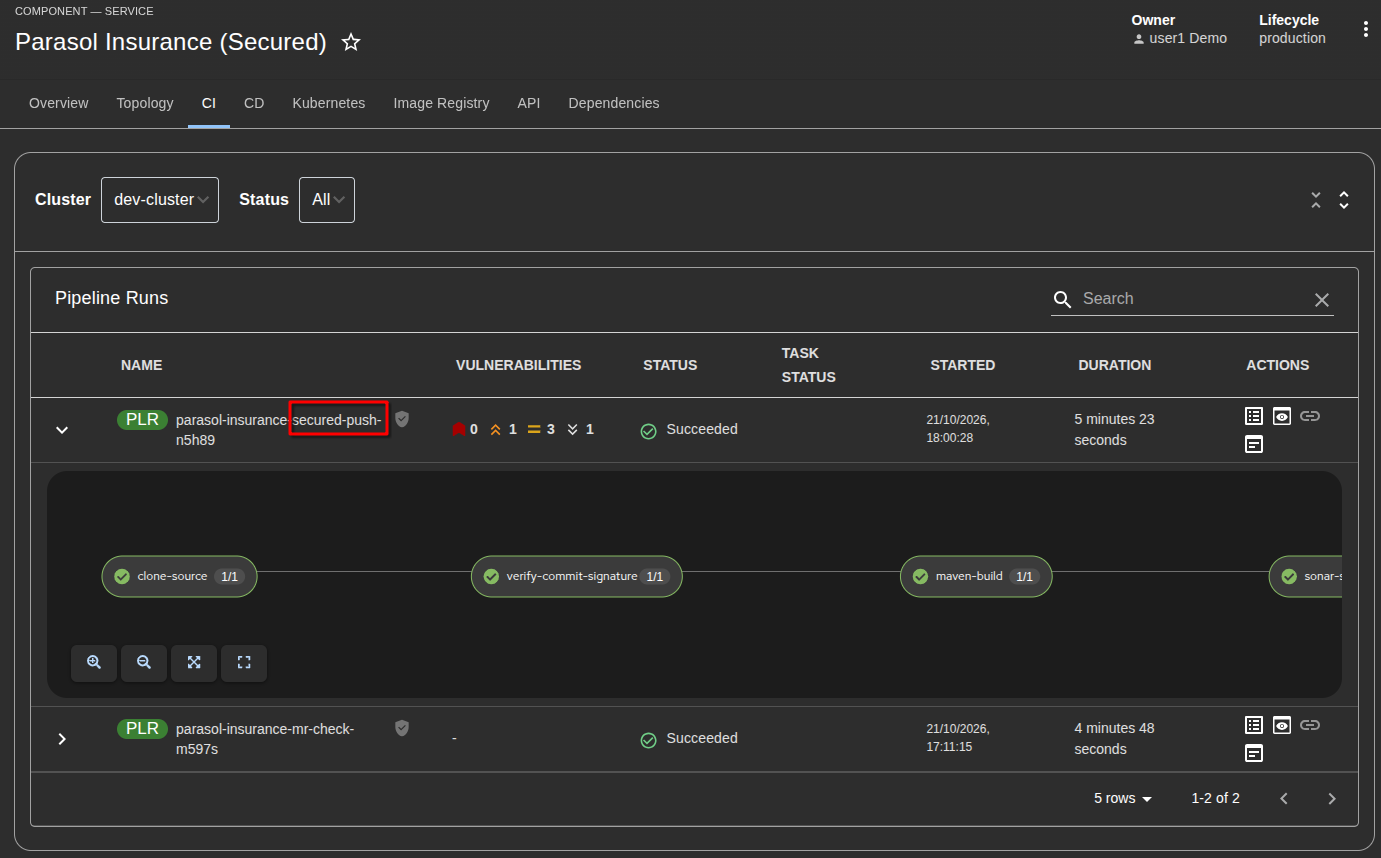
-
Wait for the post-merge build pipeline to complete before proceeding. Return to the Parasol Insurance (Secured) component in Developer Hub and click the CI tab to watch the pipeline finish (this typically takes 3-5 minutes). If this is the first time the image is being built, the tag-promote step in the next section could fail without a completed build.
Section 2: Promote to production
The post-merge build created a signed image from the main branch. To promote it to production, you create a Git tag — this triggers the tag-promote pipeline.
Exercise 1: Create a tag
-
In GitLab, find the
{user}/parasol-insurance-securedrepo and navigate to Code → Tags. -
Click New tag.
-
Enter a tag name (for example,
v2.0) and select themainbranch as the source.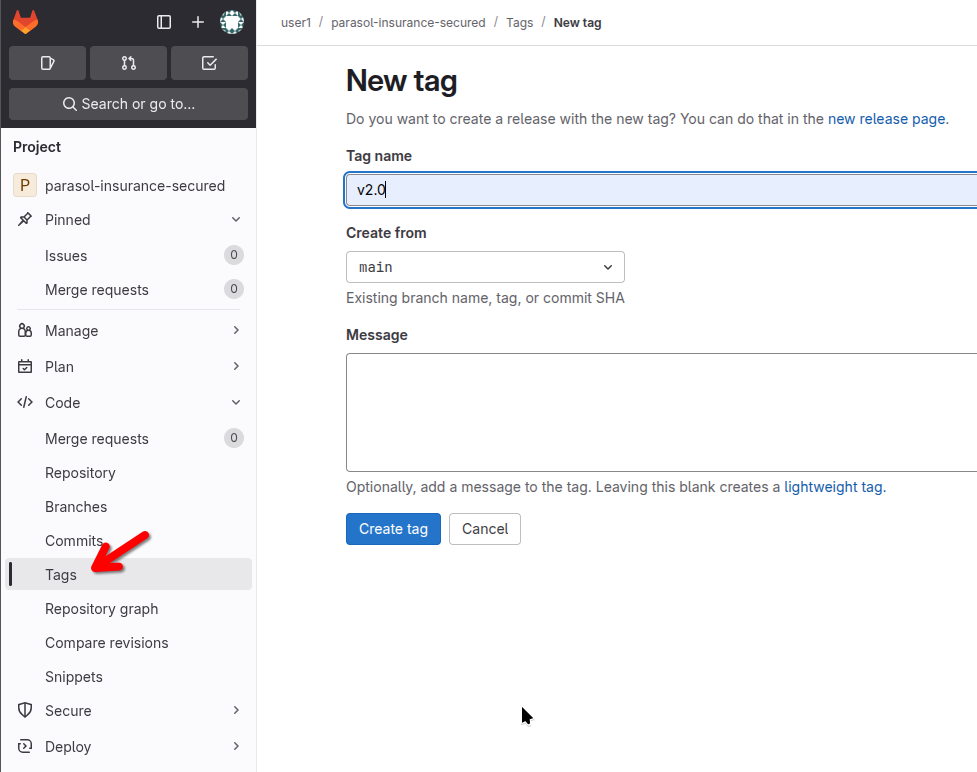
-
Click Create tag.
Exercise 2: Watch the tag-promote pipeline
-
The tag triggers the tag-promote pipeline. This pipeline:
-
Retrieves the image SHA from the registry
-
Runs Conforma/Enterprise Contract validation against the image’s attestation
-
Generates an SBOM and uploads it to TPA
-
Copies the image to a tagged version in the registry
-
Opens a merge request on the GitOps manifests repository to update the production deployment
-
-
Go to the Parasol Insurance (Secured) component in Developer Hub and click the CI tab.
Look for the
parasol-insurance-secured-tag-promotepipeline run.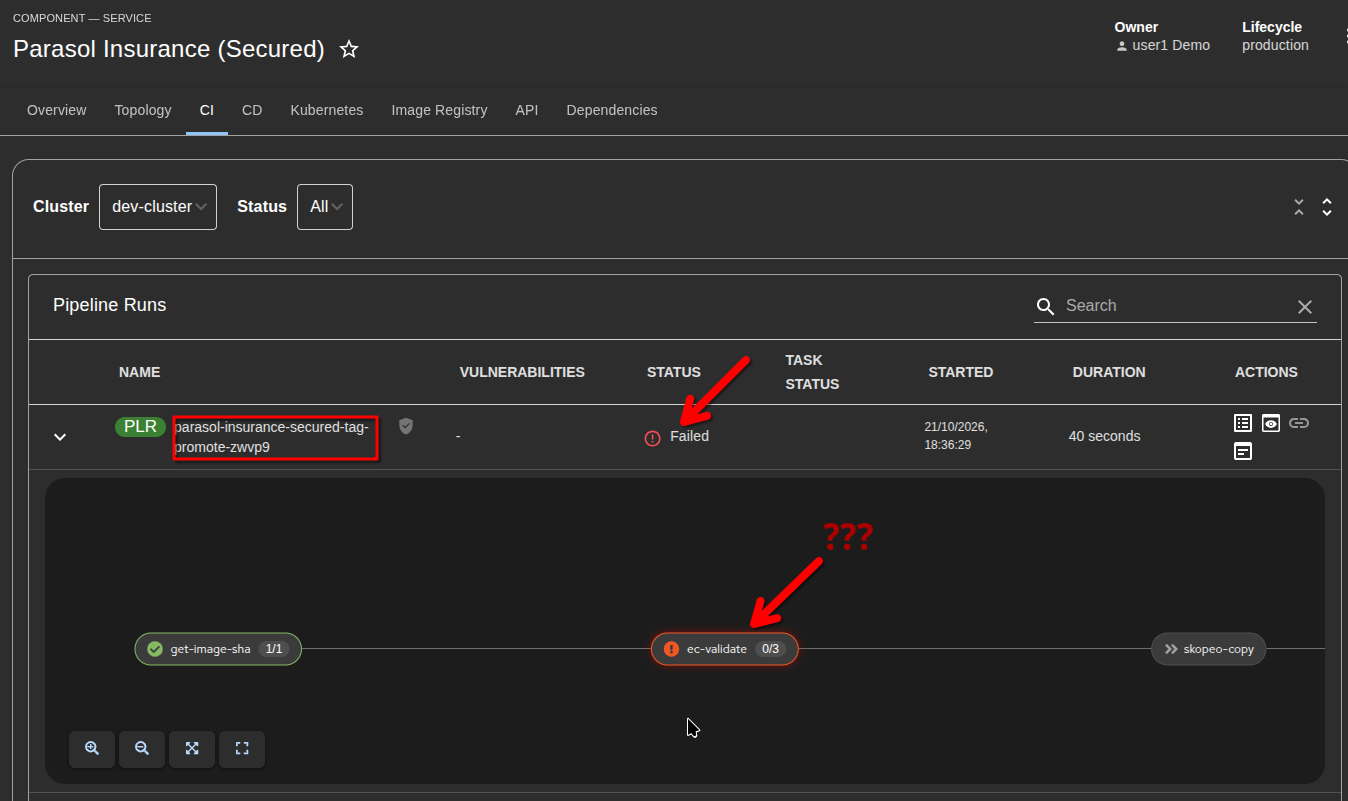
-
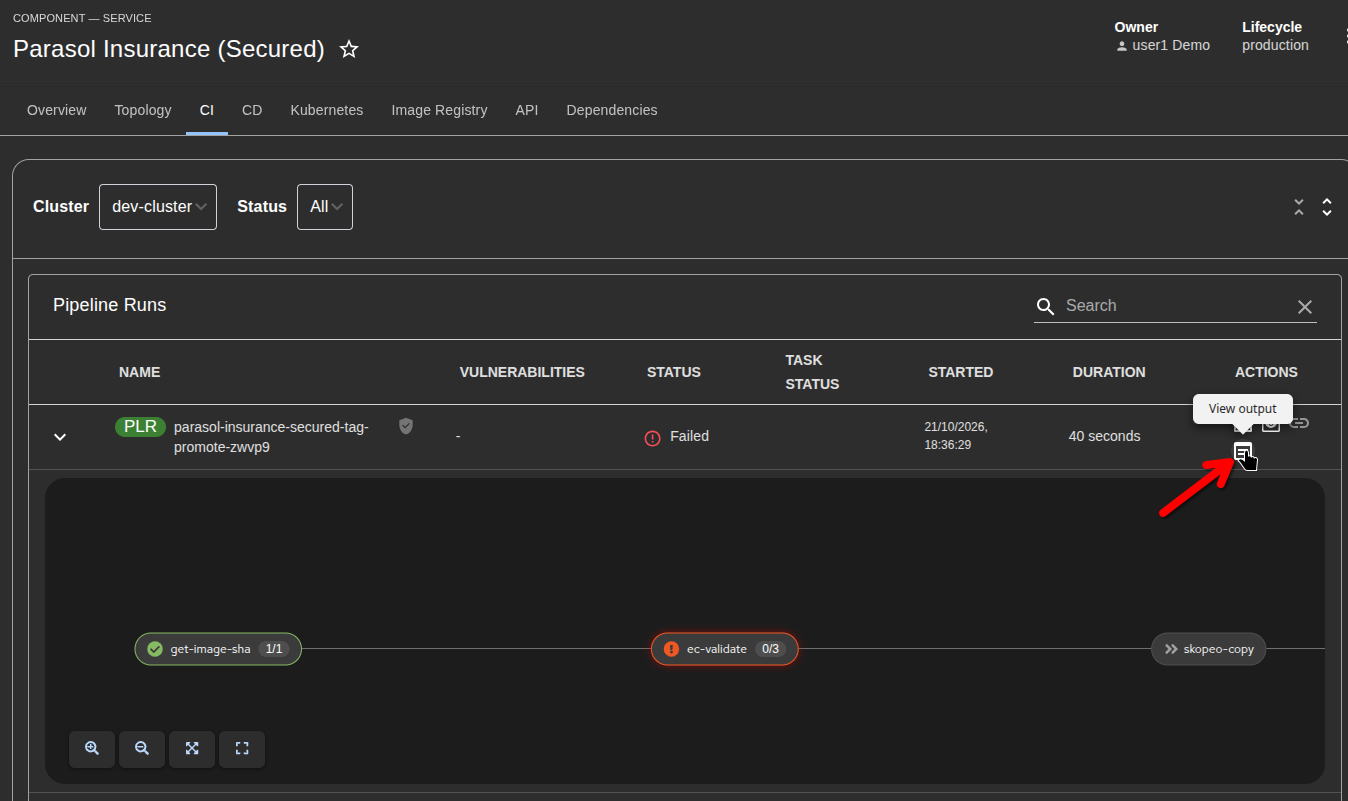
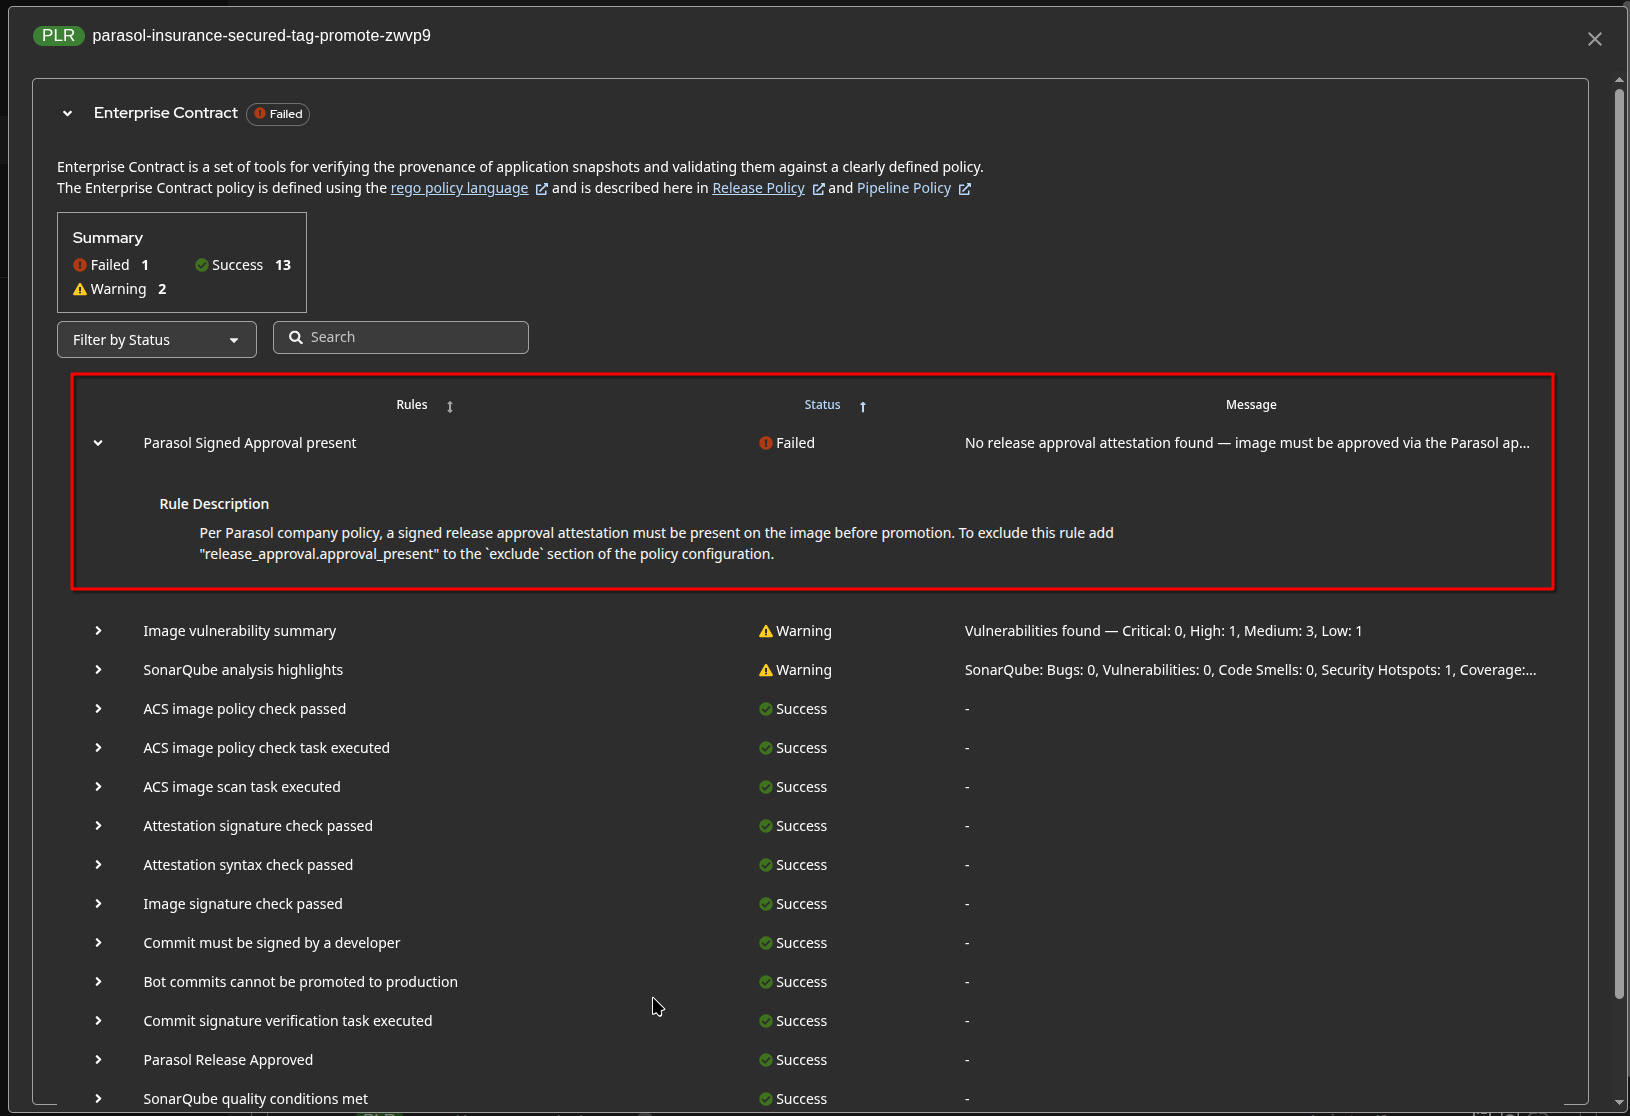
The pipeline will fail. Open the pipeline output to see why.
Exercise 3: Understand the Conforma policy violation
-
The Conforma (ec) validation checks the image’s signed attestation against a set of policies. You should see:
-
✅ Image signature check — the image is signed by Tekton Chains
-
✅ Attestation signature check — the attestation is signed and valid
-
✅ Commit must be signed — the SLSA attestation proves the commit was signed
-
✅ ACS checks passed — image scan and policy check results are in the attestation
-
✅ SonarQube quality gate — code quality metrics are in the attestation
-
❌ Parasol Release Approved — no release approval attestation found
-
-
The pipeline correctly blocks promotion because the image has not been approved for release. There is no signed attestation of a release approval attached to the image
Exercise 4: Approve the release
-
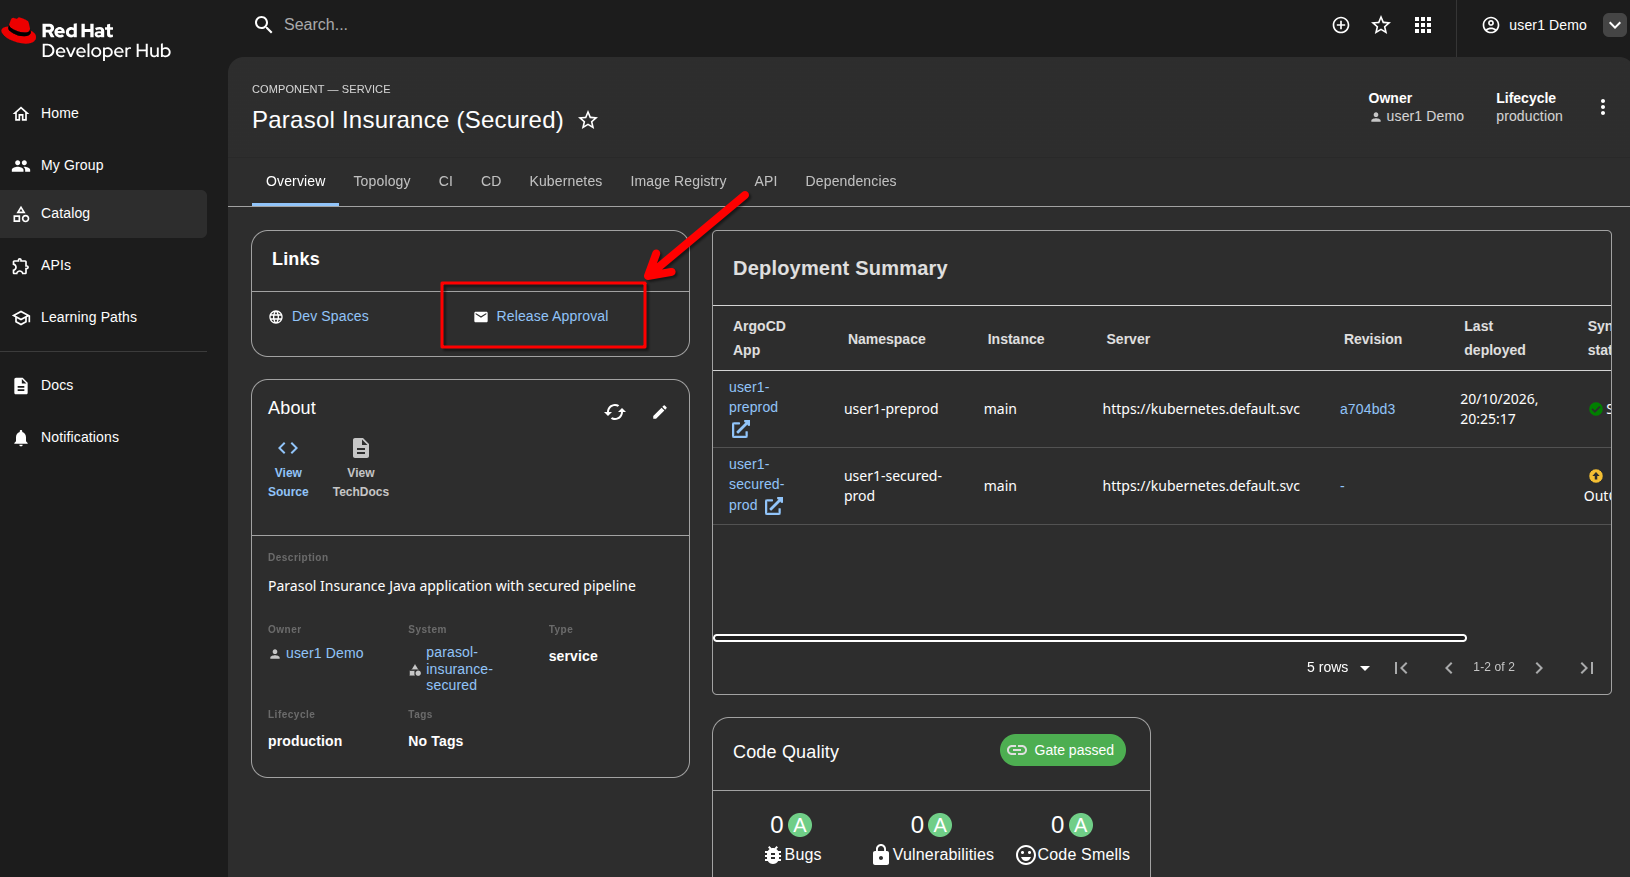
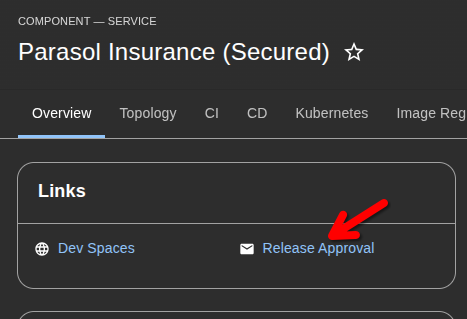
On the RHDH component overview page, click the Release Approval link (the envelope icon in the Links section).
-
The Release Approval application shows the image currently deployed to preprod.
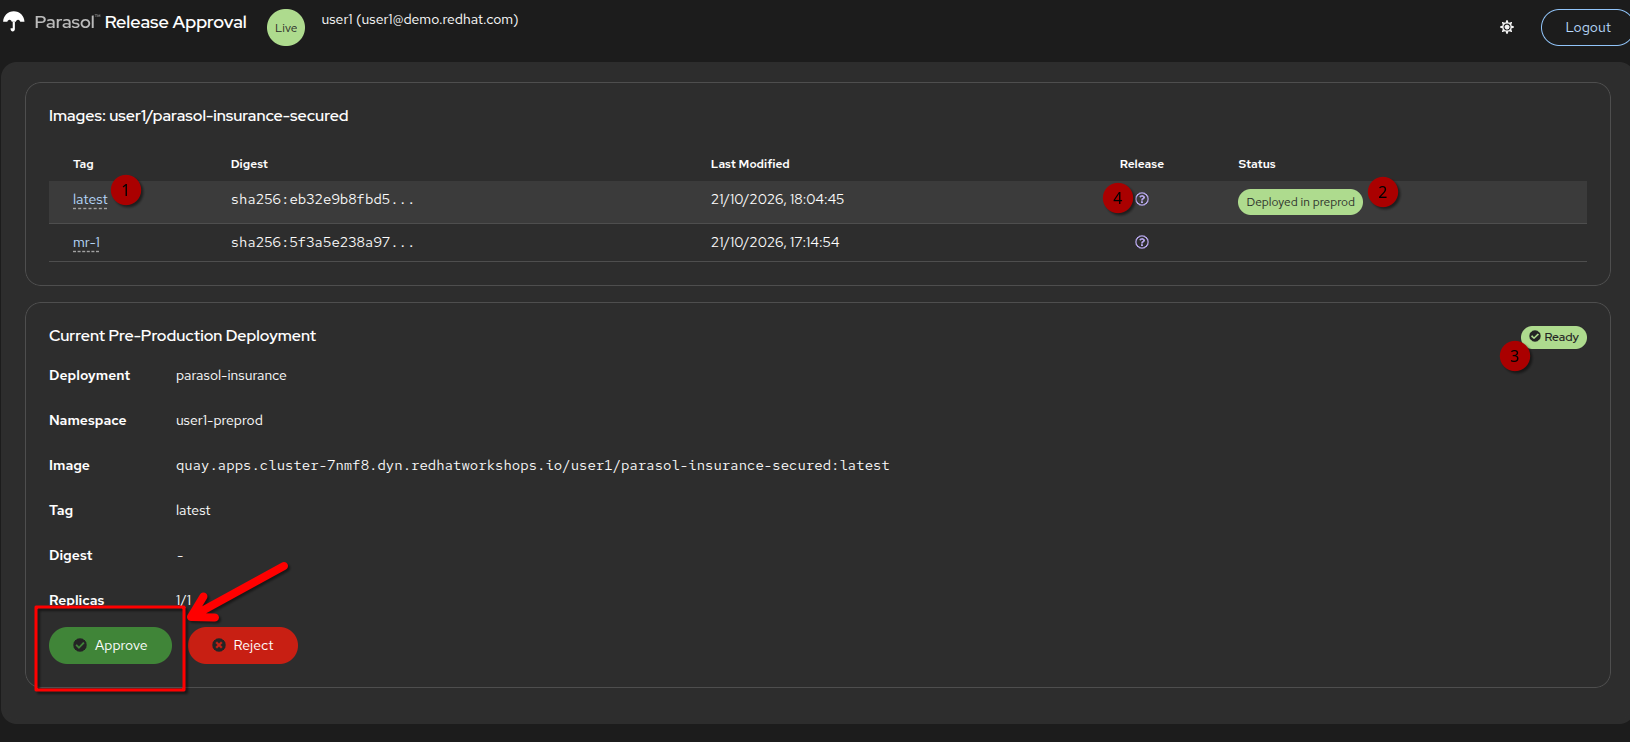
It shows that the
latesttag (1) has been deployed to preprod (2) and that the deployment is in status "ready" (3) but it doesn’t have a release attestation (4). -
Click Approve and enter an approval message:
Approved for production release. All ACS policy checks passed, vulnerabilities remediated, commit signature verified. Risk assessment: low.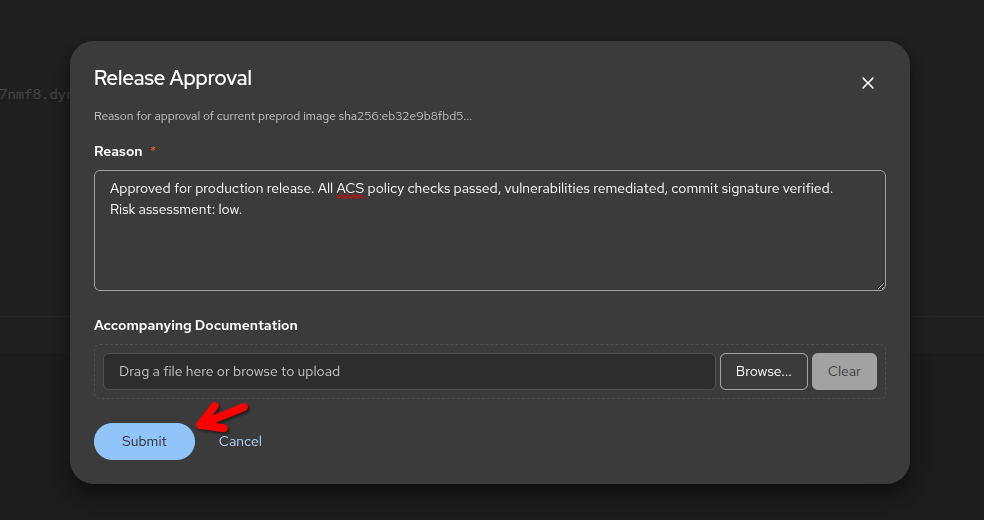
The approval is recorded as a signed attestation on the container image — signed with your identity, just like your commit signature.
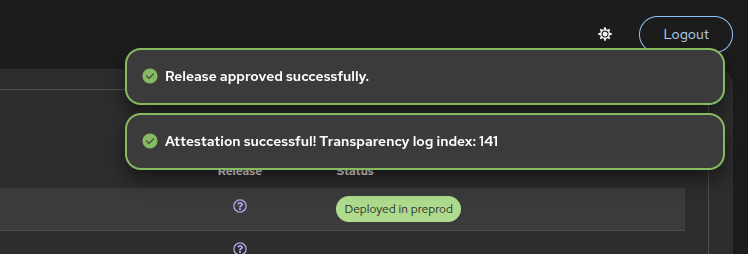
The transparency log index is where the signing event is stored in the log database for later signature verification of keyless signatures.
-
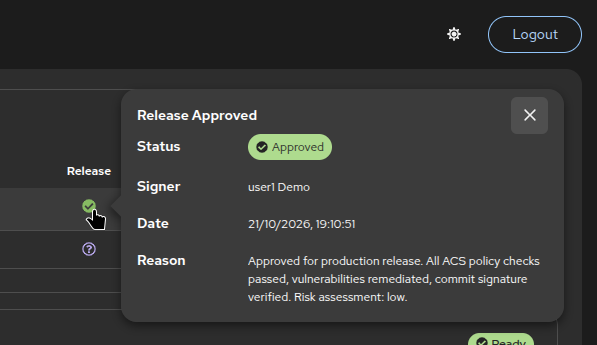
Click on the checkmark icon to see the attestation details — the approval is now cryptographically attached to the image (and retrieved and verified when you click)
Exercise 5: Re-run the tag-promote pipeline
-
Go back to GitLab and create a new tag (for example,
v2.1) — or re-run the pipeline from the secured-build namespace in the OpenShift Console. -
This time, the
ec-validatetask will find the approval attestation and the pipeline will succeed. -
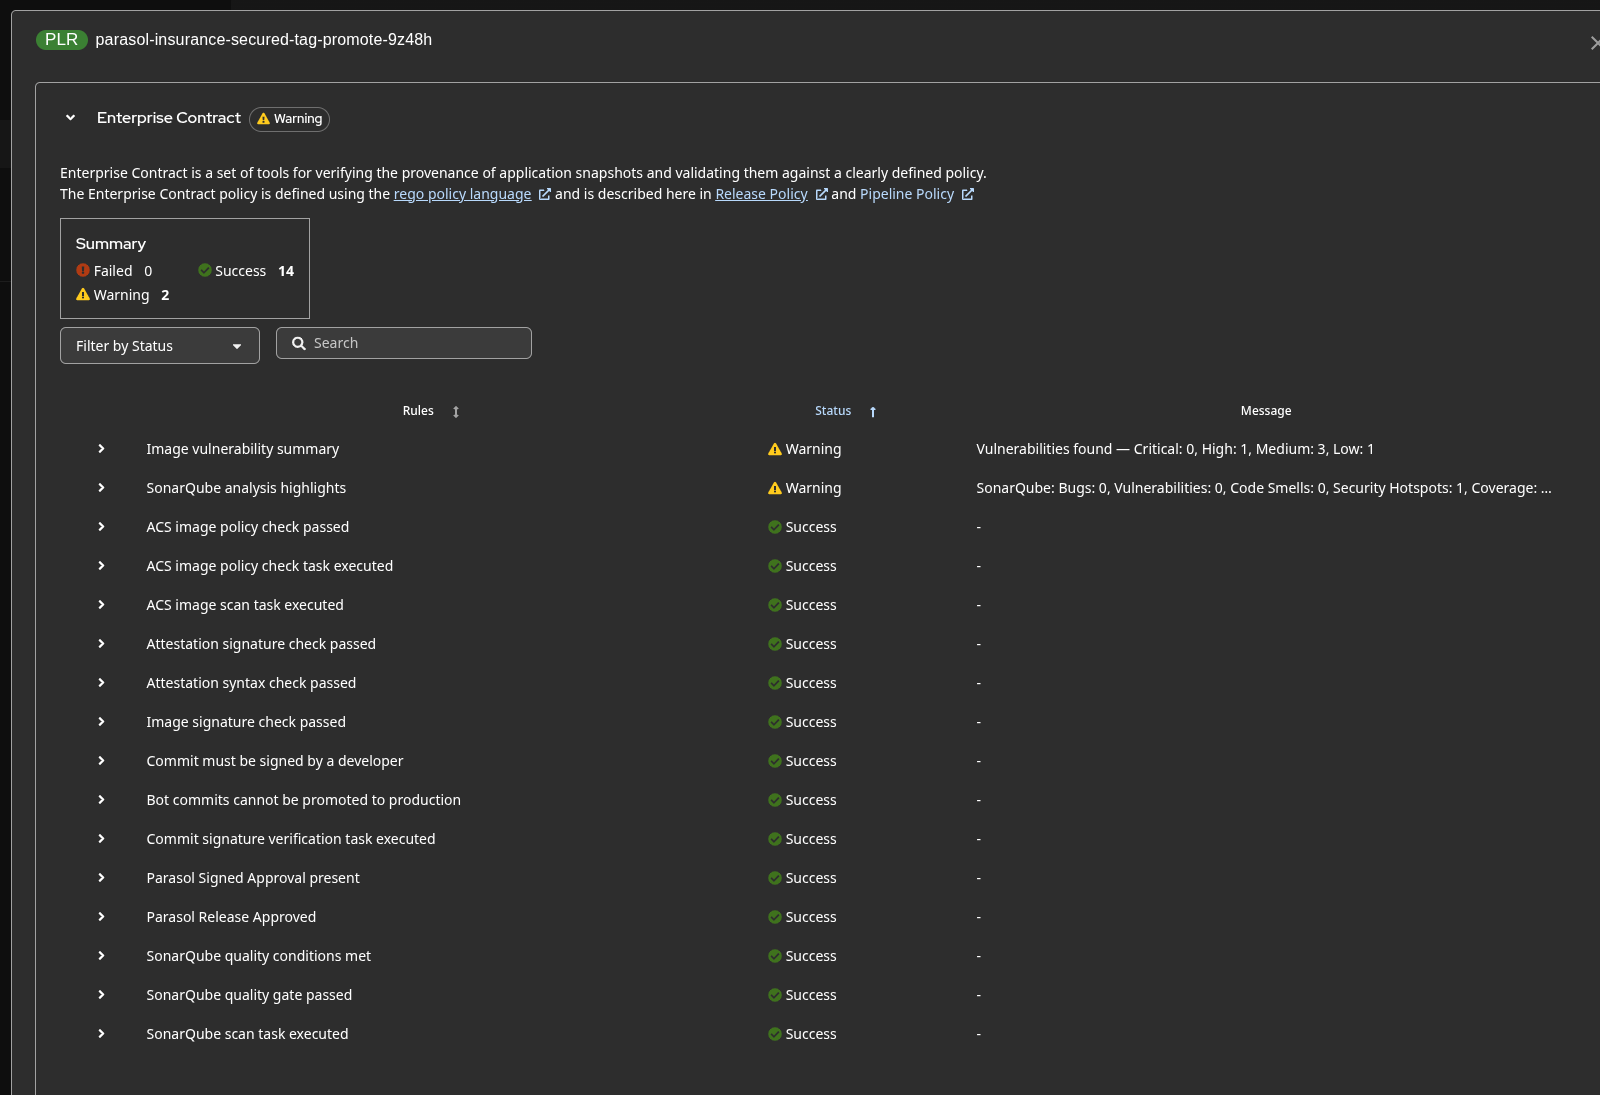
In the pipeline output, you can now see:
-
All Conforma policies passing, including the release approval
-
Warnings showing vulnerability counts and SonarQube metrics
-
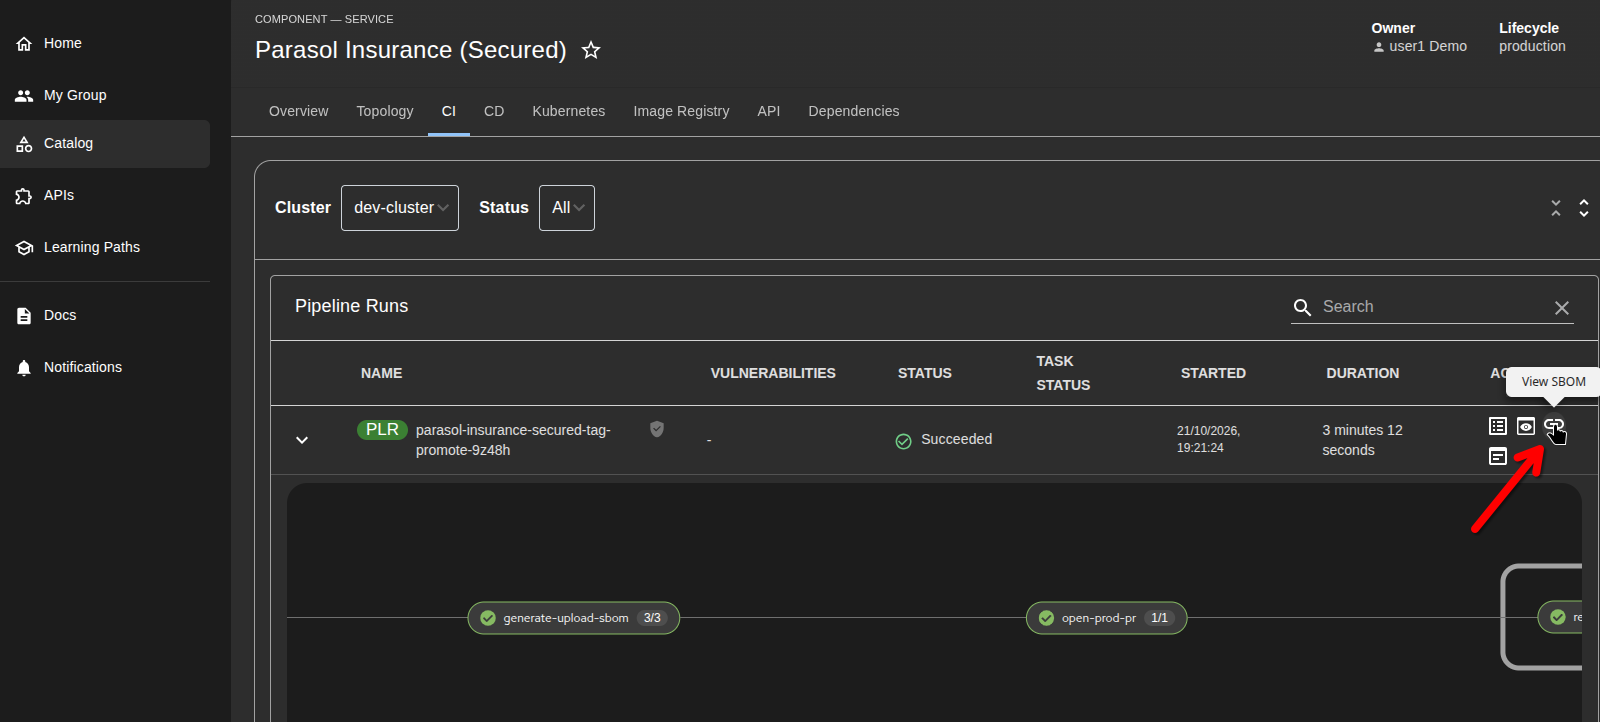
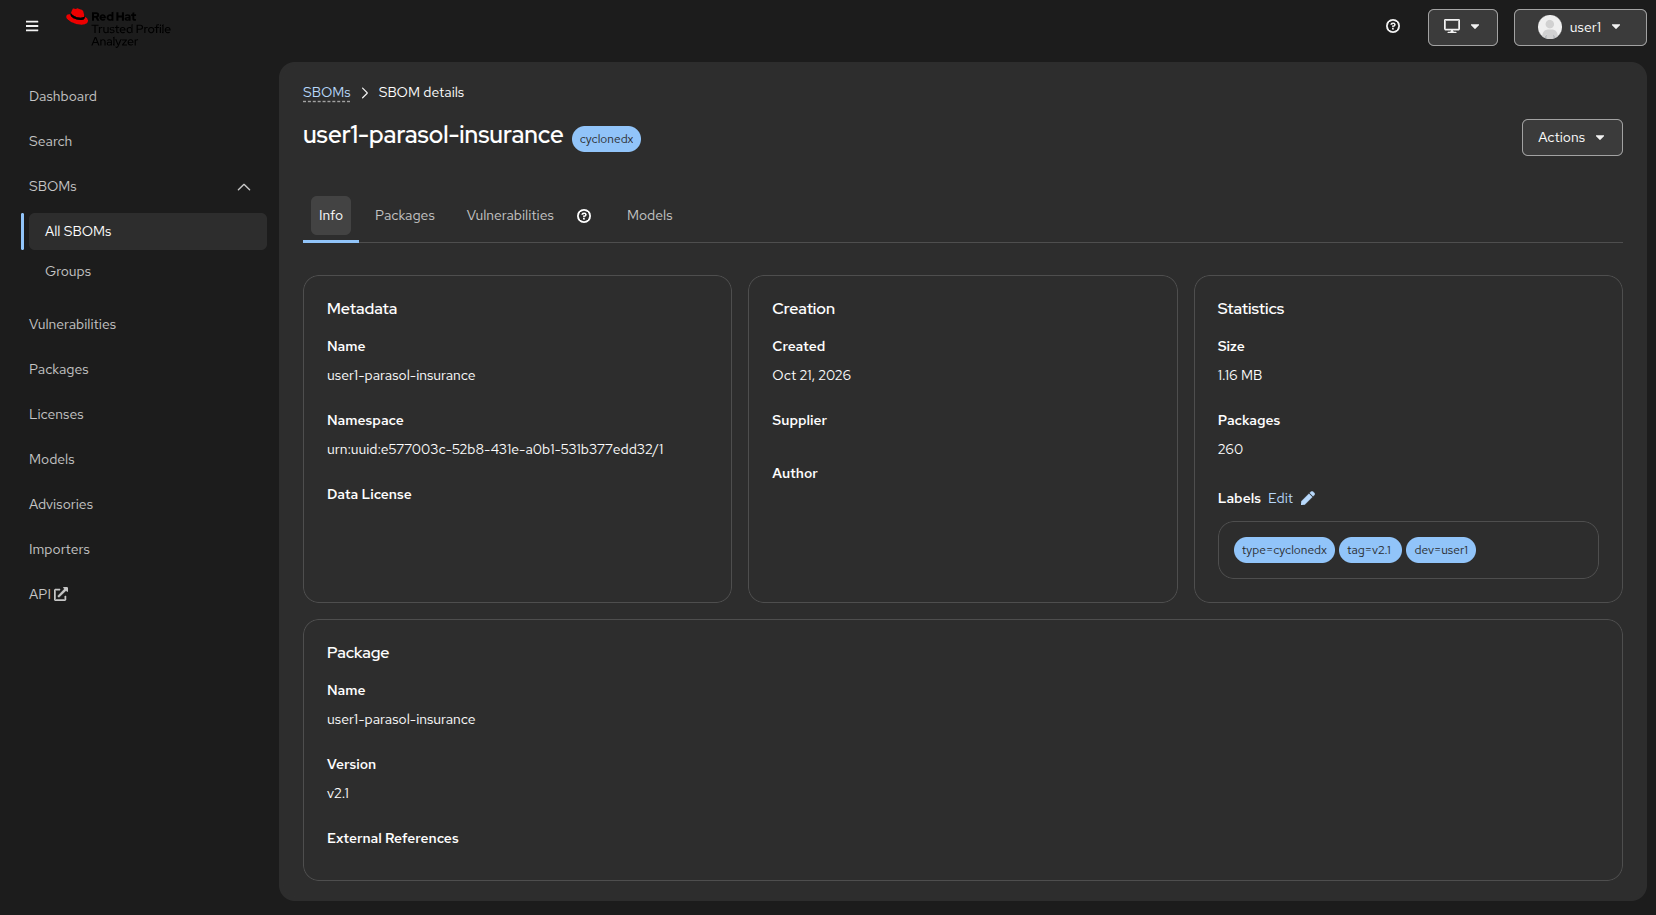
An SBOM link pointing to the uploaded SBOM in TPA, showing our version (tag)
-
-
The pipeline also:
-
Copies the image with the version tag to the registry
-
Opens a merge request on the GitOps manifests repository
-
Exercise 6: Complete the production deployment
-
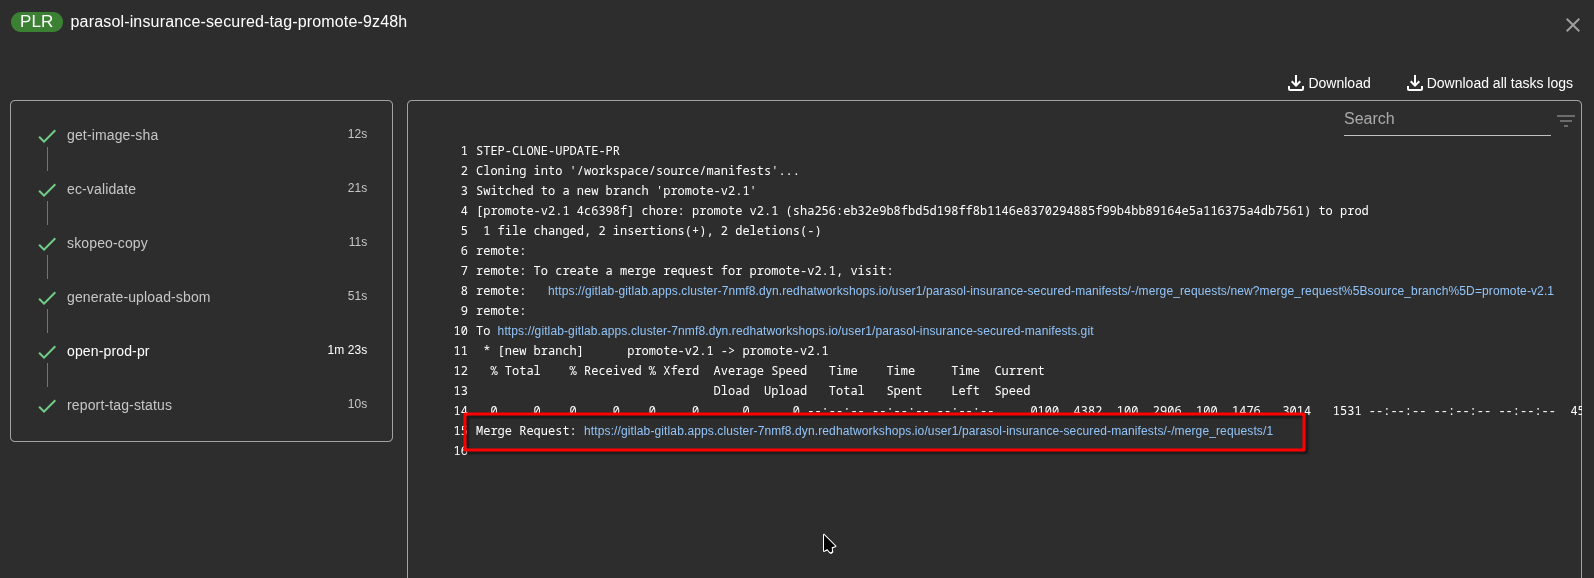
In the pipeline log for
open-prod-pr, find the merge request link and click it.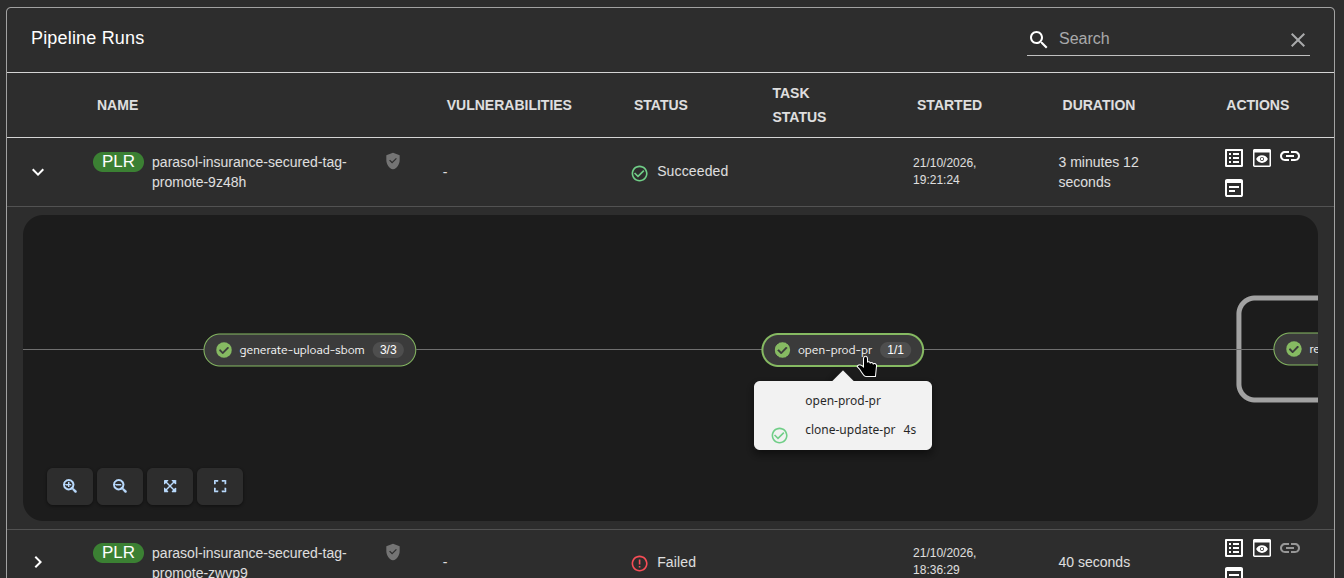
The MR on the manifests repository shows all the Conforma validation results, including a link to the image in Quay.
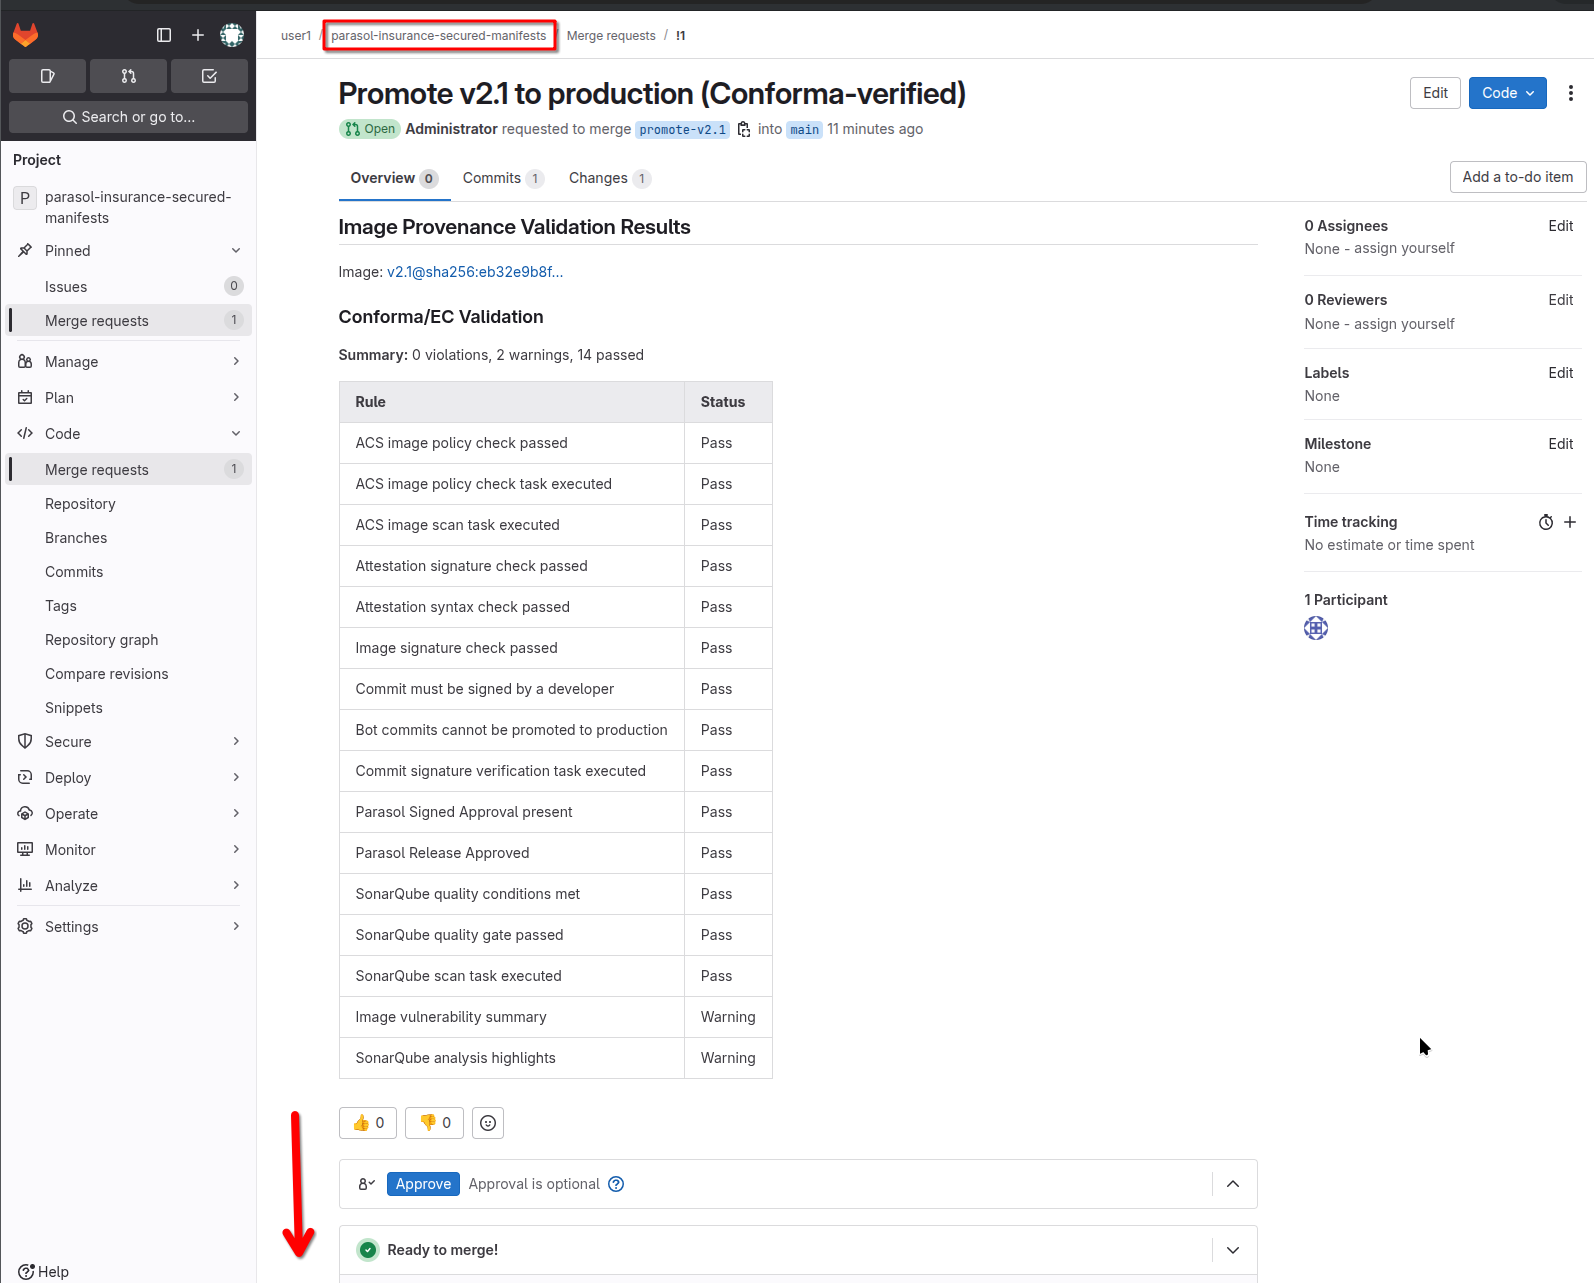
You may see warnings for Image vulnerability summary (unaddressed vulnerabilities in dependencies) and SonarQube analysis highlights (code quality findings). These are informational — they are not severe enough to fail the promotion. You could address them separately as time allows. 
-
Approve and merge the MR on the manifests repository.
-
ArgoCD will detect the change and roll out the new, signed, attested, validated, and approved image to the
secured-prodnamespace.
Why is this important?
The image deployed to production now carries a complete SLSA provenance chain:
-
Signed commit — traceable to a verified developer identity
-
SLSA attestation — proving the build pipeline ran, which tasks executed, and what results they produced
-
ACS scan results — vulnerability assessment baked into the attestation
-
SonarQube results — code quality metrics in the attestation
-
Signed approval — explicit human authorization for the release
-
SBOM — a complete inventory of components in the image, stored in TPA for ongoing vulnerability matching
This is not just a checkbox exercise — every piece of evidence is cryptographically signed and independently verifiable.
How was it done?
To keep the exercise readable, we have added the details below. Expand to read how it was done.
Open to view implementation details
Tekton Chains automatically signs pipeline artifacts using Sigstore keyless signing:
-
After each pipeline run, Chains requests a short-lived certificate from Fulcio using the pipeline service account’s identity
-
It creates a SLSA provenance attestation containing all task results
-
The attestation and signature are recorded in Rekor (transparency log) and attached to the image in the registry
Conforma (Enterprise Contract) validates the attestation against a set of Rego policies stored in the conforma-policies repository on GitLab. The policies in the parasol-software-supply-chain bundle check:
-
Required tasks were executed (verify-commit-signature, acs-image-scan, acs-image-check, sonar-scan)
-
Commit signature status is
SIGNED(not unsigned or bot commit) -
ACS policy check passed
-
SonarQube quality gate passed
-
A signed release approval attestation exists on the image
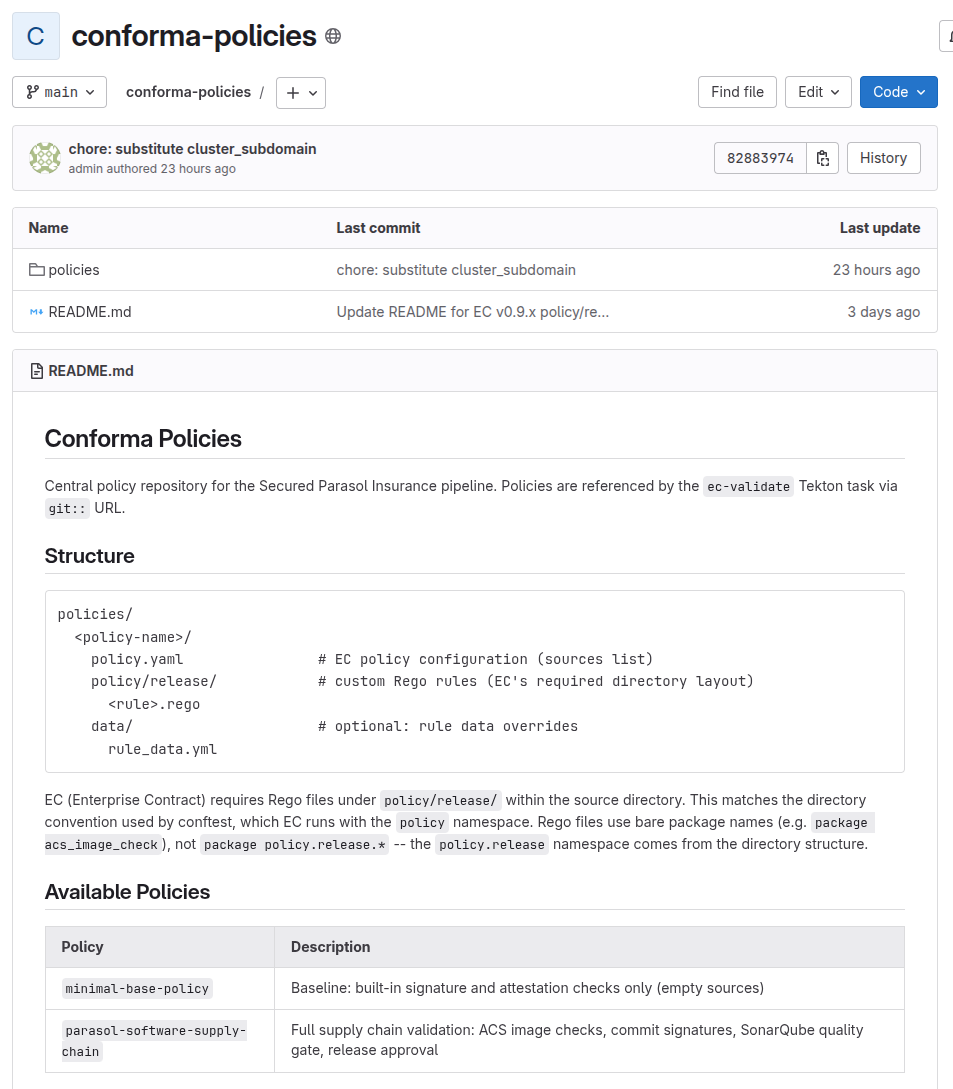
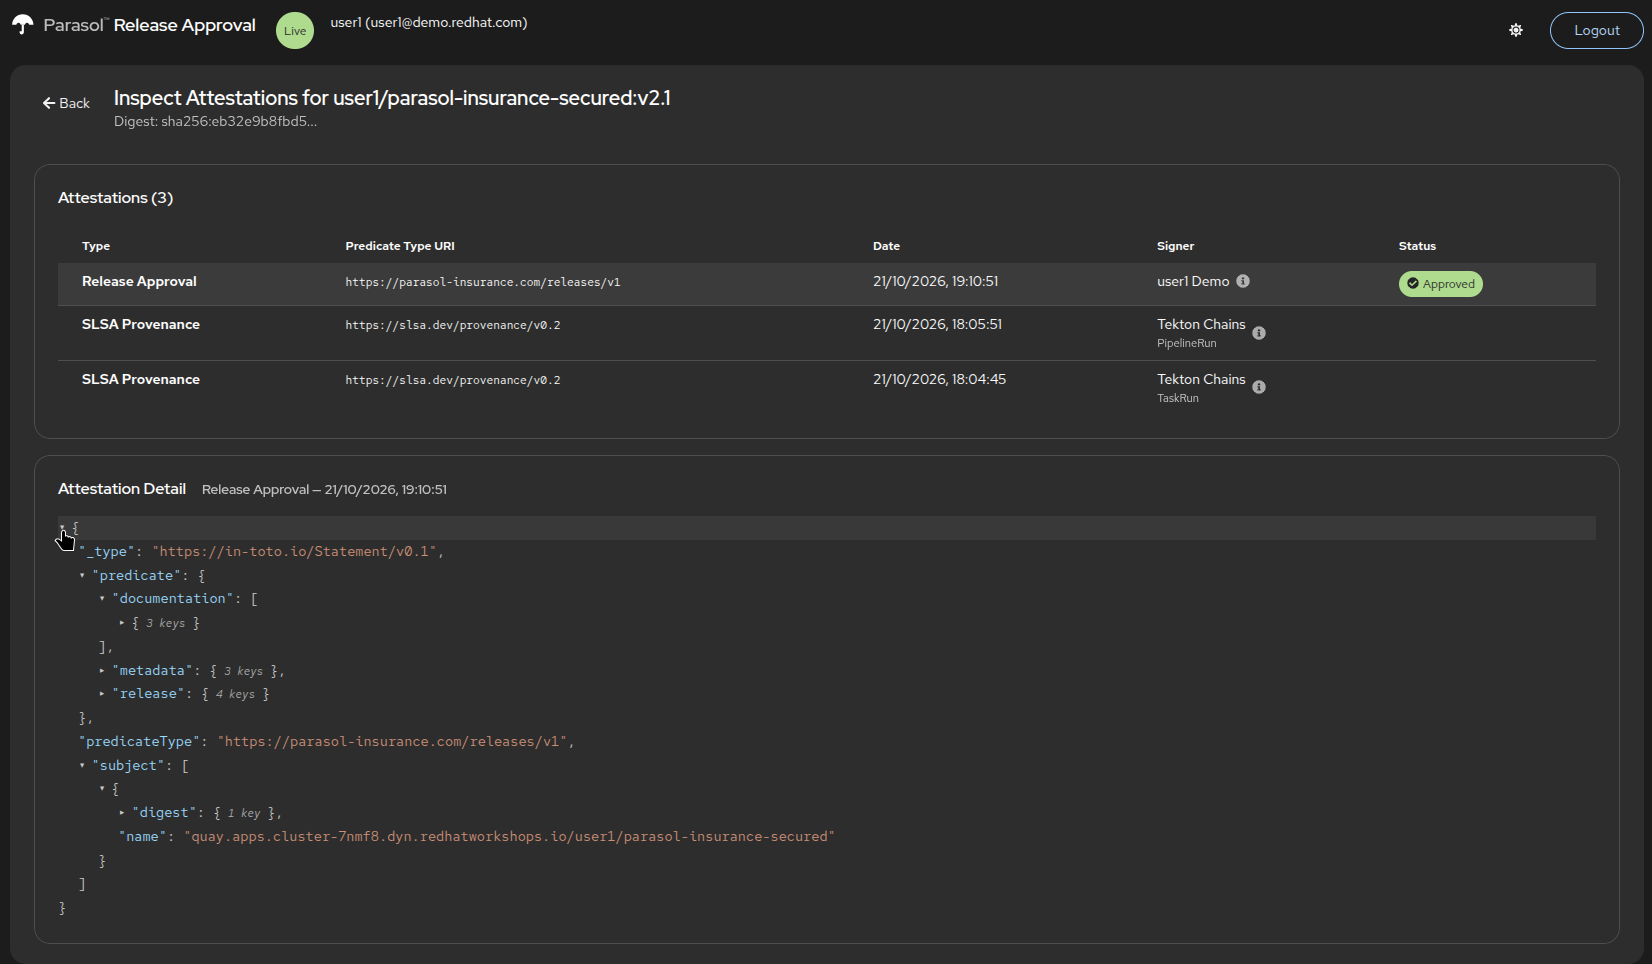
The approval attestation is a custom in-toto attestation with predicate type https://parasol-insurance.com/releases/v1. It is signed by the approver’s identity (via Fulcio) and attached to the image alongside the Chains attestation.
If you want to inspect the signed attestations associated with the image now in production, go back to the Release Approval app (via the Parasol Insurance (Secured) component on Developer Hub):
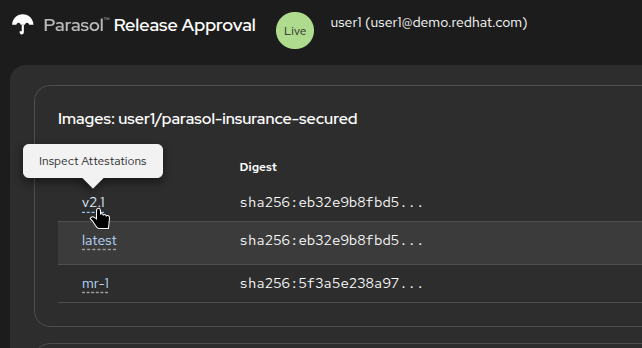
Click on a tag to inspect the signed attestations associated with that image:
Here you can see the signer identity for the custom attestation as well as the auto-generated attestations signed by Tekton Chains:
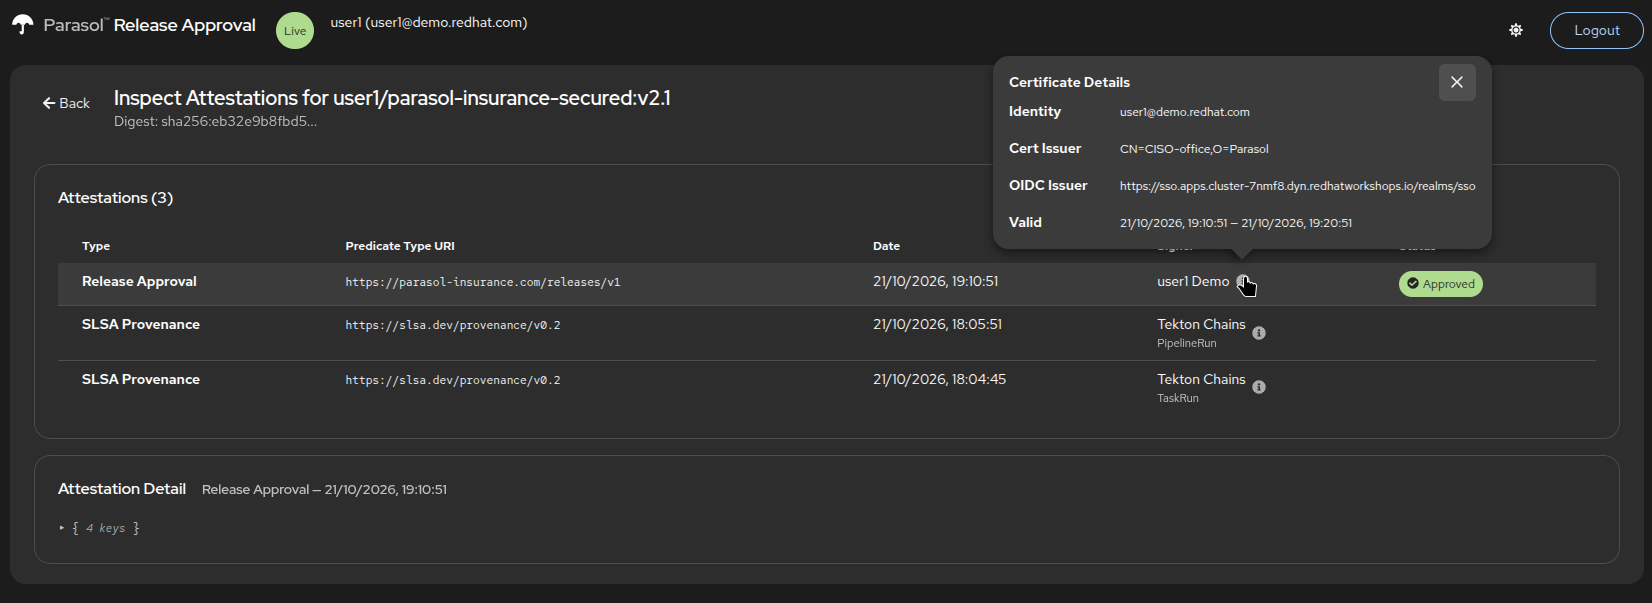
In the Attestation Detail section you can inspect the attestation stored with the image:
The SBOM is generated using syft and uploaded to TPA with labels identifying the developer and version tag. TPA continuously matches SBOMs against ingested vulnerability data, providing ongoing visibility into the security posture of deployed images.
Verify
At this point, you should have:
-
Merged a signed MR and seen the post-merge build succeed
-
Created a tag and seen the tag-promote pipeline fail due to missing approval
-
Approved the release and seen the Conforma validation pass
-
Verified the production deployment with a complete SLSA provenance chain
Next steps
Continue to Securing Your Namespaces to see how the Policy Controller prevents unauthorized images from being deployed.